Free 186 More Best Homemade Tools eBook:  
Get 2,000+ tool plans, full site access, and more.

User Tag List

Results 1 to 7 of 7

Thread: Antique Coffee Grinder Lamp Conversion

  1. #1
    Supporting Member astroracer's Avatar
    Join Date
    May 2012
    Location
    Byron, Michigan
    Posts
    311
    Thanks
    20
    Thanked 569 Times in 174 Posts

    astroracer's Tools

    Antique Coffee Grinder Lamp Conversion

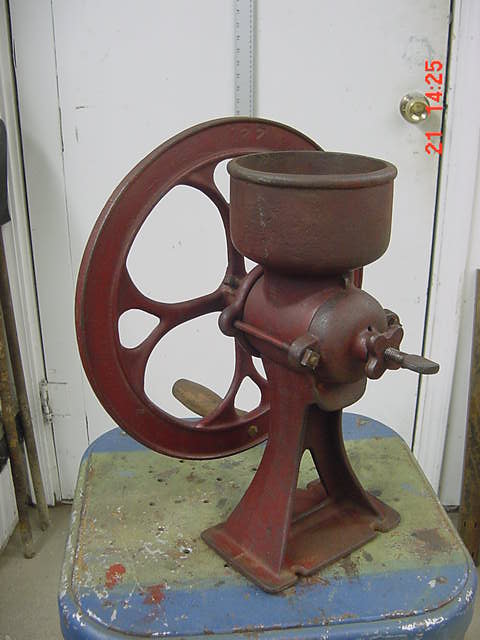
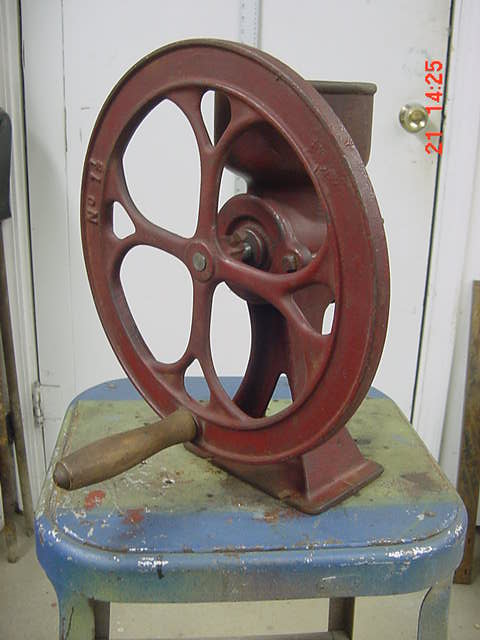
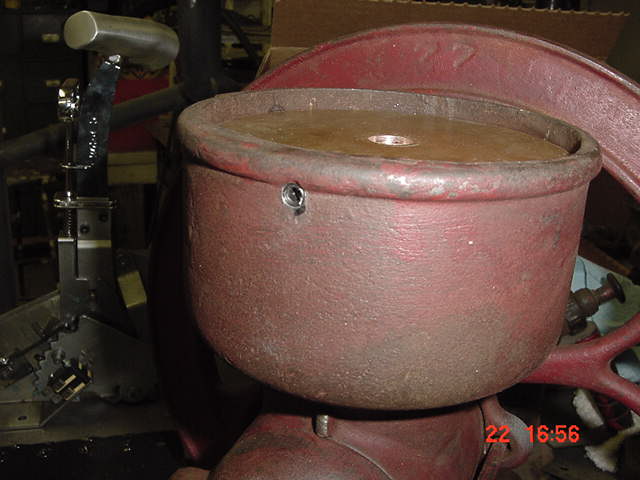
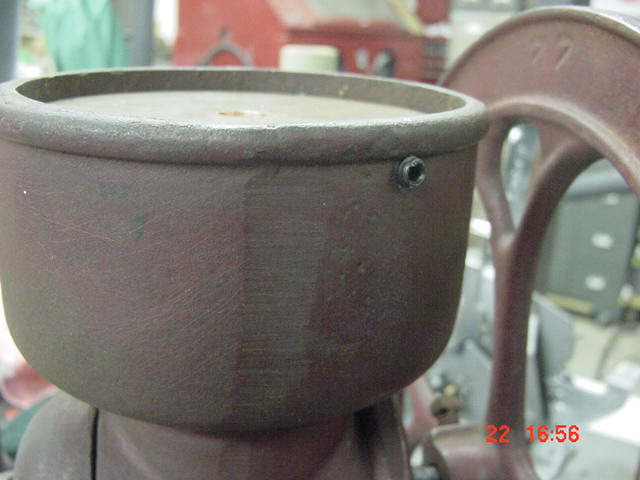
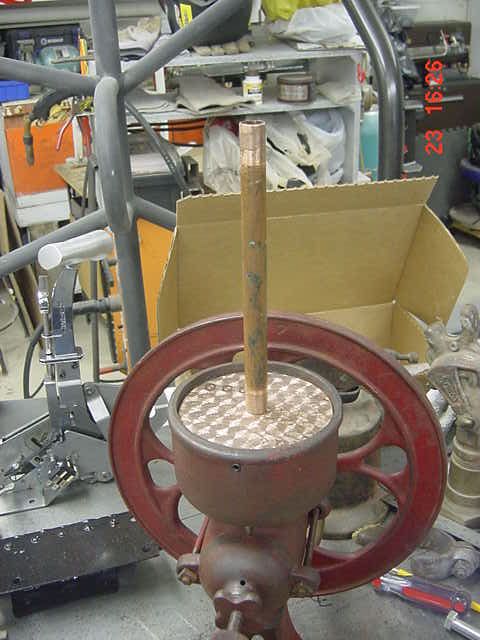
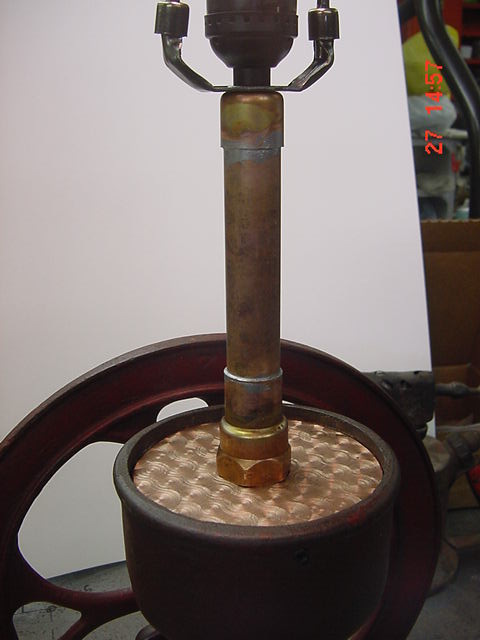
    I've had this old coffee grinder gathering dust for years. I dug it out the other day thinking I could do some repurposing. After I got it cleaned up I took some pics.

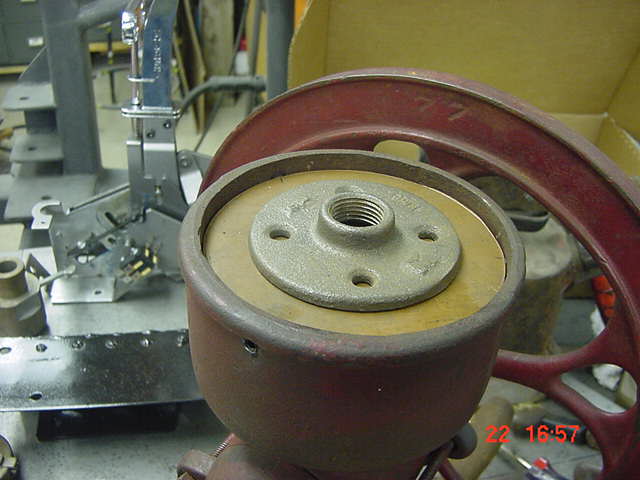
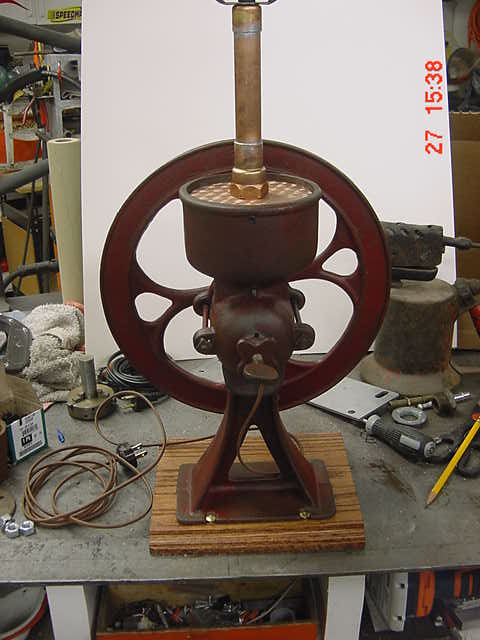
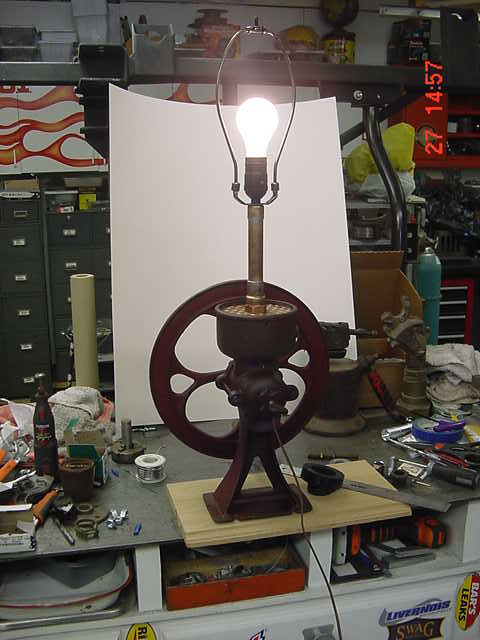
    I will degrease this, as is, and spray it with clear satin to seal it up and hopefully preserve the patina.

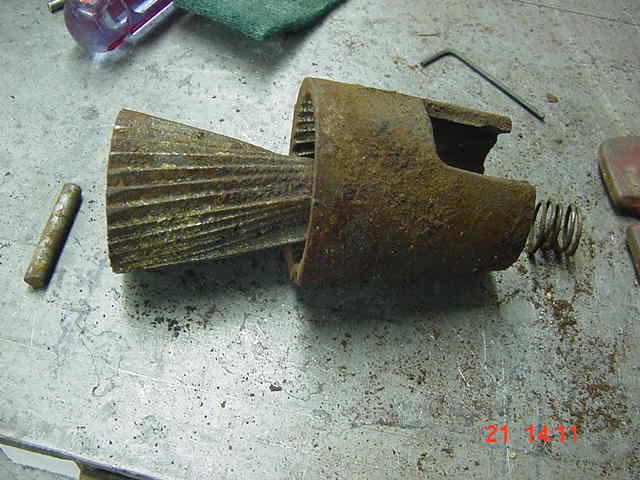
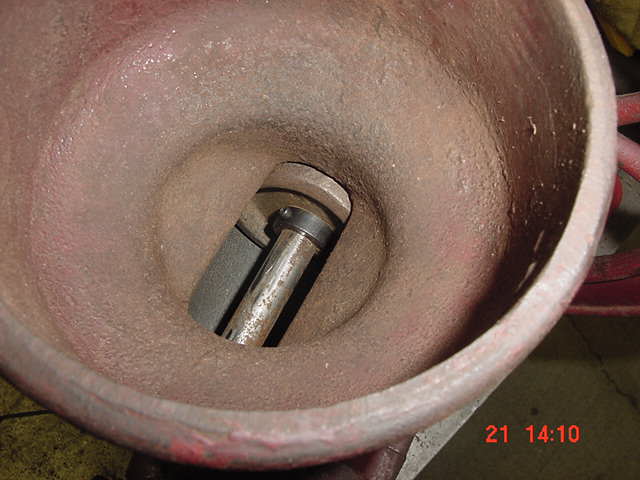
    I just hit this with a brass wire brush to clean it up. A little Tuff Stuff spray cleaner got all of the dust and brushing residue off. I took it all apart and removed the "grinding guts". These were pretty nasty...

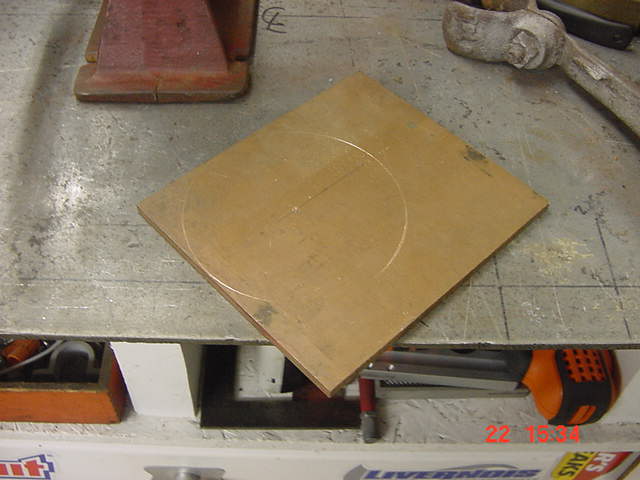
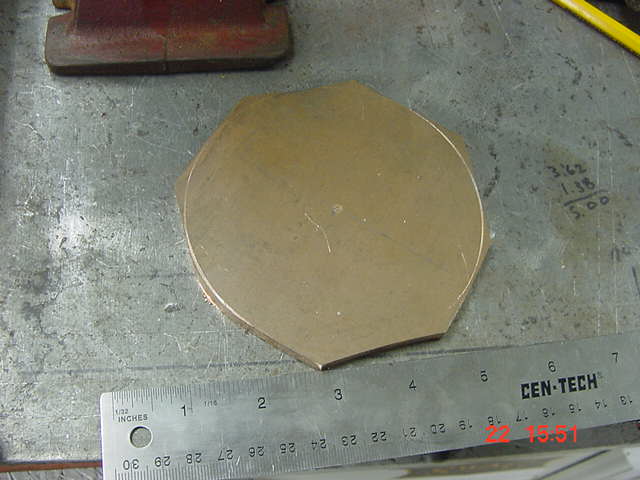
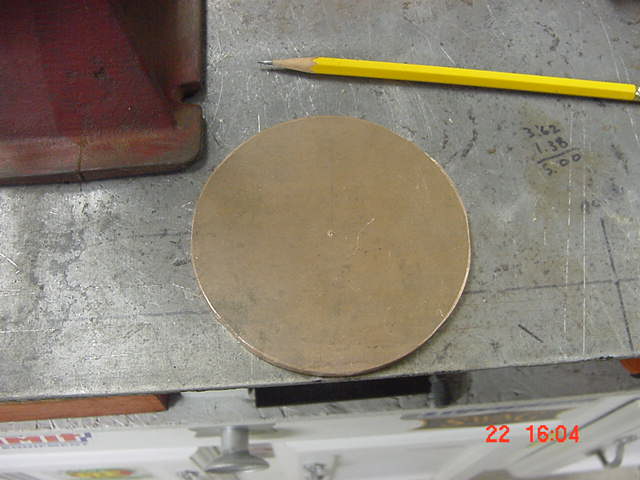
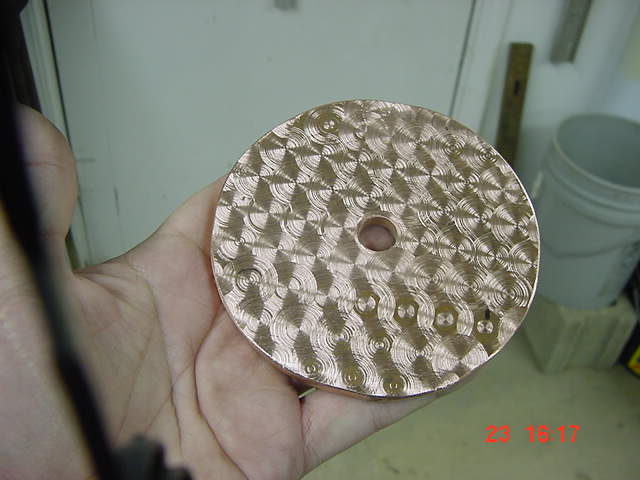
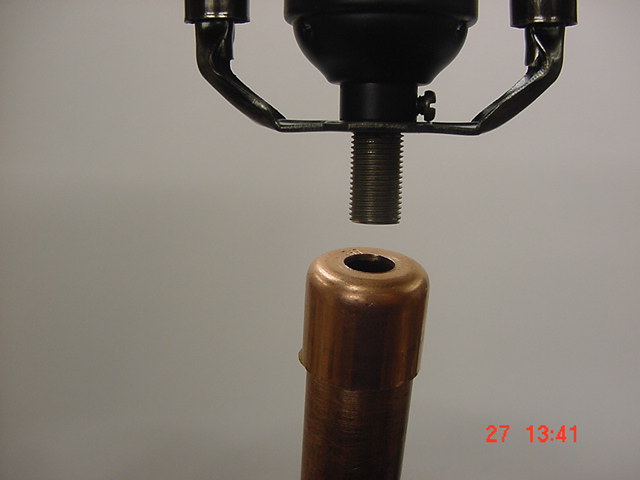
    The plan is to make a plate that will screw into the top and run the cord up thru the middle of the grinder.

    Continued in next post.

    186 More Best Homemade Tools eBook

  2. #2
    Supporting Member astroracer's Avatar
    Join Date
    May 2012
    Location
    Byron, Michigan
    Posts
    311
    Thanks
    20
    Thanked 569 Times in 174 Posts

    astroracer's Tools
    After removing the grinding cones I had to put a stop collar on the shaft to hold it in. You can see a pin in the "guts" pic above that held everything together in the body.

    I have a big piece of 1/4" thick copper plate, 6" wide x 5' long. I cut a chunk off that and laid out a circle to use as a plug for the top.

    I cut it out on the bandsaw and knocked off the corners.

    and ground it to a circle on the 6" belt sander.

    Continued...

    2000 Tool Plans

  3. #3
    Supporting Member astroracer's Avatar
    Join Date
    May 2012
    Location
    Byron, Michigan
    Posts
    311
    Thanks
    20
    Thanked 569 Times in 174 Posts

    astroracer's Tools
    To mount the plate I drilled three holes in the lip of the grinder and tapped them for 1/4-20 set screws.


    I centerdrilled the edge of the plate so the screws seat very well and hold it tightly.
    I was thinking of building the upper lamp portion with black pipe but then I had another thought...

    The plate is COPPER.... Why not flaunt that... 
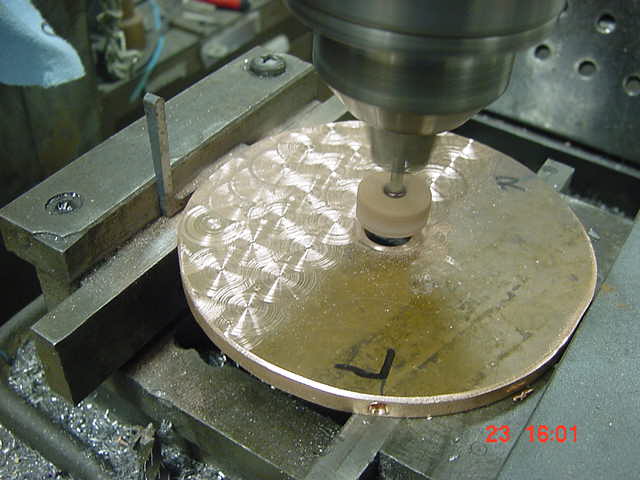
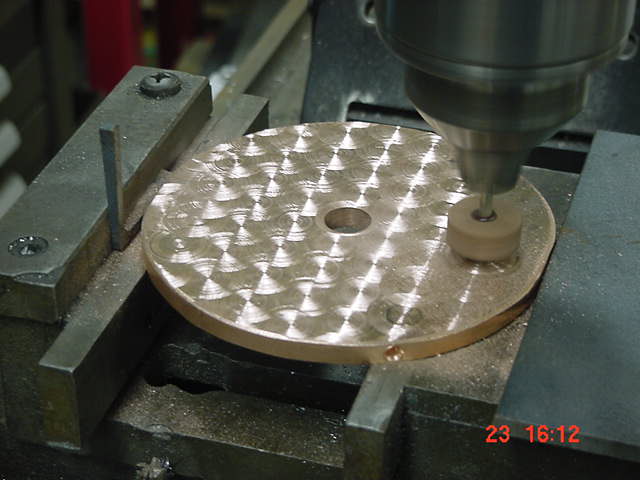
Setting the plate up in the mill for some embellishment. That is a grinding stone for a Dremel tool chucked into the mill....
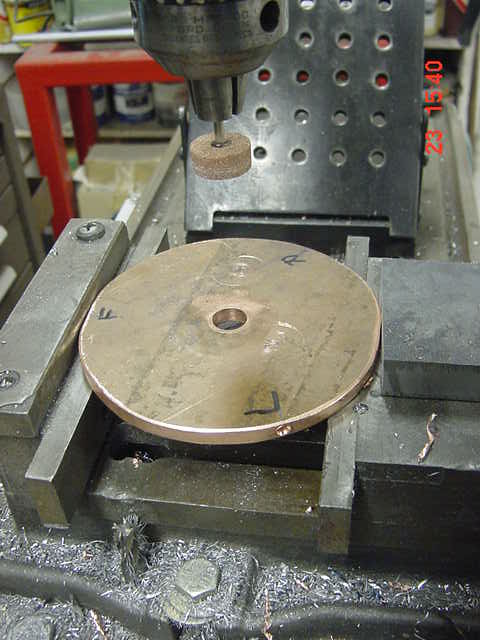
    Continued...

  4. #4
    Supporting Member astroracer's Avatar
    Join Date
    May 2012
    Location
    Byron, Michigan
    Posts
    311
    Thanks
    20
    Thanked 569 Times in 174 Posts

    astroracer's Tools
    After doing a bit of math I settled on a pattern and, using the Tpac Tools DRO, I got busy.

    It doesn't look that good initially but, the more I did, the better it got.

    It's far from perfect but it does add a bit of character.

    The plan now is to build the lamp portion out of copper tube and fittings.

    The important part is, the BOSS liked it. So I am happy. That's where I'm at right now. I have ordered some "antiqued" bronze hardware, harp and light socket, and a cloth cord with an antique plug so I am waiting on those to come in to get this wrapped up.
    Thanks for looking!
    Mark
    Last edited by astroracer; Feb 24, 2016 at 06:30 AM.

  5. The Following 3 Users Say Thank You to astroracer For This Useful Post:

    Jon (Feb 24, 2016), kbalch (Feb 24, 2016), PJs (Apr 11, 2016)

  6. #5
    Supporting Member astroracer's Avatar
    Join Date
    May 2012
    Location
    Byron, Michigan
    Posts
    311
    Thanks
    20
    Thanked 569 Times in 174 Posts

    astroracer's Tools
    Other then finding a shade this project is done.!

    I used some 3/4" copper cutoffs I had in storage to make the riser. The harp, antiquey cloth covered cord and bulb socket came from Antique Lamp Supply and a couple of fittings from the hardware store got it all bolted together.


  7. The Following User Says Thank You to astroracer For This Useful Post:

    PJs (Apr 11, 2016)

  8. #6
    Supporting Member astroracer's Avatar
    Join Date
    May 2012
    Location
    Byron, Michigan
    Posts
    311
    Thanks
    20
    Thanked 569 Times in 174 Posts

    astroracer's Tools

    Now to find the right shade...
    Mark

  9. The Following 2 Users Say Thank You to astroracer For This Useful Post:

    DIYer (Apr 12, 2016), PJs (Apr 11, 2016)

  10. #7
    Supporting Member jotasierra's Avatar
    Join Date
    Sep 2015
    Location
    país Argentina, provincia de San Juan
    Posts
    118
    Thanks
    0
    Thanked 13 Times in 13 Posts

    jotasierra's Tools
    Muy buen trabajo astroracer, no dudo que encontrarás la terminación adecuada para esa lámpara, más tu toque personal..


    186 More Best Homemade Tools eBook

Thread Information

Users Browsing this Thread

There are currently 1 users browsing this thread. (0 members and 1 guests)

Bookmarks

Posting Permissions

  • You may not post new threads
  • You may not post replies
  • You may not post attachments
  • You may not edit your posts
  •