-
11 Attachment(s)
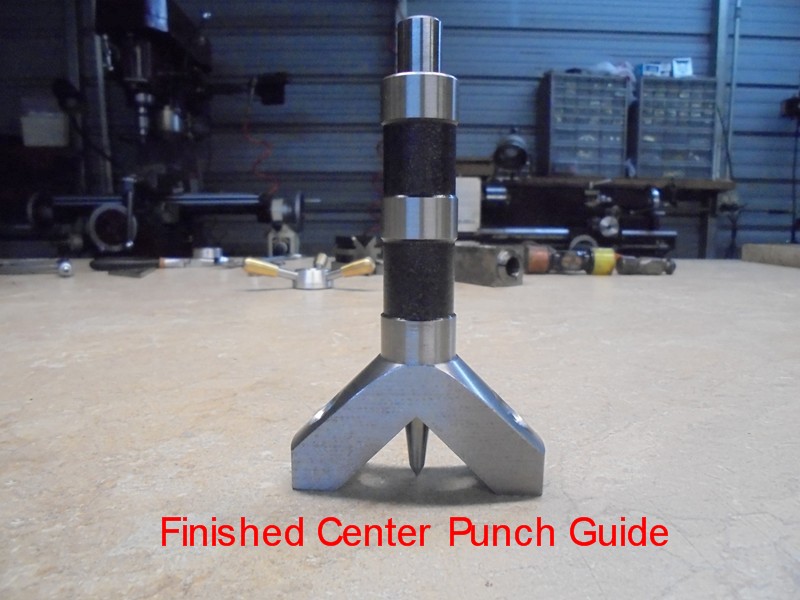
Center Punch Guide
I built this little tool to assist in holding a center punch at 90° from the work surface; it’s hard to hold a center punch at perfect right angles, when you strike the punch and it’s not held at 90° then it will move creating an inaccurate center punch mark, this tool eliminates that problem.
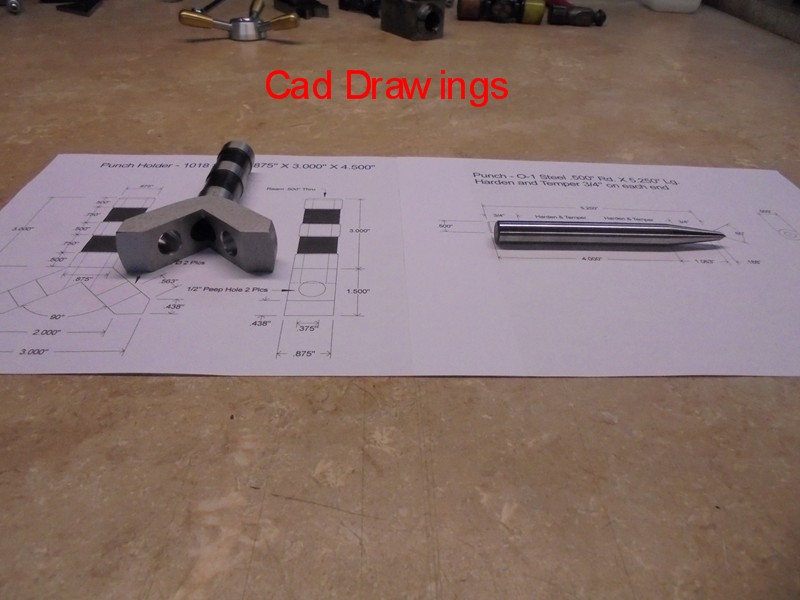
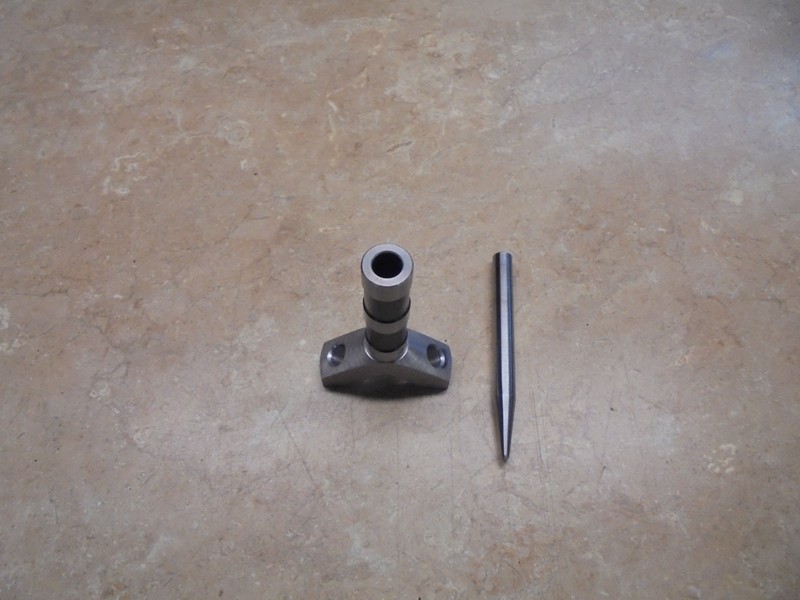
This tool was designed to be simple and user friendly; the punch guide is a one piece construction which was made from 1018 CRS, with a .500” reamed hole thru the entire length of the tool to guide the punch accurately, while the punch itself was made from O-1 tool steel hardened and tempered ¾” on each end.
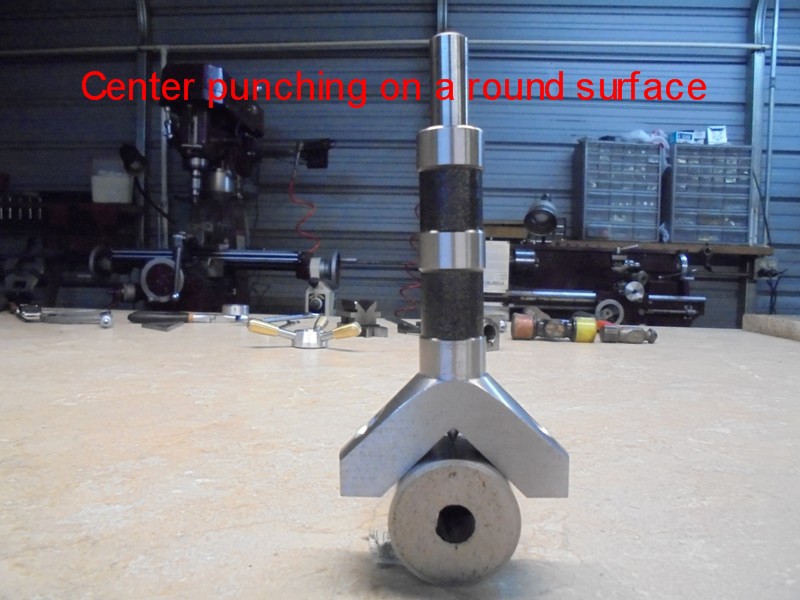
The guide was designed to work on either a flat or round surface, it has a two inch wide 90° crotch in the center of the body that will locate itself on a round surface (a shaft, pipe etc) plus the crotch also acts a viewer when locating a scribe mark on a flat surface, it has a ½” viewing hole in each of the legs which makes it very easy to locate scribe marks on a flat surface.
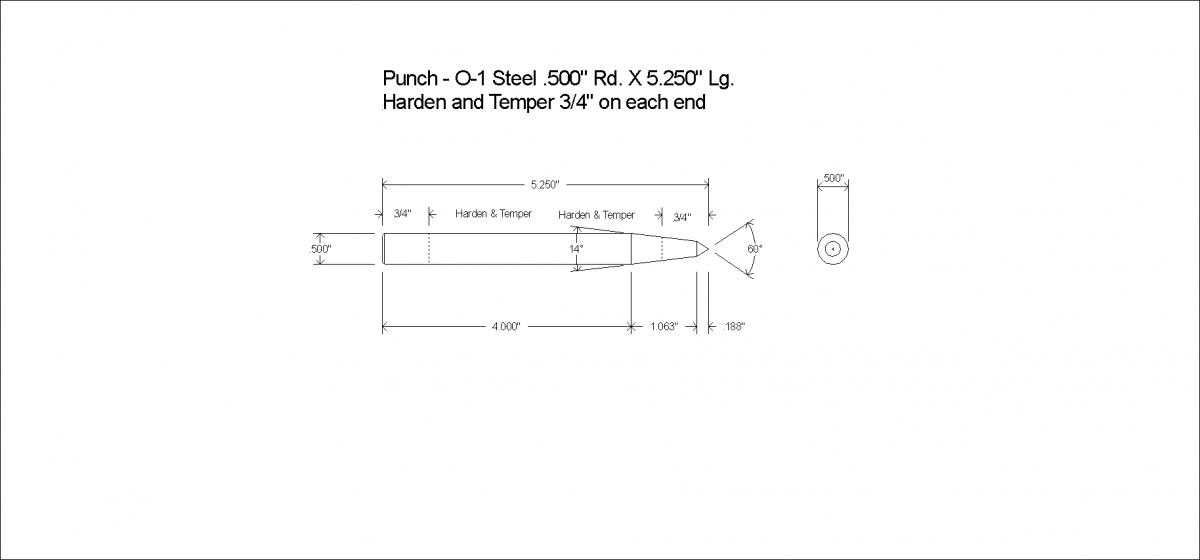
The punch was made from a piece of .500” Round by 5 ¼” Long O-1 tool steel hardened and tempered ¾” on each end, the end of the punch is machined at a 60° angle and a steep 14° angle from the end of the 60° point which gives allot of clearance for viewing and locating the point on your work piece.
Below you will see some photos of the machining process along with the tool being used on a flat and round surface; I have also included drawings for anyone who wants to make one of these tools.
As always thanks for looking
And happy machining
Doug
Attachment 18918
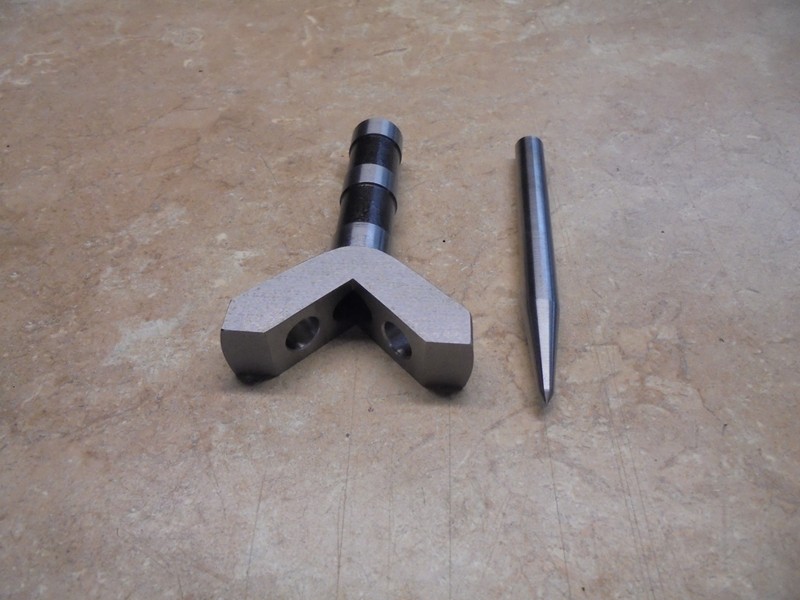
Finished punch
Attachment 18919
Drawings
Attachment 18920
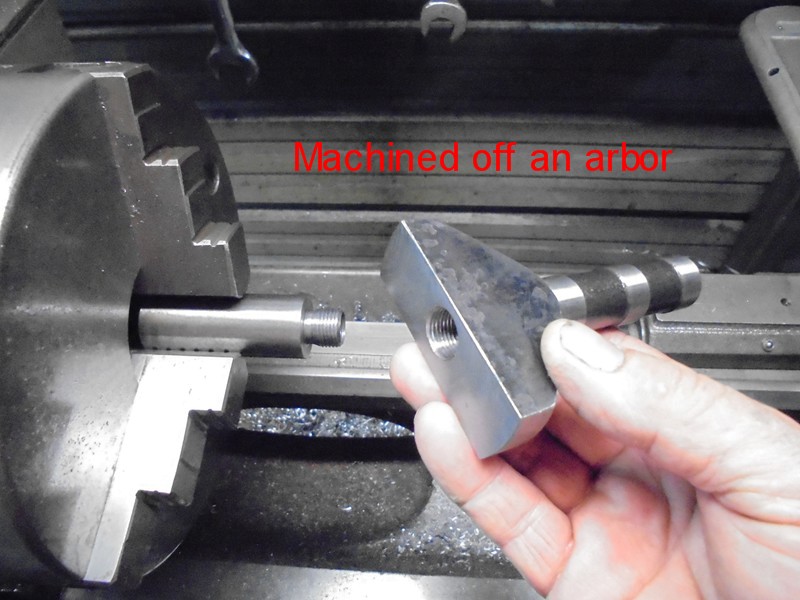
How it was machined
Attachment 18921
Machining from an arbor
Attachment 18922
A view of completed punch assembly
Attachment 18923
Top view
Attachment 18924
Used on a round surface
Attachment 18925
Used on a flat surface
Attachment 18926
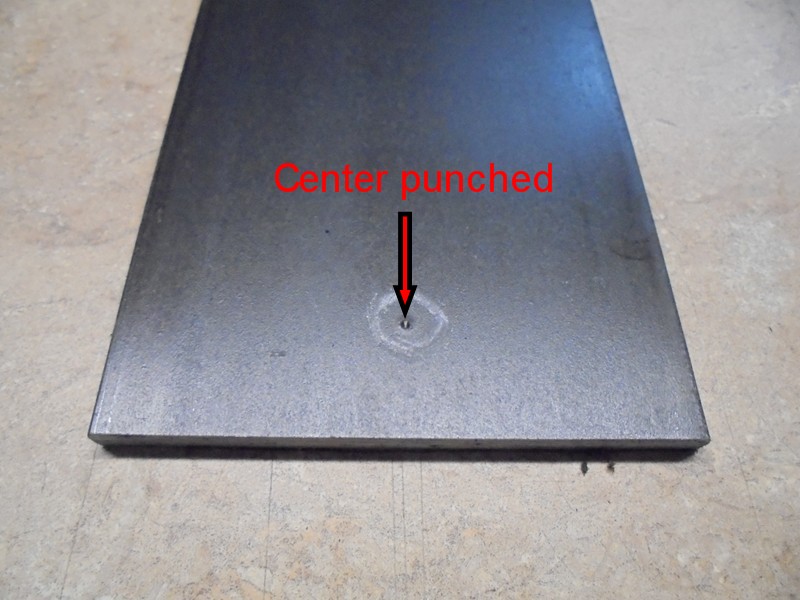
A center punch mark
Attachment 18927
Drawing 1
Attachment 18928
Drawing 2
-
This is again an excellent and very precisely done job as every other job you did and posted here. Thanks for sharing. The only observation is regarding tip angle of 60 degrees, which according to some people is not wide enough to guide drill bit to start hole right in the centre. I had that discussion several times with couple of very good machinists and engineers and most of them are claiming that center punch angle tip should be 90 degrees. I was using numerous fuel injector needles with different tip angle as center punches and I was very happy with all of them. But actually whenever I see original center punch, the tip angle is 90 degrees or very close to it.
Cheers
LMMM
-
<!-- BEGIN /var/www/html/homemadetools/protected/modules/zeus/views/tool/postUpdate.php -->
Thanks rossbotics! We've added your Center Punch and Guide to our Measuring and Marking category,
as well as to your builder page: rossbotics's Homemade Tools. Your receipt:
<div id="blocks">
<div class="block b1 pngfix">
<div class="bimg">
<div>
<a href="http://www.homemadetools.net/homemade-center-punch-and-guide">
<img src="/uploads/202388/homemade-center-punch-and-guide.jpeg"/>
</a>
</div>
</div>
<div class="head pngfix"></div>
<div class="left pngfix"></div>
<div class="right pngfix"></div>
<div class="blockover b1 pngfix">
<div class="title">
<a href="http://www.homemadetools.net/homemade-center-punch-and-guide">Center Punch and Guide</a>
<span> by <a href="http://www.homemadetools.net/builder/rossbotics">rossbotics</a></span>
</div>
<div class="tags">tags:
<a href='http://www.homemadetools.net/tag/punch'>punch</a>, <a href='http://www.homemadetools.net/tag/guide'>guide</a> </div>
</div>
</div>
</div>
<!-- END /var/www/html/homemadetools/protected/modules/zeus/views/tool/postUpdate.php -->
-
Nice job Rossbotics, have you proof the same constuction with a 2-3X magnifier ?
Have a nice day.
Pierre
-
Thank you for compliment LMMM
The reason for the 60° point is for visual purposes, that little bit of angle difference greatly increases the visual of locating the point of the center punch, I have always used a small pilot drill of no more than 3/32" to start with, then open the hole in increments to the final size, I am very aware of the proper 90° for a common center punches, even the common hand held center punches I have also have a steeper angle than 90° for that visual purpose, I agree that if someone wanted started with a 1/2" bit would create a walking problem.
Thanks for bringing that up LMMM I should have mentioned the small pilot drill is necessary first then open up the hole in increments.
Cheers LMMM
-
First off good job I like it
I like the 60° point as well. I find that when punching intersecting scribe lines trying to locate the exact center of the intersection is near impossible with a standard ground center punch. for this reason my layout punches are ground to the steeper angle often as steep as 45° if I find I require a wider more definitive punch mark I can always re punch with a wider punch but a lot of times just use a 1/8 or 3/16" diameter center drill to enlarge the mark before drilling
-
regarding the punch angle, simply call it a "prick punch" rather than centre punch and the issues go away. in layouts, a prick punch is used to form the depression for the centre punch to follow in... easy.
-
I always first use a prick punch for my high precision layout, then verify the locations, and finally follow-up with a center punch.
-
I have an old LS Sterrett automatic center punch that was among some other tools I bought at auction some years ago
Someone had reground the point on it so it was more of a scribe than a than a center punch or a prick punch it worked great for layout on SS or aluminum as well as mild steel but I have dulled the point and need to regrind it the next time I find it
-
I only rarely use punches for precision hole layout. I rely on the tool dials which are more accurate than any punching could be. On complex jobs I often do a layout on the workpiece to use as a guide to keep myself honest but the line intersections aren't punched; they're just there to warn me if I miscount dial rotations - the dreaded 0.1" location error.
For low precision stuff like wood and structural elements, I use punches. My favorite for wood is this one...
http://www.homemadetools.net/forum/p...9225#post54767
which keeps the punch from "following" the grain of the wood.