
 LinkBack URL
 About LinkBacks


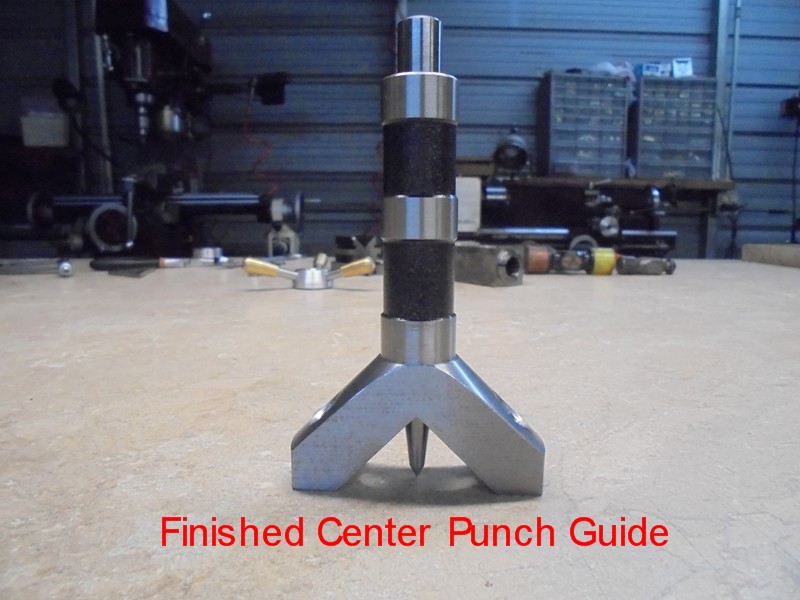
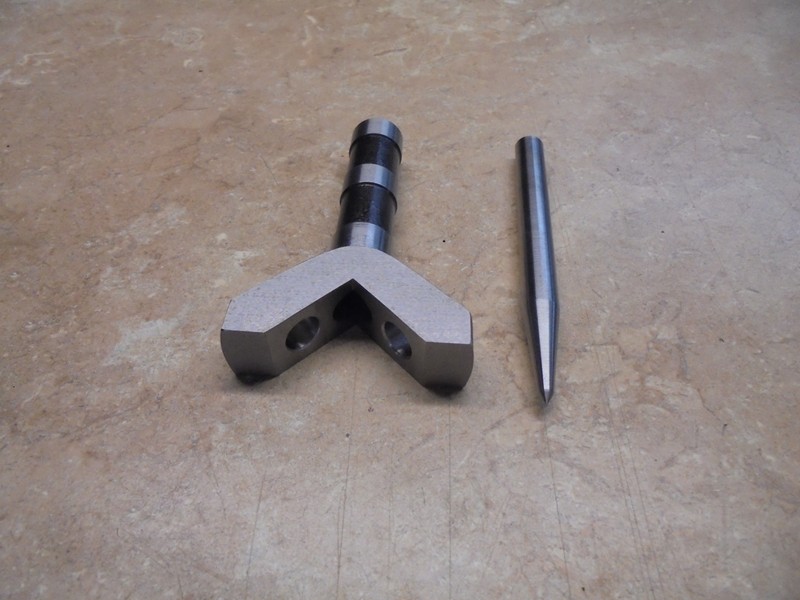
I built this little tool to assist in holding a center punch at 90° from the work surface; it’s hard to hold a center punch at perfect right angles, when you strike the punch and it’s not held at 90° then it will move creating an inaccurate center punch mark, this tool eliminates that problem.
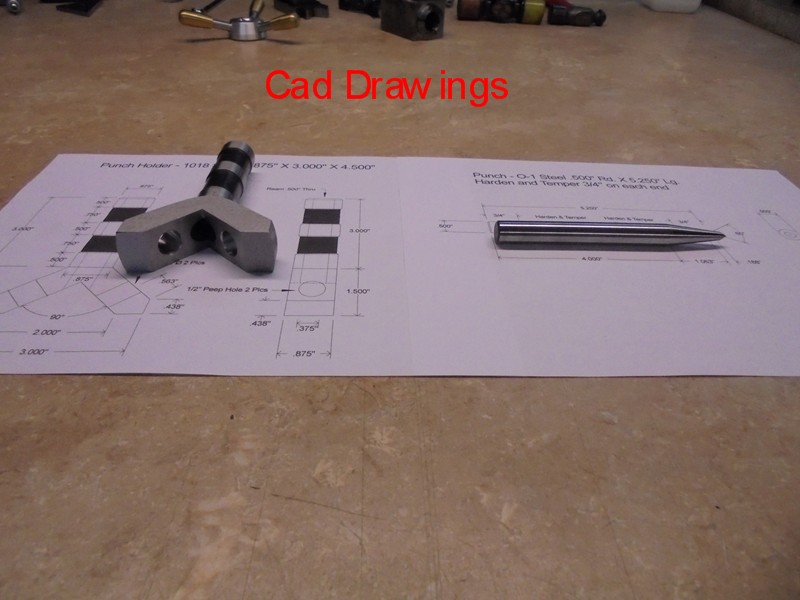
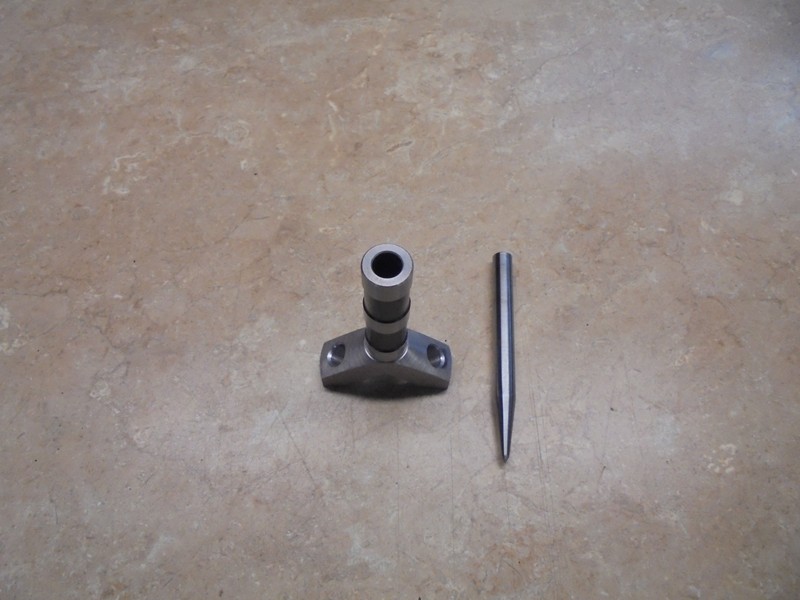
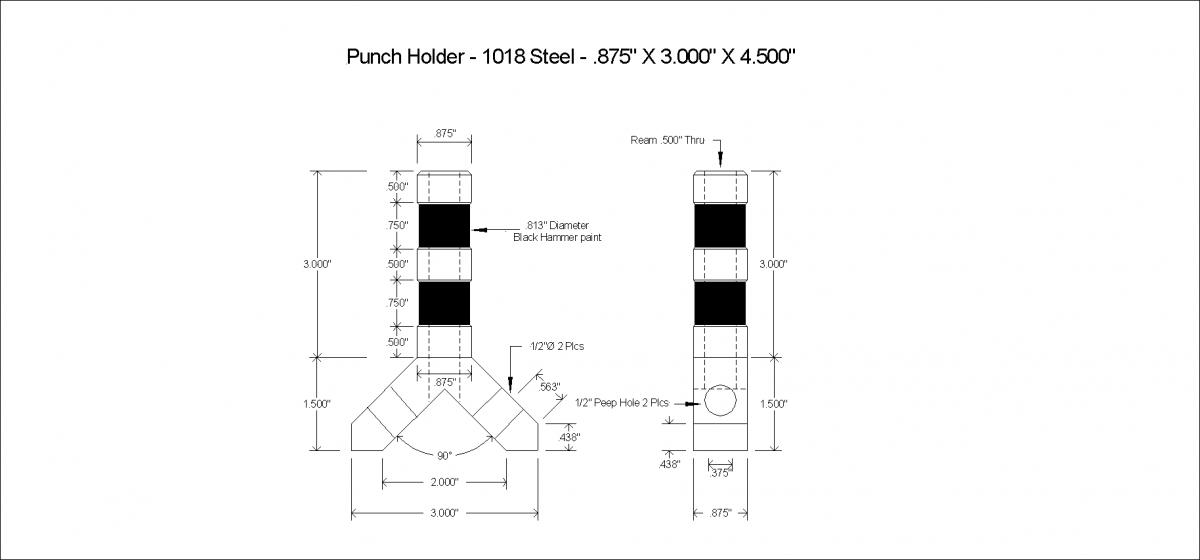
This tool was designed to be simple and user friendly; the punch guide is a one piece construction which was made from 1018 CRS, with a .500” reamed hole thru the entire length of the tool to guide the punch accurately, while the punch itself was made from O-1 tool steel hardened and tempered ¾” on each end.
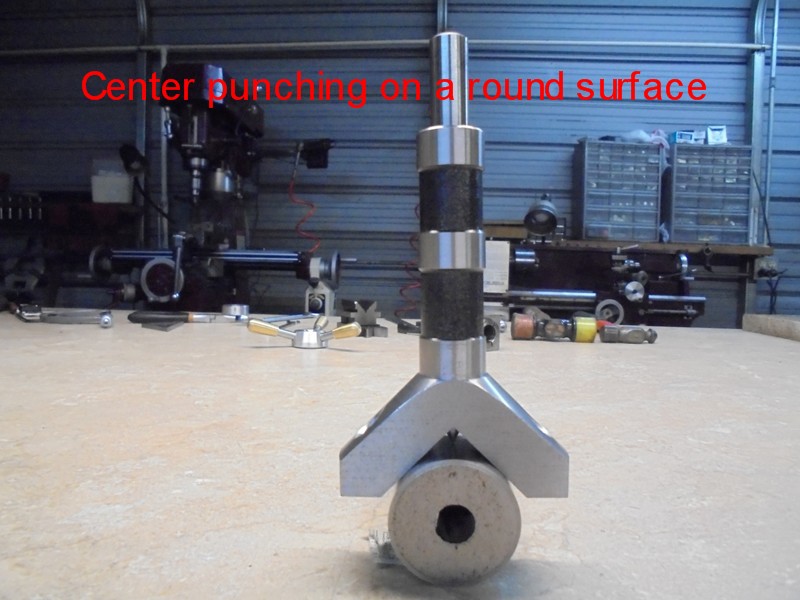
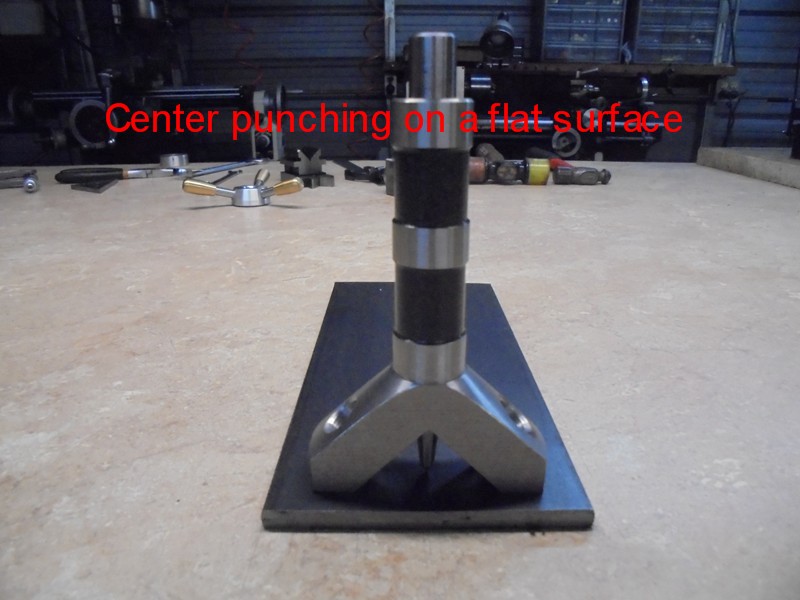
The guide was designed to work on either a flat or round surface, it has a two inch wide 90° crotch in the center of the body that will locate itself on a round surface (a shaft, pipe etc) plus the crotch also acts a viewer when locating a scribe mark on a flat surface, it has a ½” viewing hole in each of the legs which makes it very easy to locate scribe marks on a flat surface.
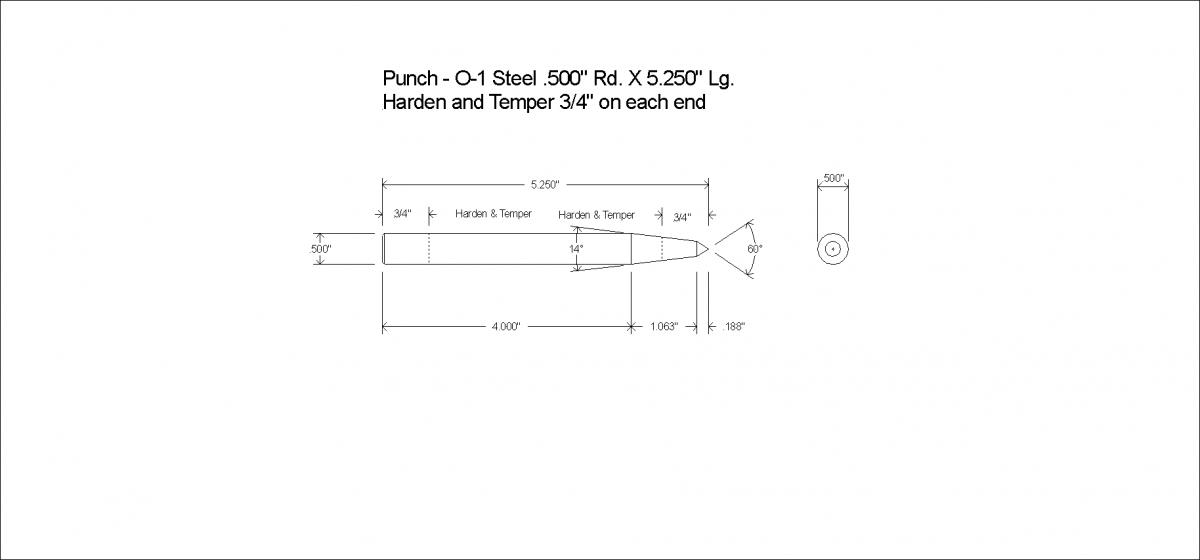
The punch was made from a piece of .500” Round by 5 ¼” Long O-1 tool steel hardened and tempered ¾” on each end, the end of the punch is machined at a 60° angle and a steep 14° angle from the end of the 60° point which gives allot of clearance for viewing and locating the point on your work piece.
Below you will see some photos of the machining process along with the tool being used on a flat and round surface; I have also included drawings for anyone who wants to make one of these tools.
As always thanks for looking
And happy machining
Doug
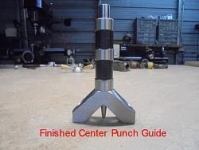
Finished punch
Drawings
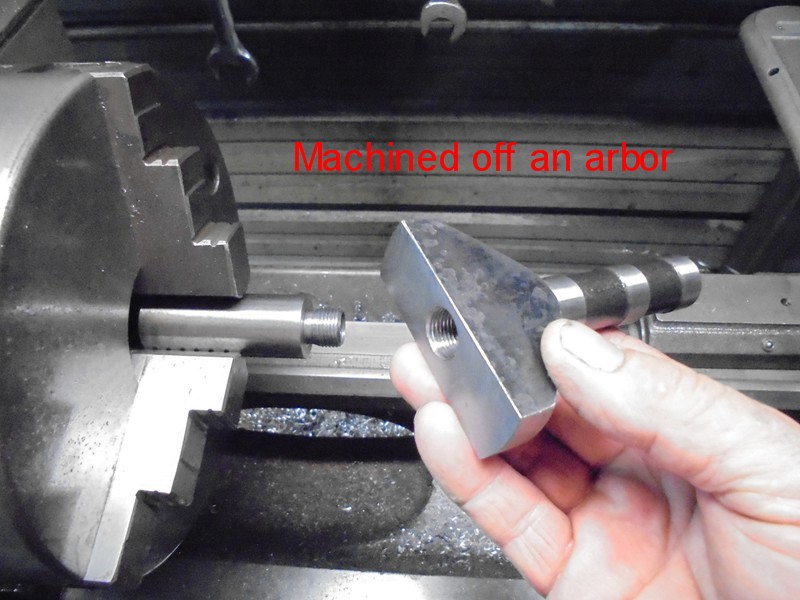
How it was machined
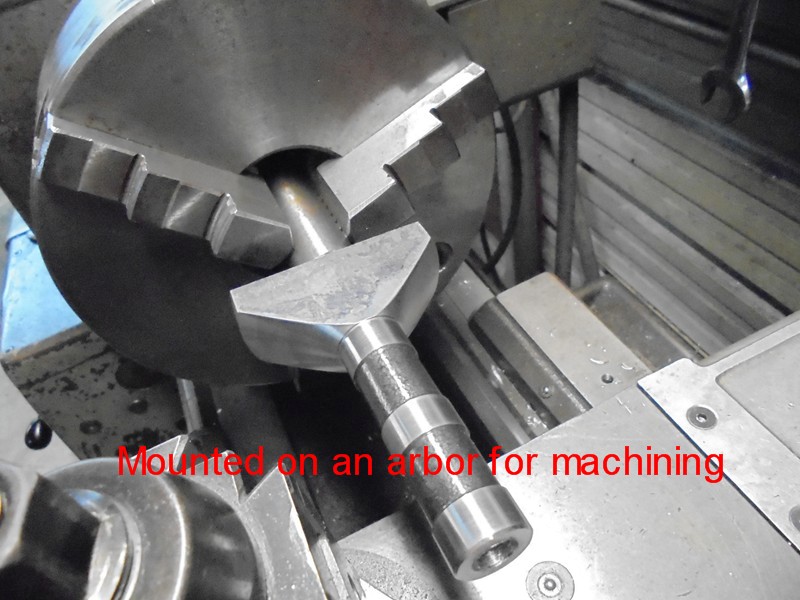
Machining from an arbor
A view of completed punch assembly
Top view
Used on a round surface
Used on a flat surface
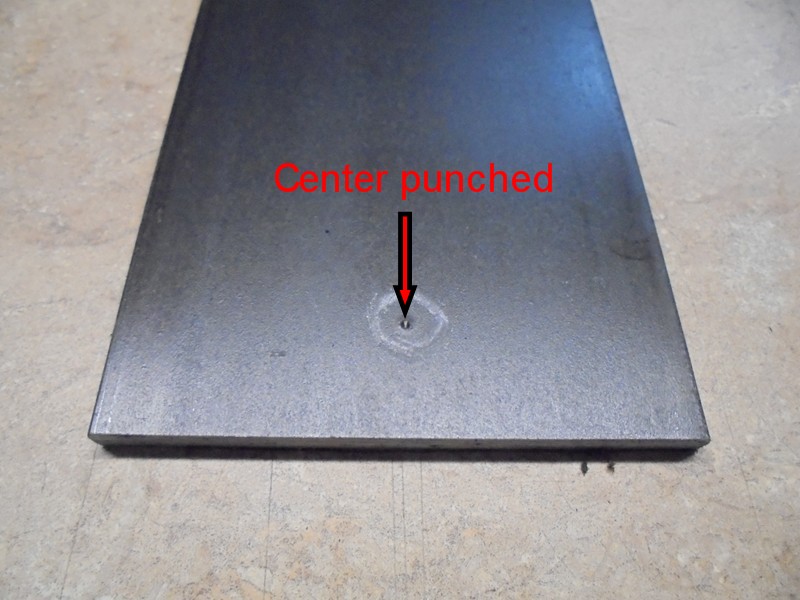
A center punch mark
Drawing 1
Drawing 2


 Reply With Quote


Bookmarks