Free 186 More Best Homemade Tools eBook:  
Get 2,000+ tool plans, full site access, and more.

User Tag List

Page 1 of 2 1 2 LastLast
Results 1 to 10 of 14

Thread: Clausing Model 111 lathe gear train shroud

  1. #1

    Join Date
    Oct 2016
    Posts
    15
    Thanks
    0
    Thanked 56 Times in 6 Posts

    DanLins's Tools

    Clausing Model 111 lathe gear train shroud

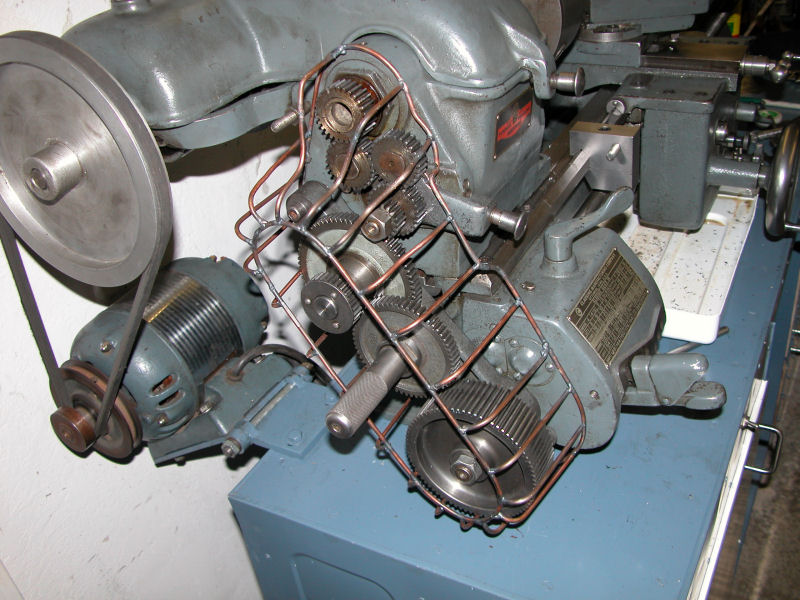
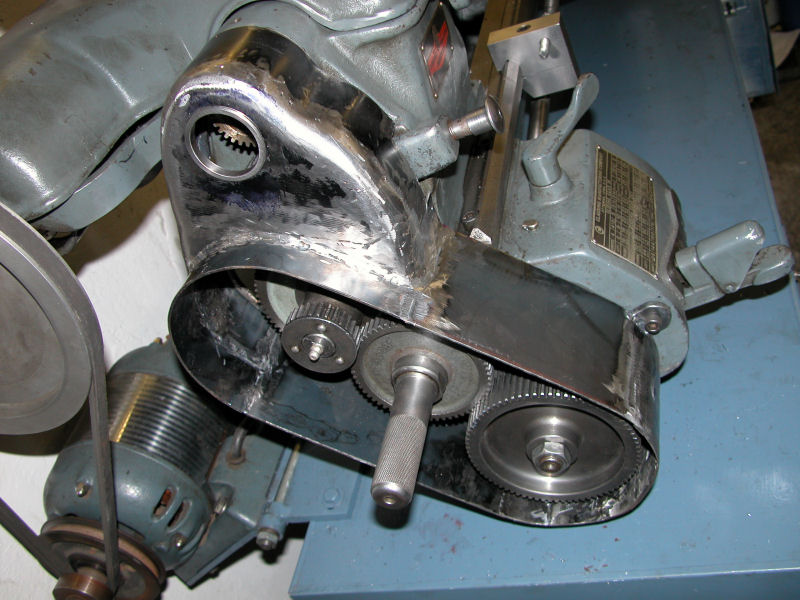
    My late 1940's Clausing model 111 mk3 lathe came with no gear train shroud, and my brother kept after me on the dangers of running it with those open gears spinning away. Finally, I decided something needed to be done. My first step was to make a wireframe full sized model just so I could get the feel for the curves and perhaps some insight on how to go about making one from scratch. I wanted to make the entire shroud out of at least 1/8" steel. The wireframe also helped me with clearances on gears and the sliding gear. I had no drawing, so I depended on images I found via Google. The wireframe will be tossed when I'm done with this little project.

    Clausing Model 111 lathe gear train shroud-shroud1.jpg

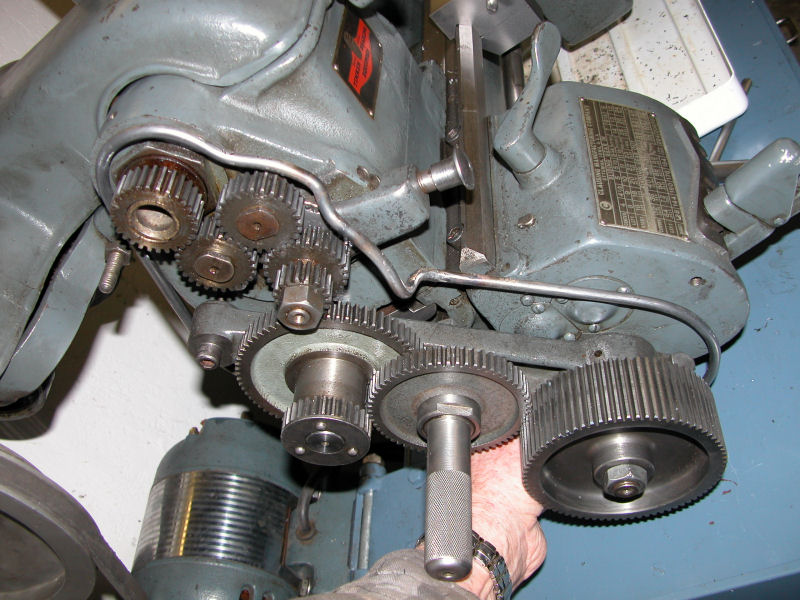
    Next, I formed an outer frame from 1/4" CRS, striving to make it fit as
    close to the online images I'd downloaded.

    Clausing Model 111 lathe gear train shroud-shroud2.jpg

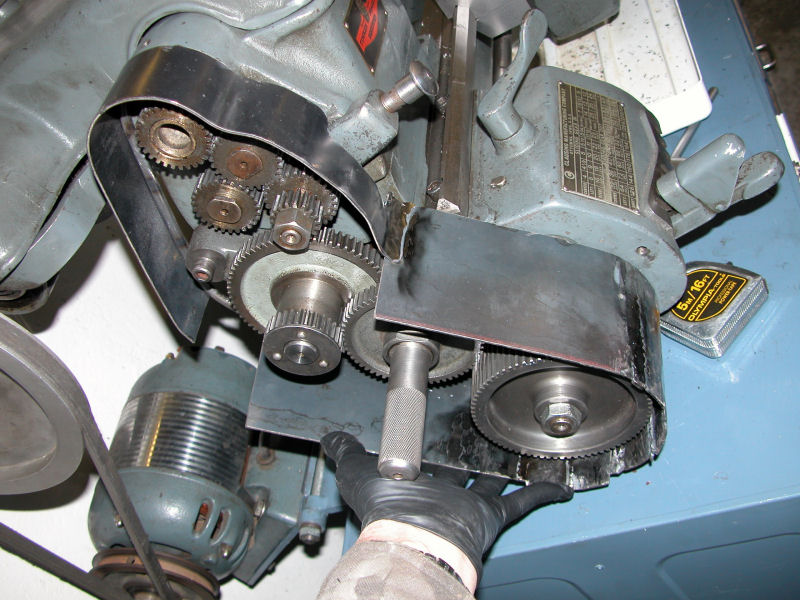
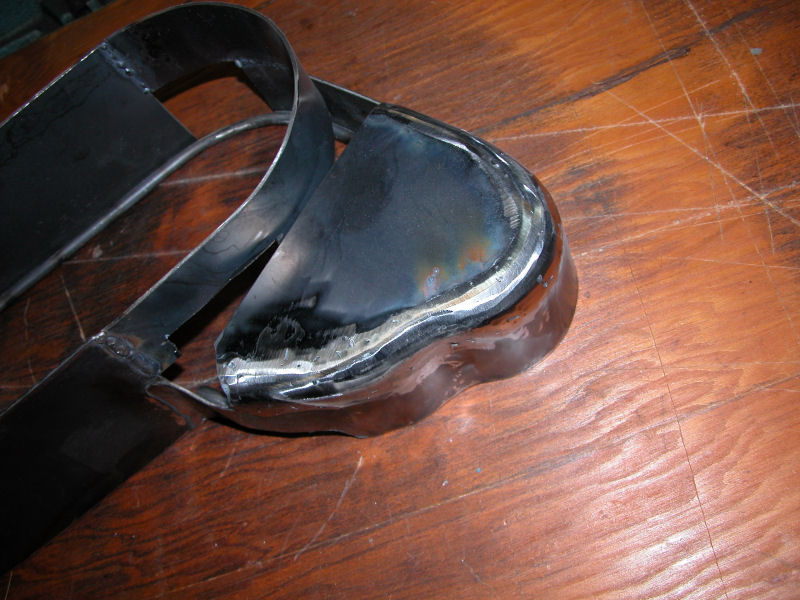
    Now it was time to start bending and tack welding the sides. The upper strip
    is 2" wide, and the lower is 4" wide, all from 1/8" thick steel.

    Clausing Model 111 lathe gear train shroud-shroud3.jpg

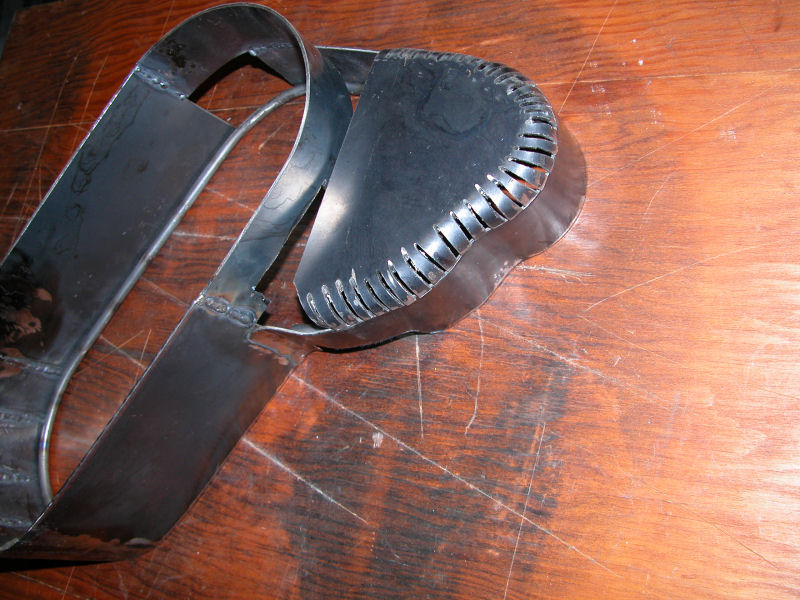
    By making a form about 3/4" oversized from the pattern I now had, I began
    making 1/16" slits about 1/4" apart around the periphery, and bending them into
    shape with pick hammer and visegrip pliers. I did not have a large enough sheet of 1/8" plate to do the entire form in this area, so I was forced to patch it together in pieces.

    Clausing Model 111 lathe gear train shroud-shroud4.jpg

    You can now see where this is going. Probably WAY too much effort going into
    this, but I wanted it to look nice and be stout. I did consider making it out
    of fiberglass, but gave up on that.

    Clausing Model 111 lathe gear train shroud-shroud5.jpg

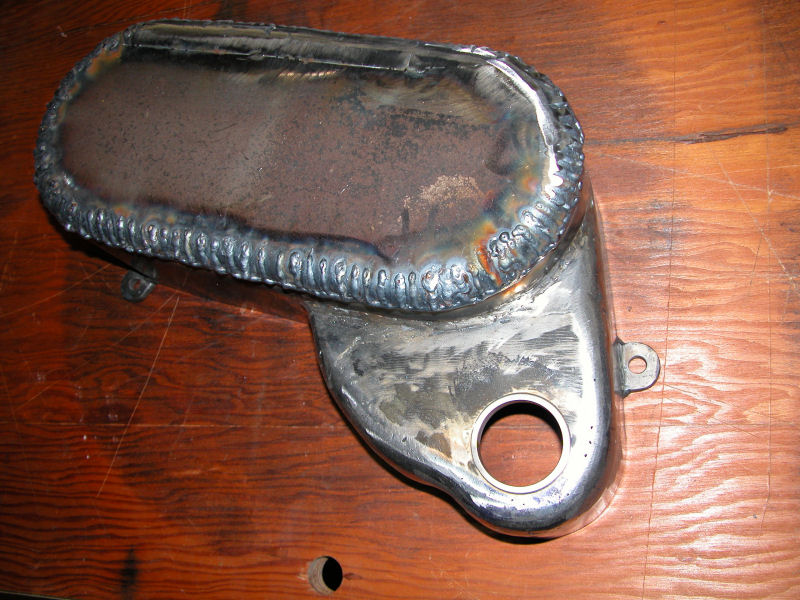
    Below, shown with the mounting tabs welded on and the upper part formed and
    rough sanded with a #60 flap disc. I stopped long enough to make the steel
    ring insert for the spindle access hole.

    Clausing Model 111 lathe gear train shroud-shroud6.jpg

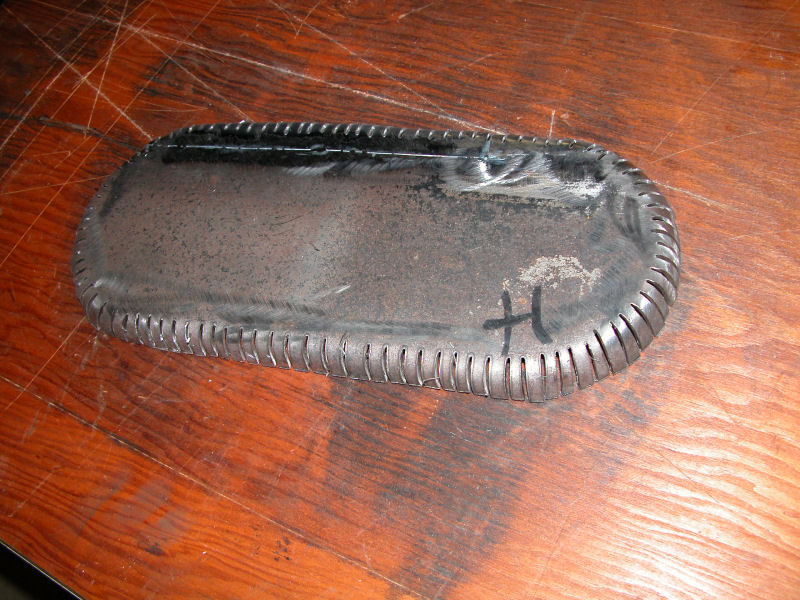
    Now I was ready to make the end plate. Same process, but it went a little
    easier since it was so straight forward.

    Clausing Model 111 lathe gear train shroud-shroud7.jpg

    Below, after about an hour of TIG welding.

    Clausing Model 111 lathe gear train shroud-shroud8.jpg

    After cutting another large holes and some final grinding and sanding, I
    gave it a very thin coat of bondo and did some final sanding.

    Clausing Model 111 lathe gear train shroud-shroud9.jpg

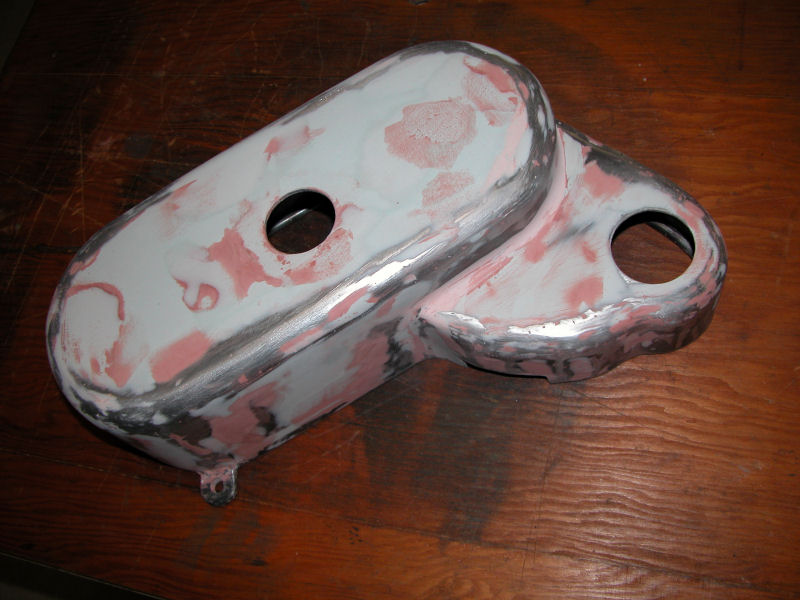
    Next I put down a couple of coats of high solids primer and shot it with a
    light coat of white to help spot trouble areas before final painting.

    Clausing Model 111 lathe gear train shroud-shroud10.jpg

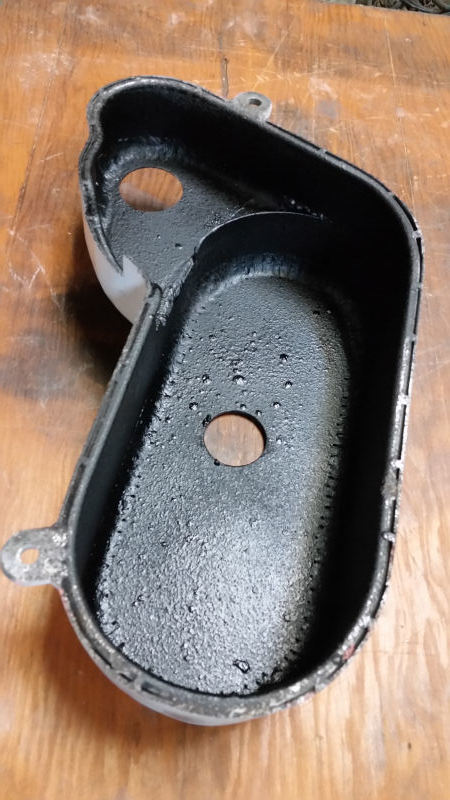
    I used a high speed handheld grinder with a carbide burr to remove evidence
    of welding burn through areas, and shot a coat of auto undercoating on the
    inside. Not that it will help with the noise, but it does make it look a little
    better.

    Clausing Model 111 lathe gear train shroud-shroud11.jpg

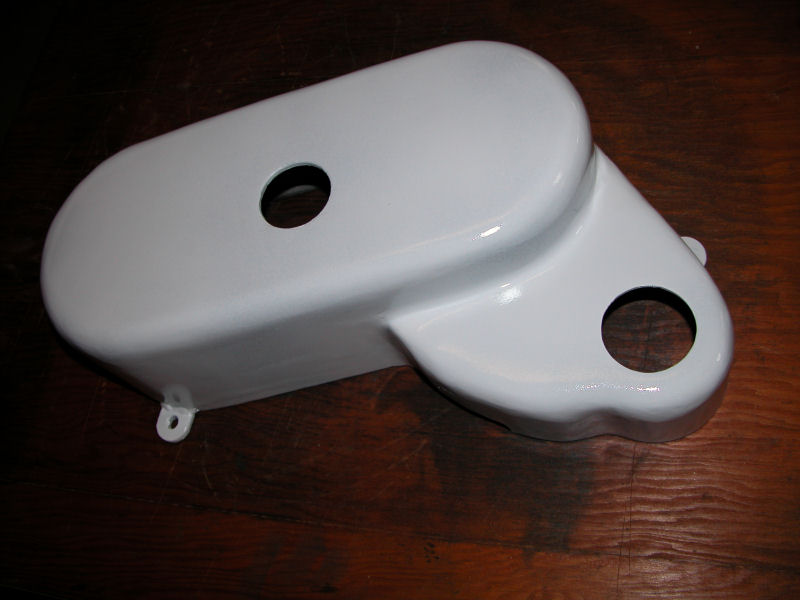
    Finally, a final coat of paint. Color not matched very closely, so I may try
    to darken up the enamel a little with some black myself.

    Clausing Model 111 lathe gear train shroud-shroud12.jpg

    Obviously not an exact duplicate of the original, but fairly close. Most photos I see show another smaller (1"?) hole in back of the sliding gear, towards the headstock, but they don't appear to line up with the upper mounting stud on the quadrant, of any of the gears, so I'm not going to drill that one in.

    Dan L

    186 More Best Homemade Tools eBook

  2. The Following 22 Users Say Thank You to DanLins For This Useful Post:

    57_210 (Feb 17, 2024), aphilipmarcou (May 13, 2018), aussie (Jan 5, 2019), baja (Dec 26, 2020), cmarlow (Jan 4, 2019), Frank S (Oct 18, 2016), high-side (Jan 6, 2019), Jon (Oct 18, 2016), Moby Duck (Jan 14, 2017), mwmkravchenko (May 14, 2018), olderdan (Oct 19, 2016), oldpastit (Jan 5, 2019), Paul Jones (Oct 18, 2016), PJs (Oct 18, 2016), rgsparber (Jan 4, 2019), rossbotics (Oct 23, 2016), sossol (May 13, 2018), Texf1 (Jan 7, 2019), that_other_guy (Jan 26, 2020), thehomeengineer (Jan 5, 2018), Tonyg (Dec 26, 2020), Toolmaker51 (Jan 1, 2018)

  3. #2
    Supporting Member C-Bag's Avatar
    Join Date
    Aug 2015
    Location
    California, central coast
    Posts
    720
    Thanks
    689
    Thanked 876 Times in 471 Posts

    C-Bag's Tools
    Exact or not Dan, it certainly looks like it belongs to the lathe. Excellent work and a worthwhile project for a worthwhile tool.

    2000 Tool Plans

  4. #3
    PJs
    PJs is offline
    Supporting Member PJs's Avatar
    Join Date
    Sep 2014
    Location
    Northern CA
    Posts
    1,841
    Thanks
    8,337
    Thanked 1,118 Times in 718 Posts

    PJs's Tools
    I applaud your insights, ingenuity, craftsmanship and gumption to build this remarkable cover!! Like C-Bag says "It certainly looks like it belongs to the Lathe"...and surely it does because of the heart and soul you put into it! Thank you for sharing this great build with us. My Hat is Off to you! ~PJ
    ‘‘Always do right. This will gratify some people and astonish the rest.’’
    Mark Twain

  5. #4
    Supporting Member Frank S's Avatar
    Join Date
    Aug 2015
    Location
    Peacock TX
    Posts
    11,224
    Thanks
    1,985
    Thanked 8,788 Times in 4,207 Posts

    Frank S's Tools
    Don't beat yourself up on it not being an exact match. Like C-bag and PJs have stated and I concur as well It defiantly looks like it belongs. Great job.
    Never try to tell me it can't be done
    When I have to paint I use KBS products

  6. The Following 2 Users Say Thank You to Frank S For This Useful Post:

    Paul Jones (Oct 19, 2016), rlm98253 (May 13, 2018)

  7. #5
    Supporting Member olderdan's Avatar
    Join Date
    Jun 2016
    Posts
    782
    Thanks
    1,457
    Thanked 1,540 Times in 466 Posts

    olderdan's Tools
    Hi Dan
    I cant add much to previous comments but to agree with them, you have made a beautiful job of it and your wire frame jig is to me a piece of art. I think I would have made a hanging flower basket from it.
    You are obviously a perfectionist.
    Regards
    Olderdan
    Last edited by olderdan; Oct 19, 2016 at 12:13 PM. Reason: politeness in text

  8. The Following 2 Users Say Thank You to olderdan For This Useful Post:

    Paul Jones (Oct 22, 2016), PJs (Oct 20, 2016)

  9. #6
    Content Editor
    Supporting Member
    DIYer's Avatar
    Join Date
    Aug 2013
    Posts
    3,056
    Thanks
    773
    Thanked 1,852 Times in 1,653 Posts


    Thanks DanLins! We've added your Lathe Gear Shroud to our Lathe Accessories category,
    as well as to your builder page: DanLins's Homemade Tools. Your receipt:


  10. #7
    Supporting Member rossbotics's Avatar
    Join Date
    Dec 2013
    Location
    Florida
    Posts
    731
    Thanks
    1,019
    Thanked 1,649 Times in 403 Posts

    rossbotics's Tools
    Hi Dan
    That's a good looking job you did there, that was a great idea with the wire frame, came out beautiful, I have a clausing lathe myself the model number is 6913 variable speed, they are great lathes.

    Again Fine Job

    Doug

  11. The Following 2 Users Say Thank You to rossbotics For This Useful Post:

    Paul Jones (Oct 24, 2016), PJs (Oct 26, 2016)

  12. #8
    creast's Avatar
    Join Date
    Sep 2016
    Posts
    3
    Thanks
    0
    Thanked 0 Times in 0 Posts
    A really professional job! Well done!

  13. #9
    Kneil's Avatar
    Join Date
    Nov 2016
    Posts
    2
    Thanks
    0
    Thanked 1 Time in 1 Post
    What an amazing job! It is so smooth (as per finished photos) that at first I thought it was made from fiberglass or 3D printing. I love the craftsmanship you displayed in forming the rounded contours on the metal. Not an easy job to be sure, but well worth it in terms of finished product and job satisfaction.

  14. #10
    Supporting Member Ralphxyz's Avatar
    Join Date
    Dec 2016
    Posts
    1,575
    Thanks
    2,509
    Thanked 281 Times in 230 Posts

    Ralphxyz's Tools
    WOW!! I need to do something similar (actually at least twice). I hope I can do half the job you did.

    Ralph

Thread Information

Users Browsing this Thread

There are currently 1 users browsing this thread. (0 members and 1 guests)

Bookmarks

Posting Permissions

  • You may not post new threads
  • You may not post replies
  • You may not post attachments
  • You may not edit your posts
  •