-
4 Attachment(s)
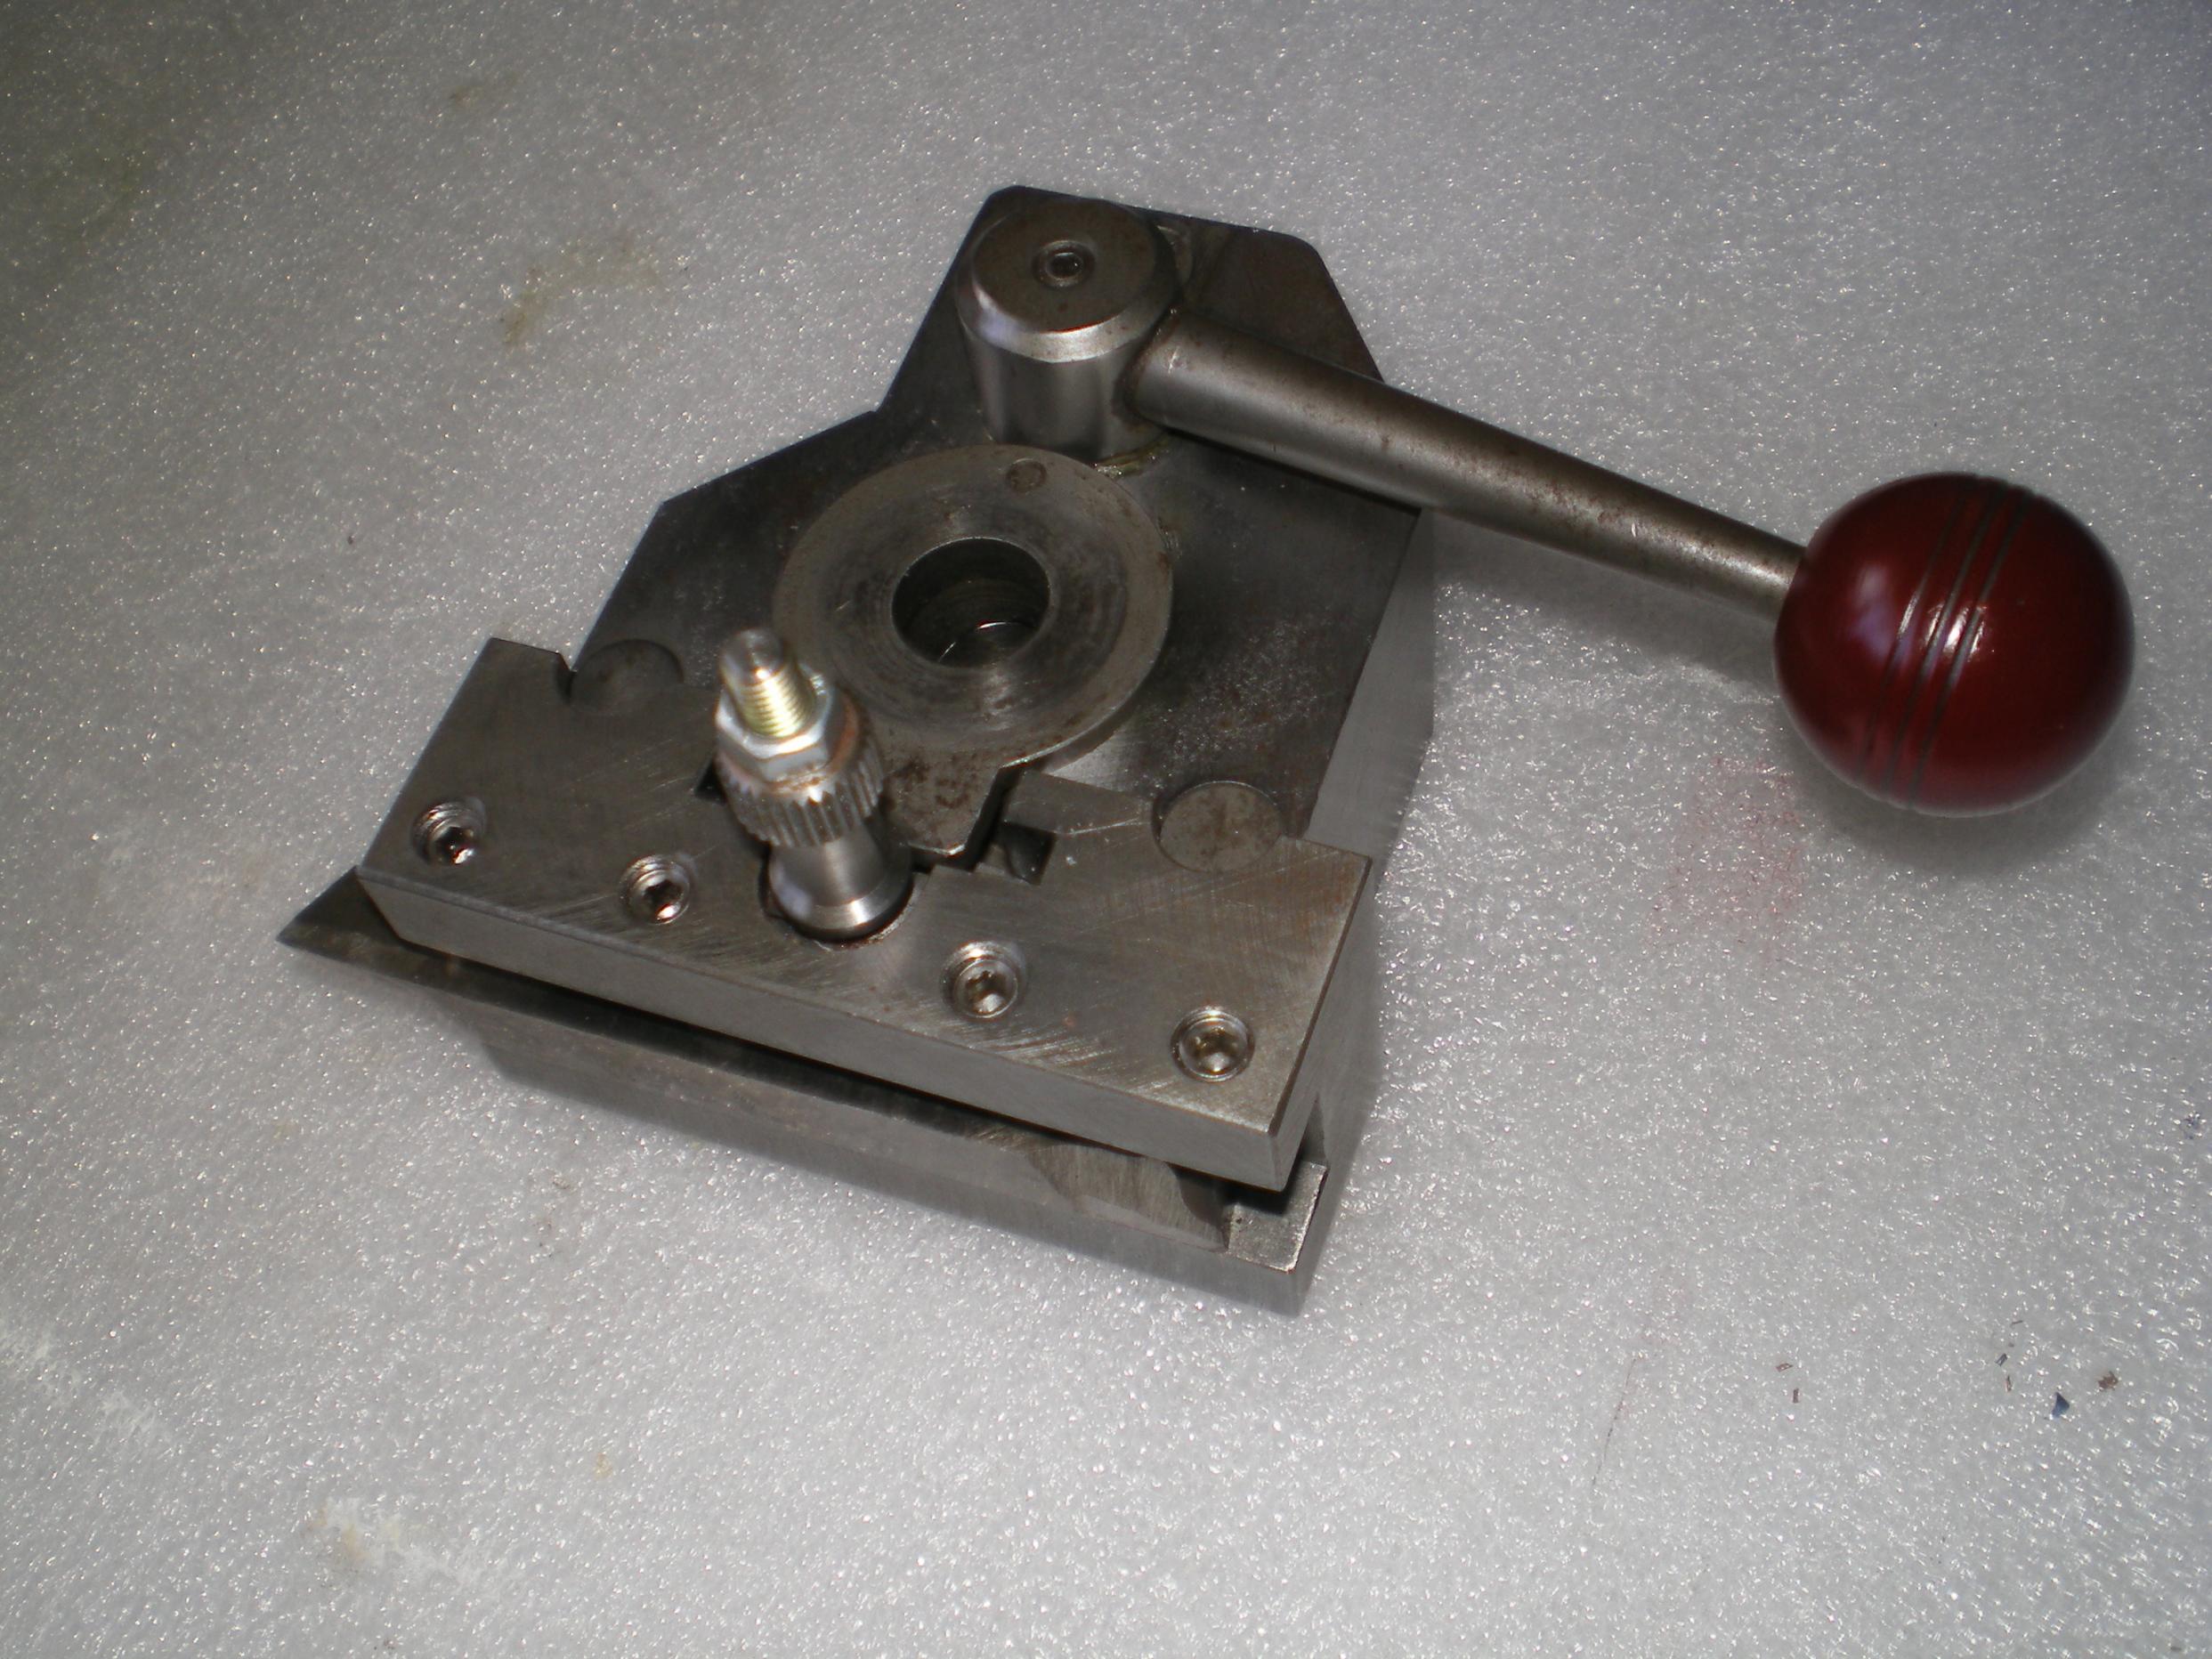
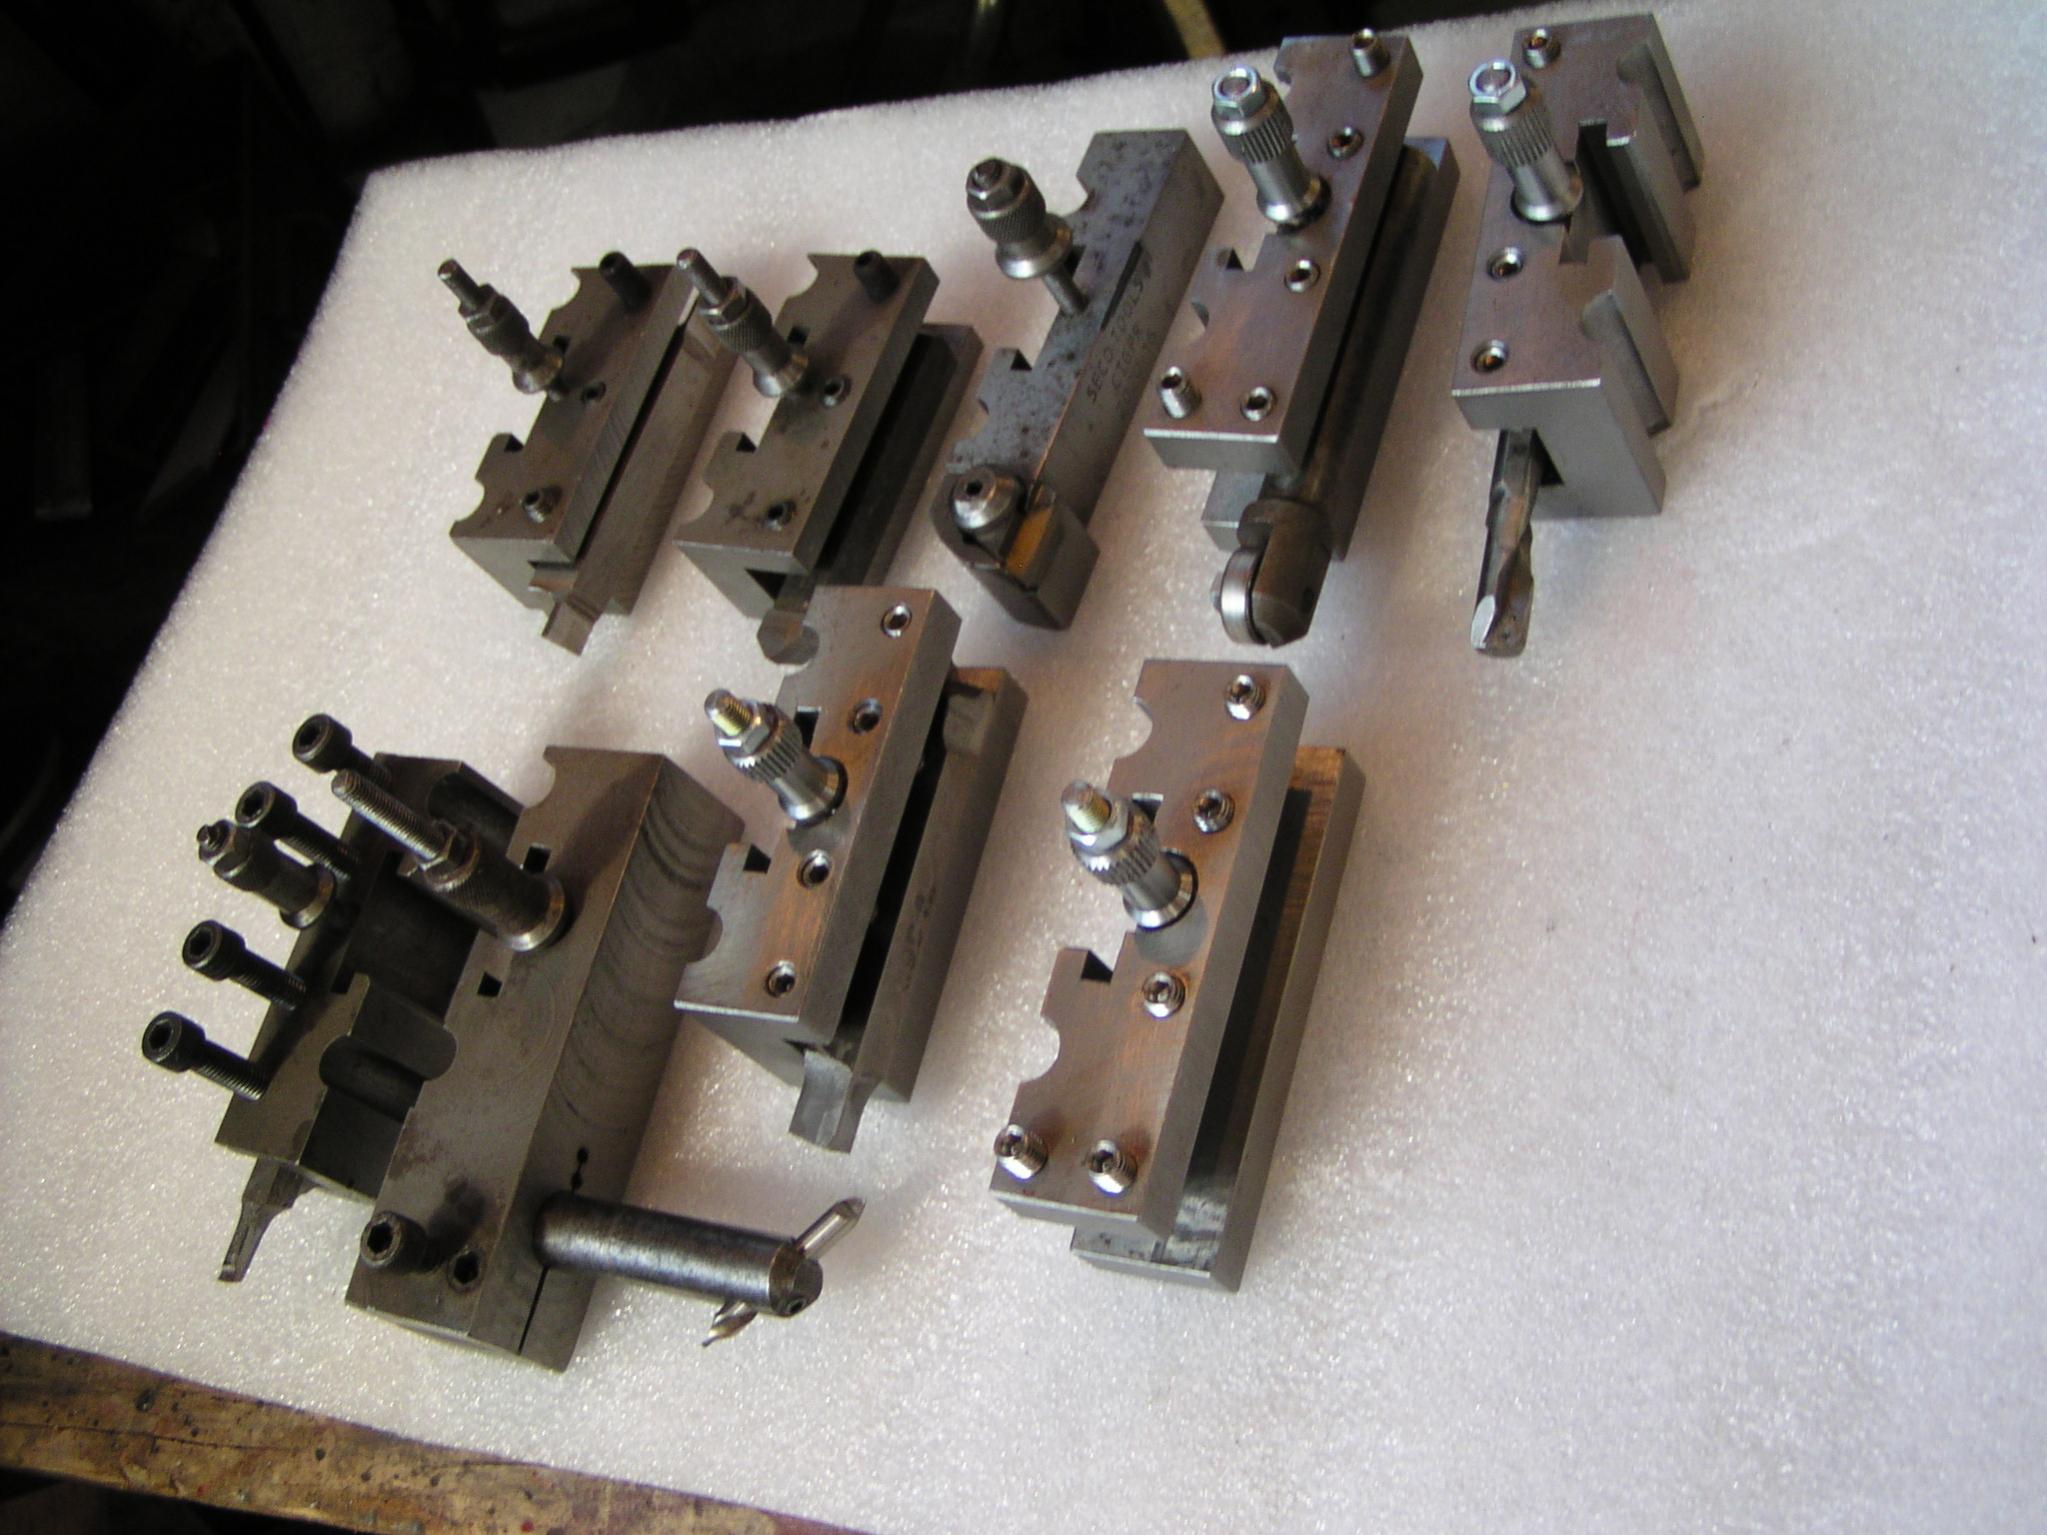
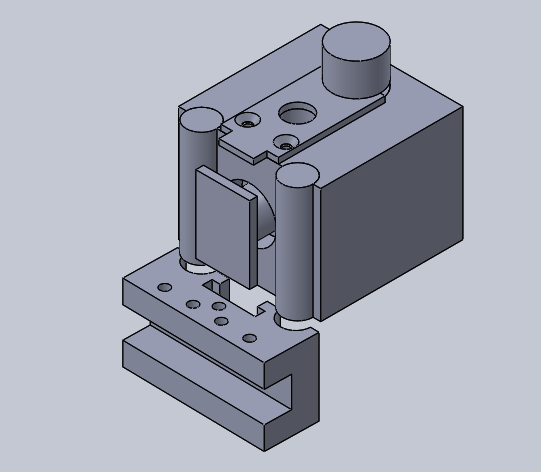
A different QC Toolpost
This is from an original design by J A Radford and was featured in the Model Engineer.
The main advantage of this design is that it can be made without the use of a milling machine as indeed was mine and has been in use for 40 years on my South Bend.
I can vouch for its sturdiness in use and it will still repeat to .0005 inches, it also gives a little more room when working close to the tailstock.
Mr Radford as I recall made a drilling jig for the dowel locations and drilled and reamed on the bench drill.
I did not follow that approach myself and instead jig bored them using my vertical slide, I am glad I did as I have only recently made some more tool holders and after all that time I doubt I would have found the jig.
I do not have the original drawings but have re drawn it to scale on 3D Cad (Sketchup) and have taken a screen shot to show the parts. The sizes are to suit your preferences but on mine the dowel ctrs are 2 inches and the centre clamp ram is .750 inches. The only other relevant dimension is the offset of the cam clamp which is .0625 (could be a little more say .075). The keen eyed will notice that the drill rod location pegs are screwed to the main block, I think that modern adhesives would probably do the job just as well.
Attachment 12384Attachment 12383Attachment 12385Attachment 12386
-
<!-- BEGIN /var/www/html/homemadetools/protected/modules/zeus/views/tool/postUpdate.php -->
Thanks olderdan! We've added your QCTP to our Machining category,
as well as to your builder page: olderdan's Homemade Tools. Your receipt:
<div id="blocks">
<div class="block b1 pngfix">
<div class="bimg">
<div>
<a href="http://www.homemadetools.net/qctp-4">
<img src="/uploads/153756/qctp-4.jpeg"/>
</a>
</div>
</div>
<div class="head pngfix"></div>
<div class="left pngfix"></div>
<div class="right pngfix"></div>
<div class="blockover b1 pngfix">
<div class="title">
<a href="http://www.homemadetools.net/qctp-4">QCTP</a>
<span> by <a href="http://www.homemadetools.net/builder/olderdan">olderdan</a></span>
</div>
<div class="tags">tags:
<a href='http://www.homemadetools.net/tag/qctp'>QCTP</a>, <a href='http://www.homemadetools.net/tag/tool-post'>tool post</a> </div>
</div>
</div>
</div>
<!-- END /var/www/html/homemadetools/protected/modules/zeus/views/tool/postUpdate.php -->
-
Hello,
Nice build. Thanks for the photos and plans.
A question please ?
Once you have turned the lever and pulled the piston tight is it possible for the lever to loosen again or is there some sort of locking mechanism that I haven't seen or understood ?
Bill
-
Hi Bill,
Thanks for the comments.
In answer to your question there is no need for any extra locking device as the cam itself provides all the force and security needed.
I have used this holder for many years sometimes on heavy interrupted cuts as well as parting of and it has never loosened in use.
Indeed I have kept the clamp lever short to avoid to much force being applied.
It grips so well that sometimes it is necessary to give the end of the ram a bump with the hand to unstick the holder.
Hope that helps.
Alan
-
I really like this design because of the sturdy low clearance. Interesting you did it all on your lathe.
Thanks for sharing the pics and drawings.
-
2 Attachment(s)
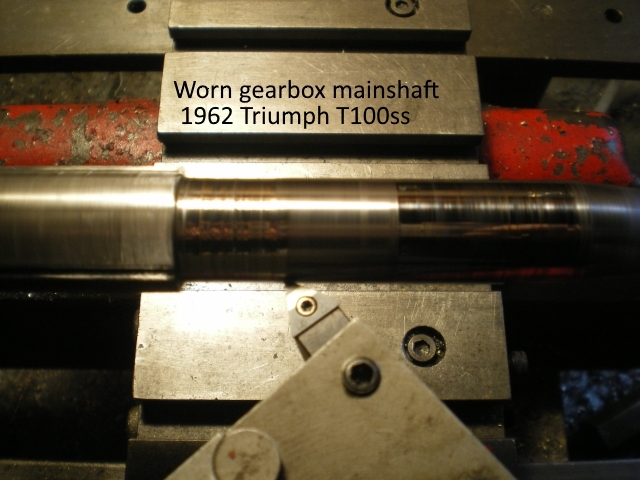
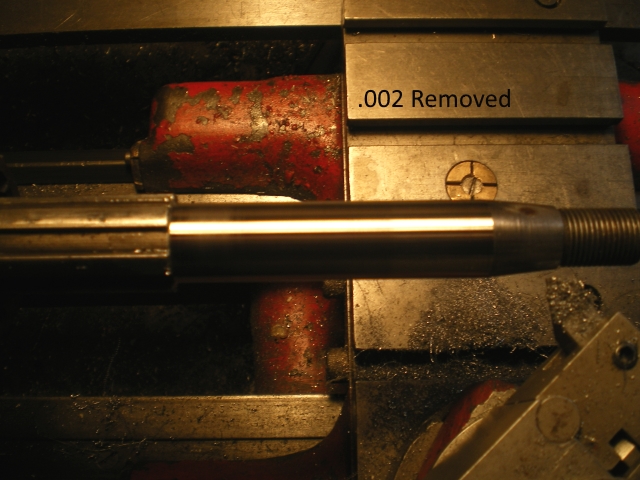
Turning hardened steel.
It is possible to turn sintered and Hss steel up to 65 Rockwell accurately with the right tool.
The tool tip required is a CBN (Cubic boron nitride), not cheap but they last a very long time with careful use. If you have an irreplaceable part to refurbish it can be an alternative to grinding with a comparable finish.
Case hardening on old motorcycle parts is usually around .010 thou deep and it is possible to skim off .002 Dia with this method.
Attachment 12437Attachment 12438
Mid range speed and finest feed no coolant.
Make new bushes to suit and good as new.
It is usual to sharpen the top face only on these tips with a diamond wheel (I have only needed to do that once in a dozen usage).
-
olderdan,
This is a good design for the QCTP and interesting story about building the parts without using a milling machine. How did you make the semi-circular grooves for the tool holders? Is it possible to make a pair by drilling (or boring) two holes spaced at 2" centers and then use a bandsaw to split the pair? More information about how you set up your milling work on the South Bend lathe would be interesting to know.
Thanks for sharing the photos and drawings. Also thanks for the tip about using CBN tools.
Regards, Paul Jones
-
Hi Paul,
After milling the blanks I clamped them in pairs and and drilled and reamed them on the centre line using co-ordinates with the vertical slide and cross slide.
Has the advantage of doing two at a time, after which I milled about .015 of the mating faces.
After milling the large clamping T slots ( vertical slide again) , I used the tool post itself to mill out the tool slots.
I hope to post more info on some of my milling setups soon.
My vertical slide is made from a large Colchester top slide and is nice and solid.
-
How can I get some plans for this very nice toolpost?
jhewitt5@wi.rr.com
-
1 Attachment(s)
Attachment 18551
Well gonna try and use your style for my own tool post. Going to try and use 16x60 hardened and ground dowels for some extra durability. Not designed one of these cams before so accidentally ended up with 5mm of movement rather than the 1.8mm I was shooting for so more iterations to come