-
2 Attachment(s)
Disc, Drum Sander
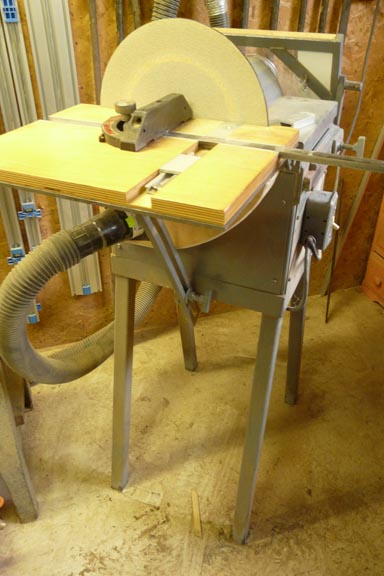
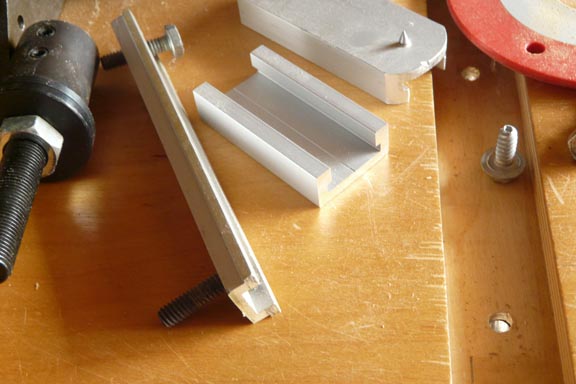
After having built myself a belt sander someone asked if I would build him a disc drum sander. So I went o work on it and built this disc/drum sander. He never did come to buy it or to see it so I kept it for myself. It is belt driven by a 3/4 hp motor inside the box which is open from the bottom for ventilation. The tilting table is 1/4" plate with a plywood top on it. It features a slot for the miter gauge as well as a slot at right angles to the disc. There are 2 pieces of T Bar in there with bolts and knobs under the table. I made various insert to fit in there from pieces of aluminum miter track to either fill the gap or to use as guides like the piece laying on the side which has a compass point for truing up circles.
On the other end it is a drum sander. The table is a router table plate with those red removable insert rings. This way I can accommodate many sizes of sanding drums. The table is tiltable as well as sliding in and out as needed or can be slid right out. I can use flap wheels as well as mop sanders and inflated soft drums or a wire wheel or even another disc, anything that will mount on a 3/4" shaft.
It is probably the second most used machine in my shop after the table saw.
Nick
Attachment 22355 Attachment 22356
-
Nick -I liked this a lot as well as you 4ft belt sander.
I'm thinking of building the belt sander for my brother whose belt sander devoured itself a while back. My neighbor has a bolt together frame and and drive components from a belt fed slab saw which would fit the bill. So thanks again for that.)
You spoiled me (all of us) with the pictures and drawing of the belt sander. How about the same for the disc/drum sander??
JohnMTO
-
<!-- BEGIN /var/www/html/homemadetools/protected/modules/zeus/views/tool/postUpdate.php -->
Thanks Nick Jonkman! We've added your Disc and Drum Sander to our Disc Sanders category,
as well as to your builder page: Nick Jonkman's Homemade Tools. Your receipt:
<div id="blocks">
<div class="block b1 pngfix">
<div class="bimg">
<div>
<a href="http://www.homemadetools.net/homemade-disc-and-drum-sander">
<img src="/uploads/210953/homemade-disc-and-drum-sander.jpeg"/>
</a>
</div>
</div>
<div class="head pngfix"></div>
<div class="left pngfix"></div>
<div class="right pngfix"></div>
<div class="blockover b1 pngfix">
<div class="title">
<a href="http://www.homemadetools.net/homemade-disc-and-drum-sander">Disc and Drum Sander</a>
<span> by <a href="http://www.homemadetools.net/builder/Nick+Jonkman">Nick Jonkman</a></span>
</div>
<div class="tags">tags:
<a href='http://www.homemadetools.net/tag/disc-sander'>disc sander</a> </div>
</div>
</div>
</div>
<!-- END /var/www/html/homemadetools/protected/modules/zeus/views/tool/postUpdate.php -->
-
8 Attachment(s)
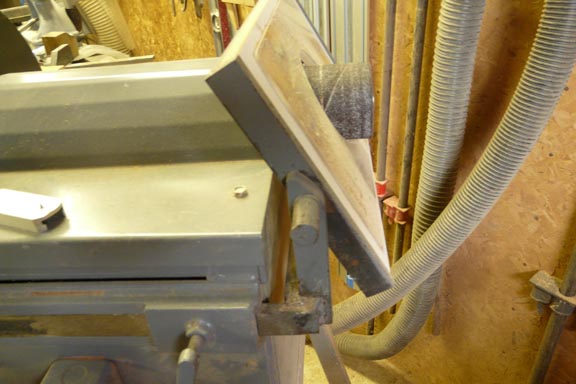
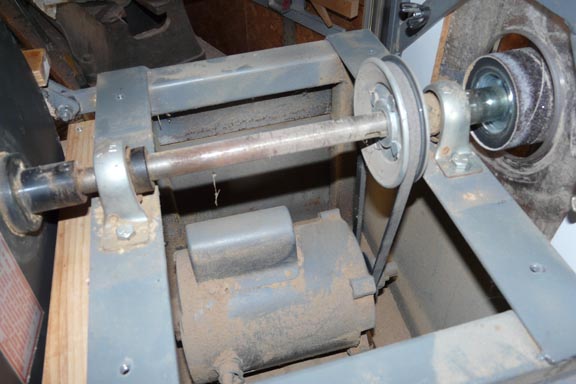
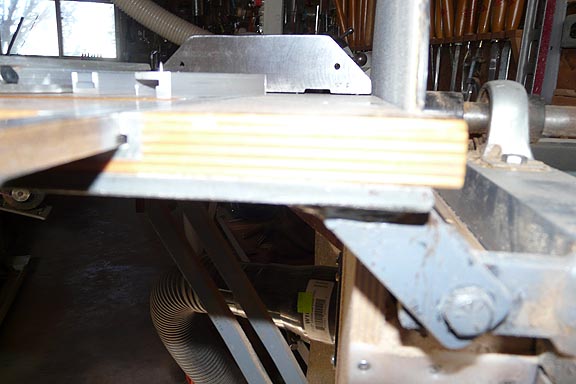
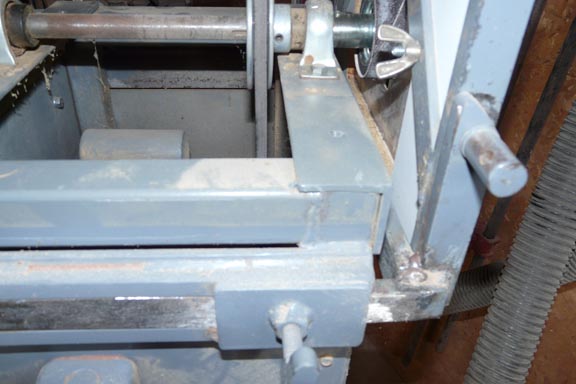
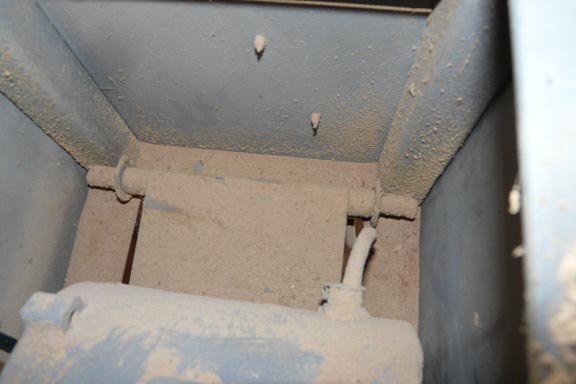
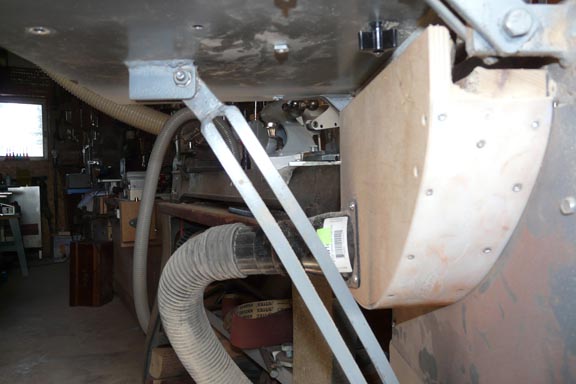
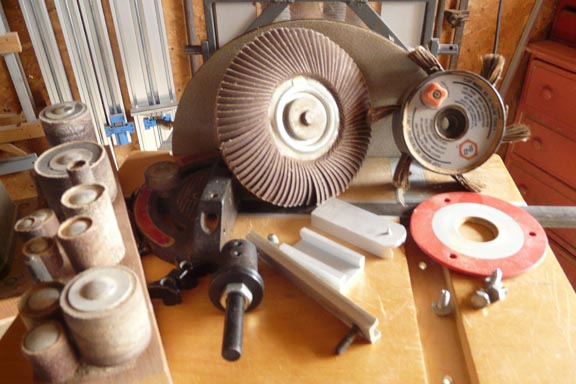
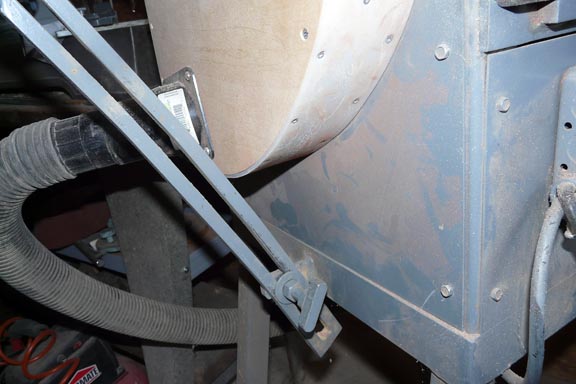
Thanks for your comment. I took the cover off the top and took some more pictures just for you. Hope you enjoy them. First you can see that I built the frame from 1 1/2" square tubing and angle iron. The shaft and bearings (3/4"D. are obvious. The motor sits on a 1/4" plate welded to a piece of 3/4" pipe with a piece of 3/4" shaft in it. The shaft is supported on each end in a washer welded to the frame members. All the cover plates are held with 4 self tapping 1/4" hex head screws for easy access to the motor etc. The miter slot is a piece of miter track available from many woodworking suppliers. Apiece of miter track slide is used up side down to hold the compass point and other inserts as can be seen in the accessories photo. These are just some of the accessories we use on the drum end of the machine.
As can be seen the drum table can be slid in and out as well as completely removed. Also shown are the red and gray inserts for the router table plate to reduce the hole size when using the small drums also shown. The small drums get held in a drill chuck not shown with an arbor like the the one shown that can hold grinding wheels, flap wheels etc. I show the disc table hinge, with the way i built it it creates a gap when the table is dropped this necessary to change the discs. I do have to remove the front plate below the disc with the dust collector hood on it to do so as well . 4 screws hold it on. I now use velcro (hook & loop) paper. If I was doing it again I would weld the clamp bracket for the table support under the frame instead of in the front which probably would have let me reverse the support bar. As can be seen the bar is just made up of two lengths of 1/2" square with short pieces welded between the ends. Hope this helps. Nick
Attachment 22402 Attachment 22403 Attachment 22404 Attachment 22405Attachment 22406 Attachment 22407 Attachment 22408 Attachment 22415