Free 186 More Best Homemade Tools eBook:  
Get 2,000+ tool plans, full site access, and more.

User Tag List

Results 1 to 7 of 7

Thread: Drive Adapter for HF Elec Pipe Threader

  1. #1
    Supporting Member astroracer's Avatar
    Join Date
    May 2012
    Location
    Byron, Michigan
    Posts
    311
    Thanks
    20
    Thanked 569 Times in 174 Posts

    astroracer's Tools

    Drive Adapter for HF Elec Pipe Threader

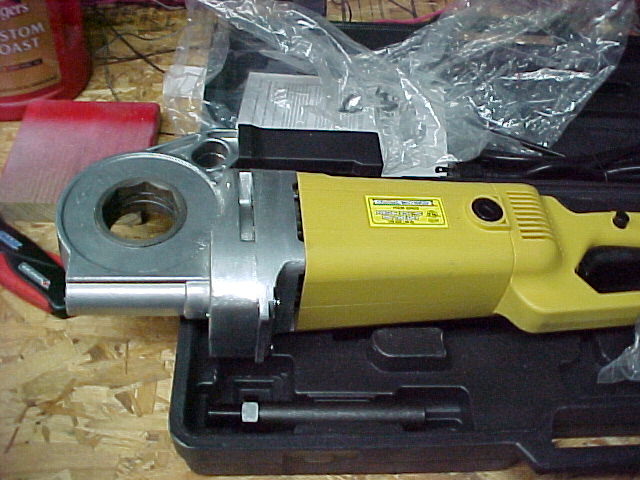
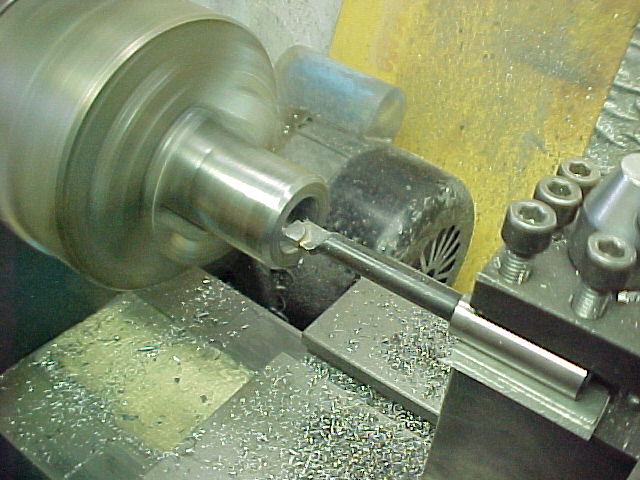
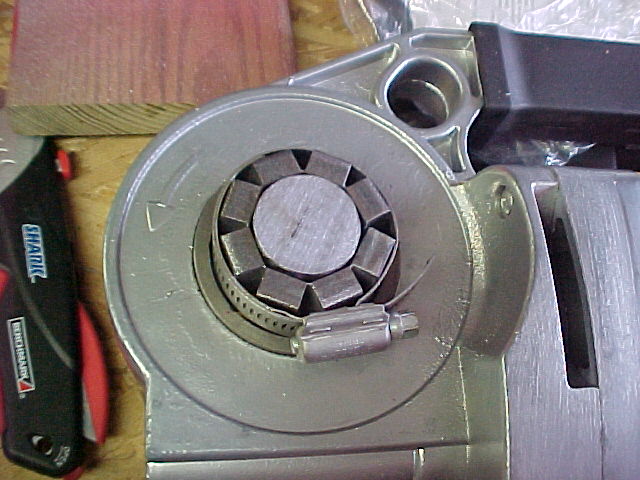
    Doing the SWAG mod to my Harbor Freight tubing roller. They say to just mash the 1/2" threading die onto the 3/4" drive shaft for the roller. I want to keep the 1/2" die usable so I designed an adapter to fit the octagon drive bore in the threader. This is an 8 sided bore. It would have been to easy to make a 6 sided one.
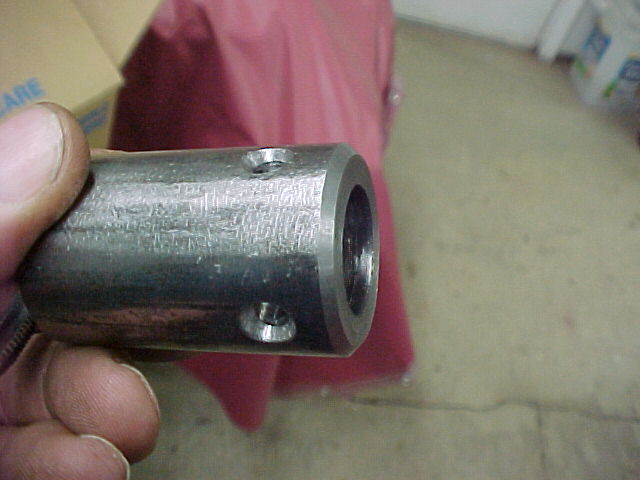
    The HF Pipe Threader.

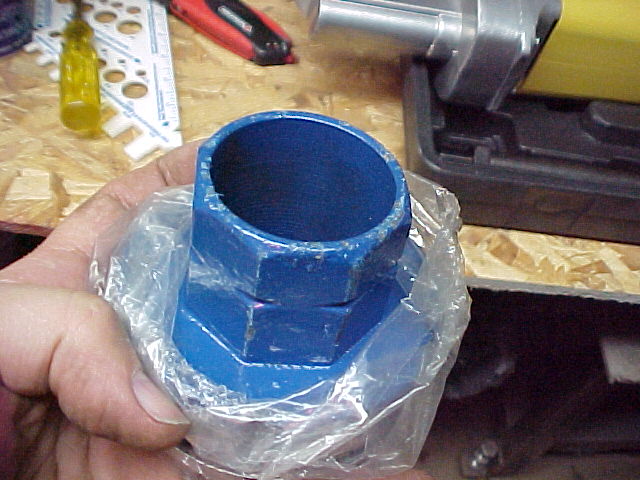
    This is one of the original dies... 8 sides, not 6... Is this a "metric" hexagon?

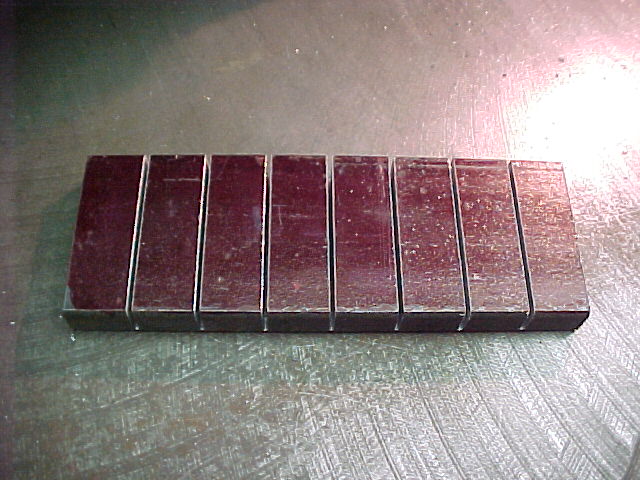
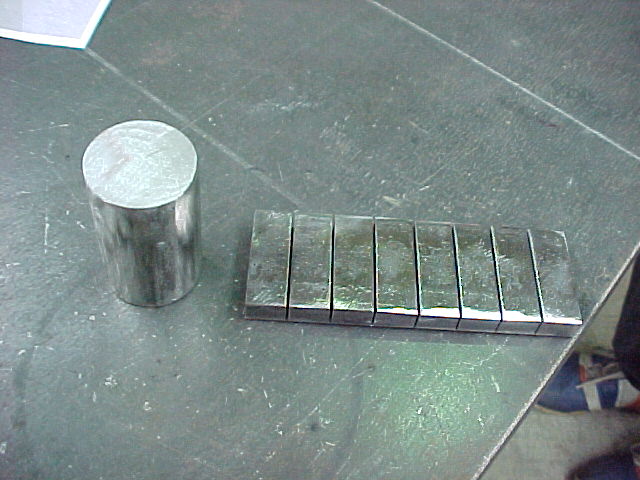
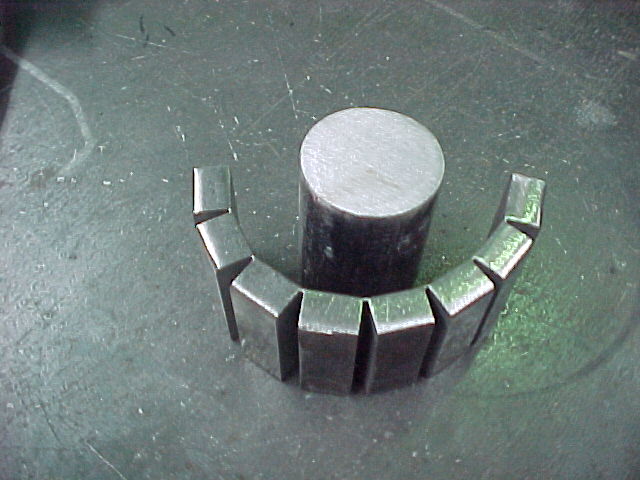
    I designed the adapter in 3D CAD so it was easy to get good dimensions. I first designed it by cutting 8 chunks of 3/8th's plate but thought it would be easier to assemble if they were all one piece.
    We laid out all of the cut lines and clamped the plate to a small angle block.
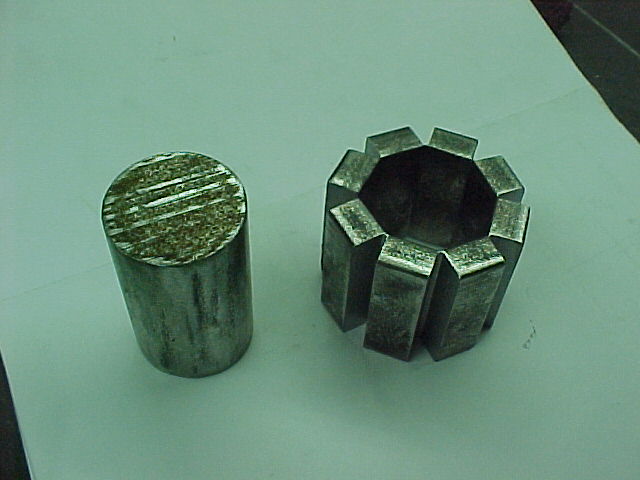
    Doing all of the cutting on VBS was pretty quick with the layout lines and block clamped on to guide the initial cut.

    The spacing was .526 inches between the centers of the cut. With all of the cuts made.

    See next post.

    186 More Best Homemade Tools eBook

  2. The Following 3 Users Say Thank You to astroracer For This Useful Post:

    greyhoundollie (Nov 12, 2019), kbalch (Nov 20, 2013), Sleykin (Nov 9, 2020)

  3. #2
    Supporting Member astroracer's Avatar
    Join Date
    May 2012
    Location
    Byron, Michigan
    Posts
    311
    Thanks
    20
    Thanked 569 Times in 174 Posts

    astroracer's Tools
    We left about .030 at the bottom of the cut to hold all of the pieces together.

    This is the "spindle" for the adapter. I cut a chunk of 1 1/4" dia. steel, cleaned it up in the lathe and bored a .75 hole thru the middle.


    Drilled and tapped two holes on one end, 90 degrees apart, to clamp the adapter to the shaft.

    See next post

    2000 Tool Plans
    Last edited by astroracer; Nov 21, 2013 at 03:20 PM.

  4. #3
    Supporting Member astroracer's Avatar
    Join Date
    May 2012
    Location
    Byron, Michigan
    Posts
    311
    Thanks
    20
    Thanked 569 Times in 174 Posts

    astroracer's Tools
    Used the spindle to form the 3/8th's plate. This wasn't that easy. It took two sets of pliers to do the bending.

    Getting it there...

    The hose clamp pulled it down pretty close but we ended up using a hammer to get it the rest of the way.

    Adjusting the fit. It fit real well on the first try.

    See next Post

  5. #4
    Supporting Member astroracer's Avatar
    Join Date
    May 2012
    Location
    Byron, Michigan
    Posts
    311
    Thanks
    20
    Thanked 569 Times in 174 Posts

    astroracer's Tools
    I welded everything up and checked the fit. Did a little clean up grinding and it was good to go.

    This thing got very hot during the welding but it still fit the shaft and the drive bore with no problems after it cooled.

    I'll end up painting it black but this will do the job and I don't have to destroy the pipe tap from the kit.

    Thanks for looking.
    Mark

  6. #5
    kbalch's Avatar
    Join Date
    Jun 2012
    Location
    Clermont, FL
    Posts
    5,034
    Thanks
    2,275
    Thanked 531 Times in 383 Posts
    Thanks astroracer! I've added your Drive Adaptor for Pipe Threader to our Metalworking category, as well as to your builder page: astroracer's Homemade Tools. Your receipt:


  7. #6
    Supporting Member
    Join Date
    Aug 2018
    Posts
    302
    Thanks
    1,081
    Thanked 90 Times in 64 Posts
    did you make the 7 cuts on a band saw?

  8. #7
    Supporting Member astroracer's Avatar
    Join Date
    May 2012
    Location
    Byron, Michigan
    Posts
    311
    Thanks
    20
    Thanked 569 Times in 174 Posts

    astroracer's Tools
    Yes we did. You don't have to jump through all these hoops though, Swag Offroad makes a machined piece that does the job now.
    https://www.swagoffroad.com/SWAG-Mac...ub-_p_113.html
    Well worth the 35 dollar price tag.
    Mark


    186 More Best Homemade Tools eBook

Thread Information

Users Browsing this Thread

There are currently 1 users browsing this thread. (0 members and 1 guests)

Bookmarks

Posting Permissions

  • You may not post new threads
  • You may not post replies
  • You may not post attachments
  • You may not edit your posts
  •