-
18 Attachment(s)
Edge Milling Vise
In my last post I fabricated and submitted a couple of Carbide Insert Tool Holders, which is not a new invention by no means, just my version, I made a lifting fixture to hold the tool holders up off the milling machine table to machine the edges and to avoid cutting into the mill table, I thought after I was done that some sort of tool that would clamp work on its edge would be nice to have for times like this, so thats what intrigued me to make this tool I call the Edge Milling Vise.
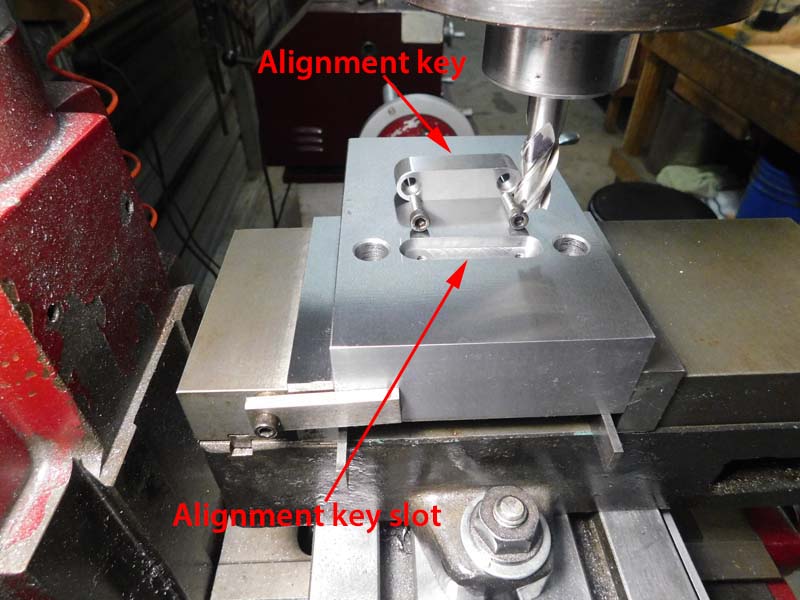
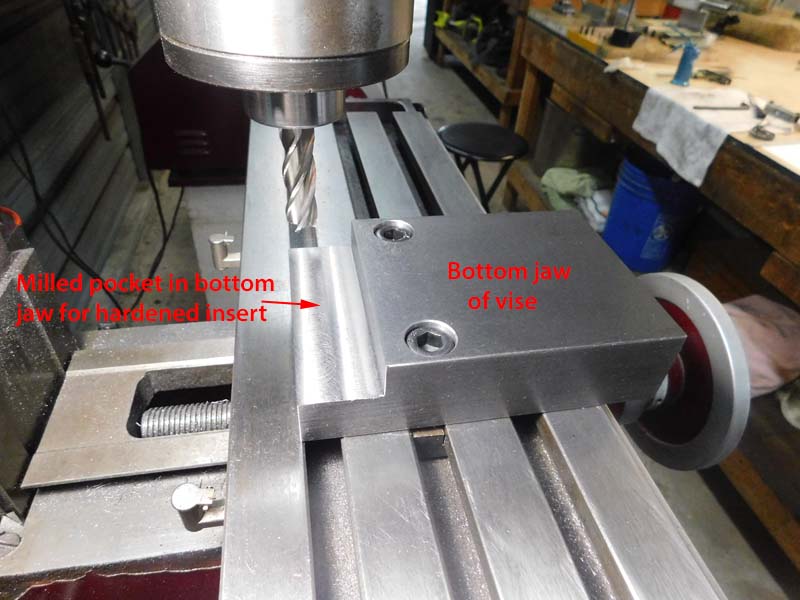
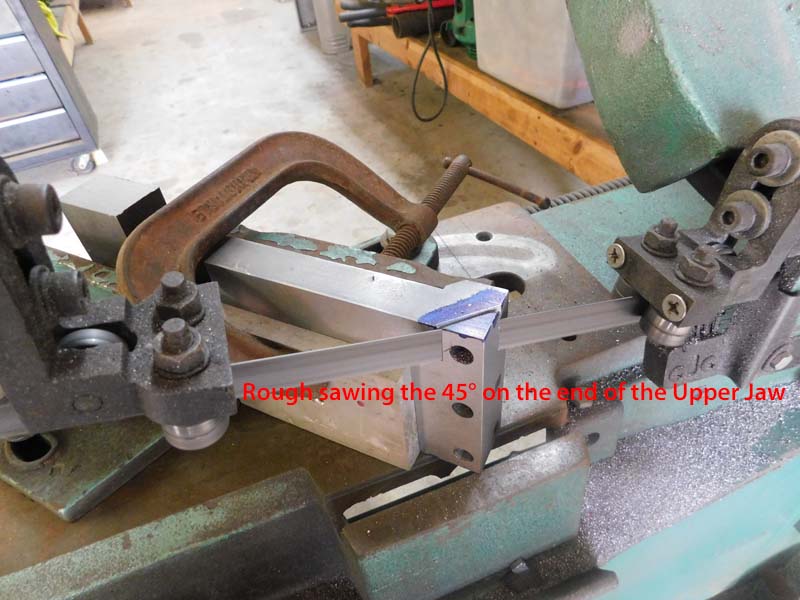
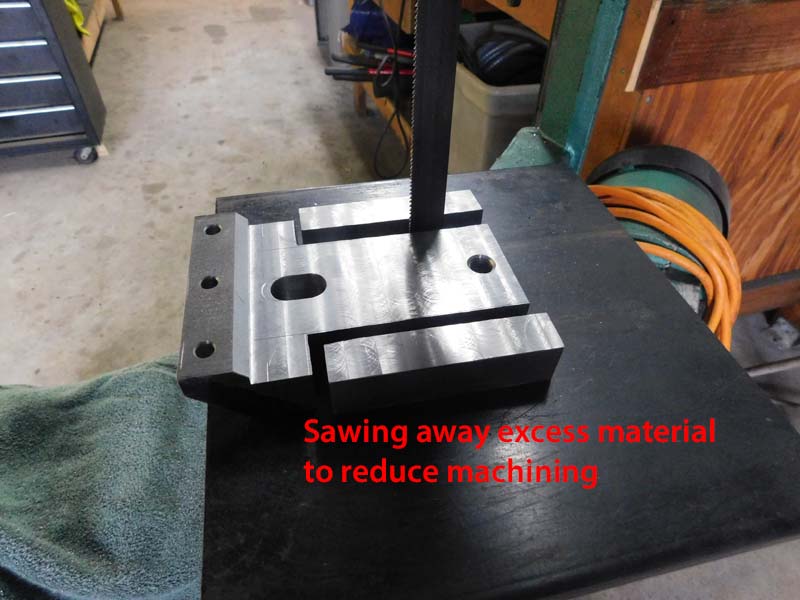
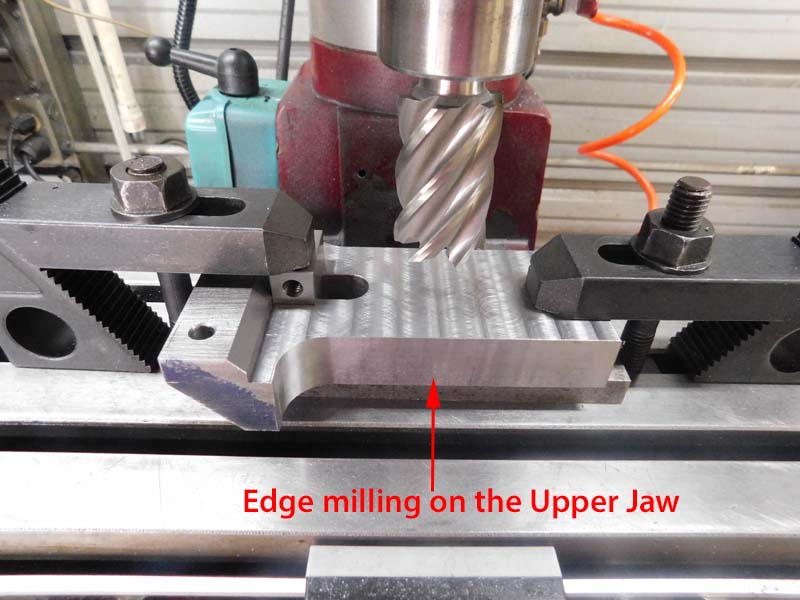
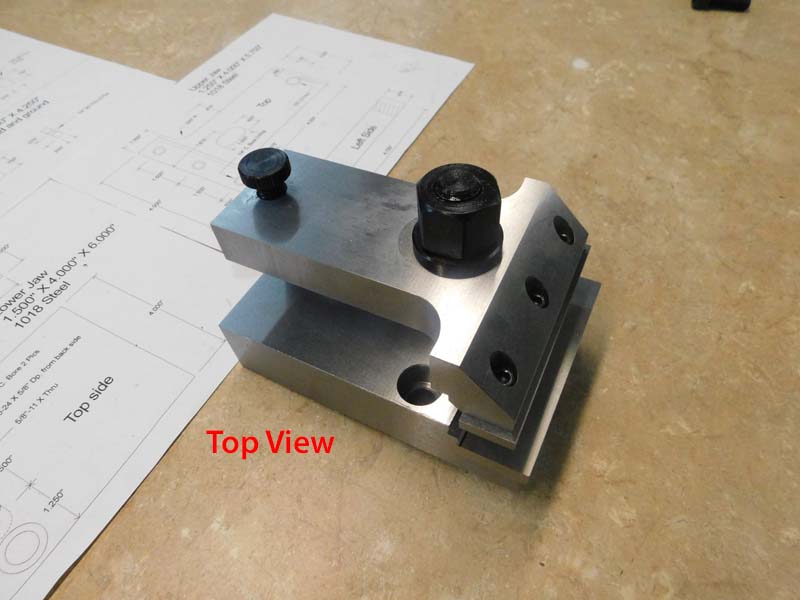
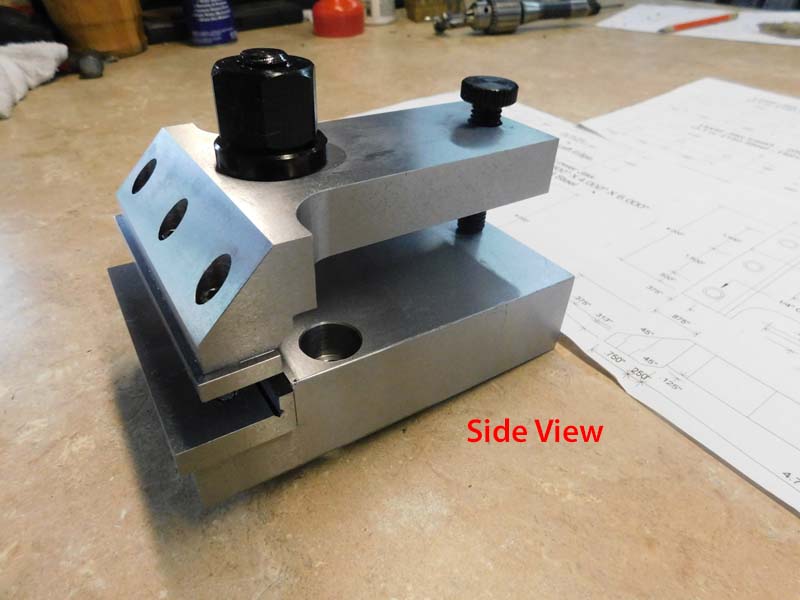
The vises dimensions are 4 wide 6 long, the vise has hardened Jaws inserted into a recesses machined in the Base and Upper Jaw, there is a 5/8 alignment key in the bottom of the vises base to accurately locate it in the T-slots of the mill, the front of the Upper Jaw is machined at 45° to give sufficient clearance for milling close to the edge of the vise, the Upper Jaw can also slide in or out .375 to give additional milling cutter clearance, the sides of the upper jaw has been reduced in width from 4at the front to 2 ¼ in the rear to give away access to the two 1/2"socket head cap screws that holds the vise down on the mill table, the vise can be rotated to any angle by removing the 5/8 key from the bottom of the vise, the vise can be set at any angle with the useof a protractor, angle plate Etc.
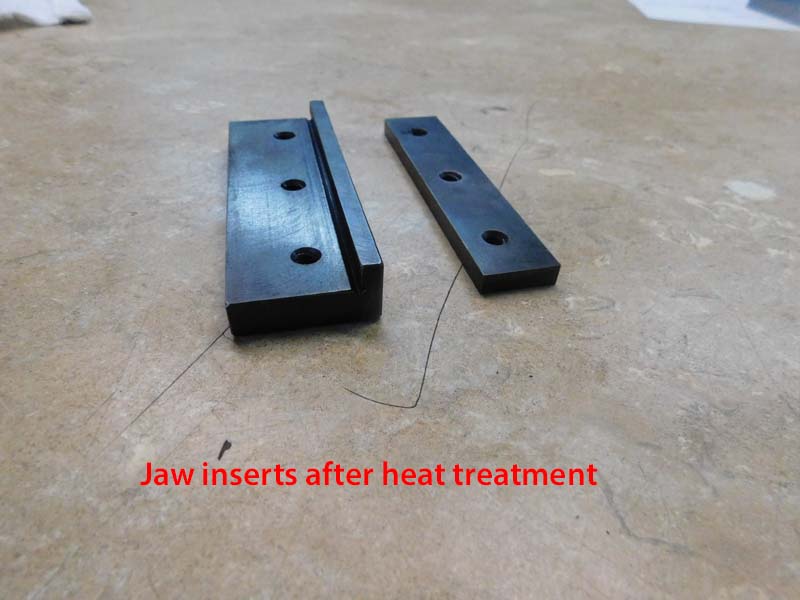
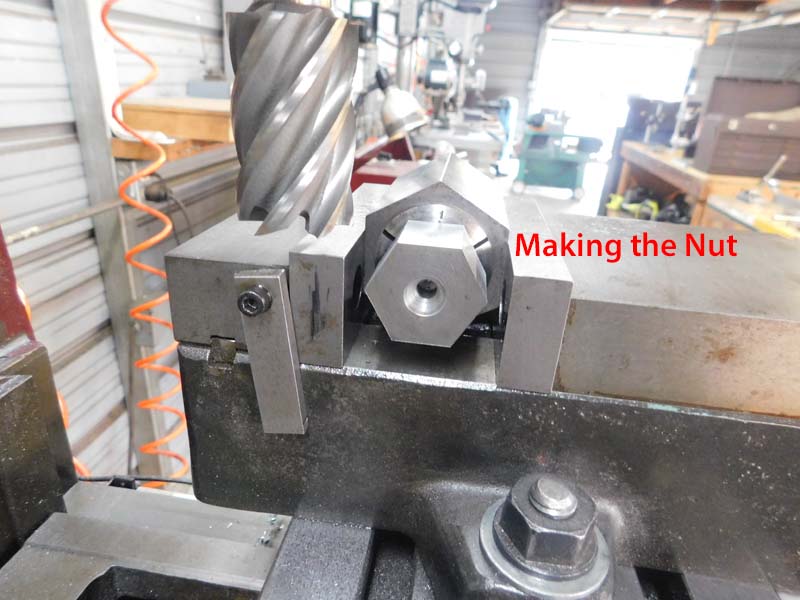
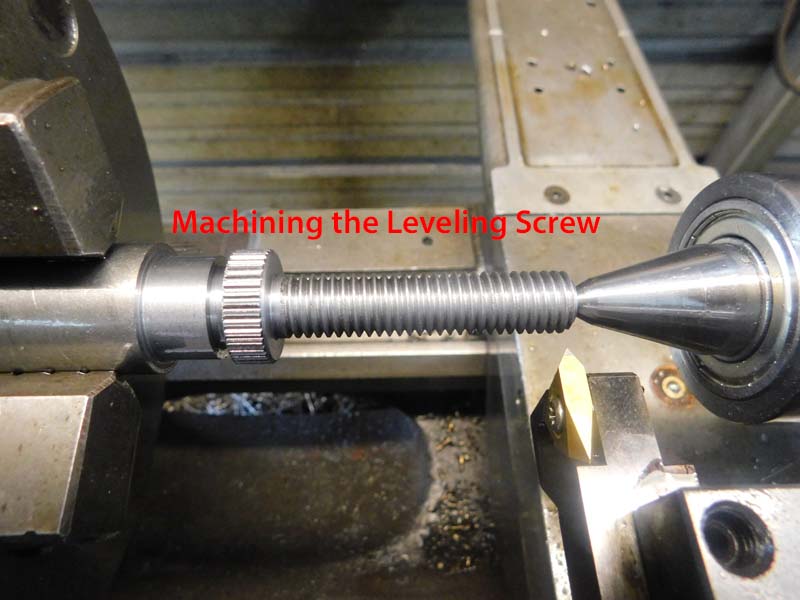
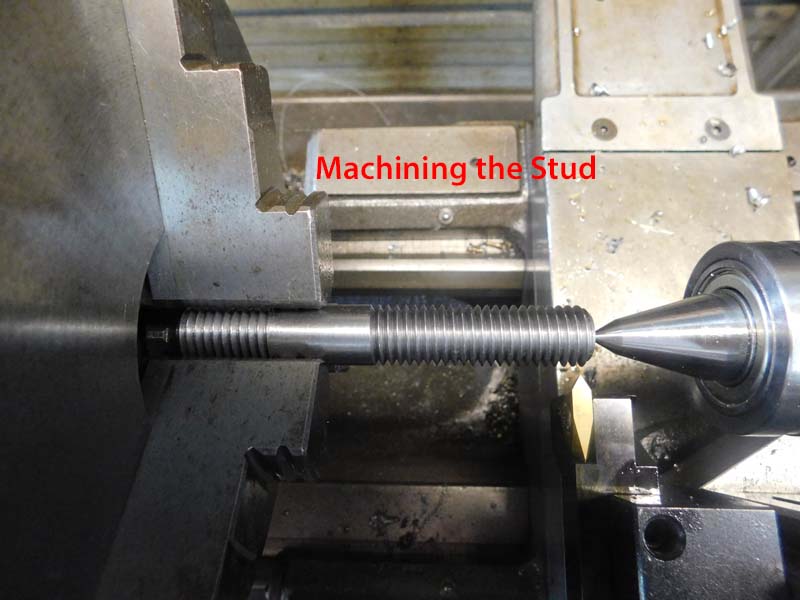
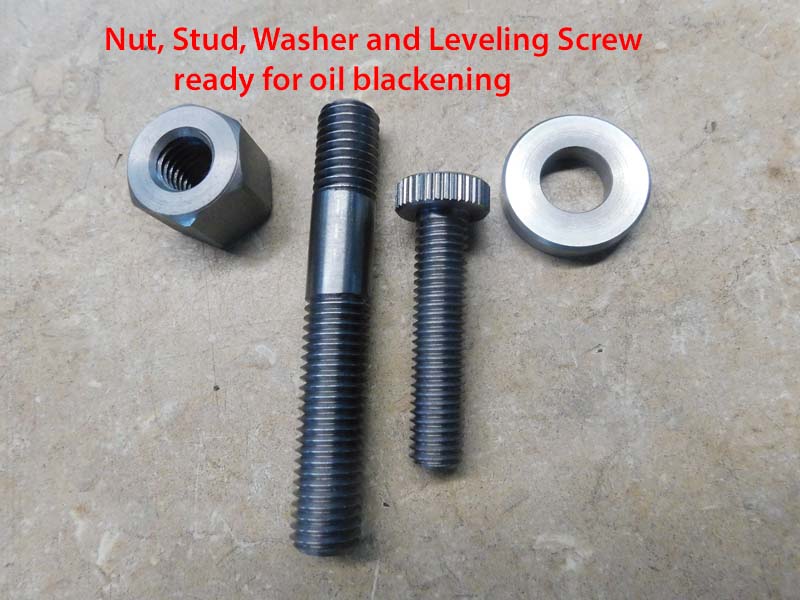
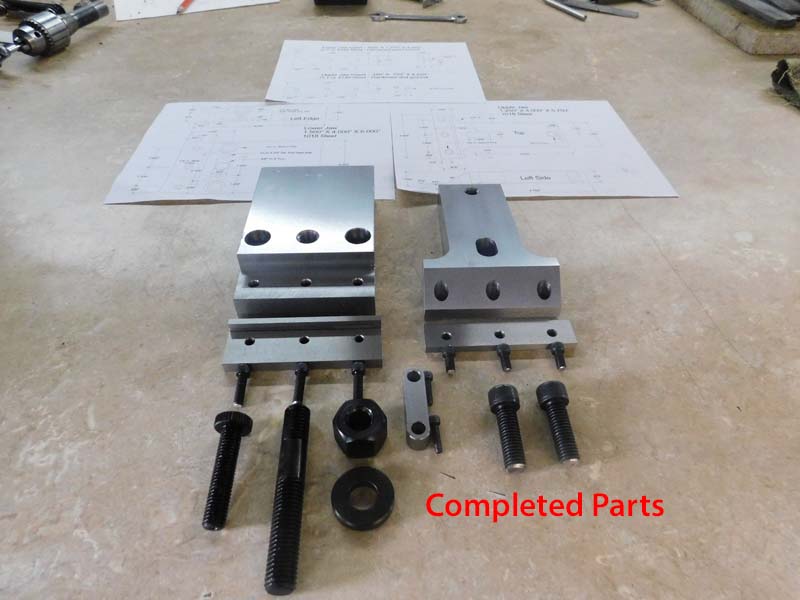
The vises body was made from 1018 steel, the upper and lower jaw inserts were made from O-1 steel hardened and ground, the stud, nut and washer were made from 4140 steel.
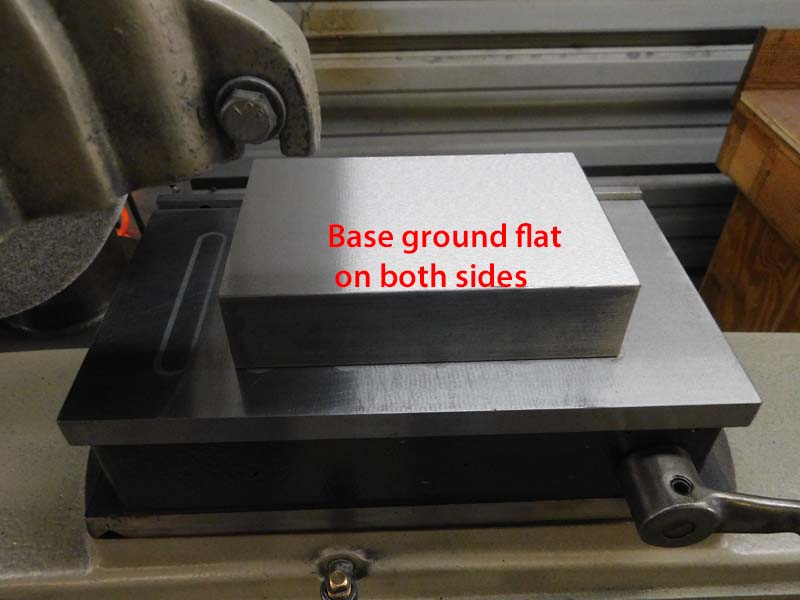
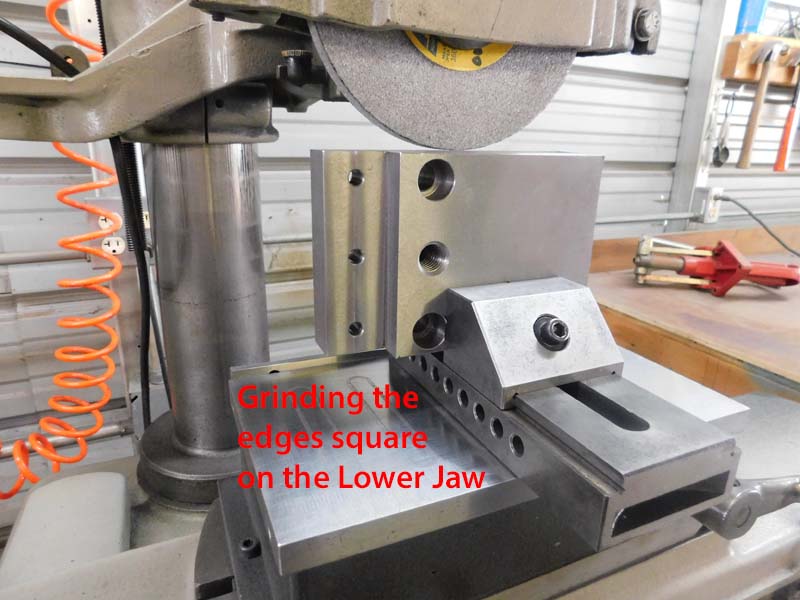
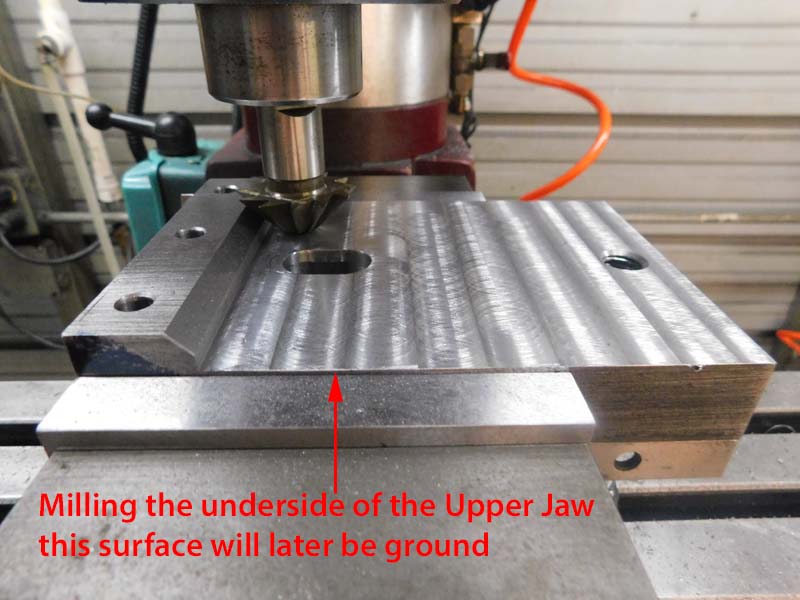
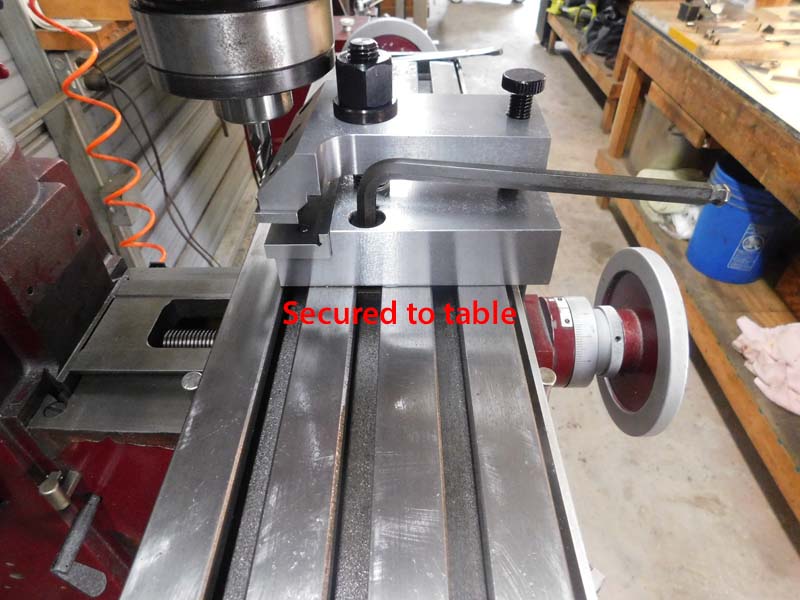
I started out by grinding all surfaces of the vises base and upper jaw parallel and square, I machined a 5/8 alignment key slot in the base along with two 1/2" counter bored holes for mounting to the mill table, the 5/8 alignment key is secured in the keyslot with two 10-24 socket head cap screws, the base was then flipped over and inserted into the T-slot of the mill table and bolted down with two T-nuts and two 1/2 socket head cap screws, I completed all the machine work to the base while it was bolted down to the mill table before removing , the upper jaw was then fabricated along with all the other hardware items, this vise is solid and very rigid in construction and functions as intended,
I have included multiple photos of the machining process to make this vise along with a demonstration video.
As always thanks for looking and happy machining
Doug
Attachment 23889Attachment 23890Attachment 23891Attachment 23892Attachment 23893Attachment 23894
Attachment 23895Attachment 23896Attachment 23897Attachment 23898Attachment 23899Attachment 23900
Attachment 23901Attachment 23902Attachment 23903Attachment 23904Attachment 23905Attachment 23906
<span style="font-family: Calibri"><font size="3"><font color="#000000">https://www.youtube.com/watch?v=wFHo...ature=youtu.be
-
Wow a great looking vice I can only see one thing that I might have added. every-time I have had blind location keys bolted in place I always wished the manufacture or me had added a 3rd hole in the key threaded to use as a means to pushing the key out of the base.
-
Doug, another really useful tool..... As a matter of further interest would you mind describing how you do the oil blackening? (I often get mixed inconsistent quality when I do this).
-
What a GREAT idea. How long did it take you? I just have a small Atlas mill and 12 in Atlas Lathe.
-
Thanks Frank
Thats a good idea about tapping an extraction hole for the key
-
Thanks aphilipmarcou
The oil blackening process takes quiet few minutes, I find it takes about 25-30 times of dipping in oil and reignite it, you have to turn the piece continuously and rotate it to get a good even color,
-
This is the 4th rossbotics vise. Here are the other three:
<div id="blocks">
<div class="block b1 pngfix">
<div class="bimg">
<div>
<a href="https://www.homemadetools.net/forum/tool-makers-vise-18400#post25623"><img src="/uploads/118804/homemade-toolmaker-s-vise-2.jpeg" alt="Toolmaker\'s Vise"></a>
</div>
</div>
<div class="head pngfix"></div>
<div class="left pngfix"></div>
<div class="right pngfix"></div>
<div class="blockover b1 pngfix">
<div class="title">
<a href="https://www.homemadetools.net/forum/tool-makers-vise-18400#post25623">Toolmaker's Vise</a>
<span> by <a href="/builder/rossbotics">rossbotics</a></span>
</div>
<div class="tags">tags: <a href="/tag/vise">vise</a>, <a href="/tag/machining">machining</a></div>
</div>
</div>
<div class="block b1 pngfix">
<div class="bimg">
<div>
<a href="https://www.homemadetools.net/forum/vise-sensitive-drill-press-65134#post103377"><img src="/uploads/207742/homemade-drill-press-vise-8.jpeg" alt="Drill Press Vise"></a>
</div>
</div>
<div class="head pngfix"></div>
<div class="left pngfix"></div>
<div class="right pngfix"></div>
<div class="blockover b1 pngfix">
<div class="title">
<a href="https://www.homemadetools.net/forum/vise-sensitive-drill-press-65134#post103377">Drill Press Vise</a>
<span> by <a href="/builder/rossbotics">rossbotics</a></span>
</div>
<div class="tags">tags: <a href="/tag/vise">vise</a>, <a href="/tag/drill-press">drill press</a></div>
</div>
</div>
<div class="block b1 pngfix">
<div class="bimg">
<div>
<a href="https://www.homemadetools.net/forum/tool-makers-bench-vise-67406#post110459">
<img src="/uploads/212924/homemade-toolmakers-bench-vise.jpeg"/>
</a>
</div>
</div>
<div class="head pngfix"></div>
<div class="left pngfix"></div>
<div class="right pngfix"></div>
<div class="blockover b1 pngfix">
<div class="title">
<a href="https://www.homemadetools.net/forum/tool-makers-bench-vise-67406#post110459">Toolmaker's Bench Vise</a>
<span> by <a href="https://www.homemadetools.net/builder/rossbotics">rossbotics</a></span>
</div>
<div class="tags">tags:
<a href='https://www.homemadetools.net/tag/vise'>vise</a> </div>
</div>
</div>
</div>
-
I frequently tilt my bench-mounted, articulated Panavise down so that the vise jaws are horizontal and the adjusting screw is vertical as is the case with your edge vise. There are certain jobs that are made easier in that configuration.
You may want to give a thought to making your edge vise a companion to your toolmaker's bench vise so you can utilize its utility at the bench. Attaching the edge vise to a plate that could be clamped to the bench would be all it takes.
I love the design and wish I had one. I've held my small toolmaker's vise vertically in the mill vise to achieve the same jaw orientation but that's problematic since the height of the toolmaker's vise can interfere with the mill chuck, etc.. Your low profile device is much better.
Keep up the great work. I'm always delighted when I see a new build from you.
-
Thank You
I really didn't keep up with my hours but I would guesstimate 40 hours
-
Thank you very much Marv
i'll keep that in mind about this vise being a companion to the tool makers vise, good idea
Doug