Free 186 More Best Homemade Tools eBook:  
Get 2,000+ tool plans, full site access, and more.

User Tag List

Page 3 of 5 FirstFirst 1 2 3 4 5 LastLast
Results 21 to 30 of 48

Thread: Power Hack Saw help needed

  1. #21
    Supporting Member garage nut's Avatar
    Join Date
    Jul 2017
    Location
    Port Elizabet, SA
    Posts
    246
    Thanks
    92
    Thanked 433 Times in 109 Posts

    garage nut's Tools
    Done.
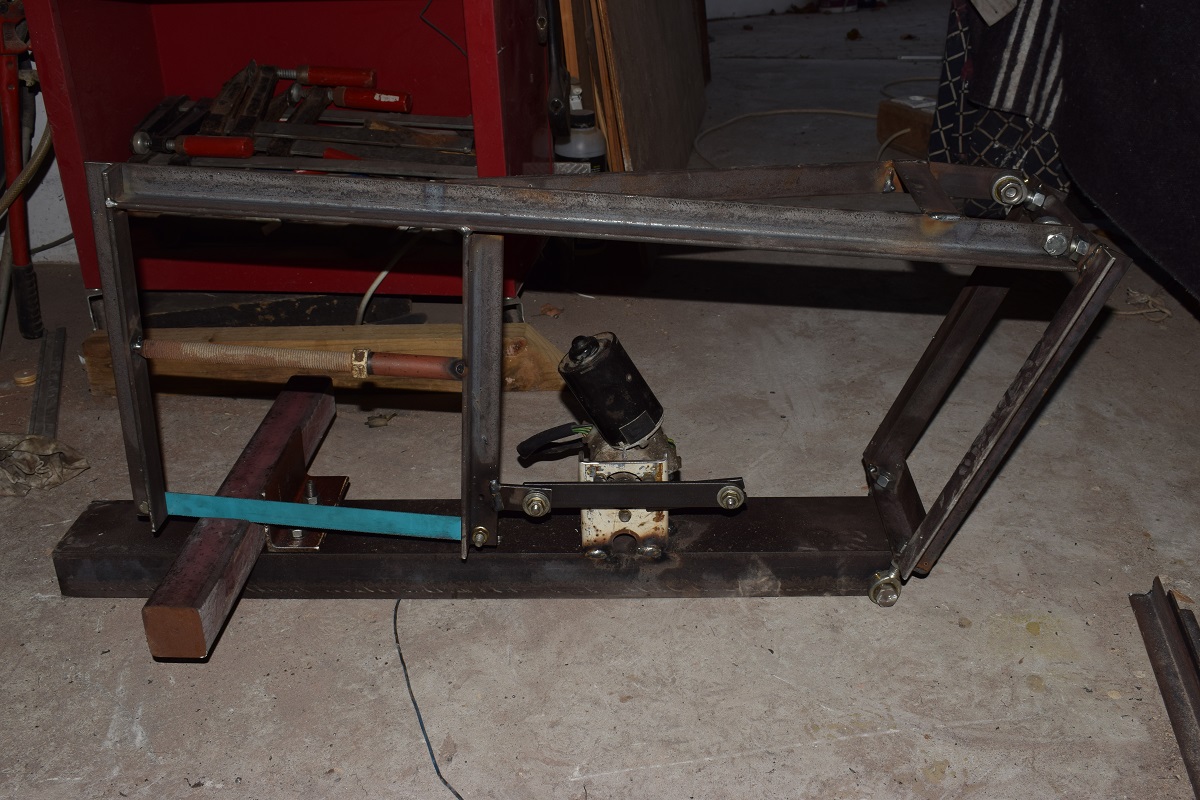
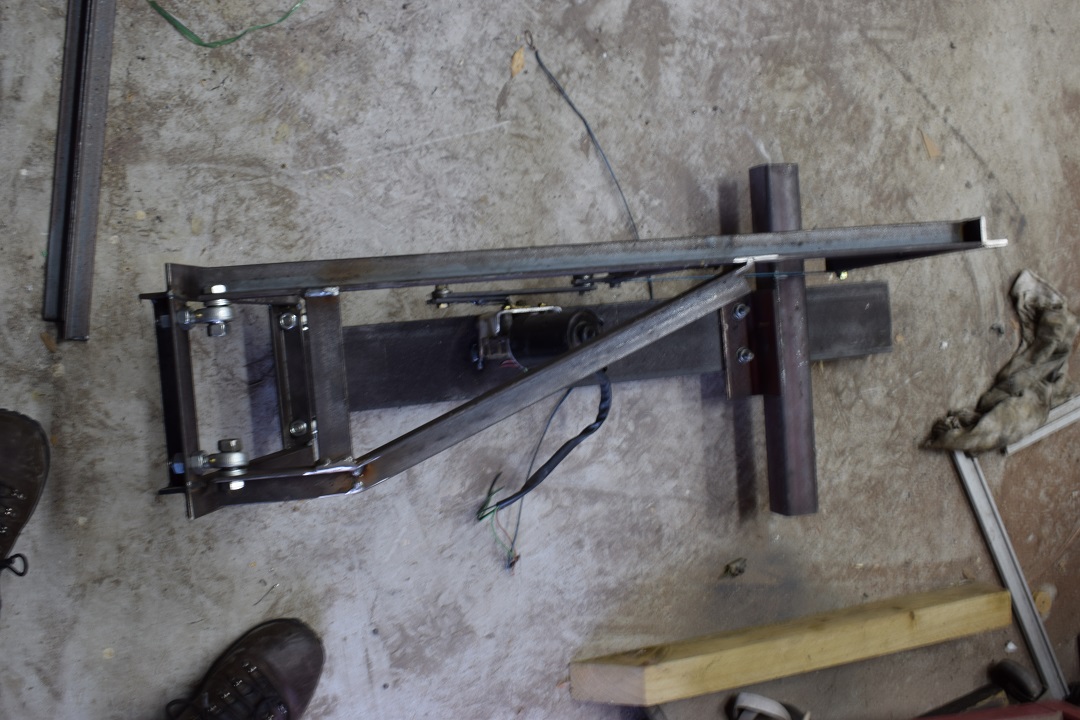
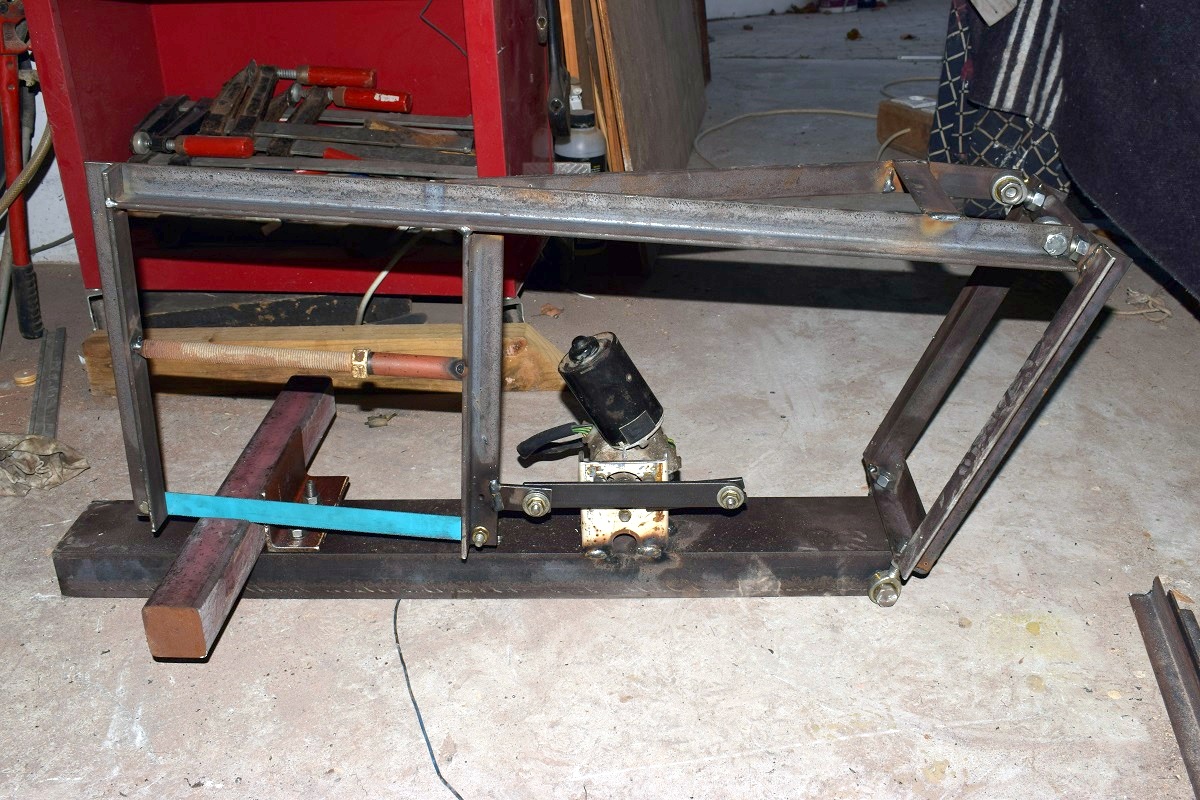
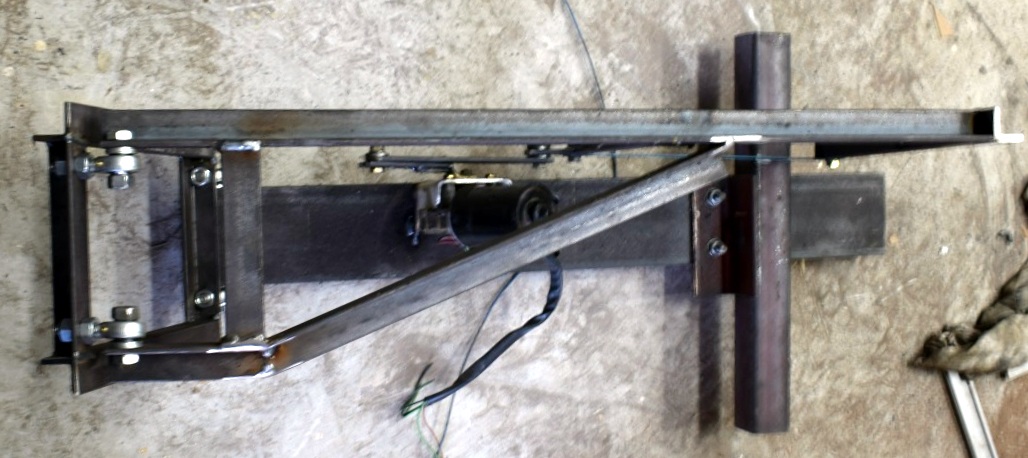
    Saw is working. Needs finishing off, proper vice, switch, arm rest and a coat of paint.

    Power Hack Saw help needed-powersaw.jpgPower Hack Saw help needed-power-saw-top%5D.jpg

    I must say it is very slow, so will start by adding weight to the arm.

    I drilled the holes to mount the blade 2mm longer than the blade pitch in an effort to avoid a complicated and time consuming blade tensioner, but the blade wobbled on its first cut. I then added the 16mm threaded rod. nut and piece of pipe to push the two arms appart and add the desired tension.

    186 More Best Homemade Tools eBook
    Last edited by garage nut; Oct 21, 2017 at 08:40 PM.

  2. The Following 3 Users Say Thank You to garage nut For This Useful Post:

    blkadder (Oct 21, 2017), Jon (Oct 21, 2017), Seedtick (Oct 21, 2017)

  3. #22
    Supporting Member Toolmaker51's Avatar
    Join Date
    Feb 2016
    Location
    Midwest USA
    Posts
    5,331
    Thanks
    7,042
    Thanked 2,980 Times in 1,893 Posts

    Toolmaker51's Tools
    Can only offer a hint here; but a current and pro-grade hand hack saw uses threads and an over-centering lever, stipulating 50k of blade tension. The current designs of good saws are rectangular tubing and diecast fittings. They cut like no hack saw ever did in the past, easier mechanically to tighten and rigid frames have to be the root.
    Can't think of a measuring instrument at low cost. However, it shouldn't be too hard to generate a linear formula calculating 'X' amount turns of a known pitch produces tension of so many pounds per revolution.

    2000 Tool Plans
    Sincerely,
    Toolmaker51
    ...we'll learn more by wandering than searching...

  4. The Following User Says Thank You to Toolmaker51 For This Useful Post:

    garage nut (Oct 21, 2017)

  5. #23
    Supporting Member Frank S's Avatar
    Join Date
    Aug 2015
    Location
    Peacock TX
    Posts
    11,210
    Thanks
    1,982
    Thanked 8,785 Times in 4,206 Posts

    Frank S's Tools
    I almost never criticize anyone's build and I will not do so now.
    I will offer a couple of hopfully helpful comments though.
    Looking at your frame design I note a couple of potential flaws the use of angle iron for your legs that the blade is attached to might not have been the best choice but be that as it may I believe you need to box those legs from as high up to as far down as possible to add more rigidity to the frame As it is currently made I have reservations as to whether or not you will be able to acheive enough blade tension to ever obtain true straight cuts. Right now it looks like you could tighten the adjusting screw until the legs of the frame actually bend and never get the blade tight enough to run true.
    Additionally you mentioned adding weight to have more down force on your blade. Having the ability to add or subtract weight will help in making cuts on the different types of materials you intend to cut However back dragging on the teeth will greatly shorten the life of the blade to overcome this some additional mechanisms in the way of possibly a rotating cam of an up lifting link that causes the frame to raise slightly on the return stroke relieving the load on th teeth as the blade returns. It looks like you should be able to do this by adding a cam to the motor spindle easy enough but the link bar which would be raised by th ecam may be a little more complex.
    Never try to tell me it can't be done
    When I have to paint I use KBS products

  6. The Following User Says Thank You to Frank S For This Useful Post:

    garage nut (Oct 21, 2017)

  7. #24
    Supporting Member garage nut's Avatar
    Join Date
    Jul 2017
    Location
    Port Elizabet, SA
    Posts
    246
    Thanks
    92
    Thanked 433 Times in 109 Posts

    garage nut's Tools
    Material used is all 30 x 30 x 5 angle iron. Pretty solid. There is almost no flex while sawing.

  8. #25
    Supporting Member ncollar's Avatar
    Join Date
    Oct 2012
    Posts
    354
    Thanks
    23
    Thanked 180 Times in 126 Posts
    Garage nut
    You have done a super job and love the information you were given and what you came up with. Very nice and ignore all the things that have been written, you are the judge on how well it works and what you will need to do to improve what you have. I like the method of tightening your blade. Let us know how well she works out.

  9. #26
    Supporting Member tonyfoale's Avatar
    Join Date
    Nov 2016
    Location
    Spain
    Posts
    1,556
    Thanks
    686
    Thanked 2,643 Times in 708 Posts

    tonyfoale's Tools
    Quote Originally Posted by ncollar View Post
    ...... ignore all the things that have been written, you are the judge on how well it works and what you will need to do to improve what you have......
    The previous comments by two extremely experienced contributors were in the spirit of helpful advice to do that very thing. i.e. improve what has been made. To simply ignore such advice would be less than sensible. That doesn't mean that the advice should necessarily be followed, just that it should not be disregarded out of hand.

  10. The Following 2 Users Say Thank You to tonyfoale For This Useful Post:

    Okapi (Oct 26, 2017), olderdan (Oct 22, 2017)

  11. #27
    Supporting Member Hans Pearson's Avatar
    Join Date
    Jan 2017
    Posts
    173
    Thanks
    16
    Thanked 70 Times in 48 Posts
    Have you retained the fibre gear in the wiper motor. When these motors are used in garage door etc. applications the worm is usually replaced by a brass worm. I am a bit dubious as to the amount of load a fibre gear will withstand. Otherwise a simple and practical application for a motor that already employs a reciprocating action.

  12. #28
    Supporting Member nhengineer's Avatar
    Join Date
    Aug 2016
    Posts
    186
    Thanks
    10
    Thanked 65 Times in 37 Posts

    nhengineer's Tools
    Nice job Mr. Garage Nut. I have to dispute Mr. Toolmaker51's recommendation of 50k blade tension unless he really meant 50kg which is much more like it. 50,000# would bend the frame into a pretzel.

    I did find this recommendation (at https://www.g-w.com/pdf/sampchap/9781590702499_ch12.pdf ) of 100kg which is 220# (avoir du pois). "Tighten the blade until a low musical ring is heard when the blade is tapped lightly. A high-pitched tone indicates that the blade is too tight. A dull thud means the blade is too loose."

    Here's another good power hacksaw blade link: Technical Information for the Hacksaw Blades : Pilana

    For now, a "C" clamp would serve as a vice.

    Good job. Ive touched up you photos a bit so I could try your idea myself. I have tried to design one using a clothes washer transmission like one shown in an old magazine (Popular Science?) but it was hopeless. There just wasn't enough detail.

    Power Hack Saw help needed-powersaw.jpg

    Power Hack Saw help needed-power-saw-top%5D.jpg

    Thanks for sharing.

  13. The Following User Says Thank You to nhengineer For This Useful Post:

    Jon (Oct 22, 2017)

  14. #29
    Supporting Member tonyfoale's Avatar
    Join Date
    Nov 2016
    Location
    Spain
    Posts
    1,556
    Thanks
    686
    Thanked 2,643 Times in 708 Posts

    tonyfoale's Tools
    Quote Originally Posted by Frank S View Post
    ....back dragging on the teeth will greatly shorten the life of the blade to overcome this some additional mechanisms in the way of possibly a rotating cam of an up lifting link that causes the frame to raise slightly on the return stroke relieving the load on the teeth as the blade returns. It looks like you should be able to do this by adding a cam to the motor spindle easy enough but the link bar which would be raised by the cam may be a little more complex.
    Frank,
    I completely agree about the advisability of relieving the blade on the return stroke. Do you have a specific design in mind? It doesn't seem like a trivial task to do mechanically. All of the "real" saws that I have seen or used have an hydraulic lifter which allows for a leak down as the cut progresses. This works well and has stood the test of time. It would seem to me that any cam operated system would likewise have to follow the blade down and at the moment I don't see an easy way to do that.
    Let's see who can come up with the simplest system to lift the blade on the non-cutting stroke.

    Later addition;
    I started sketching various schemes to do this and it quickly became obvious that the vertical load on the blade can be determined by the angle that the conrod from the crank to the saw frame makes. Assuming that the cut is on the rearward stroke then if the conrod angles upward there will be a vertical component of the conrod force acting to increase blade load on the cutting stroke and reduce it on the forward non-cutting stroke. This would be a very easy system to implement but there are numerous considerations to design for.
    Firstly, the conrod angles will differ between the outward and inward strokes and this difference will depend on the ratio of the conrod length to the stroke. Which direction gives the largest angle will depend on the direction of rotation of the crank.
    Secondly, the vertical (lift) force will be in direct proportion to the horizontal (in-line) force on the blade for any given conrod angle. That means that on the cutting stroke the extra vertical load on the blade will depend on the material being cut and the state of wear of the blade. On the return stroke the best that we could hope for would be to relieve some of the vertical force on the blade but not to lift the blade completely. This is because if we lift the blade there will be little horizontal force and hence little vertical lift force generated by the conrod angle. However, if we add some "artificial" horizontal force to the saw frame then we could get as much lift as we wanted. A vehicle shock absorber of the type with much greater rebound damping than bump damping could be attached to the frame to provide the necessary one-way force to the extent of fully lifting the blade.
    Although this is a simple solution with only the addition of a single component, the shock absorber, it is not really a system to consider as a general retro-fit. It would best be implemented at the design stage, when the conrod to stroke ratio could be decided as could the relative locations of the crank axis and connection point to the saw frame.

    I await with interest to see suggestions from others here.

  15. The Following User Says Thank You to tonyfoale For This Useful Post:

    olderdan (Oct 23, 2017)

  16. #30
    Supporting Member ncollar's Avatar
    Join Date
    Oct 2012
    Posts
    354
    Thanks
    23
    Thanked 180 Times in 126 Posts
    For myself, I am not the smartest around but when you research all the info around and well there is a lot that can be done. If you look at this video, you will see it does not have a lift mechanism and it has worked fine for many years. And if you do enough research you will find that saw is just like a saw manufactured with a lift on it but it works well in the video. The saw manufacture was know as Kennedy. I am saddened by the spirit it is not like a real saw. If it works that is what counts and when the bugs show up it time to solve it. There are many things I would do but it is not my saw and to me it looks like something with a lot of promise. Garage Nut you did a great job and enjoy your, yes your saw, you made.


    Video

    Last edited by ncollar; Oct 22, 2017 at 03:45 PM. Reason: forgot link

  17. The Following User Says Thank You to ncollar For This Useful Post:

    Jon (Oct 22, 2017)

Thread Information

Users Browsing this Thread

There are currently 1 users browsing this thread. (0 members and 1 guests)

Bookmarks

Posting Permissions

  • You may not post new threads
  • You may not post replies
  • You may not post attachments
  • You may not edit your posts
  •