Free 186 More Best Homemade Tools eBook:  
Get 2,000+ tool plans, full site access, and more.

User Tag List

Results 1 to 8 of 8

Thread: Power X axis for mill PLUS remote power unit for the lathe

  1. #1
    Supporting Member bobs409's Avatar
    Join Date
    Dec 2016
    Posts
    202
    Thanks
    449
    Thanked 594 Times in 112 Posts

    bobs409's Tools

    Power X axis for mill PLUS remote power unit for the lathe

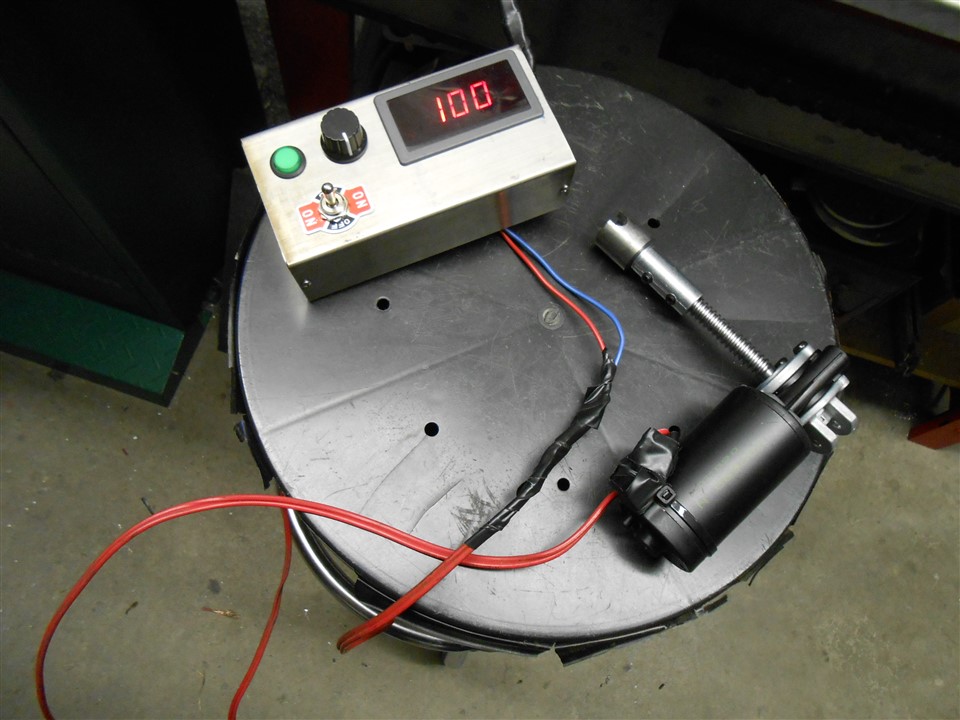
    Today I present 2 projects, one inspired from the other. A built in power unit for the mill's X table axis and a second hand held remote unit that works on the lathe slides and Y axis of mill.

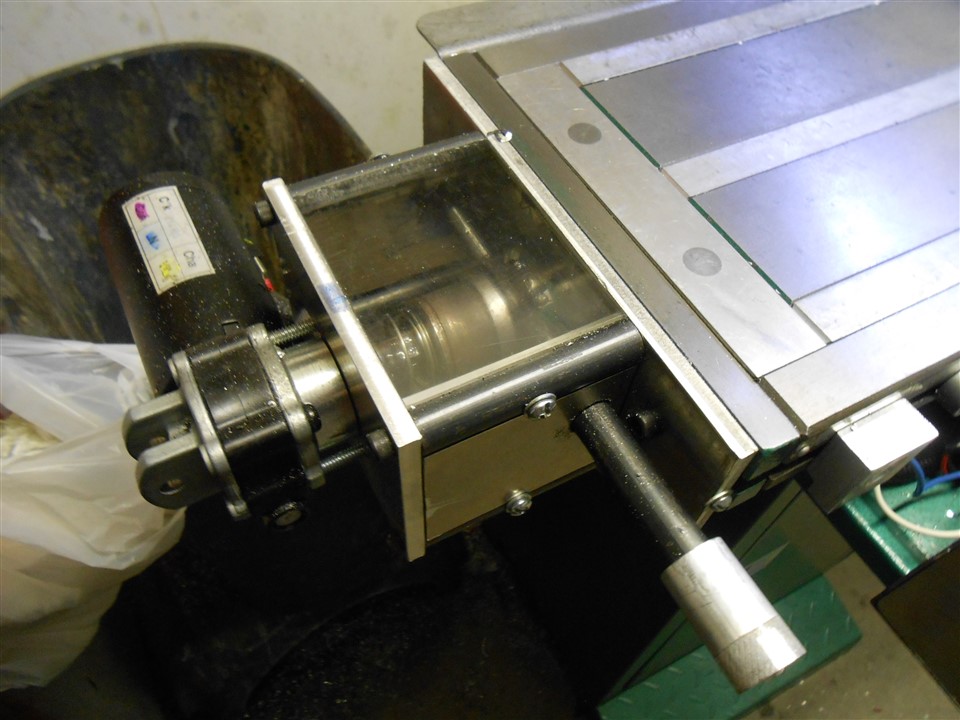
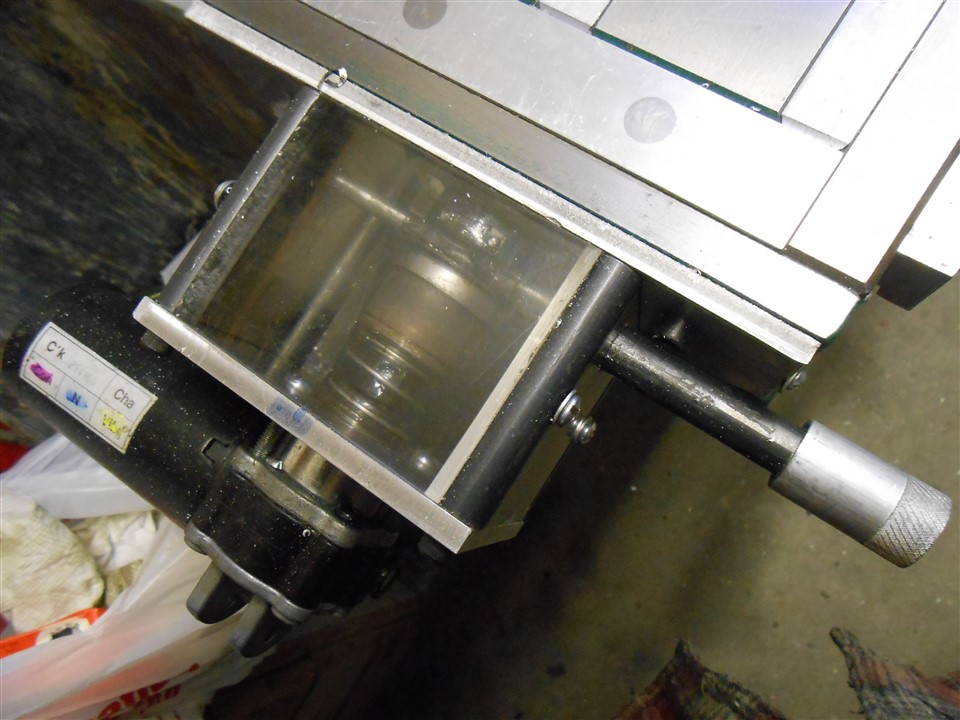
    Part I: (power X Axis for the mill)

    A while back I made this power X axis for my mill. Special thanks to Mr.PragmaticLee who made one in a you tube video and inspired me. See that at bottom of thread.

    Parts to do this are very cheap! Motor was $17.95, controller about $12, power supply about $10, etc...I used the same motor and controller that he did in the video but I built mine a bit different from there. I chose to keep the motor and all of it's working at or below the table height. I noticed even the commercial units tend to sit above the table and that might be a problem if you have to mill a long piece some day (rare but...) so I made that change. I also came up with my own type of engaging mechanism using stuff I had lying around. (many ways to do that, consult your scrap box! lol) I made the top panel over the motor from some 1/4 inch plexi for fun because I had it. You get to watch the parts turning if your that bored or amuse easily. lol I also added limit switches to the table to shut things down before crashing into the stops at the end of travel if I get distracted. (not that I would do that!)

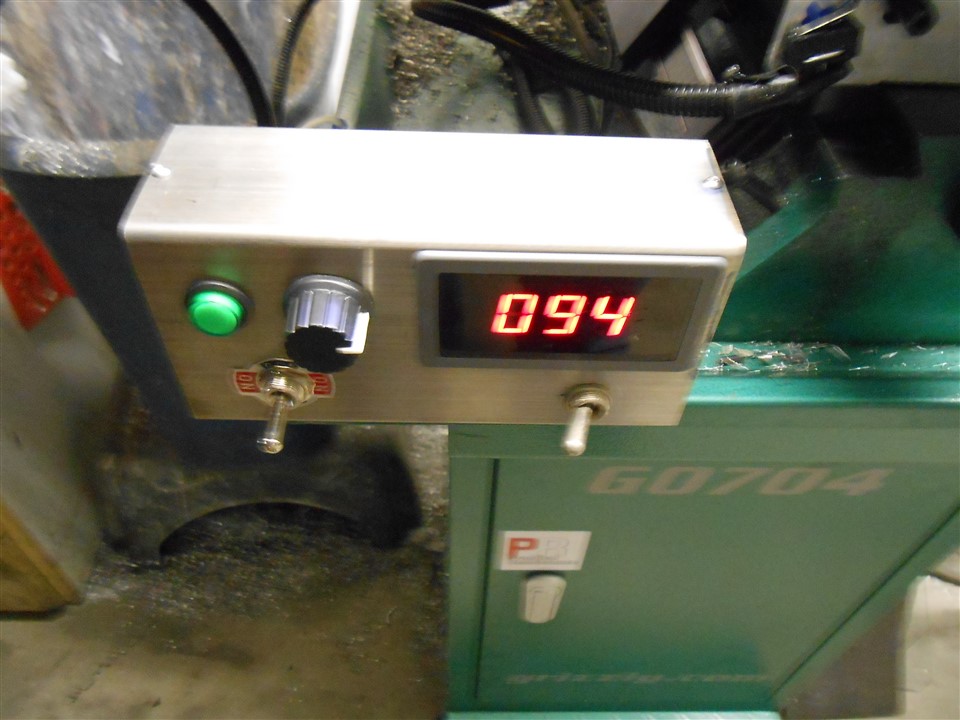
    For the control box, I had some stainless rectangular tube so I used that. The ends are capped with 1/4 aluminum.

    Power X axis for mill PLUS remote power unit for the lathe-dscn7829.jpgPower X axis for mill PLUS remote power unit for the lathe-dscn7830.jpgPower X axis for mill PLUS remote power unit for the lathe-dscn7832.jpgPower X axis for mill PLUS remote power unit for the lathe-dscn7828.jpg

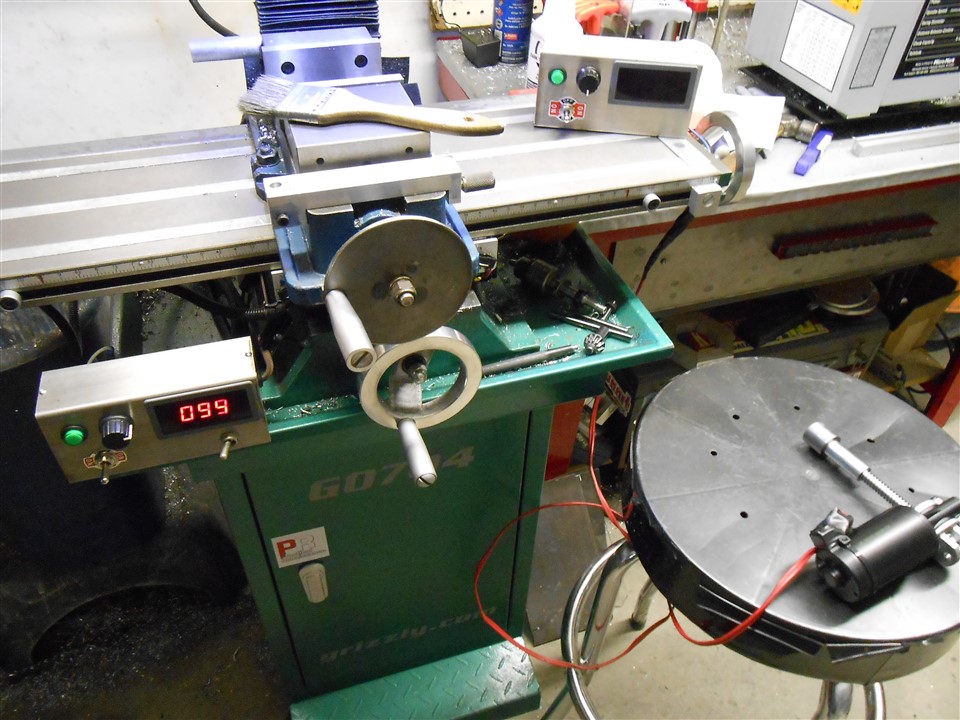
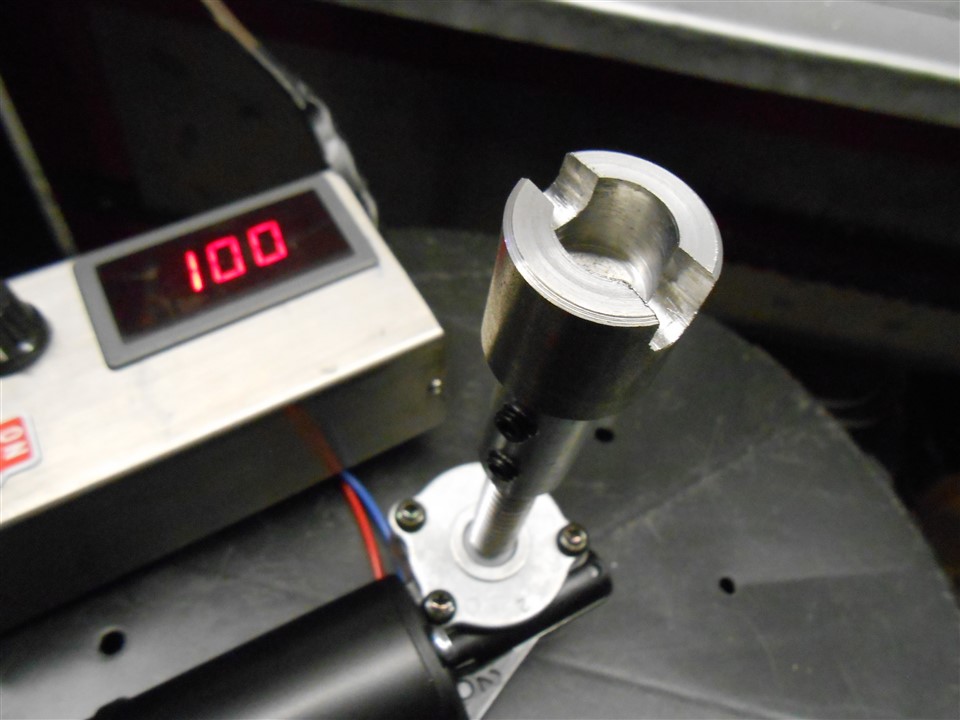
    Part II: (remote hand held power unit, mill Y axis, lathe slides)

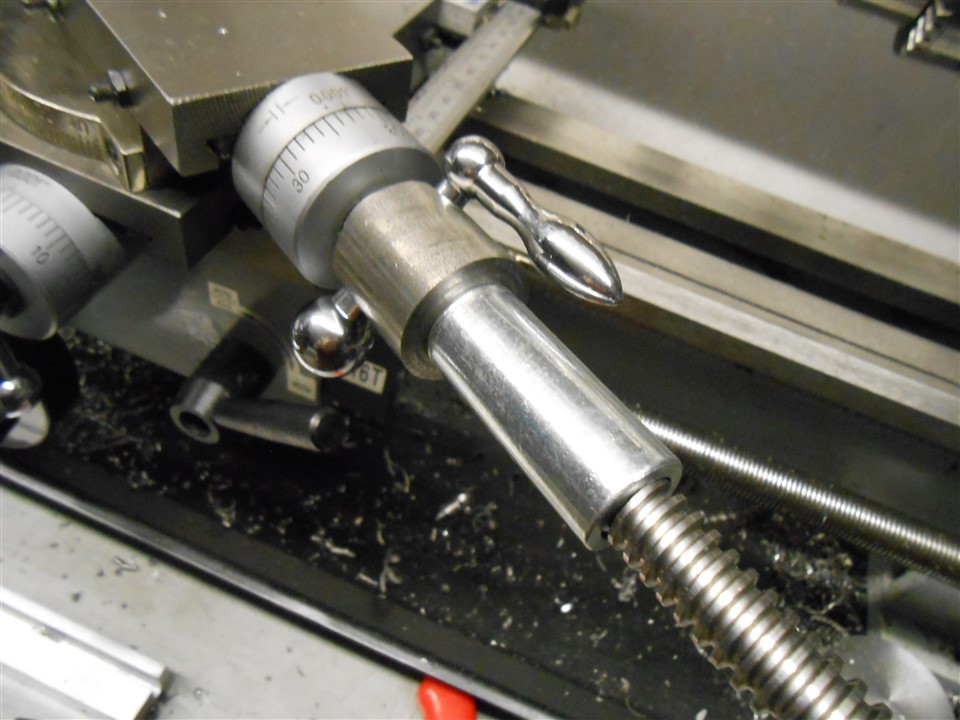
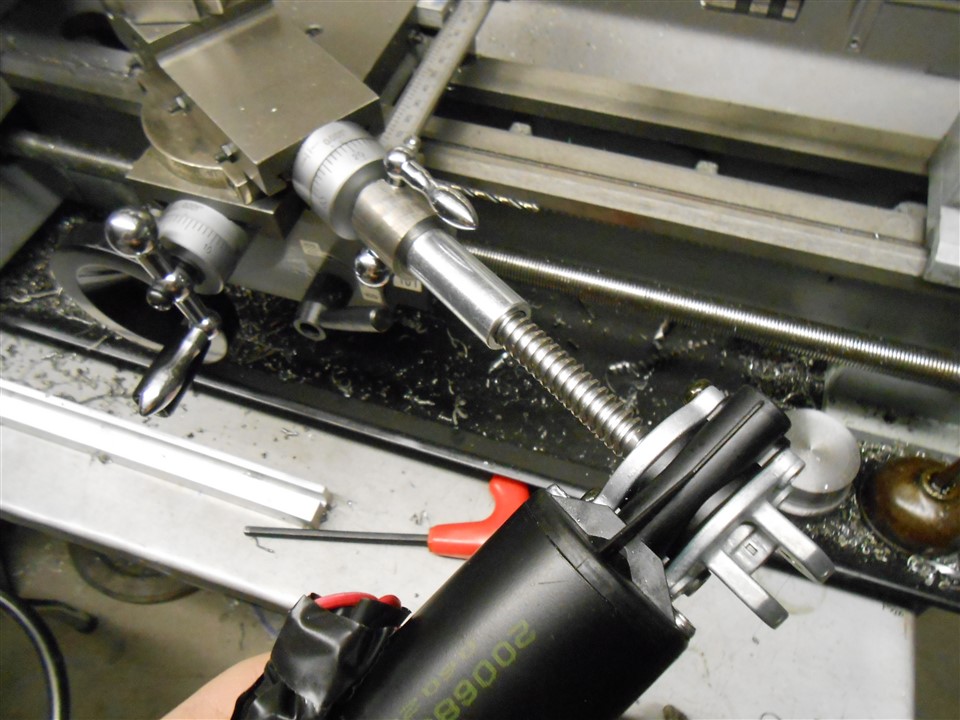
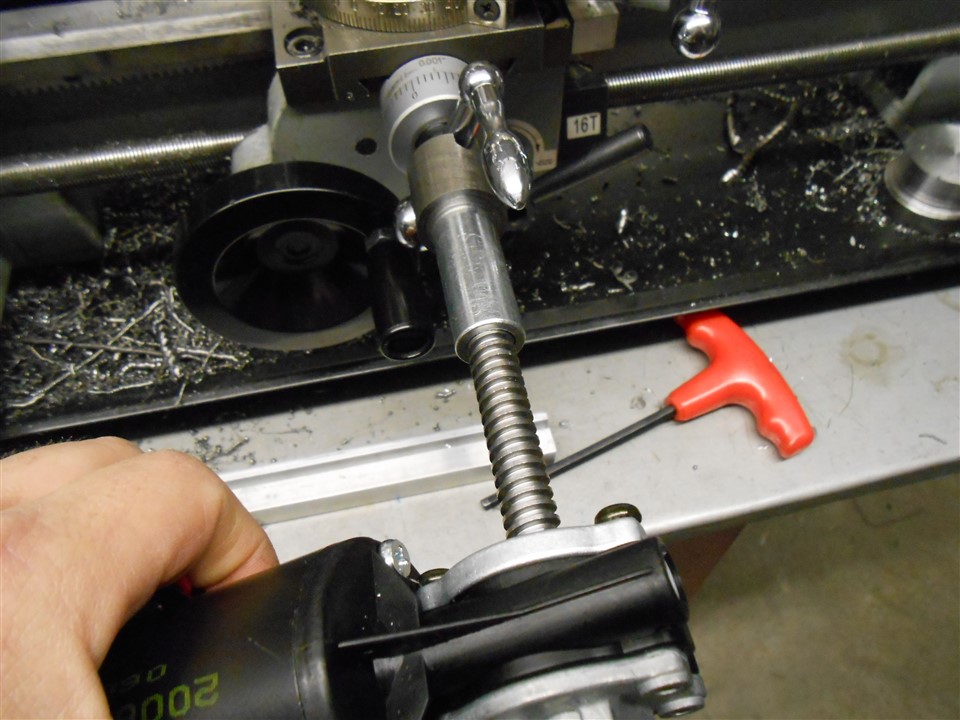
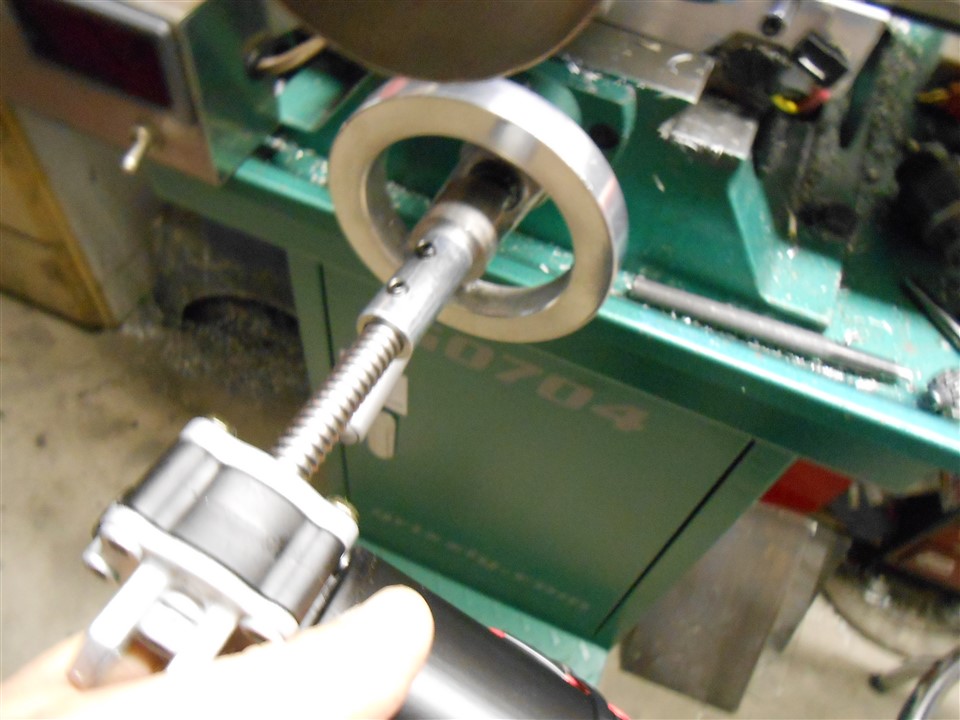
    The above worked so good, the other day when I was cranking and cranking on my lathe's compound slide while doing a small taper, I got a new idea and thought it's time that I invent something so I made a similar "hand held" power unit using the same parts! This also works great! It uses another motor and controller (same exact parts) and I built an identical control box for this one that is not bolted down so you can move it close to where you are working. This motor shaft has an end piece that is changeable and I will have 3 different tips for it. These just slip right over the existing handle. The one shown fits my mini lathe compound slide handle but I will make a slightly larger one to fit the cross slide handle and also one to use for the Y axis on the mill.

    I have heard of others using hand drills for this but when I tried that approach, I noticed it very hard to control the speed. Not a problem with this setup.

    The wire harness will get a plastic loom to cover those wires. I will probably make one other improvement as well. I think I will put a momentary on-off-on switch right on the motor. As it is now, you hold the motor with one hand and have your other hand at the control box. It works this way but I think it will feel more in control with the switch right there leaving one hand free to hold your beer or to hit the stop in an emergency. (just kidding about the beer!)

    I highly recommend these mods, they both work great and were a lot of fun to build.

    Power X axis for mill PLUS remote power unit for the lathe-dscn7822.jpgPower X axis for mill PLUS remote power unit for the lathe-dscn7823.jpgPower X axis for mill PLUS remote power unit for the lathe-dscn7824.jpgPower X axis for mill PLUS remote power unit for the lathe-dscn7825.jpgPower X axis for mill PLUS remote power unit for the lathe-dscn7826.jpgPower X axis for mill PLUS remote power unit for the lathe-dscn7827.jpg


    Below is the video of MrPragmaticLee building his:


    186 More Best Homemade Tools eBook
    Last edited by bobs409; May 4, 2017 at 02:07 PM.

  2. The Following 14 Users Say Thank You to bobs409 For This Useful Post:

    baja (Sep 24, 2023), dave_rupp (May 19, 2017), freddo4 (Jul 22, 2020), jjr2001 (Oct 9, 2018), LMMasterMariner (May 4, 2017), marksbug (Jul 23, 2020), mwmkravchenko (Aug 3, 2022), Okapi (Feb 19, 2018), Paul Jones (May 4, 2017), rossbotics (May 7, 2017), scrdmgl (Feb 13, 2018), Toolmaker51 (May 19, 2023), Tule (May 6, 2017), WinDancerKnives (May 10, 2017)

  3. #2
    Content Editor
    Supporting Member
    DIYer's Avatar
    Join Date
    Aug 2013
    Posts
    3,056
    Thanks
    772
    Thanked 1,852 Times in 1,653 Posts


    Thanks bobs409! We've added your Powered X Axis to our Machining category,
    as well as to your builder page: bobs409's Homemade Tools. Your receipt:


    2000 Tool Plans

  4. The Following User Says Thank You to DIYer For This Useful Post:

    dave_rupp (May 19, 2017)

  5. #3
    Content Editor
    Supporting Member
    DIYer's Avatar
    Join Date
    Aug 2013
    Posts
    3,056
    Thanks
    772
    Thanked 1,852 Times in 1,653 Posts


    Thanks bobs409! We've added your Handheld Power Crank to our Machining category,
    as well as to your builder page: bobs409's Homemade Tools. Your receipt:


  6. The Following 3 Users Say Thank You to DIYer For This Useful Post:

    Bummers (May 19, 2023), dave_rupp (May 19, 2017), Okapi (Feb 19, 2018)

  7. #4
    Supporting Member pfredX1's Avatar
    Join Date
    Sep 2016
    Location
    Delaware
    Posts
    162
    Thanks
    6
    Thanked 121 Times in 62 Posts

    pfredX1's Tools
    Your power feed looks real good. I made mine a lot rougher looking. It works OK though. I am in the process of making a speed controller for mine right now. Sometimes I want it to go a little slower than it does.

  8. The Following 3 Users Say Thank You to pfredX1 For This Useful Post:

    bobs409 (May 7, 2017), dave_rupp (May 19, 2017), Paul Jones (May 9, 2017)

  9. #5
    Supporting Member
    Join Date
    Dec 2014
    Posts
    10
    Thanks
    0
    Thanked 3 Times in 1 Post
    What did you use for a box to put your controler in ?

  10. #6
    Supporting Member bobs409's Avatar
    Join Date
    Dec 2016
    Posts
    202
    Thanks
    449
    Thanked 594 Times in 112 Posts

    bobs409's Tools
    Quote Originally Posted by nextofkin View Post
    What did you use for a box to put your controler in ?
    That was cut from a piece of 3 x 2 thinwall stainless rectangular tube I have here. I made end caps from aluminum to enclose it.

  11. #7
    Supporting Member
    Join Date
    Mar 2017
    Location
    Colorado, USA
    Posts
    42
    Thanks
    24
    Thanked 107 Times in 30 Posts

    dgbreggin's Tools
    Very nice. I am currently in the process of making an X-axis mini-mill power feed, also inspired by the same youtube videos. I, too, am designing it to be below table-top-level. I did recently machine a large piece that would have interfered with above-table-level obstructions. (It was an extended bed for my mini-lathe.) I am designing a completely different engagement mechanism, though. I'll try to post something when I get it finished.

    I particularly like your hand-held version. I now have another project... Excellent idea to mount the momentary CW/off/CCW switch on the motor. Probably leave the speed controls and display in a box that sits on the bench.

  12. The Following User Says Thank You to dgbreggin For This Useful Post:

    bobs409 (Jun 12, 2018)

  13. #8
    Supporting Member marksbug's Avatar
    Join Date
    Apr 2016
    Posts
    1,901
    Thanks
    734
    Thanked 372 Times in 298 Posts
    yes it needs to be below the top. what motor did he use? also for the changeer you dont want aluminum agnist alumin spining.it needs some brass incerts and some moly greessee,possiably the molly greese will do on the wheel&guide.or make the wheel out of brass or steel and use moly lube..you could also add a oil dripercup and posibly a wick so it dont just run off.you could also use a bearing there insted of the disc...lots of ways to skin cats and not get bitten... the price of power feeds has come down a lot in the past 5 years. but most take away some travell.on my big mill(9x42) I made spacers to space it away so I didnt loose somuch, also it was skeey close to the glass DRO scale... Im not sure why they make them like that but thats how they are. I have a 40 year old enco mill drill I may put power drive on...or cnc conversion. this may help if I only add a power feed. thanks and keep the chips flying!!


    186 More Best Homemade Tools eBook

Thread Information

Users Browsing this Thread

There are currently 1 users browsing this thread. (0 members and 1 guests)

Bookmarks

Posting Permissions

  • You may not post new threads
  • You may not post replies
  • You may not post attachments
  • You may not edit your posts
  •