-
15 Attachment(s)
Rotary Broaching Tool
What inspired me to make this tool was I wanted to make a speed handle for my mill vise, I have never been fond of any milling machine vise handle, while the original handle is satisfactory I still like things to be a bit more user friendly, the original handle is to awkward when having to open the vise up more than an inch or so, they have a tendency to fall off and hit your big toe nail, while speed handles are readily available I still prefer to make my own tools, store bought tools today aren’t what they use to be, there is very little quality anymore,
Making a new handle for the vise is easy; it’s the hexagonal hole in the handle that becomes a can of worms, shops with a punch press would have no problem with this setup, but unfortunately there isn’t one of those beasts sitting in my shop, after watching numerous videos on You Tube and reading about rotary broaching I decided that this was the most practical way for me to tackle this 9/16” hexagonal hole.
This is not a tool you will put in your arsenal that will be used on a regular basis but it will be a great tool to have when that moment arrives, instead of putting a screw driver slot or a hexagon on the head of a special bolt that you made now you can put a socket head for an allen wrench,
The concept of how the tool works is simple, instead of pushing straight down on all six points of the broach at one time like a punch press would do the broach’s axis is tilted 1°, as the broach rotates it only makes contact on one point of the hexagonal broach at a time, making it easy to push the broach thru a predrilled hole, I ran the lathes spindle at 600 RPM’s
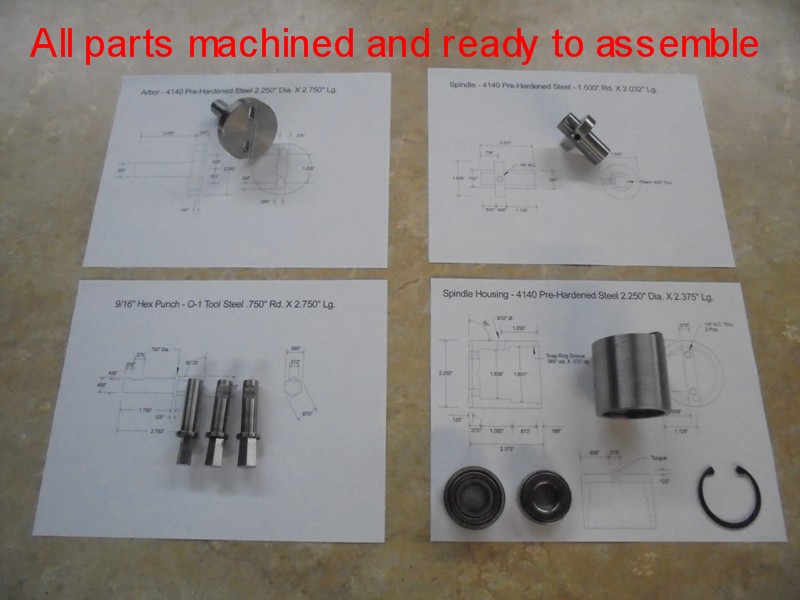
There are only four parts to make, the arbor, bearing housing, spindle and broaching tool, the spindle rotates in a SKF-5204 double row angular contact bearing and end pressure is absorbed by a NICE-607 thrust bearing, the three main parts were machined from 4140 pre-hardened steel, the 3/8”-1/2” and 9/16” hexagon punches were made from O-1 tool steel hardened and ground, square punches and form tools can be made as well.
Below you will see some photos of the machining steps of the tool being made and a video broaching a 9/16” hexagon hole, along with 4 drawings at the bottom of this page for anyone wanting to make this tool.
As always thanks for looking
And happy machining
Doug
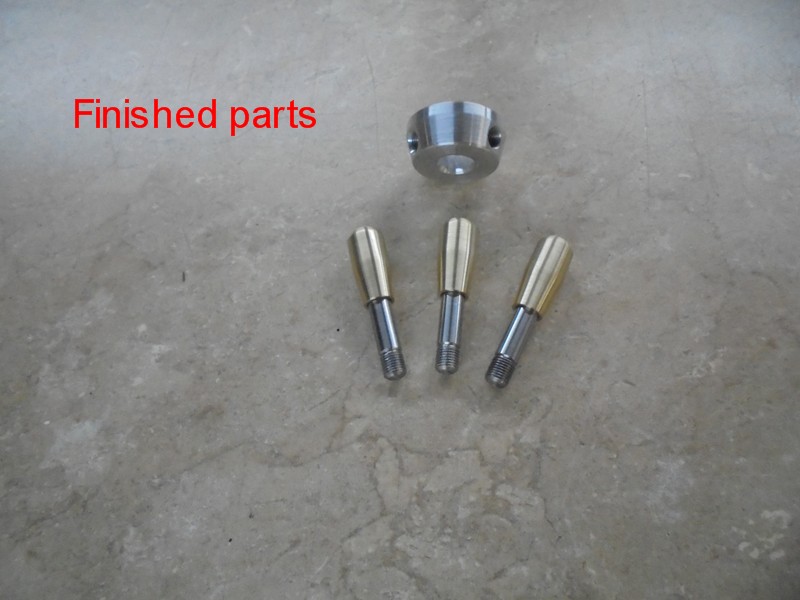
Attachment 18791
All parts made for the Rotary Broaching Tool
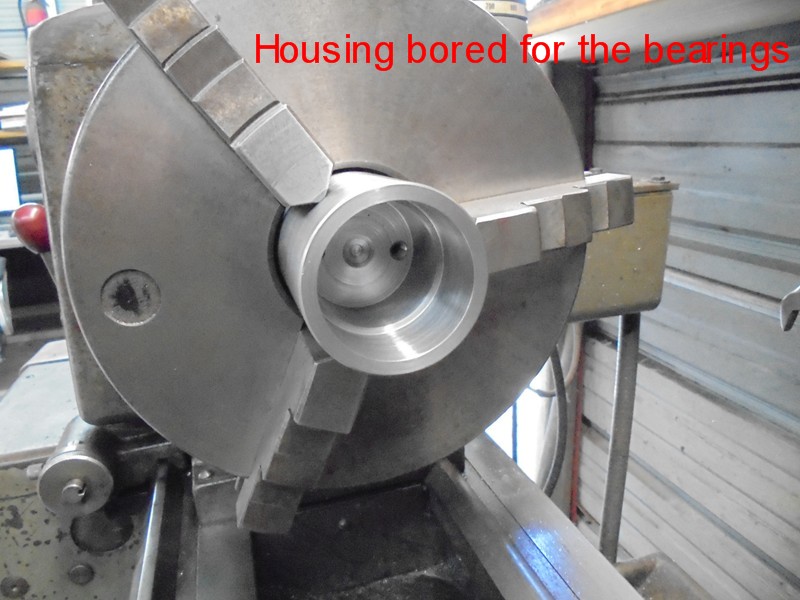
Attachment 18781
Bearing housing bored for the angular contact bearing and thrust bearing
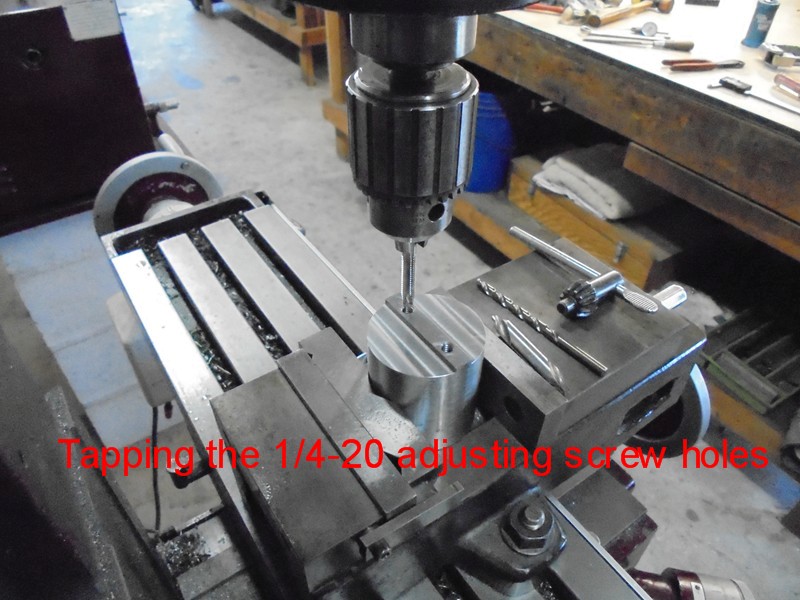
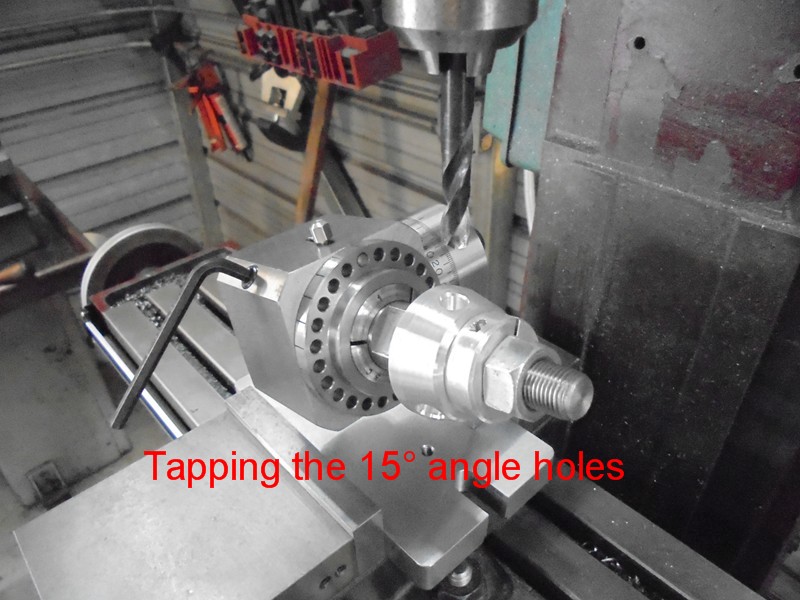
Attachment 18782
A 1° angle has been milled on the backside of the bearing housing along with the tongue and two 1/4"-20 holes
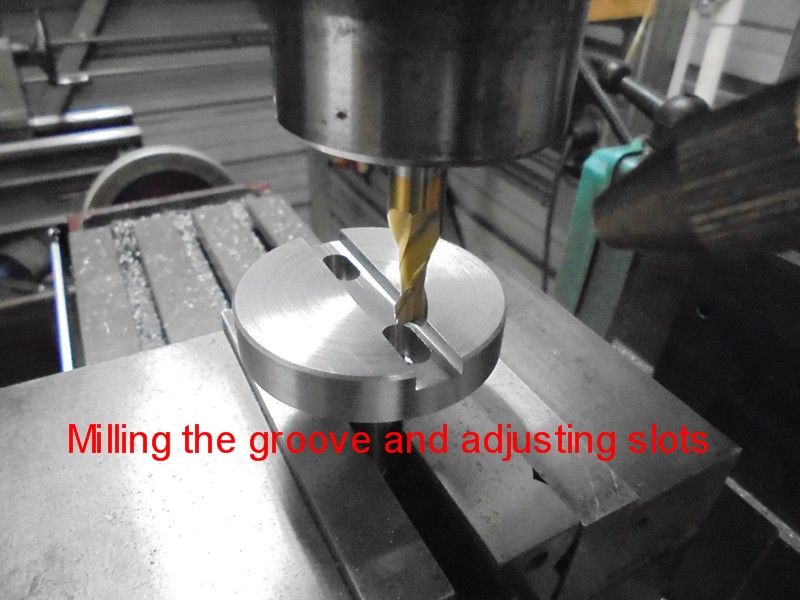
Attachment 18783
This is the arbor with two adjusting slots and a groove for the tongue on the bearing housing to mate
Attachment 18784
This photo shows the unit assembled and installed in a collet on the lathe, a 1/2" dowel pin is protruding 1" from the face of the bearing, this is where the it has to be running true, all punches were made the same length so indicating was only necessary one time, make the punches the same length no matter what size they are and indicating will only have to be done one time, it's just a matter of changing punches
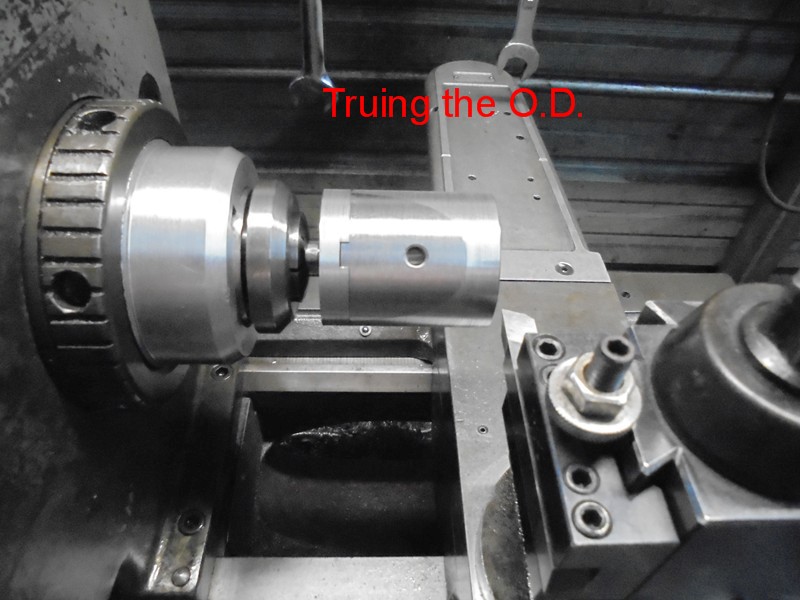
Attachment 18785
This photo shows the unit held in a 5/8" collet on the lathe and being turned true after the indicating
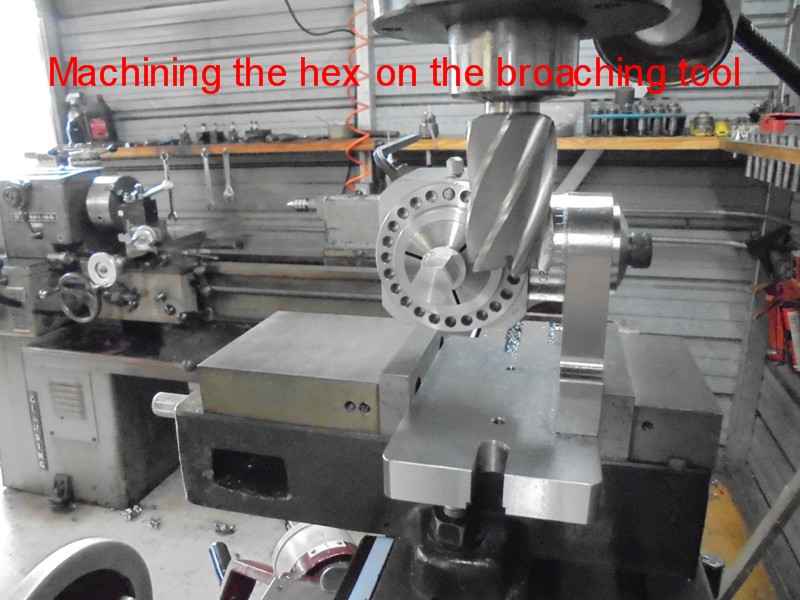
Attachment 18786
This photo shows the hex punches being made
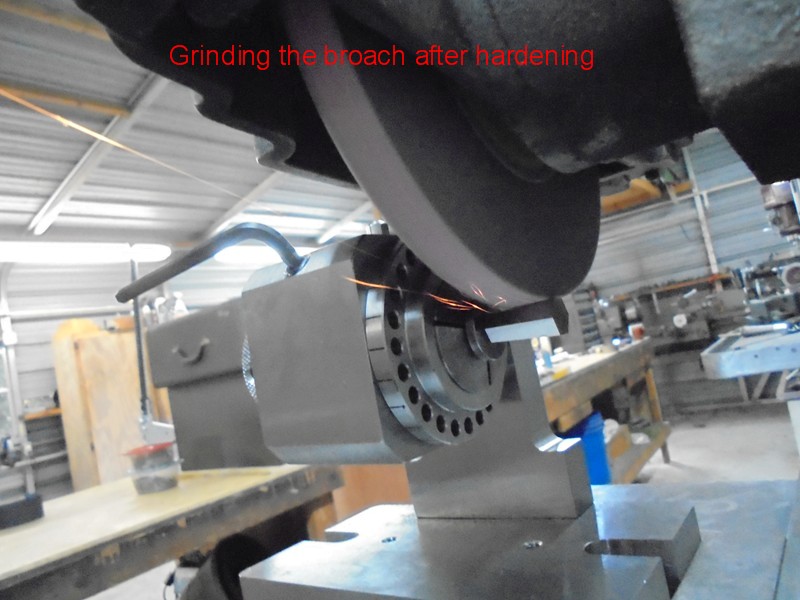
Attachment 18787
This photo shows the punches being ground after heat treating
Attachment 18788
This photo shows the hub for the mill vise handle being drilled and tapped for the three spokes
Attachment 18789
This photo shows all the parts made for the speed handle
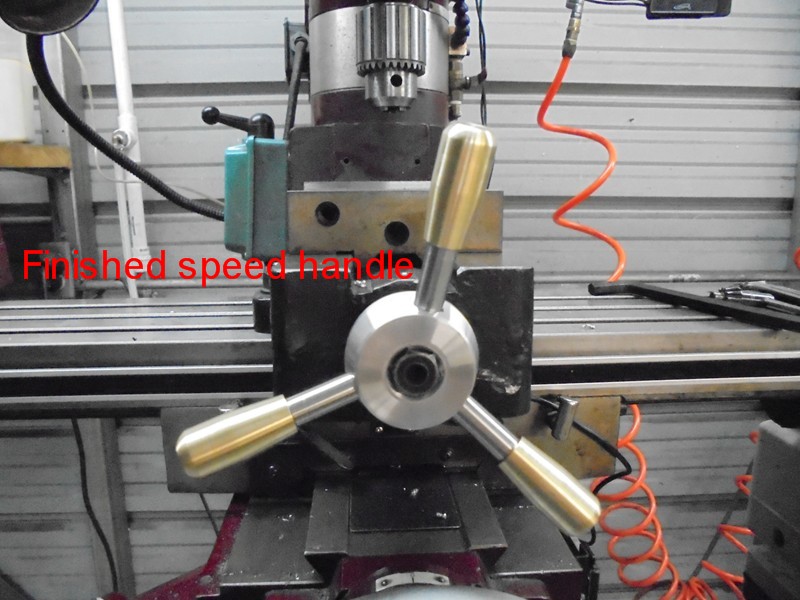
Attachment 18790
Speed handle complete and install on the mill vise
Here is a video of the hex being cut using the rotary broaching tool
https://youtu.be/FPfgDL7wkCs
Below are the 4 drawings to make this tool, good luck, and post your completed tool !
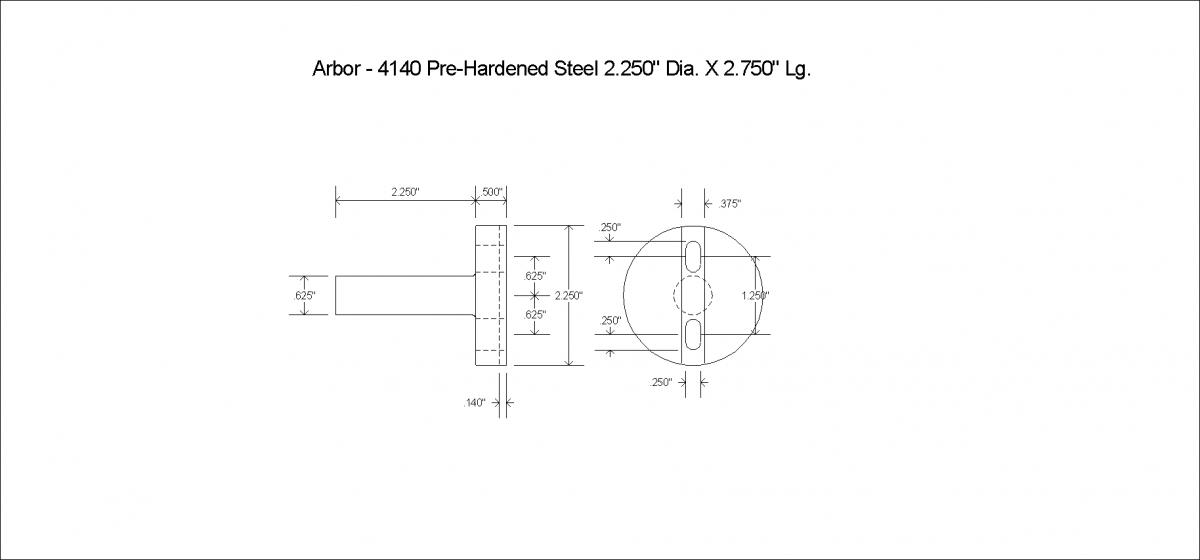
Attachment 18797
Drawing of Arbor (above)
Attachment 18798
Drawing of Spindle Housing (above)
Attachment 18799
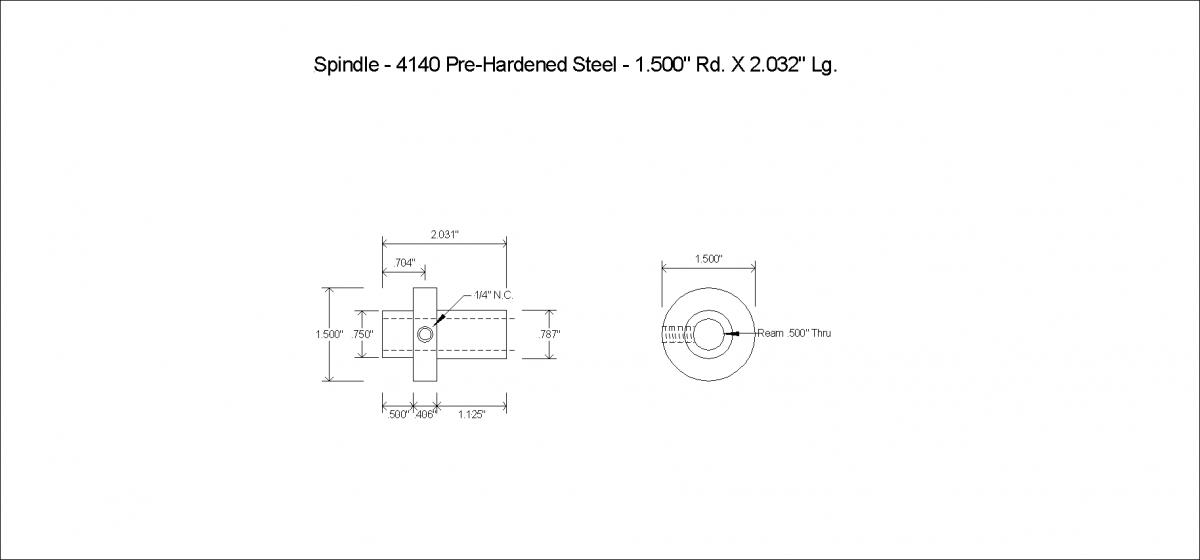
Drawing of Spindle (above)
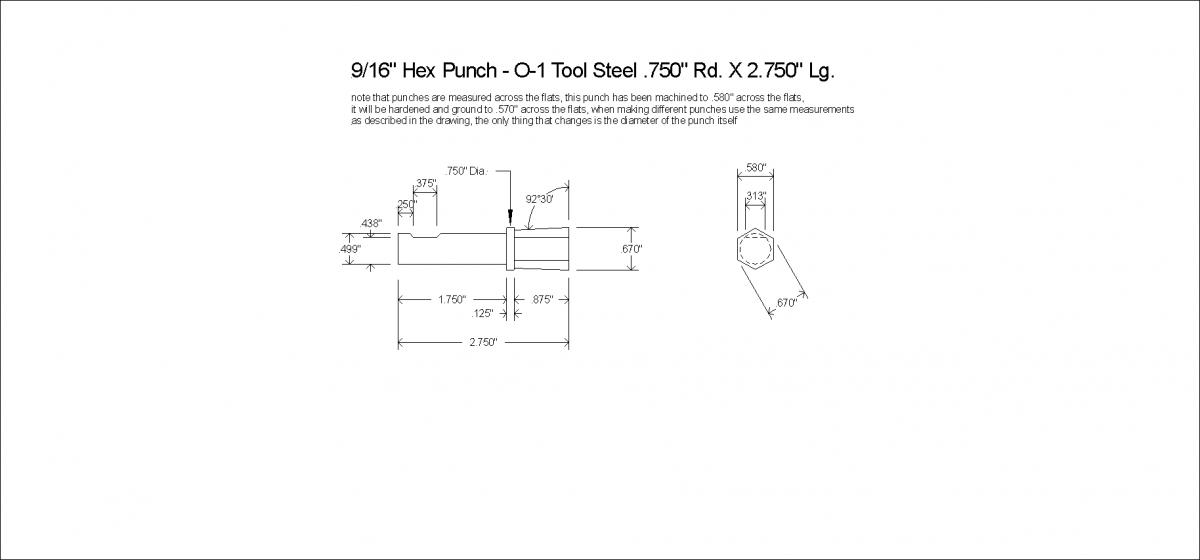
Attachment 18800
Drawing of Punch (above)
-
Very nice job, well done Doug. Thats a very large, clean, well equipped,(I don't have enough words) professional looking shop you have there.
-
Hi Doug, great job. I really like this Broaching tool. Will you publish the plans? The first photo
seems to have a very good set of plans.
Jim D
-
Hi Jim
Thanks for the compliment, as soon as I go over the plans just to make sure there are no errors they will be available to download
-
I would have liked to see the hex off the chuck maybe with an allen wrench.
But nice tool looking forward to seeing the plans.
Ralph
-
Thanks Ralph
I didn't have a 9/16" allen wrench, but it goes on the hex of the vise shaft and that's where it's being shown it fits
-
Very nice work and documentation. JR
-
<!-- BEGIN /var/www/html/homemadetools/protected/modules/zeus/views/tool/postUpdate.php -->
Thanks rossbotics! We've added your Rotary Broaching Tool to our Machining category,
as well as to your builder page: rossbotics's Homemade Tools. Your receipt:
<div id="blocks">
<div class="block b1 pngfix">
<div class="bimg">
<div>
<a href="http://www.homemadetools.net/homemade-rotary-broaching-tool-4">
<img src="/uploads/202082/homemade-rotary-broaching-tool-4.jpeg"/>
</a>
</div>
</div>
<div class="head pngfix"></div>
<div class="left pngfix"></div>
<div class="right pngfix"></div>
<div class="blockover b1 pngfix">
<div class="title">
<a href="http://www.homemadetools.net/homemade-rotary-broaching-tool-4">Rotary Broaching Tool</a>
<span> by <a href="http://www.homemadetools.net/builder/rossbotics">rossbotics</a></span>
</div>
<div class="tags">tags:
<a href='http://www.homemadetools.net/tag/broach'>broach</a>, <a href='http://www.homemadetools.net/tag/rotary-tool'>rotary tool</a> </div>
</div>
</div>
</div>
<!-- END /var/www/html/homemadetools/protected/modules/zeus/views/tool/postUpdate.php -->
-
Doug,
You built nice tools, both of them. Thanks for sharing.
I also have the very same problem with original milling vise handle and I am using 19 mm (3/4") combination spanner for that purpose. It's 6" machine vise, little bit big for this mill, but this size is very useful sometimes. Even I have three 19mm spanners, I am always using the same spanner for drawbar. As I can see from your posts we have the same mill/drill (HF40939 mini knee mill) but the only difference is that my riser block is 5" high and I think your one is about 3 1/2 - 4" high. I am also thinking about making speed handle, but it will take me some more time as my idea is to do it on the lathe in the same way as cutting keyways.
Best regards
LMMasterMariner
-
Do you have info on the bearings?
nevermind...reread.:embarrassed: