-
4 Attachment(s)
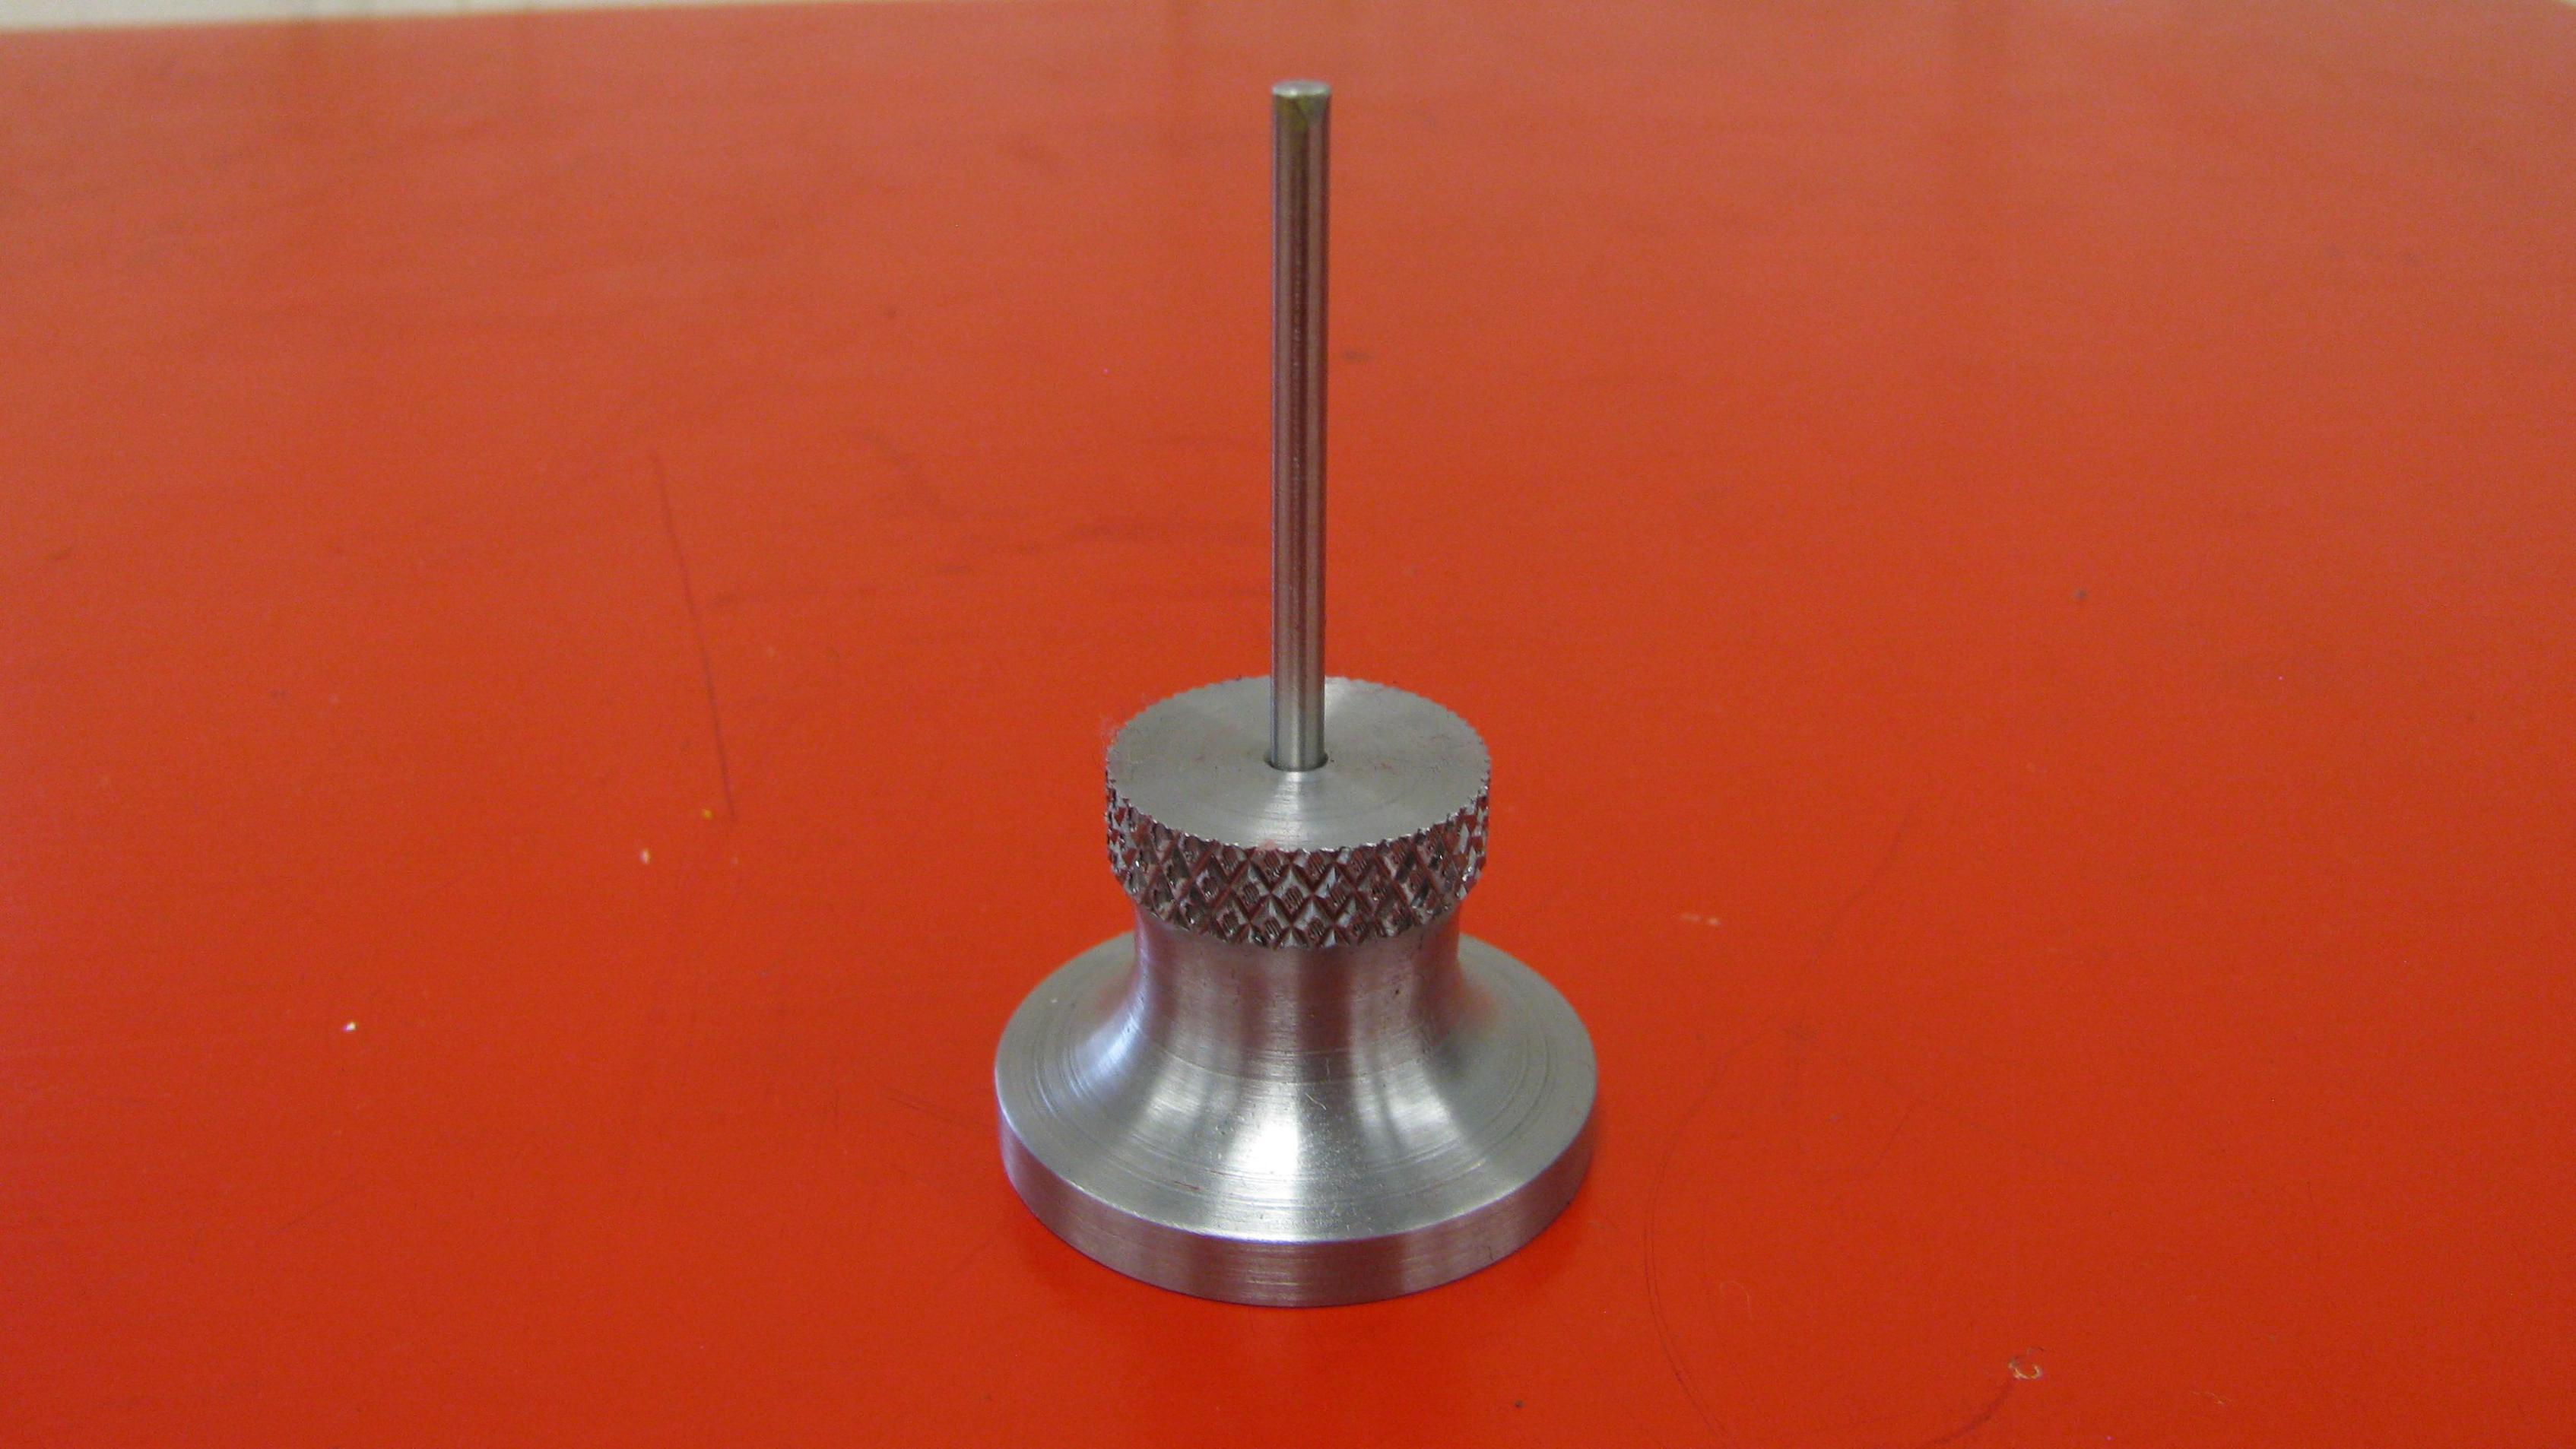
Small Depth Gage
Just completed a very useful little tool that is fairly easy to machine and involves both milling and turning operations. The design for this tool came from Guy Lautards, Machinist Bedside Reader.
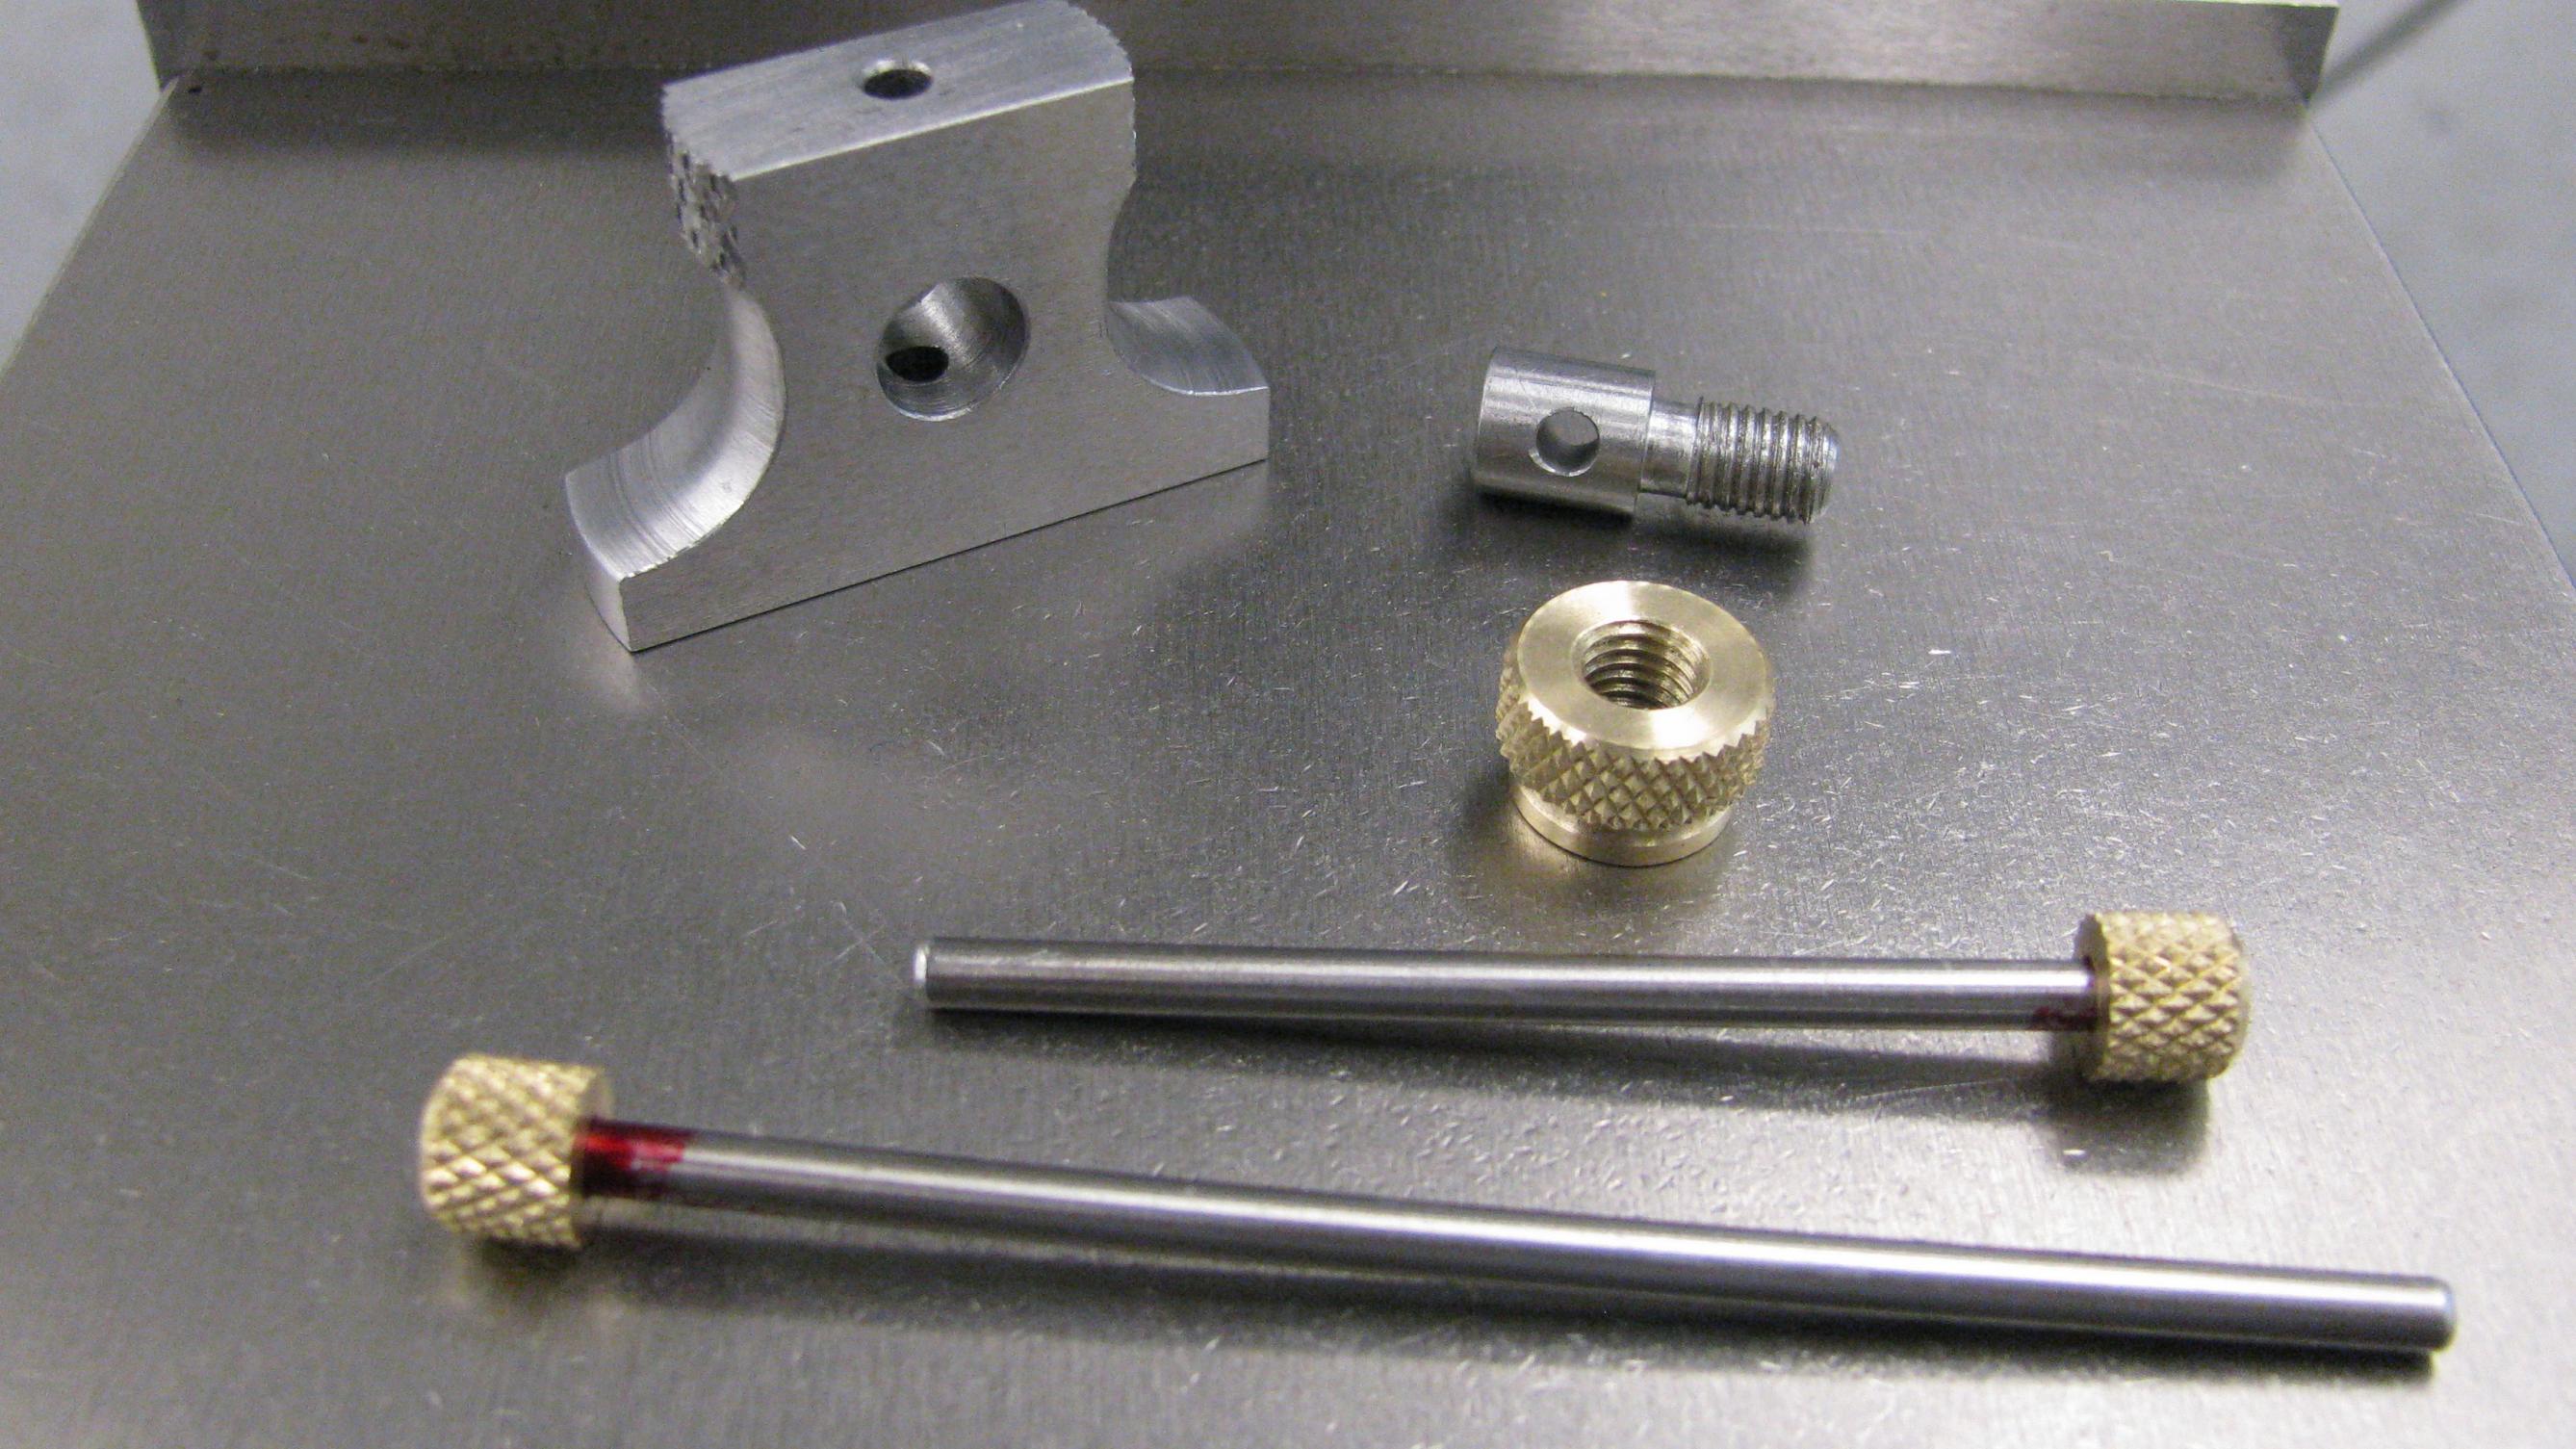
The tool presented here has a couple of very small differences from the original design which are additional measuring rods with knurled knobs for ease of handling and is slightly larger overall.
Materials used were 1018 CRS Rod, 1/8 Drill Rod and some 360 Brass Rod.
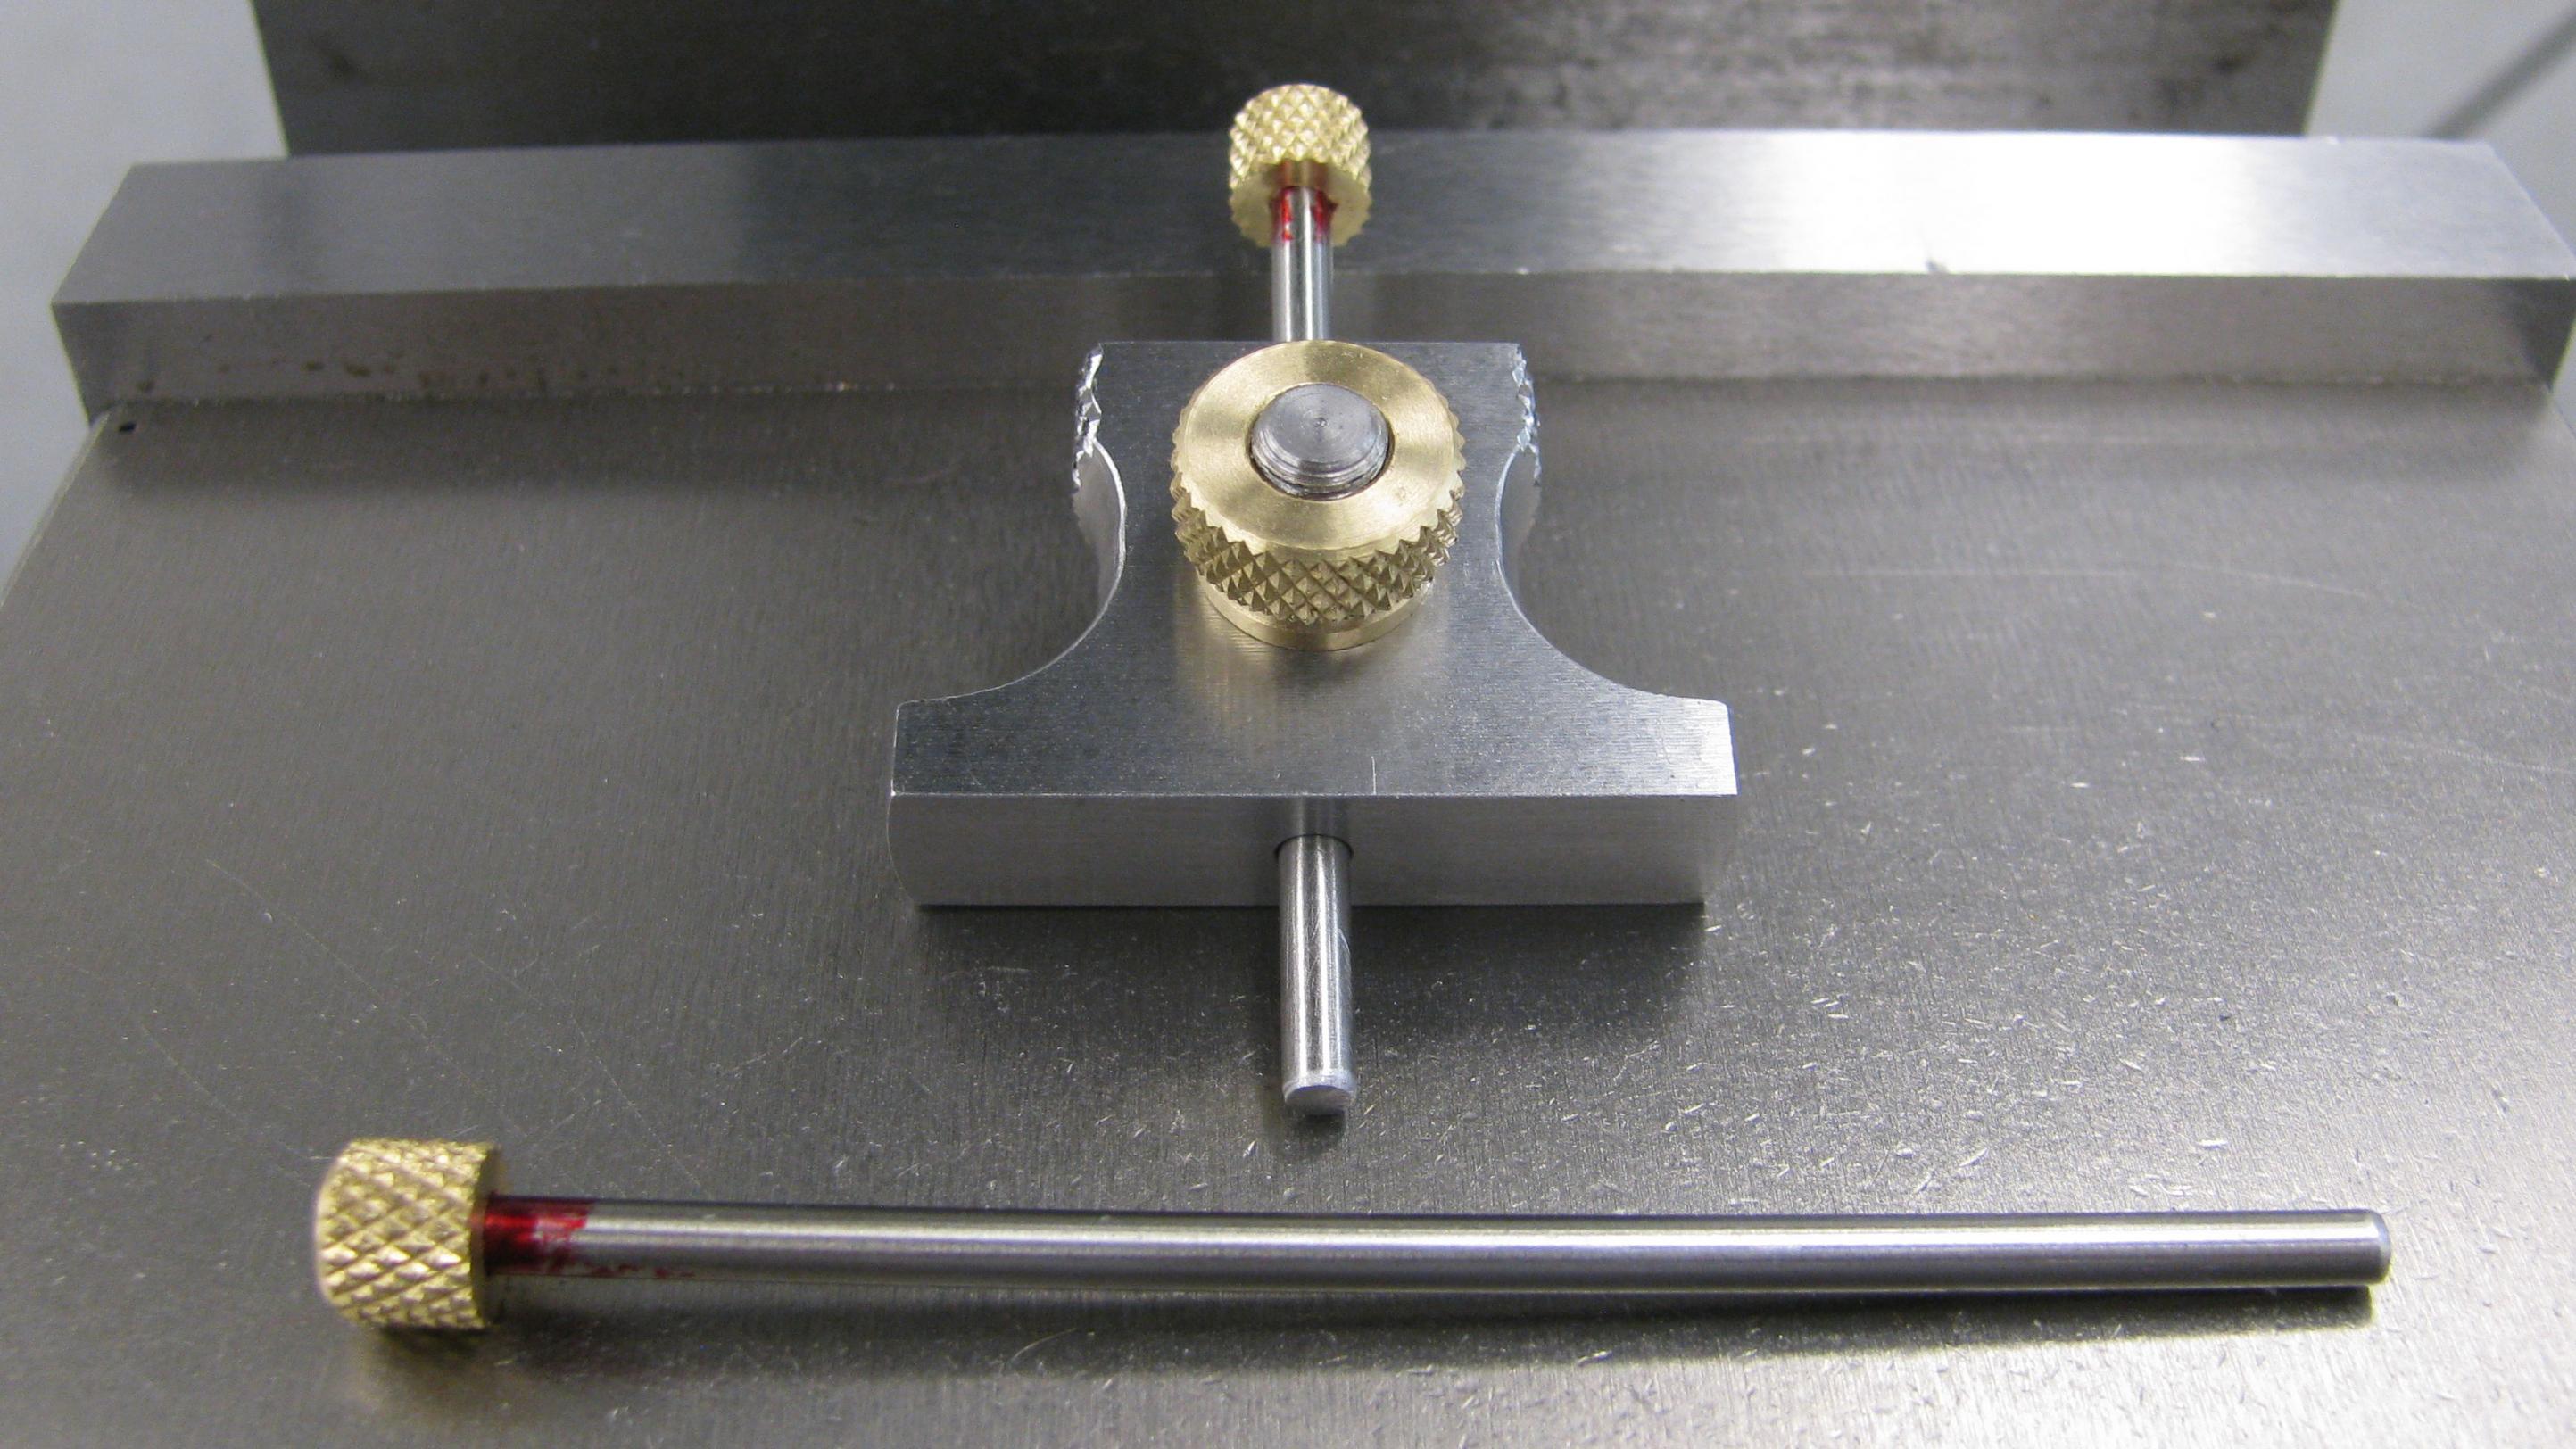
The device is primarily used to measure the depth of blind holes and minimize moving the knee of the mill up and down to measure the hole depth with more traditional measuring tools. Im sure this tool could be applied to other applications as well.
Attachment 20451Attachment 20452Attachment 20453Attachment 20454
-
Shelly142,
Very nice workmanship and a useful shop addition. Guy Lautard’s, “Machinist Bedside Reader” is one of those books that is worthwhile reading several times.
Regards,
Paul
-
Nice looking work.
What is the red material on the measuring rods?
-
Red Dykem Layout Fluid. Guess my lazy self overlooked that one. It easily comes off with solvent.
-
<!-- BEGIN /var/www/html/homemadetools/protected/modules/zeus/views/tool/postUpdate.php -->
Thanks Shelly142! We've added your Depth Gage to our Height and Depth Gauges category,
as well as to your builder page: Shelly142's Homemade Tools. Your receipt:
<div id="blocks">
<div class="block b1 pngfix">
<div class="bimg">
<div>
<a href="http://www.homemadetools.net/homemade-depth-gage">
<img src="/uploads/206901/homemade-depth-gage.jpeg"/>
</a>
</div>
</div>
<div class="head pngfix"></div>
<div class="left pngfix"></div>
<div class="right pngfix"></div>
<div class="blockover b1 pngfix">
<div class="title">
<a href="http://www.homemadetools.net/homemade-depth-gage">Depth Gage</a>
<span> by <a href="http://www.homemadetools.net/builder/Shelly142_2">Shelly142</a></span>
</div>
<div class="tags">tags:
<a href='http://www.homemadetools.net/tag/depth-gauge'>depth gauge</a> </div>
</div>
</div>
</div>
<!-- END /var/www/html/homemadetools/protected/modules/zeus/views/tool/postUpdate.php -->
-
Very nice work. This is one of those things that I could have used yesterday if I had one. Just another item to throw on my too do list.
One question are the depth rods radiuses on the ends or flat?
I'm also wondering how you kept the bore on centerline and thus perpendicular to the base face. It seems like it would be a challenge to keep the bore from wandering off with such a skinny drill bit.
-
Wizard,
I thank you for your positive comments. This really is a very useful little tool.
The measuring rods were sawed to length and then faced off on the lathe and then gently filed to remove the burr. The two shown will measure up to a 2” deep hole or slot but you could make them just about any length you may need.
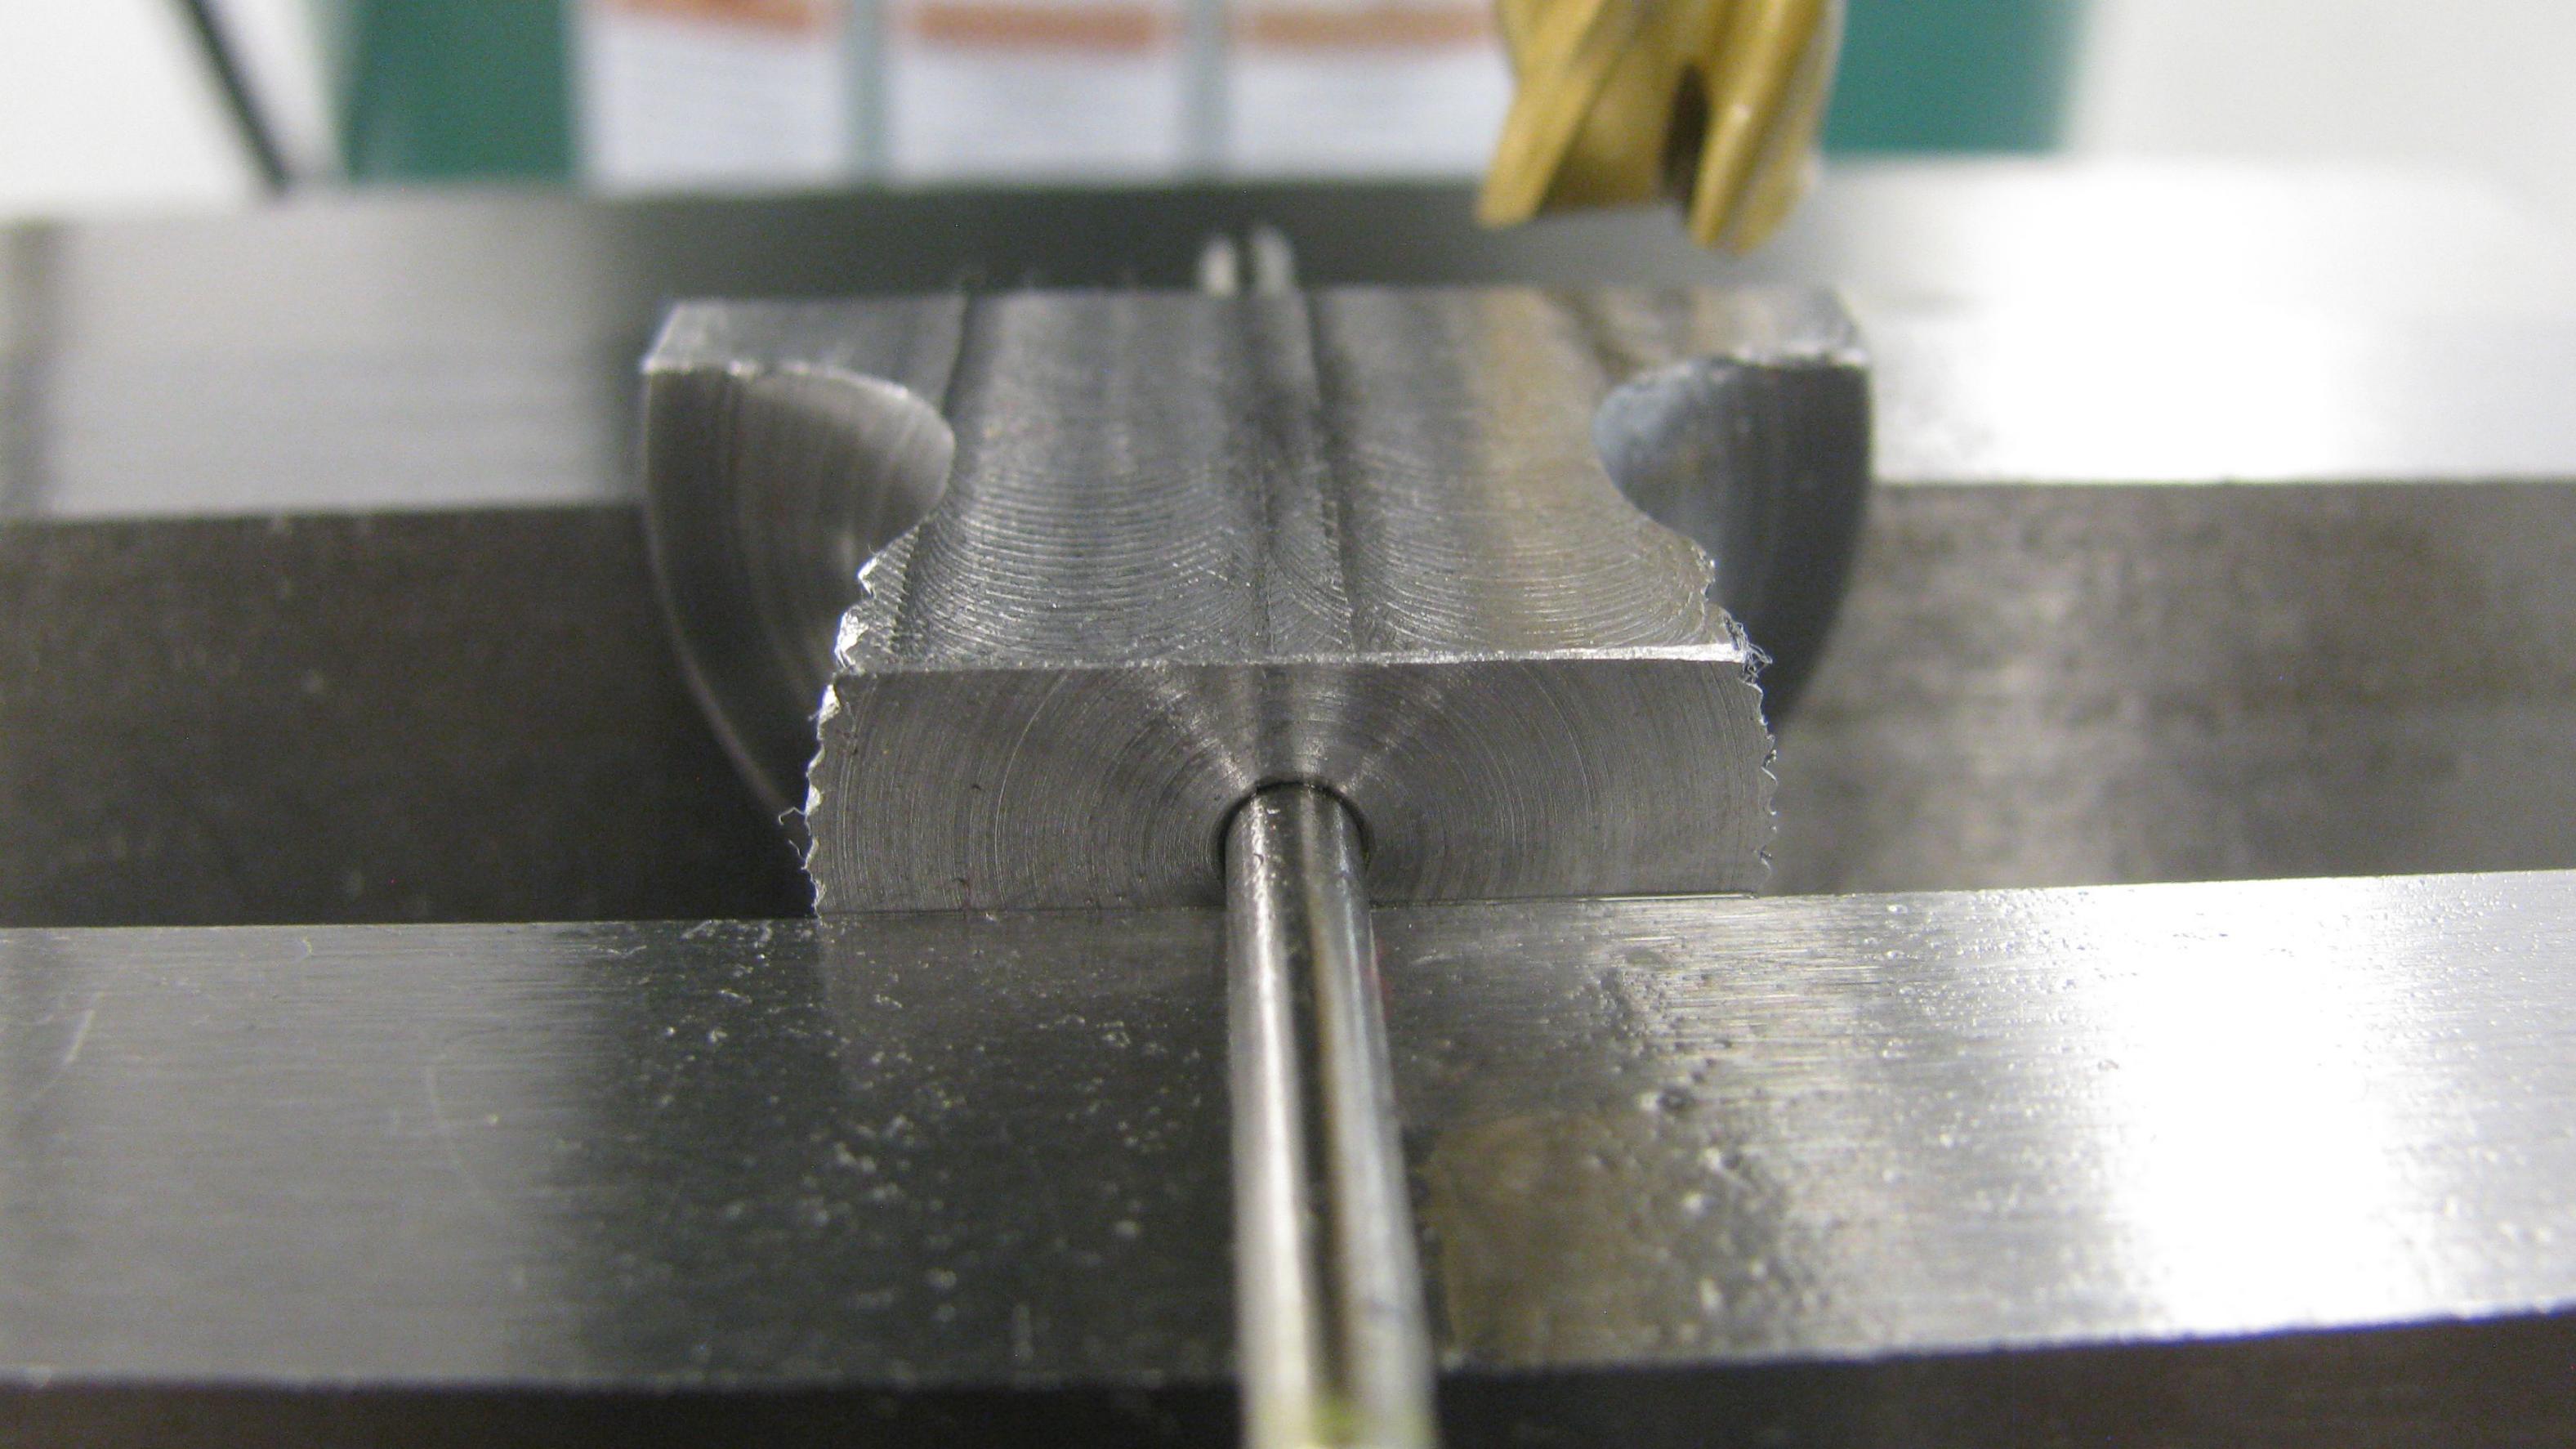
The 1/8” dia. hole was drilled in the lathe after turning the base, profile and the knurled end all in one setup. I just tried to go as gently as possible with plenty of coolant and backing the drill out from the hole several times to remove the chips in an attempt to keep the drill from walking all over the place. A new sharp drill will also help.
In milling the flat portions, I placed an 1/8” drill rod through the part and rested that on the top of the vise jaws. That seemed to work pretty well and when I checked it with a machinist square when done, everything looked good in both directions.
I hope this helps.
Phil