Free 186 More Best Homemade Tools eBook:  
Get 2,000+ tool plans, full site access, and more.

User Tag List

Results 1 to 8 of 8

Thread: socket extentions with handles

  1. #1
    Supporting Member sossol's Avatar
    Join Date
    Oct 2012
    Location
    Lafayette, Indiana
    Posts
    511
    Thanks
    847
    Thanked 407 Times in 209 Posts

    sossol's Tools

    socket extentions with handles

    I wondered why Sears doesn't make the 6" extension with a handle in anything but the 1/4" drive. They don't, so I did. I made my first two a year ago, but didn't want to post them because they look like rubbish. They were just experiments and they were for me, so appearance was secondary to function.

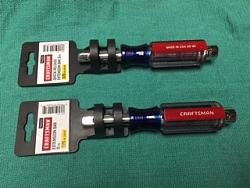
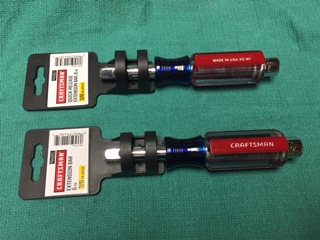
    These are two that I just finished today as Christmas gifts. As gifts, appearance was more important than it was for mine, so I took way more time on the finish.
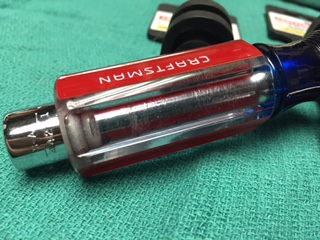
    I made them from Craftsman bottle openers and 6" Craftsman socket extensions. I started with the bottle opener because it is easier to pull the shank out (heat it a bit and it slips out) than does a screwdriver. I built a jig to hold the handles vertical in my drill press, then carefully drilled it through until it was a tight interference fit.
    The jig was made out scrap wood. I have photos & video if anyone wants to see them, though anything that holds it vertical without spinning or scarring it will work.
    Next step was to chuck the socket extension with the handle into the drill press and cut the palm knob off with a coping saw.
    Next I used part of a golf club shaft and cordless drill to shape the cut end with a belt grinder, which was followed up by a round of hand sanding and shaping up to 800 grit. I also sanded the bore a little to knock down any errant gouges. No need to get it smooth. More on that later.
    The last step of the shaping handle was to flow the re contoured end with a heat gun, alternating with dips in cold water to counter sag until it had the factory gloss. A quick denim buffing and they were ready.
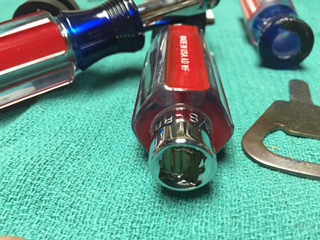
    The final step is to completely coat the bore with 2-part epoxy and shove the extension through. This squeezes out the excess epoxy and forces it into all of the scratches in the bore. I used crystal clear epoxy for the first two that I made, but went with standard yellowish epoxy this time. Wiping the excess away leaves a nice radius of epoxy between the handle and extension, further hiding any evidence of tampering.
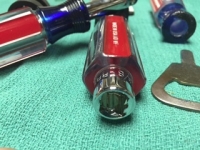
    The handle end is bored out a little wider to let the extension sit into the end. I think that it looks better, and makes a nice pocket for epoxy.
    Adding texture to the extensions would strengthen the bond, but it holds well enough to spin bolts/nuts in, which is their purpose. It's mostly to enhance the friction fit.

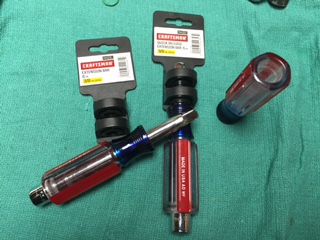
    It would have been a lot easier & cheaper to make handles from scratch or use opaque handles, but I wanted them to look like factory-made Craftsman items. The polysomethinorother material of these handles is amazing to work with, but very unforgiving. This is a thermoplastic with a narrow working range between solid and blob. I learned that the hard way on my first few attempts. See also the melted end of the unfinished 3rd one.

    socket extentions with handles-socket1.jpg socket extentions with handles-socket2.jpg
    socket extentions with handles-socket3.jpg socket extentions with handles-socket4.jpg

    Neil

    186 More Best Homemade Tools eBook

  2. The Following 3 Users Say Thank You to sossol For This Useful Post:

    chevysman21 (Feb 22, 2016), kbalch (Dec 23, 2014), Paul Jones (Dec 24, 2014)

  3. #2
    kbalch's Avatar
    Join Date
    Jun 2012
    Location
    Clermont, FL
    Posts
    5,034
    Thanks
    2,275
    Thanked 531 Times in 383 Posts
    Thanks sossol! I've added your Socket Extensions to our Miscellaneous category, as well as to your builder page: sossol's Homemade Tools. Your receipt:


    2000 Tool Plans

  4. #3
    Content Editor
    Supporting Member
    DIYer's Avatar
    Join Date
    Aug 2013
    Posts
    3,056
    Thanks
    773
    Thanked 1,852 Times in 1,653 Posts
    I wouldn't mind getting those as Christmas gifts. Good job!

  5. #4
    Supporting Member sossol's Avatar
    Join Date
    Oct 2012
    Location
    Lafayette, Indiana
    Posts
    511
    Thanks
    847
    Thanked 407 Times in 209 Posts

    sossol's Tools
    Quote Originally Posted by DIYer View Post
    I wouldn't mind getting those as Christmas gifts. Good job!
    Thanks!

    Neil

  6. #5
    Supporting Member Hotz's Avatar
    Join Date
    Feb 2013
    Location
    South of Brazil.
    Posts
    360
    Thanks
    157
    Thanked 75 Times in 51 Posts

    Hotz's Tools
    Quote Originally Posted by DIYer View Post
    I wouldn't mind getting those as Christmas gifts. Good job!
    me neither ...
    Sorry my mistakes in english.
    to share your tip >>> http://www.homemadetools.net/forum/tool-tips-tricks/ <<<

  7. #6
    kbalch's Avatar
    Join Date
    Jun 2012
    Location
    Clermont, FL
    Posts
    5,034
    Thanks
    2,275
    Thanked 531 Times in 383 Posts
    If you're taking orders, I'd buy a set.

    Might be a nice side biz…

    Ken

  8. #7
    Supporting Member Paul Jones's Avatar
    Join Date
    May 2014
    Location
    Del Mar, California
    Posts
    1,231
    Thanks
    5,810
    Thanked 1,441 Times in 655 Posts

    Paul Jones's Tools
    Fantastic details on the steps for making these and I also learned several new techniques along the way. Nice presents to give and receive! Thanks for sharing.

  9. #8

    Join Date
    Nov 2014
    Posts
    1
    Thanks
    0
    Thanked 0 Times in 0 Posts
    Nice idea and project. I'd be interested in a set too!


    186 More Best Homemade Tools eBook

Thread Information

Users Browsing this Thread

There are currently 1 users browsing this thread. (0 members and 1 guests)

Bookmarks

Posting Permissions

  • You may not post new threads
  • You may not post replies
  • You may not post attachments
  • You may not edit your posts
  •