Free 186 More Best Homemade Tools eBook:  
Get 2,000+ tool plans, full site access, and more.

User Tag List

Page 1 of 2 1 2 LastLast
Results 1 to 10 of 17

Thread: Tool Makers Bench Vise

  1. #1
    Supporting Member rossbotics's Avatar
    Join Date
    Dec 2013
    Location
    Florida
    Posts
    730
    Thanks
    1,019
    Thanked 1,645 Times in 402 Posts

    rossbotics's Tools

    Tool Makers Bench Vise

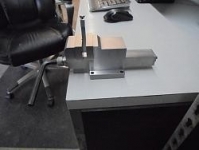
    While fumbling around filing a small piece the other day I thought it would be nice to have a small vise to mount on my desk to hold small parts for filing, measuring or whatever, just another hand if you will.

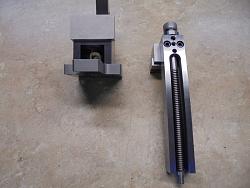
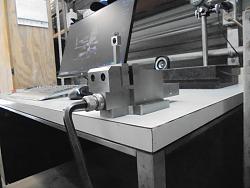
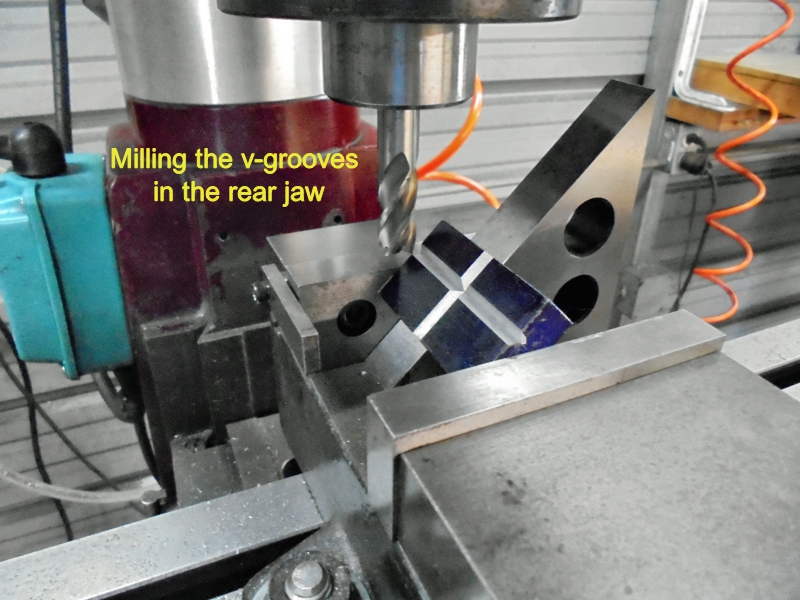
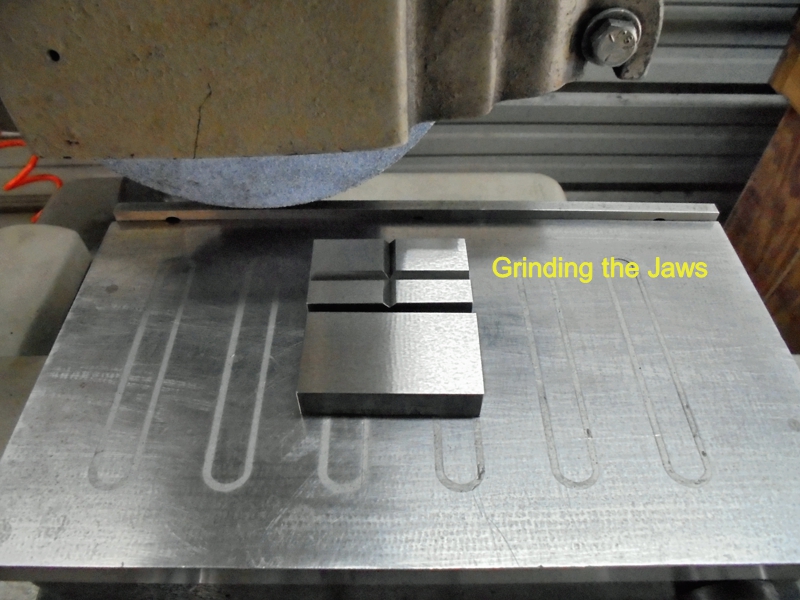
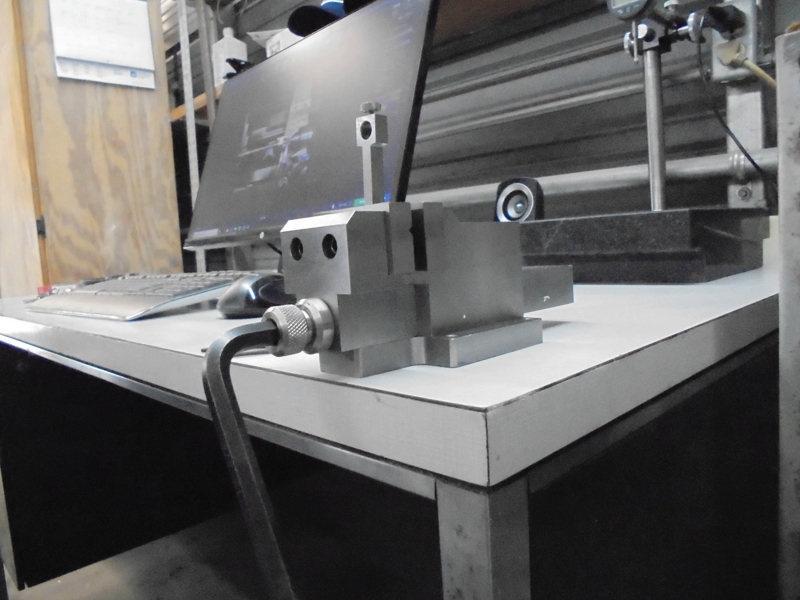
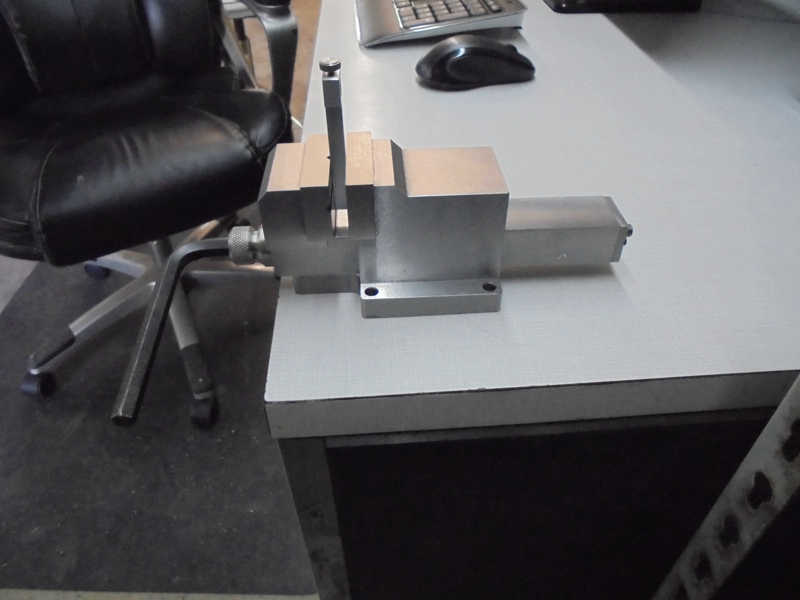
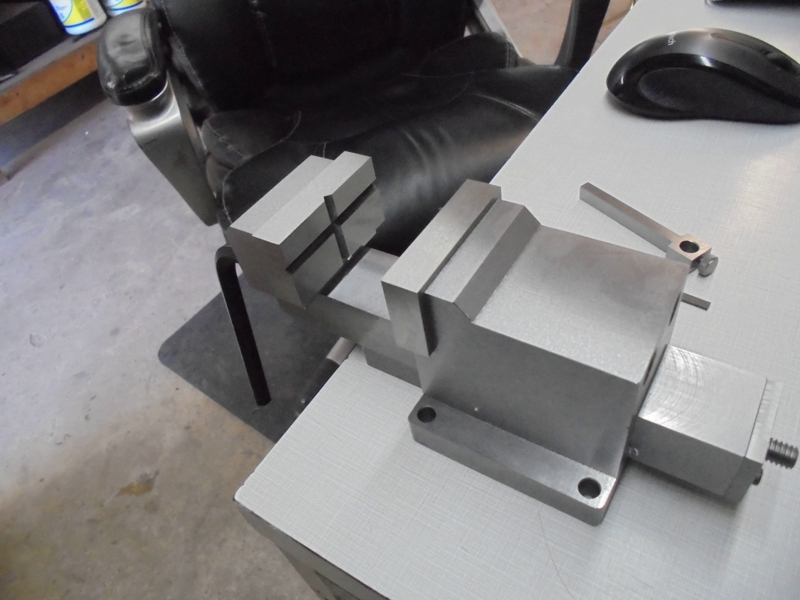
    That vise needed to have hard smooth jaws that would not mar the finish on work pieces with a horizontal and a vertical V-groove in the rear jaw for holding round work, the jaws are 2.250” wide with an opening of 5.000”, I was thinking about putting a step in the top of the jaws but sometimes I need to clamp something really close to the top of the jaws therefore I decided against that, so after a couple of days on the computer I came up with this new tool I call the Tool Makers Bench Vise.


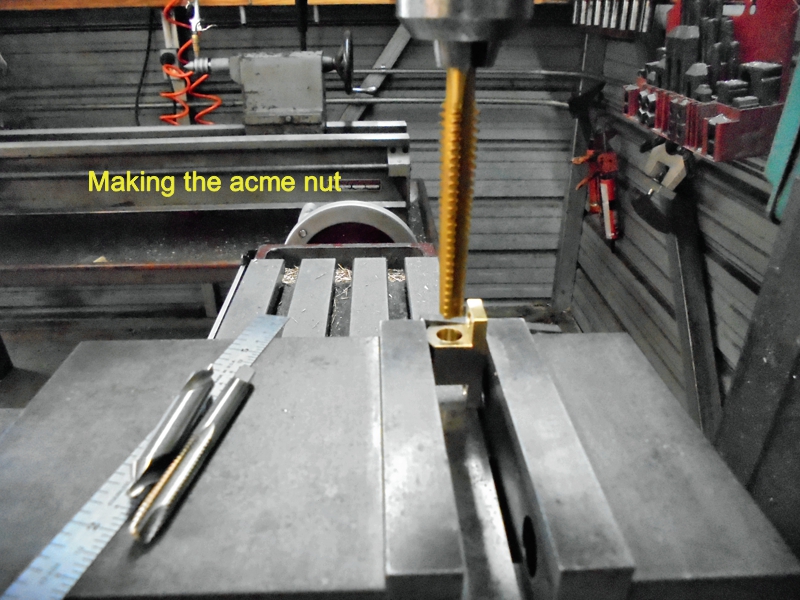
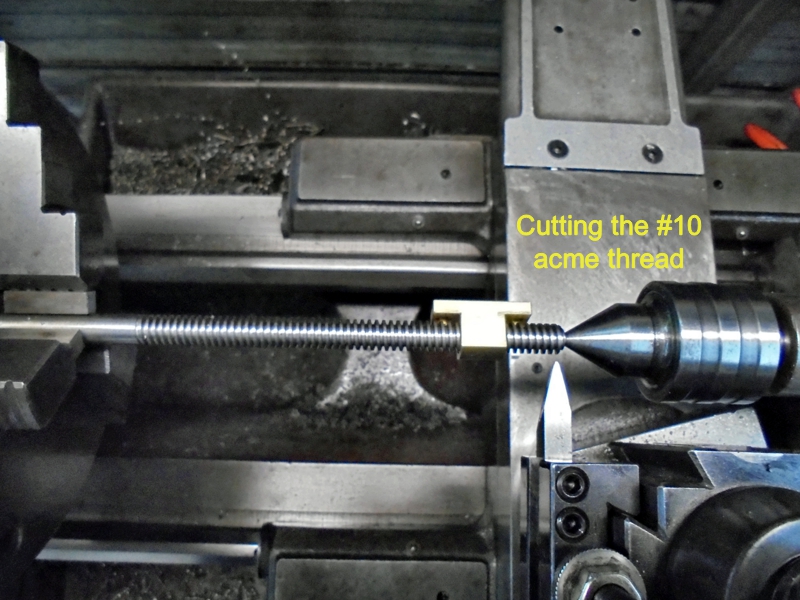
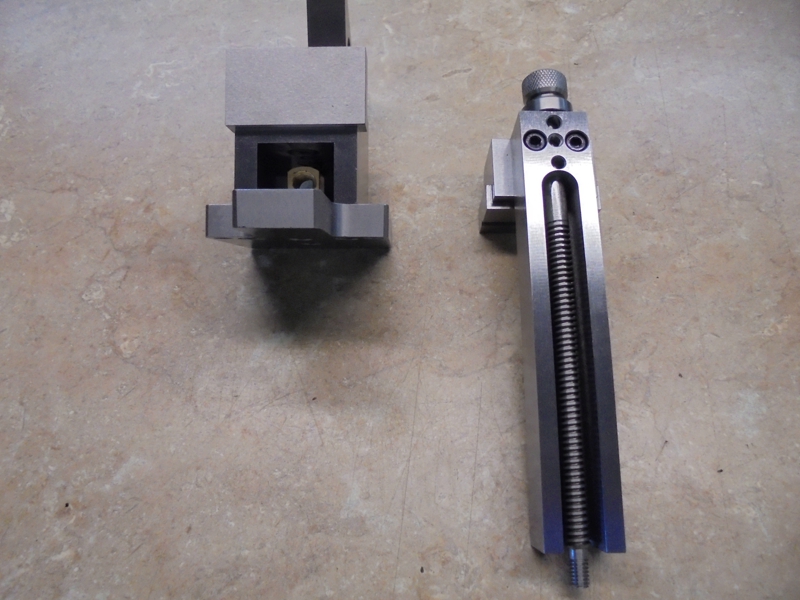
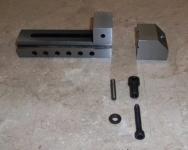
    This vise is very rigid in construction and is machined to very close tolerances (like a tool makers vise) with just enough clearance for the moving parts to slide without binding; the sliding jaw of the vise is advanced by a custom made 303 Stainless Steel acme threaded shaft with a hexagonal hole in the center for an allen wrench, the entire vise was made from 1018 steel except for the jaws which was made from O-1 steel hardened and ground.


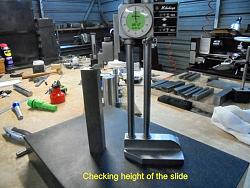
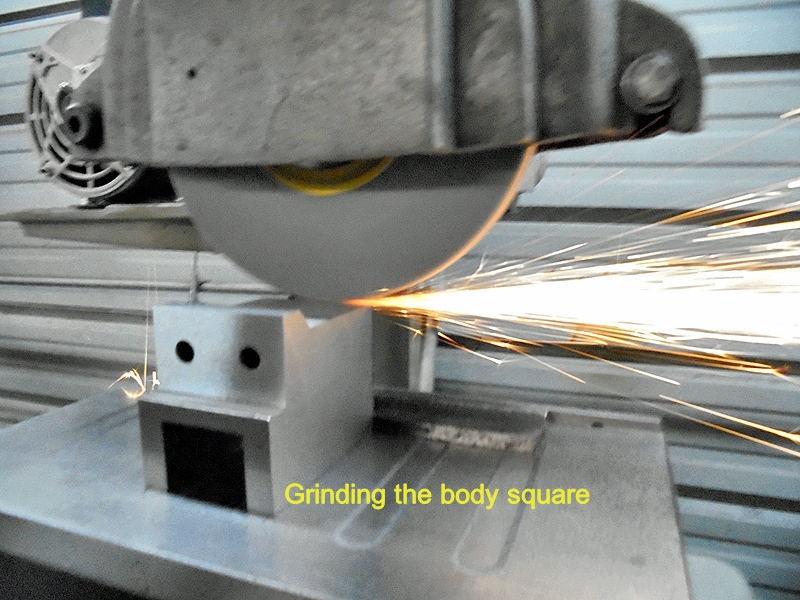
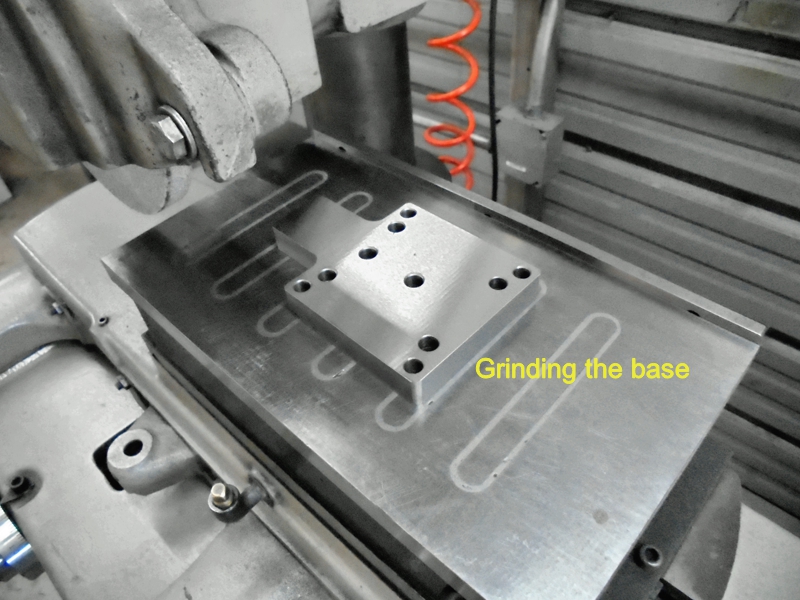
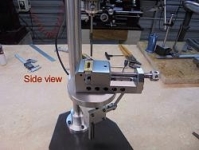
    The vise has four holes in the base for mounting to any surface; the vise is ground flat and square in relation to any surface or edge so it can be used on the milling machine, surface grinder or drill press, but its main purpose is to be mounted on my desk to hold work for filing,


    The vise was built with the assistance of two tools I previously made and posted to the Home Made Tools Forum, my Universal Grinding Fixture and Rotary Broach, without those two tools the steps they performed would have been difficult to achieve.


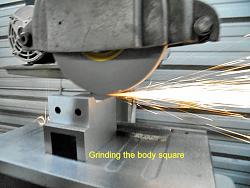
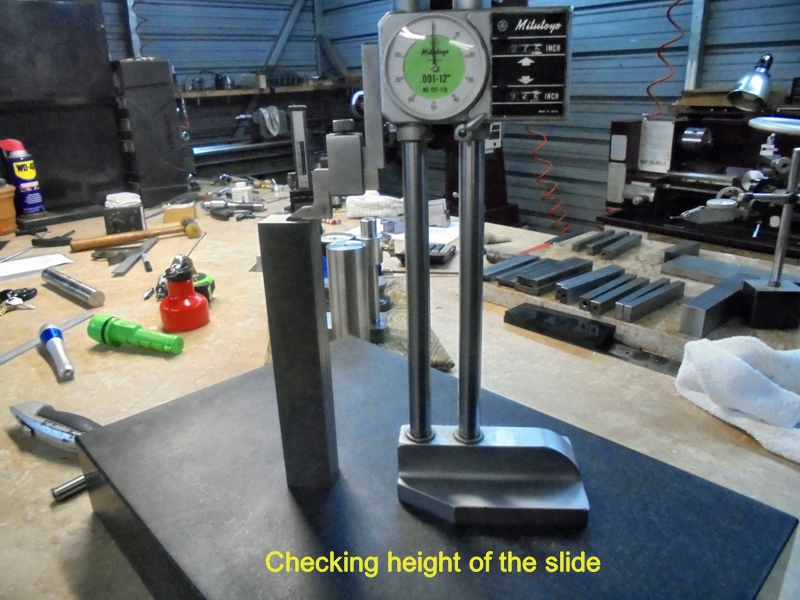
    For those of you that are fairly new to the machining world it is essential for your steel to be flat, square with parallel edges before you start any project, if you purchase good quality ground bar stock then your projects will come out with allot closer fits than that of just using a milled bar, if you purchase just milled bar stock you should machine or grind all surfaces to insure squareness and also to clean up all surface imperfections, in my case with this vise I did use just milled bar stock, but I machined each piece all over to insure them to be flat, square and parallel before I started the project.

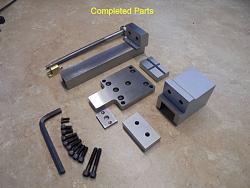
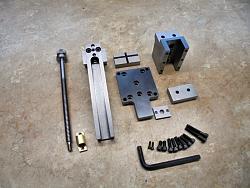
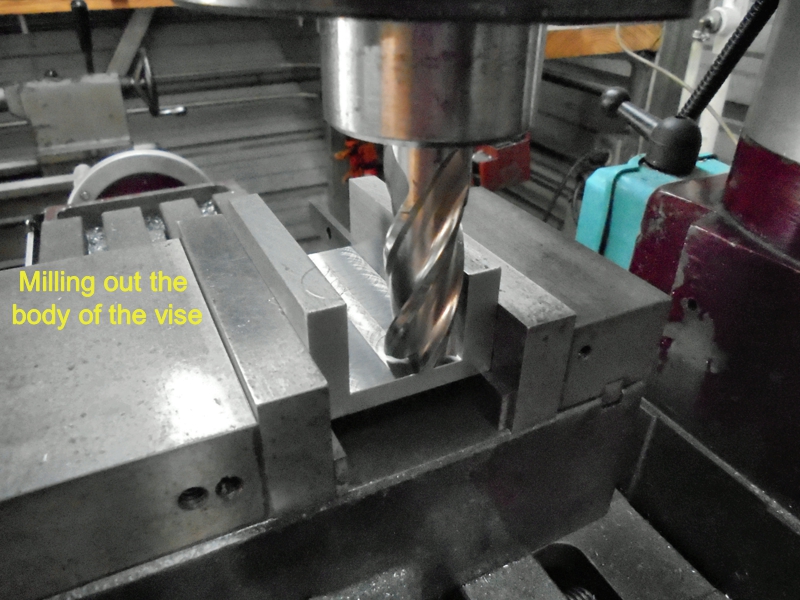
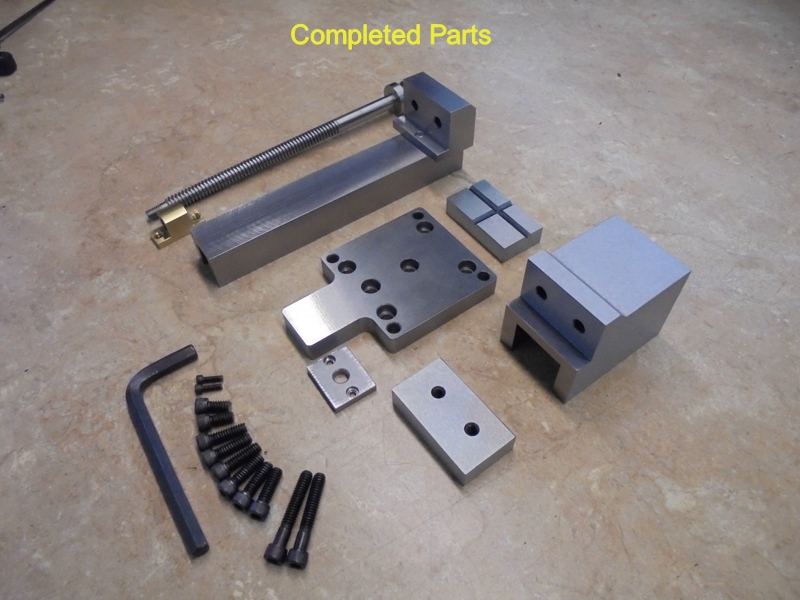
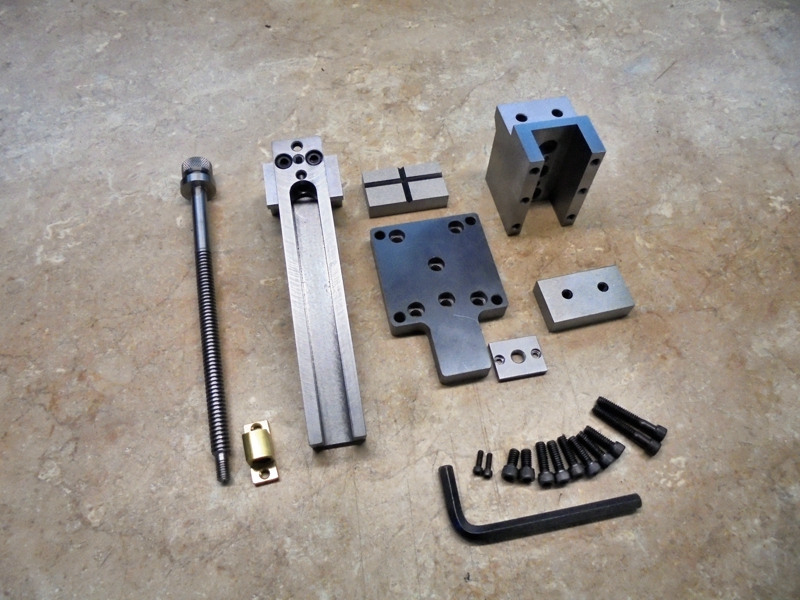
    Below you will find some photos of the machining process along with the completed tool

    As Always Thanks For Looking
    And Happy Machining
    Doug

    Tool Makers Bench Vise-1.jpg Tool Makers Bench Vise-2.jpg Tool Makers Bench Vise-3.jpg Tool Makers Bench Vise-4.jpg Tool Makers Bench Vise-5.jpg

    Tool Makers Bench Vise-6.jpg Tool Makers Bench Vise-7.jpg Tool Makers Bench Vise-8.jpg Tool Makers Bench Vise-9.jpg Tool Makers Bench Vise-10.jpg

    Tool Makers Bench Vise-11.jpg Tool Makers Bench Vise-12.jpg Tool Makers Bench Vise-13.jpg Tool Makers Bench Vise-14.jpg Tool Makers Bench Vise-15.jpg Tool Makers Bench Vise-16.jpg

    186 More Best Homemade Tools eBook
    Comments are always welcome
    Doug

    Subscribe to my you tube channel

    https://www.youtube.com/channel/UCDD..._as=subscriber


    Tool Plans for Sale by rossbotics


  2. The Following 20 Users Say Thank You to rossbotics For This Useful Post:

    bobs409 (Apr 17, 2018), Harvey Melvin Richards (Apr 17, 2018), high-side (Aug 31, 2018), HobieDave (Mar 27, 2020), Jon (Apr 17, 2018), LMMasterMariner (Apr 17, 2018), Miloslav (Dec 25, 2018), mklotz (Apr 17, 2018), Papa Bill (Jan 2, 2019), Paul Jones (Apr 18, 2018), PJs (Apr 18, 2018), rlm98253 (Aug 31, 2018), Seedtick (Apr 18, 2018), that_other_guy (Sep 3, 2018), thevillageinn (Jul 7, 2018), threesixesinarow (Jan 13, 2019), Tonyg (Dec 26, 2018), Toolmaker51 (Sep 3, 2018), tooly (Jul 10, 2023), trigger (Sep 18, 2020)

  3. #2
    Supporting Member Tuomas's Avatar
    Join Date
    Jun 2016
    Location
    Jyväskylä Finland
    Posts
    832
    Thanks
    558
    Thanked 1,837 Times in 507 Posts

    Tuomas's Tools
    Beautifull work!

    2000 Tool Plans

  4. The Following User Says Thank You to Tuomas For This Useful Post:

    rossbotics (Apr 18, 2018)

  5. #3
    Supporting Member Canobi's Avatar
    Join Date
    Mar 2016
    Location
    Shrewsbury, Shropshire (UK)
    Posts
    181
    Thanks
    92
    Thanked 361 Times in 98 Posts

    Canobi's Tools
    Gorgeous vice Ross, I love it.
    It's not the destination but the journey you take to get there that matters.

  6. The Following User Says Thank You to Canobi For This Useful Post:

    rossbotics (Apr 18, 2018)

  7. #4
    Supporting Member
    Join Date
    Jun 2012
    Posts
    66
    Thanks
    157
    Thanked 71 Times in 32 Posts

    Harvey Melvin Richards's Tools
    Great idea, very well done. Thanks for the excellent photo documentation.

  8. The Following User Says Thank You to Harvey Melvin Richards For This Useful Post:

    rossbotics (Apr 18, 2018)

  9. #5
    Supporting Member ncollar's Avatar
    Join Date
    Oct 2012
    Posts
    354
    Thanks
    23
    Thanked 180 Times in 126 Posts
    Doug
    That is toooo cooool. You make me want a surface grinder real bad.
    One day I will get lucky I guess.
    Beautiful work
    Nelson

  10. The Following User Says Thank You to ncollar For This Useful Post:

    rossbotics (Apr 18, 2018)

  11. #6
    Supporting Member Toolmaker51's Avatar
    Join Date
    Feb 2016
    Location
    Midwest USA
    Posts
    5,331
    Thanks
    7,042
    Thanked 2,981 Times in 1,893 Posts

    Toolmaker51's Tools
    Lots of good features, none I can think to add. Very best is elimination of the typical bar handle, which are always in the way of something...
    To aspiring builders....be certain front of back [rigid] jaw protrudes beyond the base. Also engineer in the offset needed to clear mounting hardware and whatever the edge of your bench is made of.
    Gunsmiths and most other bench-men mount vises with a bar is clamped in vise; locating the mount so jaw and a sturdy bench edge are in a single plane. Adds a good deal of non-flex rigidity when bending.
    Sincerely,
    Toolmaker51
    ...we'll learn more by wandering than searching...

  12. The Following 3 Users Say Thank You to Toolmaker51 For This Useful Post:

    Paul Jones (Apr 18, 2018), rossbotics (Apr 18, 2018), volodar (Apr 19, 2018)

  13. #7
    Content Editor
    Supporting Member
    DIYer's Avatar
    Join Date
    Aug 2013
    Posts
    3,056
    Thanks
    772
    Thanked 1,852 Times in 1,653 Posts

    Thanks rossbotics! We've added your Toolmakers Bench Vise to our Vises category,
    as well as to your builder page: rossbotics's Homemade Tools. Your receipt:


  14. #8
    Jon
    Jon is online now Jon has agreed the Seller's Terms of Service
    Administrator
    Supporting Member
    Jon's Avatar
    Join Date
    Jan 2012
    Location
    Colorado, USA
    Posts
    25,546
    Thanks
    7,952
    Thanked 38,795 Times in 11,326 Posts
    This is the third rossbotics vise we've seen. The other two, also excellent builds:


  15. The Following User Says Thank You to Jon For This Useful Post:

    rossbotics (Apr 18, 2018)

  16. #9
    PJs
    PJs is offline
    Supporting Member PJs's Avatar
    Join Date
    Sep 2014
    Location
    Northern CA
    Posts
    1,841
    Thanks
    8,337
    Thanked 1,118 Times in 718 Posts

    PJs's Tools
    Surgical Doug! Looks like it belongs in a clean room. Is that a 2g left hand thread? That coated tap must have been pricey. Loved the way you ground the tool and used the broach for the hex...tools to make tools.

    One can only aspire to your standards.

    Thank you for the great pics and build!

    PJ
    ‘‘Always do right. This will gratify some people and astonish the rest.’’
    Mark Twain

  17. The Following User Says Thank You to PJs For This Useful Post:

    Paul Jones (Apr 18, 2018)

  18. #10
    Supporting Member rossbotics's Avatar
    Join Date
    Dec 2013
    Location
    Florida
    Posts
    730
    Thanks
    1,019
    Thanked 1,645 Times in 402 Posts

    rossbotics's Tools
    LOL, thanks PJ.
    Actually the tap is a 1/2"-10 R.H. HSS Acme but it didn't say the thread limit no where, I just cut my thread for a nice fit, it was only 29.95 with free shipping from e-bay, I didn't mind buying the tap cause I have a couple other jobs for it later on.
    I'm satisfied with the outcome of the project
    Thanks for everyone's comment

    Doug
    Last edited by rossbotics; Apr 19, 2018 at 01:31 AM.
    Comments are always welcome
    Doug

    Subscribe to my you tube channel

    https://www.youtube.com/channel/UCDD..._as=subscriber


    Tool Plans for Sale by rossbotics


  19. The Following User Says Thank You to rossbotics For This Useful Post:

    PJs (Apr 19, 2018)

Thread Information

Users Browsing this Thread

There are currently 1 users browsing this thread. (0 members and 1 guests)

Bookmarks

Posting Permissions

  • You may not post new threads
  • You may not post replies
  • You may not post attachments
  • You may not edit your posts
  •