
 LinkBack URL
 About LinkBacks


When it comes to welding cast iron there are a few critical procedures to follow.
Depending on the grade of cast iron these procedures can vary greatly
In this discussion I am going to explain a few stead fast rules to welding any cast iron but mostly for the cleaner grade that is used to make 6000 PSI hydraulic valve bodies.
First off you need to determine if the crack is even in an area which makes it feasible to weld or if it would be cheaper to just replace it
If a crack is in any part of the internal area you might as well huck it in with the recyclables. I'm not saying that it cannot be repaired since I have done just that on extremely rare next to impossible to replace castings .
Never easy and never cheap I have had to cut away perfectly good areas to get at the crack then weld those cut outs back in. So you will have to be your own judge jury and executioner on something like that.
Now to start off after we have identified the effected area/s we need to determine if the crack could possibly extend while the repair process is underway.
The best way to prevent a crack from extending beyond where it is would be to carefully drill a small hole at each end of the crack. This will serve as a stress reliever once you start welding.
Many cracks in high pressure castings are caused by a very small casting flaw. Some of which are nearly impossible to find without ex-ray, magnetic resonance powder radiation dies and so forth.But most folks are not going to have access to the sophisticated often very expensive equipment for that sort of testing.
We have grinders torches drills diesel or possibly alcohol ro locate cracks with.
Next is grinding and CLEANING or vise versa but just like welding anything else clean is more than golden it is absolute.
Once I have used my die grinder to gouge out a nice deep furrow keeping the crack as close to the center as possible I will visually inspect again and again before proceeding further.
Next I lay out the tools I know I will need. When using stick electrodes N naturally need the stinger the ground the rods my helmet ( Auto dark is preferred) instead of a chipping hammer I prefer to use my needle scaler . Not everyone has one so I will explain later how to get by without one.
Now I'm one of those guys who are not bothered by sparks and have never had to worry about UV radiation on my skin so most of the time I might not even be wearing a long sleeve shirt and half the time I don't even wear gloves I don't recommend this as a practice. When I am welding something that requires a lot of heat and for a long time you bet I put on a long sleeve shirt and wear gloves. I'm not that guy who wore the blue tights and red cape there are a few things other than kypronite that can effect me much to the disbelief of my wife. Don't tell her though.
OK enough driving around the deep end.
On this valve after cleaning and grinding I warmed the area slightly then proceeded to make small wet puddle welds.
My definition of wet puddle: having the right amount of heat to create even flow which spreads out 1 1/2 to 2 times the thickness of the rod without side to side oscillation.
Never make long stringer passes and keep the rod as close to the puddle that a stabilized arc will allow.
Now here is a problem on Hydraulic bodies too much heat will distort the precision machining inside also I sometimes do not completely disassemble the body leaving check valves and spool valves intact. under fittings and in check valves as well as the seals at the ends of the spool valves there are usually delicate non metal items which are greatly effected by heat IE nylon, viton,rubber and other substances cannot take a lot of heat so your welding process must take into consideration just how hot the casting is going to get while you are welding it.
Anyway after I warm the area slightly usually just enough to cause the freshly die ground area to discolor. I immediately weld about 1 to 1 1/2 inches then use my needle gun to anneal the weld for a bout 30 to 45 seconds then make another pass and do the needle gun thing again. this helps to stabilize the molecules in both the casting and the weld creating a better bond. Much like a Blacksmith would do when forge welding to pieces together except he must have his items white hot and nearly to the dripping state then he hammers and hammers and hammers some more before reheating and starting the process over again.
We cannot afford that much heat plus the marvels of electric welding has made it possible for us to concentrate our heat zone to a much smaller area.
Now I said I would explain how to do this without a needle gun. All you have to do is have a good wooden handled chipping hammer with a medium dull point. grip the hammer loosely between the thumb and first 2 fingers just a little to the rear of the balance point then rock your hand as if you were shaking the ice in a drink, allowing the tip of the hammer to work all along the weld a 2" long wrld is going to need a full minute and a half of annealing over its entire surface. Don't strike the weld hard and don't think you can shortcut by using a ball peen hammer.
My needle gun has 11 needles in it and strikes at a rate of over 2000 beats per minute. Your chipping hammer has 1 point and if you are proficient with it, and can use it as well as you should be able to use a wood handled planishing hammer you can expect around 1000 to 1200 beats per minute, you do the math.
You then continue making small wet passes and hammering your brains out until the crack is fully repaired.
Now I omitted the type of filler because again this depends somewhat on the grade of gast iron but for all around weld quality from the poorest to the highest grade gray cast I'm not talking about camshafts or crankshafts here. White cast is yet another animal, it can be successfully mended the process shares some similarities with the exception you need to maintain s near constant heat in the parts as possible and at much higher temperatures. Did I say much higher? make that a whole lot higher. Plus you will need a full blown heat treat facility at arms reach.
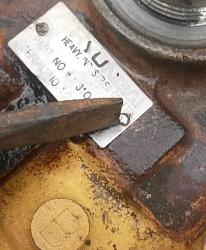
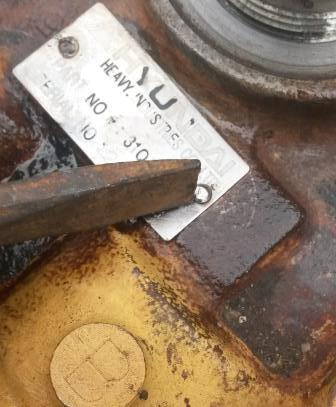
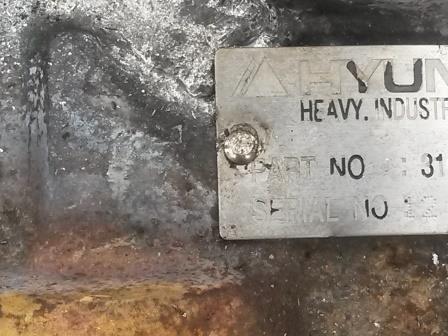
After inspection and cleaning carefully remove the drive screws that hold any data tags if they are in the effected areas
I sometimes use the corner point of a reasonably sharp chisel against the edge of the screw These things are like rivets in a way but they are almost threaded with a very steep TPI just turning them about 1/4 turn will loosen them enough to grab them with a pliers so you can twist and remove them. Unless you have a ready supply of them be sure to save them for reinstall. Data tags may not mean much to you the repairman but TRUST ME they are very important to someone.
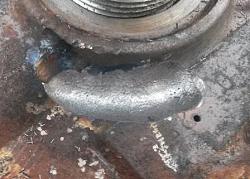
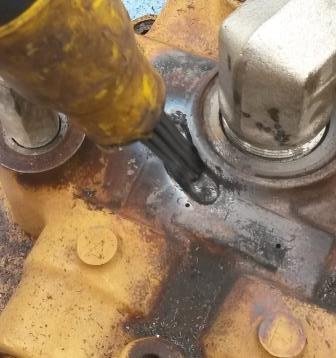
now that the area is ground deep enough and wide enough it is ready to weld. Notice the grove is as wide as it is deep and smooth.
Note the needle scaler I'm not sure how many passes I have made at this point but the process is the same for each one.
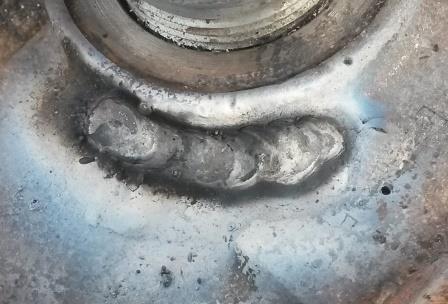
this is a pass before annealing with the needle gun
This is what it looks like with a few strikes just enough to remove the flux
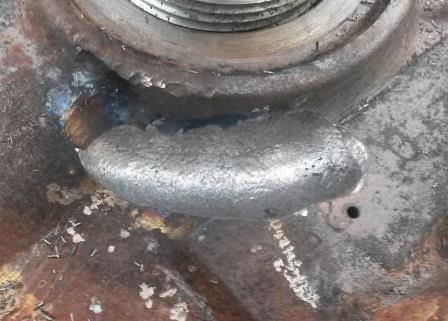
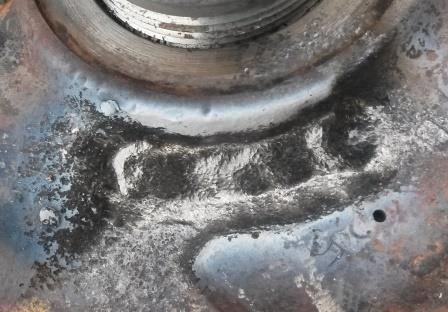
After 10000 strikes
Job done
OK my choice of fillers was AMTEC 133 1/8" for this job
I hope this helps someone in the future


 Reply With Quote


Bookmarks