Free 186 More Best Homemade Tools eBook:  
Get 2,000+ tool plans, full site access, and more.

User Tag List

Page 3 of 5 FirstFirst 1 2 3 4 5 LastLast
Results 21 to 30 of 43

Thread: Wip...

  1. #21
    Supporting Member Tuomas's Avatar
    Join Date
    Jun 2016
    Location
    Jyväskylä Finland
    Posts
    832
    Thanks
    558
    Thanked 1,837 Times in 507 Posts

    Tuomas's Tools
    Quote Originally Posted by Frank S View Post
    An amassing build. I own 8 angle grinders 2 9 inch a 7 inch 1 5 inch and the rest are 4 1/2 inch all of them have different types of grind wheels, cobs, brushes, and sanding disks on them I figure that I would wear out everyone of them trying to grind away that much materiel.
    I must say you have perfected the art of using an angle grinder.
    Thanks Frank.

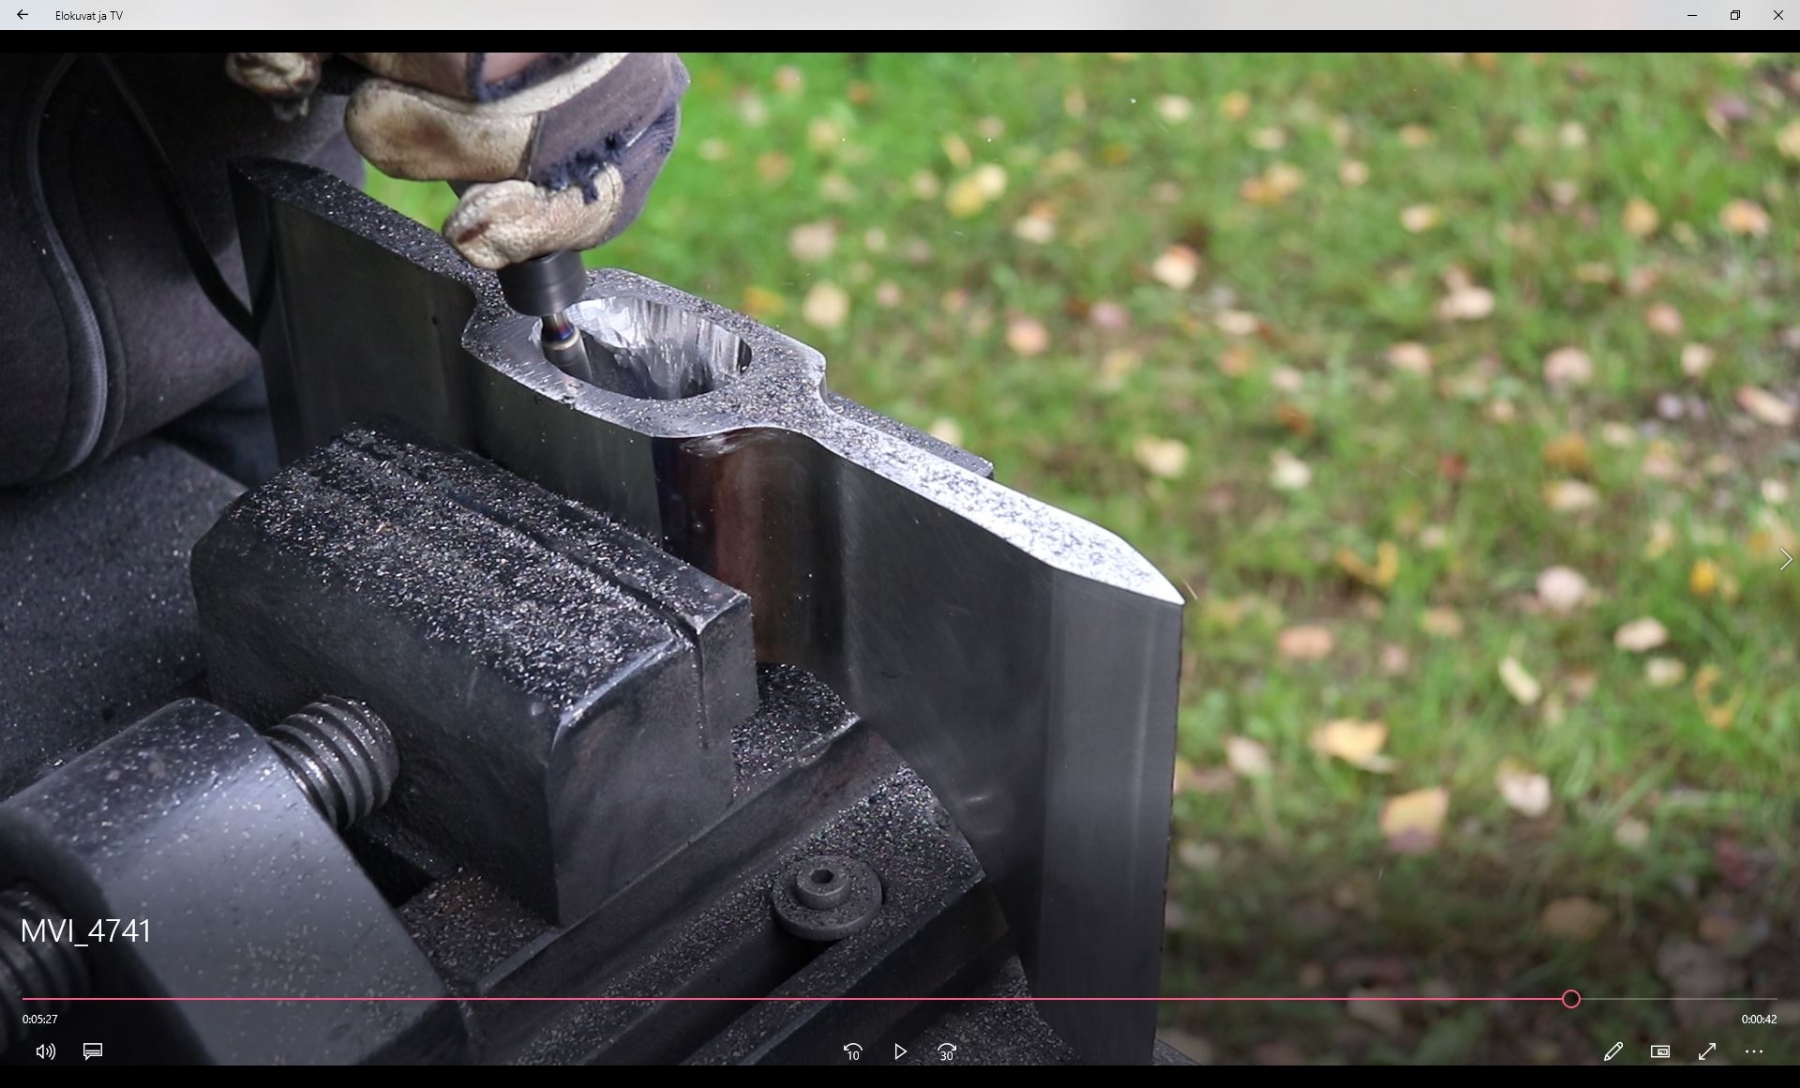
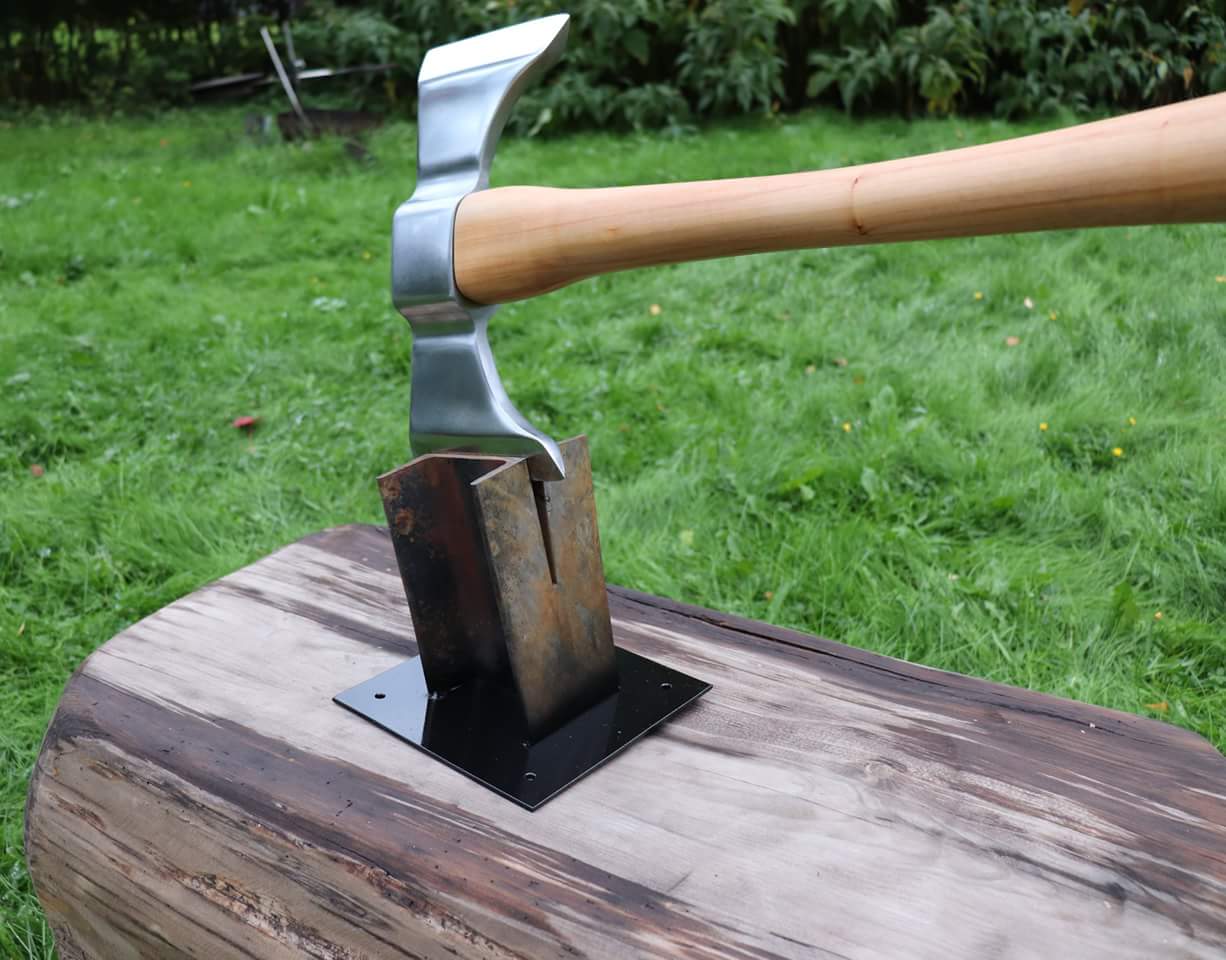
    I used one 1.6mm cut off wheel.
    Partly one 2mm cut off wheel
    One 36 grit fiber sanding pad and partly one 60 grit.
    Partly one 4.5mm grinding wheel
    And just a little from one 80 grit flap wheel.

    Four 40 grit sanding drums..

    About 10 pcs different grade sanding pads for finishing.

    All those are 3M Cubitron 2 brand.
    Didn't supposed to advertise, but those really lasts well.

    Price for the used accessory is about 20 $.
    Of course these sanding backing pads costs more than that 20$
    But i can use them in the future too, so i don't count them.

    https://www.3m.com/3M/en_US/company-...94857497&rt=r3

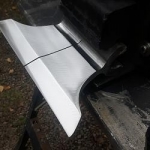
    For sanding grooved parts i used these softener pads between sanding paper and pad.

    https://www.3m.com/3M/en_US/company-...8710948&rt=rud

    We use those at work too, those are great when you need to finish interiors of the round objects. It follows grooved surface and sands from larger area.

    I got those 3M products for free, but i checked that when bought price would be around 20 $ for the accessory used. 20-30$ more for the pads and backings.

    186 More Best Homemade Tools eBook
    Last edited by Tuomas; Sep 19, 2018 at 01:14 AM.

  2. The Following User Says Thank You to Tuomas For This Useful Post:

    Frank S (Sep 18, 2018)

  3. #22
    Supporting Member Tuomas's Avatar
    Join Date
    Jun 2016
    Location
    Jyväskylä Finland
    Posts
    832
    Thanks
    558
    Thanked 1,837 Times in 507 Posts

    Tuomas's Tools
    Quote Originally Posted by PJs View Post
    Quite the Handsome Axe Tuomas! One day there will be a bronze of you and your angle grinder somewhere in prominence in Finland overlooking a Grand industrial park!

    That belt grinder was a Beautiful build!!! Was also Awed by the 70T capacity CMM in the work video...Holy Kadoodle. Definitely Heavy Industry by anyone's book.

    Thanks for sharing the build and your work video.
    Thanks buddy.

    Working on heavy industry is sometimes bad thing too..
    When you need to do something small.
    We are allowed to use machines in our spare time, but those are too big for most builds i'd like to make. Roller bender that can bend 7" steel is useless because 4 feet is the smallest radius that it makes.

    That was the actual reason that made me to build my own workshop. Otherwise i wouldn't have needed to.

    2000 Tool Plans

  4. The Following User Says Thank You to Tuomas For This Useful Post:

    PJs (Sep 18, 2018)

  5. #23
    Supporting Member will52100's Avatar
    Join Date
    Oct 2015
    Location
    Bassfield, MS
    Posts
    122
    Thanks
    748
    Thanked 71 Times in 36 Posts

    will52100's Tools
    Nice axe, and great finish, I hadn't thought of doing it that way. If you don't mind a suggestion, on the handle, or any wood handle for that mater, leave a little wood above the head, just a 1/16" to 1/8" sticking out. It'll basically make sure the handle never gets loose. Wood fiber has a spring back and the little sticking out expands and helps lock the handle in the head.
    courtneyknives.net

  6. The Following 2 Users Say Thank You to will52100 For This Useful Post:

    PJs (Sep 18, 2018), Toolmaker51 (Sep 18, 2018)

  7. #24
    Supporting Member Tuomas's Avatar
    Join Date
    Jun 2016
    Location
    Jyväskylä Finland
    Posts
    832
    Thanks
    558
    Thanked 1,837 Times in 507 Posts

    Tuomas's Tools
    Quote Originally Posted by will52100 View Post
    Nice axe, and great finish, I hadn't thought of doing it that way. If you don't mind a suggestion, on the handle, or any wood handle for that mater, leave a little wood above the head, just a 1/16" to 1/8" sticking out. It'll basically make sure the handle never gets loose. Wood fiber has a spring back and the little sticking out expands and helps lock the handle in the head.
    Suggestions are allways welcome.
    Here we use this kind of method..

    Wip...-homemadetools-soikkeli.jpg

    End of the axe is shaped to cone, spline spreads the end of the handle against that cone shape. Spline is secured with epoxy.
    It gives firm and solid connection. Videos are allways tricky, i passed that point too fast.

  8. The Following 2 Users Say Thank You to Tuomas For This Useful Post:

    Toolmaker51 (Sep 18, 2018), will52100 (Sep 18, 2018)

  9. #25
    Supporting Member Tuomas's Avatar
    Join Date
    Jun 2016
    Location
    Jyväskylä Finland
    Posts
    832
    Thanks
    558
    Thanked 1,837 Times in 507 Posts

    Tuomas's Tools
    Quote Originally Posted by rlm98253 View Post
    Exceptional build, Tuomas. Also enjoyed seeing where you normally work. Awesome skills and machinery.
    Thank you very much!

  10. #26
    Supporting Member will52100's Avatar
    Join Date
    Oct 2015
    Location
    Bassfield, MS
    Posts
    122
    Thanks
    748
    Thanked 71 Times in 36 Posts

    will52100's Tools
    That will certainly help, but with use and moister changes in the environment it can work loose as the wood fibers compress over time. It will still work loose, not off. Took me a while to figure out, but after talking with a blacksmith well known for his hammers and axes I haven't had any more issues with a head getting loose. Leaving a little sticking proud of the eye is just an additional lock and added insurance. All of my axes and hammers have a taper at the eye, but if I don't leave a little wood proud of the eye they will work loose over time, even the ones I tried with epoxy on the end. Part of that is the high humidity we have here part of the time, and dry spells later. YMMV.
    courtneyknives.net

  11. The Following User Says Thank You to will52100 For This Useful Post:

    Tuomas (Sep 19, 2018)

  12. #27
    Content Editor
    Supporting Member
    DIYer's Avatar
    Join Date
    Aug 2013
    Posts
    3,056
    Thanks
    772
    Thanked 1,852 Times in 1,653 Posts


    Thanks Tuomas! We've added your Axe to our Miscellaneous category,
    as well as to your builder page: Tuomas's Homemade Tools. Your receipt:


  13. #28
    Supporting Member DrByte's Avatar
    Join Date
    Aug 2015
    Posts
    26
    Thanks
    28
    Thanked 56 Times in 14 Posts

    DrByte's Tools
    Great project! You sir are one hell of a craftsman! How much does the axe weigh? I spent a couple of weeks in Finland back in the late 1990s and saw a lot a fine skills while there and you are one of the best!

  14. The Following User Says Thank You to DrByte For This Useful Post:

    Tuomas (Sep 19, 2018)

  15. #29
    Supporting Member Tuomas's Avatar
    Join Date
    Jun 2016
    Location
    Jyväskylä Finland
    Posts
    832
    Thanks
    558
    Thanked 1,837 Times in 507 Posts

    Tuomas's Tools
    Quote Originally Posted by DrByte View Post
    Great project! You sir are one hell of a craftsman! How much does the axe weigh? I spent a couple of weeks in Finland back in the late 1990s and saw a lot a fine skills while there and you are one of the best!
    It weights about 10kg with handle. Little less, but more than 9. My scale ain't very accurate.

    Thank you very much. Here is many different traditions about handgrafts.. knife and lure making is very popular.. i make my own lures too, like most from those fishermans i know.

  16. The Following User Says Thank You to Tuomas For This Useful Post:

    PJs (Sep 19, 2018)

  17. #30
    Supporting Member Tuomas's Avatar
    Join Date
    Jun 2016
    Location
    Jyväskylä Finland
    Posts
    832
    Thanks
    558
    Thanked 1,837 Times in 507 Posts

    Tuomas's Tools
    Made a stand for it.

    Wip...-fb_img_1537376293250.jpg


    Step 1. Cut 10" long piece of H-beam.

    Step 2 . Smash axe to one end of it.

    Step 3. Weld a little mild steel plate to other end of the H-beam.

    Very simple but working solution.
    Last edited by Tuomas; Sep 19, 2018 at 02:08 PM.

  18. The Following User Says Thank You to Tuomas For This Useful Post:

    will52100 (Sep 21, 2018)

Thread Information

Users Browsing this Thread

There are currently 1 users browsing this thread. (0 members and 1 guests)

Bookmarks

Posting Permissions

  • You may not post new threads
  • You may not post replies
  • You may not post attachments
  • You may not edit your posts
  •