3 Attachment(s)
35 buck Chinese Machinist's Level overhaul and cralibation (!)
No pause for the wicked:
Needing an accurate and repeatable Machinist's level for some time, but being a Swedish cheapskate,
I didn't particularly want to part from the 100-150ish bucks necessary to get one.
-Lo and behold: there IS actually one to be found for 35-ish USD at a Chinese web vendor site!
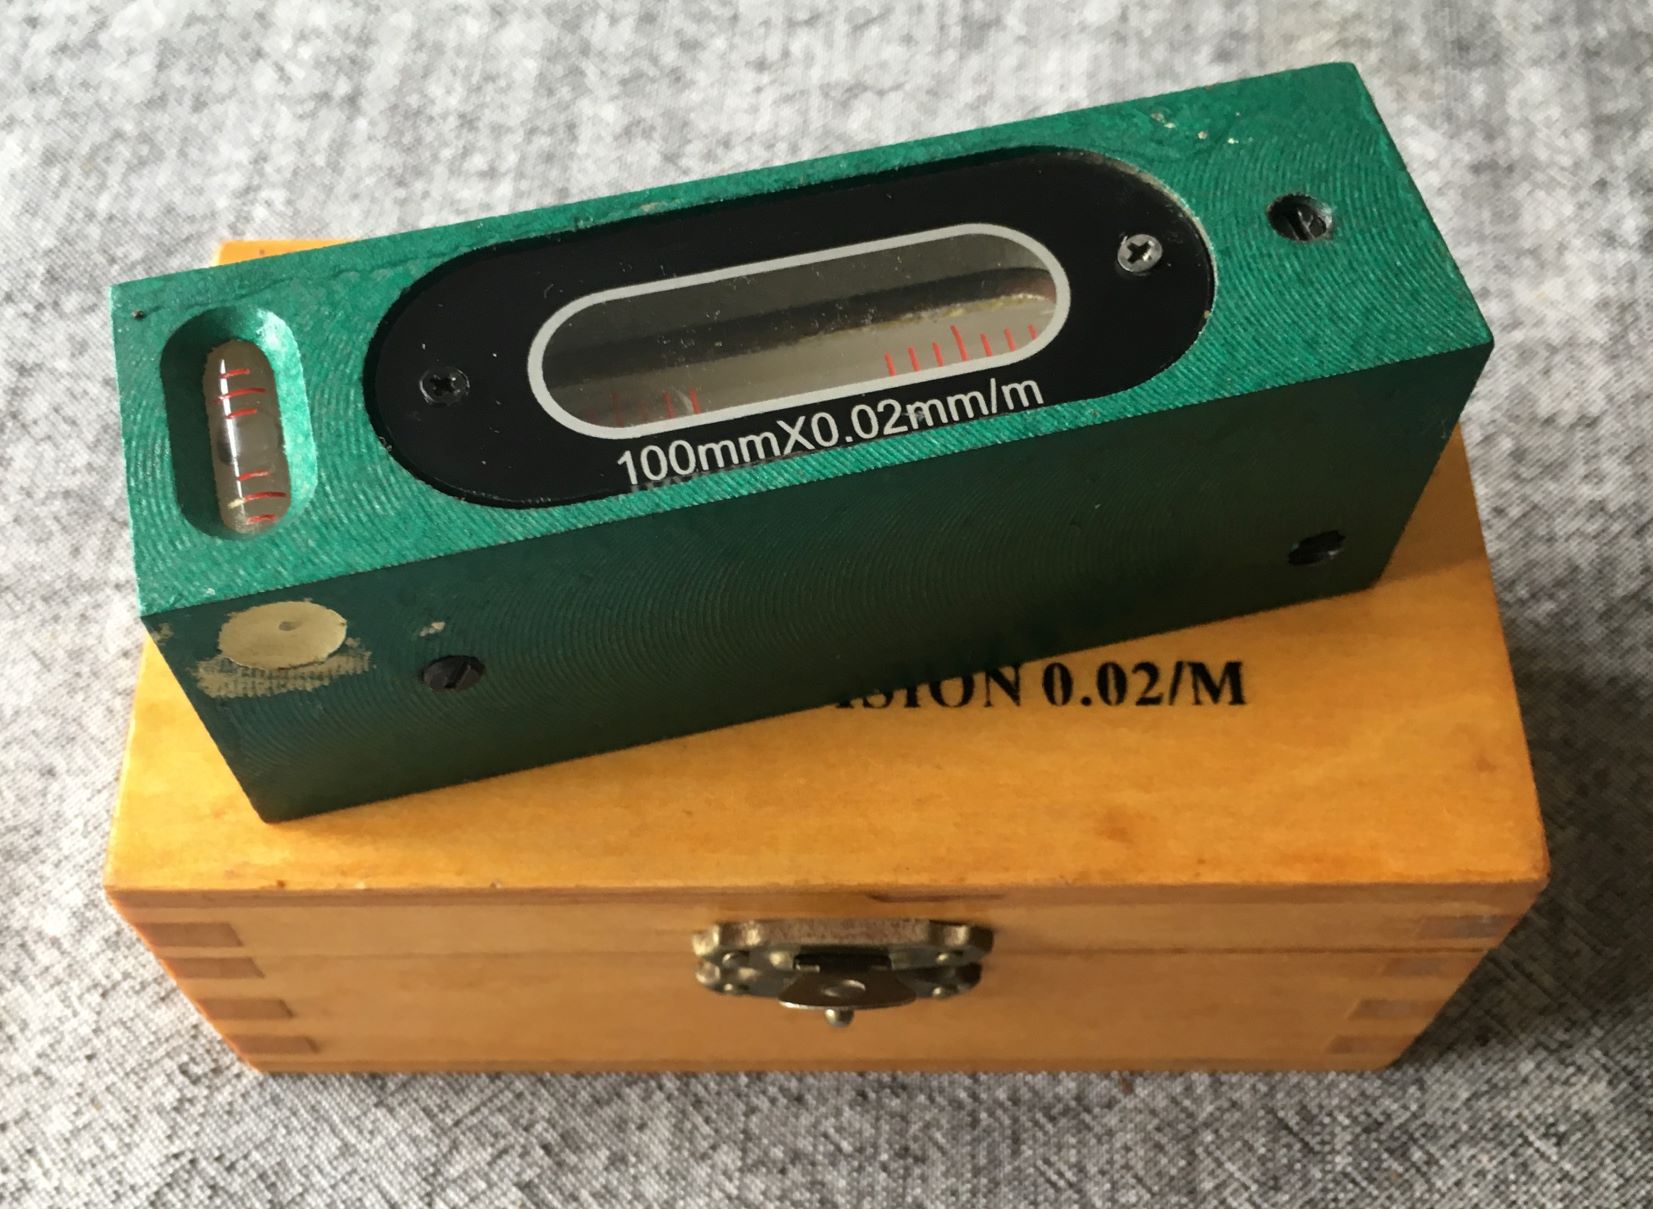
Attachment 30808
-Now, is this to good to be true, you may rightly ask?
-Well, this might seem simple and straightforward - but wait 'til I've explained!
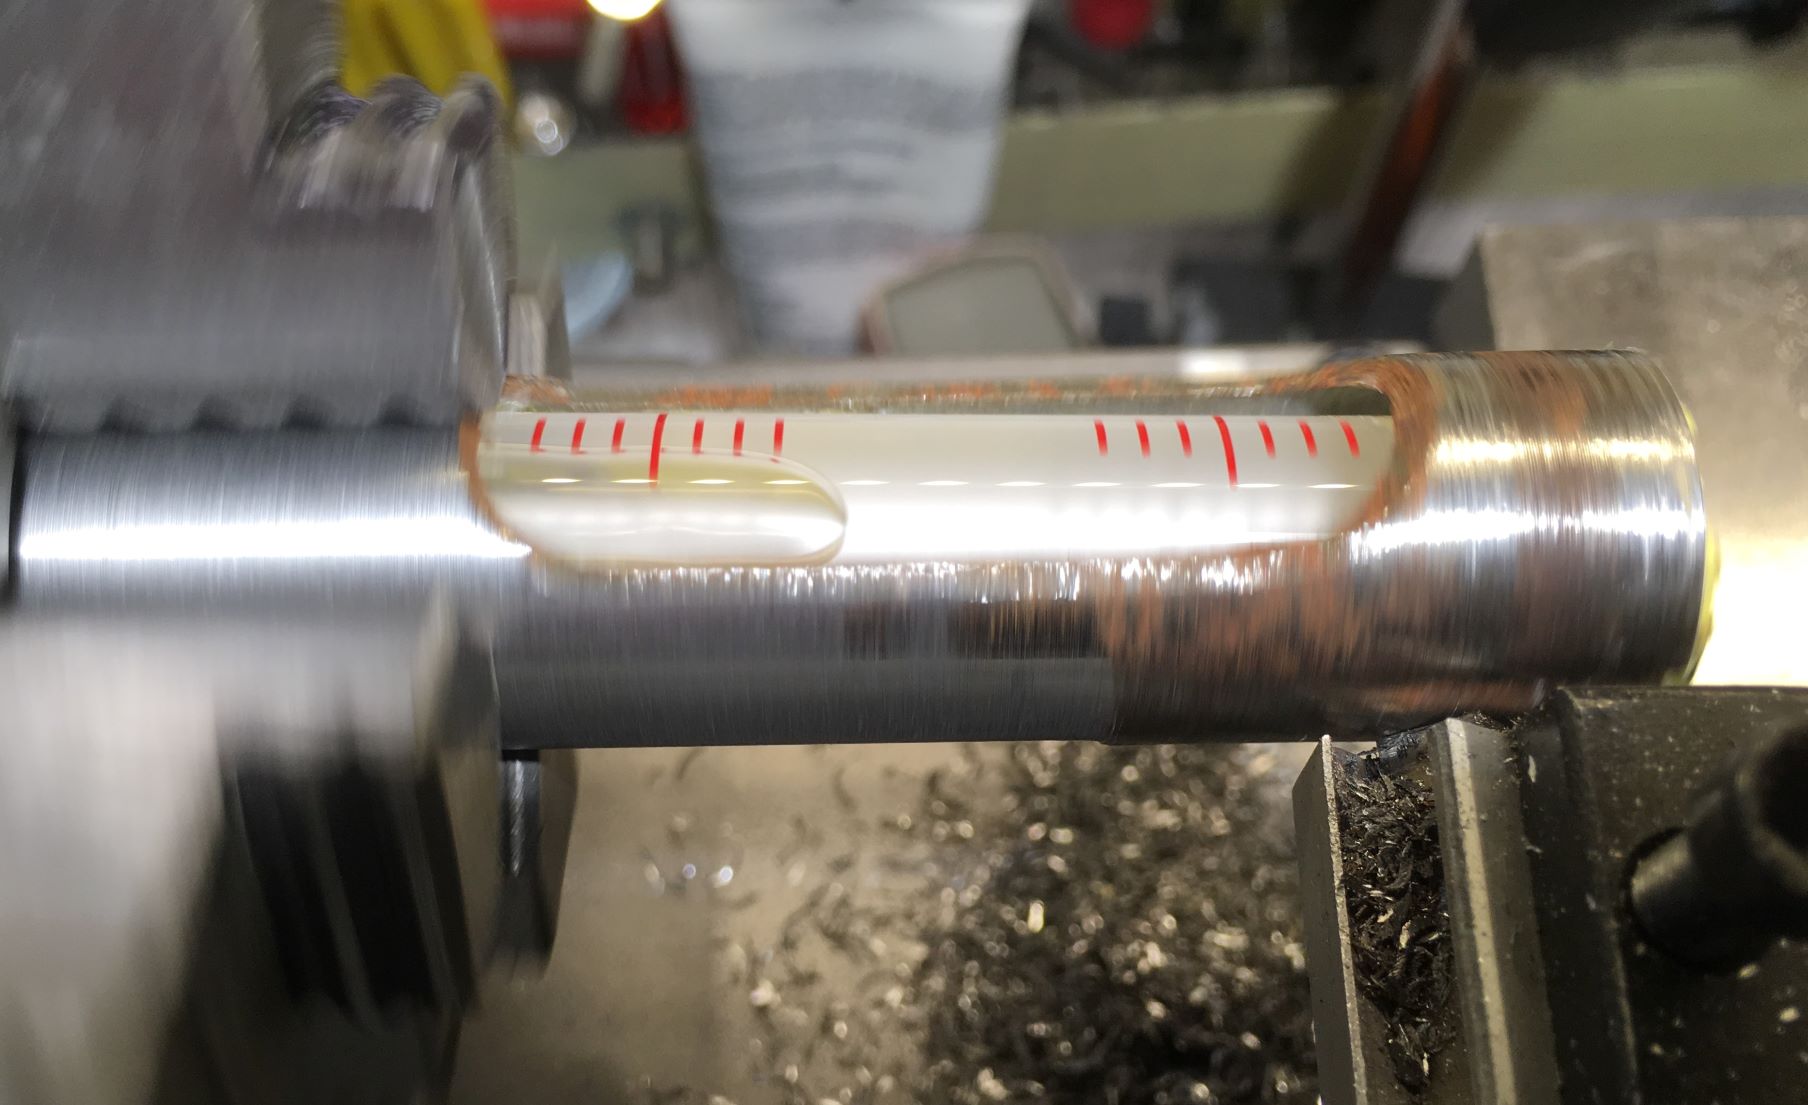
First: It IS within stated specs in the pic above, confirmed relatively via a 1 m long DIY sine bar & feeler gauges:
2 hundreds of a mm (per div) in 1 meter is darned good at that price, equals 1 in 50 000 (any measurement system).
You really have to wait for the bubble to set, and even my weight shifting on the
(wood on concrete) floor below the bench influences it...
Machining of the 4 x 1 x 1" tool steel house, the paint choice & job + the fixation of the tiny, coarse vial on top is a bit sloppy,
but its foot with the V-groove is excellently ground - checked by its consistent bluing from my surface plate.
There were also some ill-fitting black rubber "butt-plugs" at the tool ends.
Todays assignment was to try out the DIY 3-point absolute leveling system I've kludged together for my surface plate,
taping up an angle to rest the level against: Check, twist the level, check and turn knobs. Rinse and repeat - Simple, right?
Started out to measure, soon to find that the calibration screws weren't even close enuff for comfort.
There's 5 of them, two horizontal pivot set screws at the tiny vial's end, and three at the other, 120 degrees apart,
for vertical (and side - if ever needed...) alignment. The latter ones didn't have the travel enuff to zero it out. Dang.
So - opening up and checking for a remedy I found all this inside:
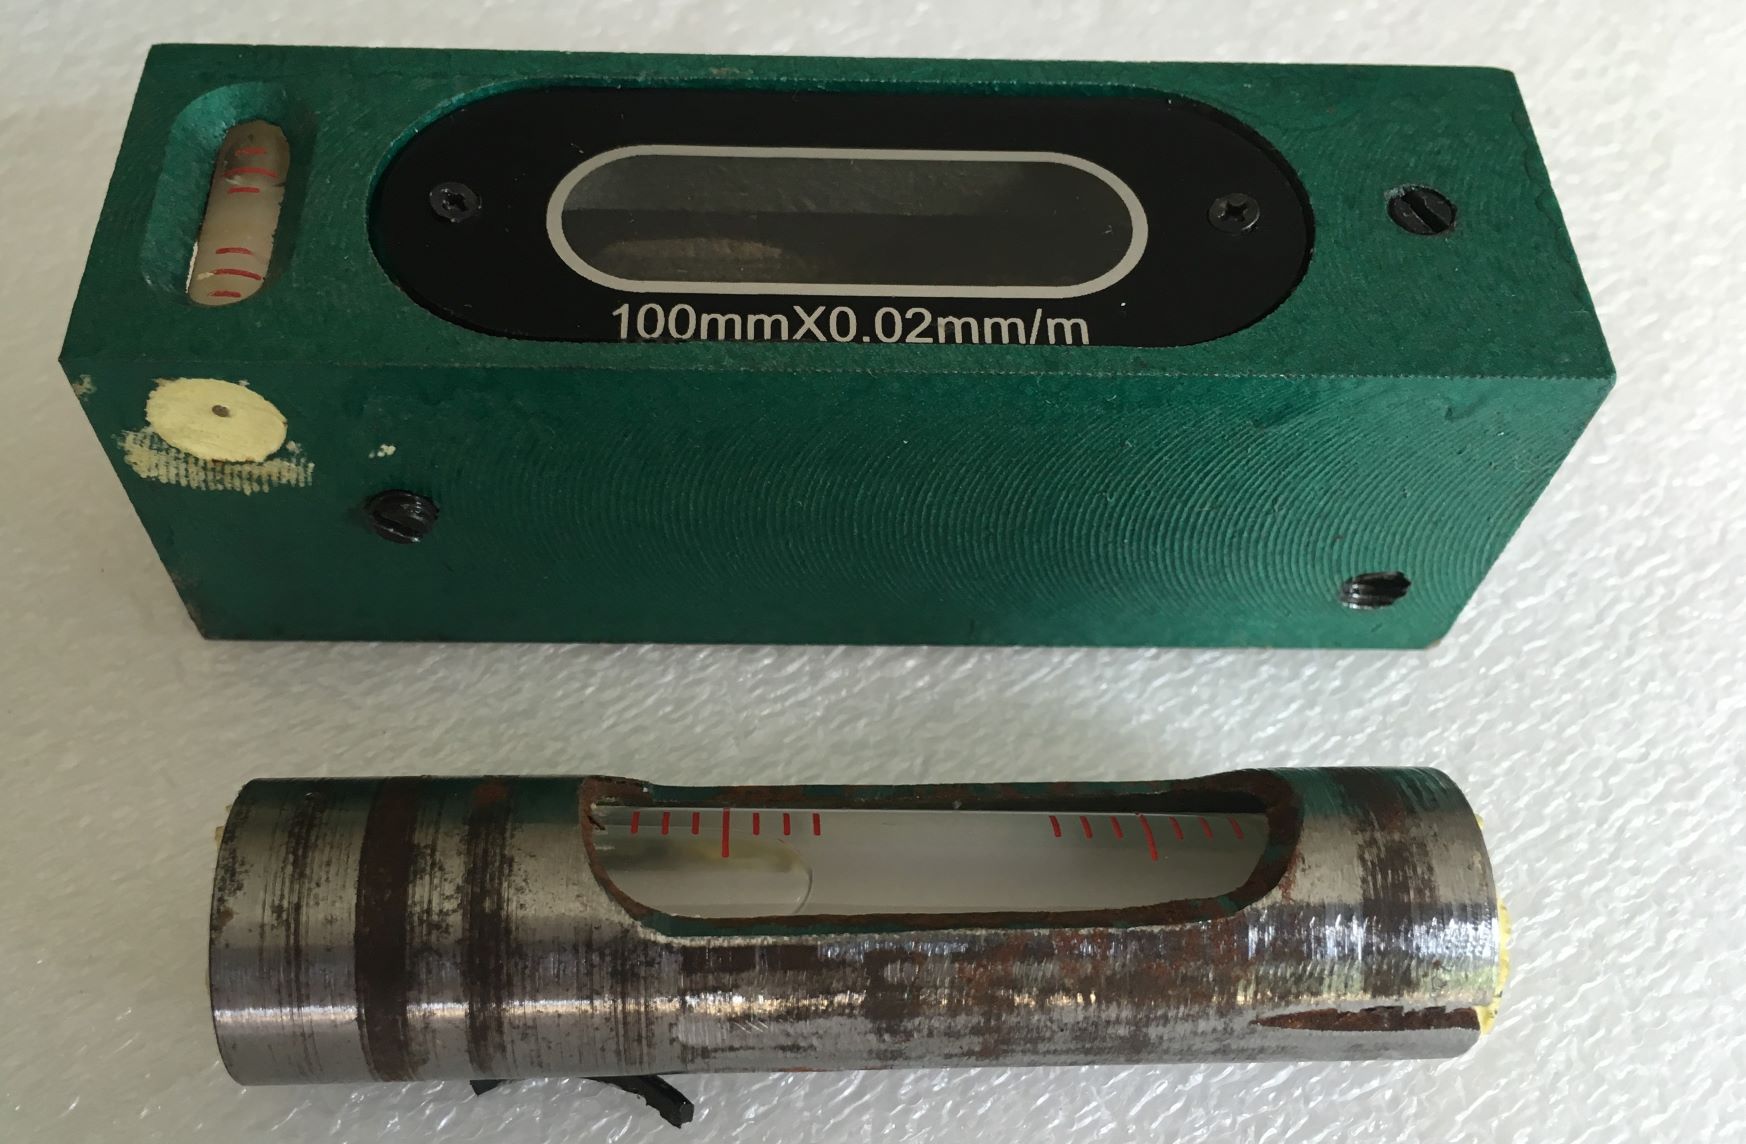
Attachment 30809
(Yeah - I've turned the vial tube over ends...)
The vial's fitted (by something yellowish, looking like molten sulphur...) inside a 3/4" steel tube (non-stainless...)
within the house's 20,5 mm bore (also rusty where the paint haven't run), so given the two horizontal pivot points,
the 3" long vial tube should have a plentiful movement of +/- 0,7 mm at the other end, right?
NOTE: I'm NOT sniveling over the lousy turning, poor grinding or the rough hacksawing of the tube, right?
This tool, though produced with the immense possibilities of achieveing an excellent value for money, misses out a bit:
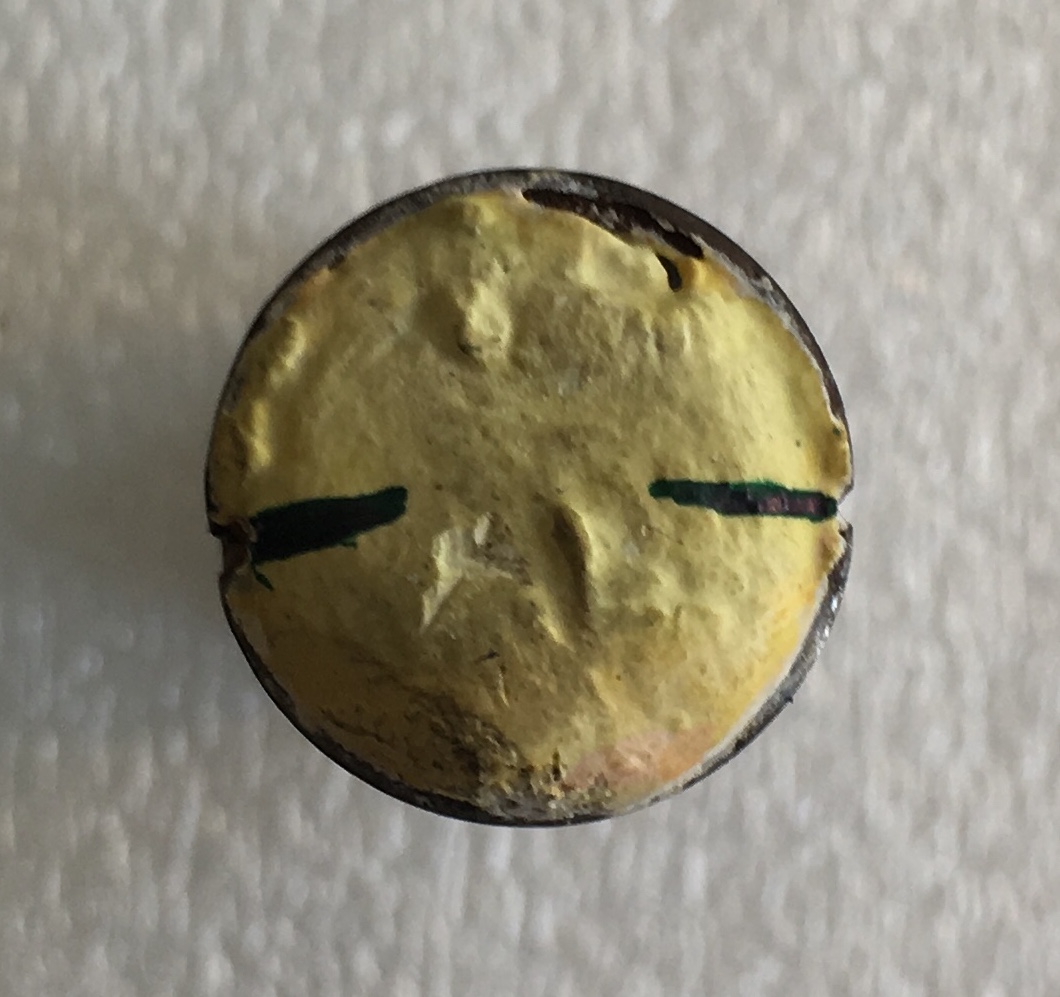
Attachment 30811
This end view of the vial tube would've been totally uncalled for, hadn't it been for the 2 grooves' horizontal positions.
I took the liberty of Sharpie-extending the grooves' angles inwards, to show their "peripheral offset from intention"...
Given the hacksawed grooves' offset downwards from center, the tube's top rests darned close to the bore,
thus eliminating the small nudge needed to zero it out, as the tube's other end jams to the bore's ceiling.
What to do?
1) Turn the entire tube clean a few thou, drill 2 tiny holes for the pivot screws at the right spots. Rustproof. Remount. or:
2) Fit entire house in 4-jaw, bore out hole with a compound taper to accomodate more travel. Rustproof inside.
Both methods having slight disadvantages: Mounting the vial tube in a collet and turning it feels kinda anxious,
but OTOH hard-turning the housing feels a bit overkill.
"Work order" as of now:
1) Turn/ clean up the vial tube, radially drill two holes for set screws at the right places lengthwise and centered. Rustproof.
2) Wrap emery round a tight-fitting wooden/ plastic dowel, run round and down the house's hole. Rustproof.
3) Remount the shooting works and cralibate it. Enamel the screws.
4) Rejoice in all the achieved cheap results, and use for intended purposes.
To be continued...
2 Attachment(s)
"Assembled Kit" Chinese Machinist's level fixup cont'd:
-Chucked the vial tube in the 4-jaw for an assumed quick cleanup.
20 mm mystery metal tube with a sturdy 2 mm wall thickness - how hard can it be?
Clocked it in, showed that the reason for the horrendous original grinding job probably
was that it's been ground lengthwise, top and bottom to achieve better adjustment clearance.
It would then have been just really convenient if they'd cut the two pivot screw slots correctly,
(i. e. 180 deg apart & horizontally) to make full use of the 3 adjustment screw's clearance at the other end.
Now when that isn't an option, I'll eventually have to set up my (nearly finished) toolpost radial drill,
and centre drill a pair of tiny dimples/ holes for the pointed pivot screws to sit in.
Back to tonight's work: As the top and bottom parts of the tube has been ovally ground,
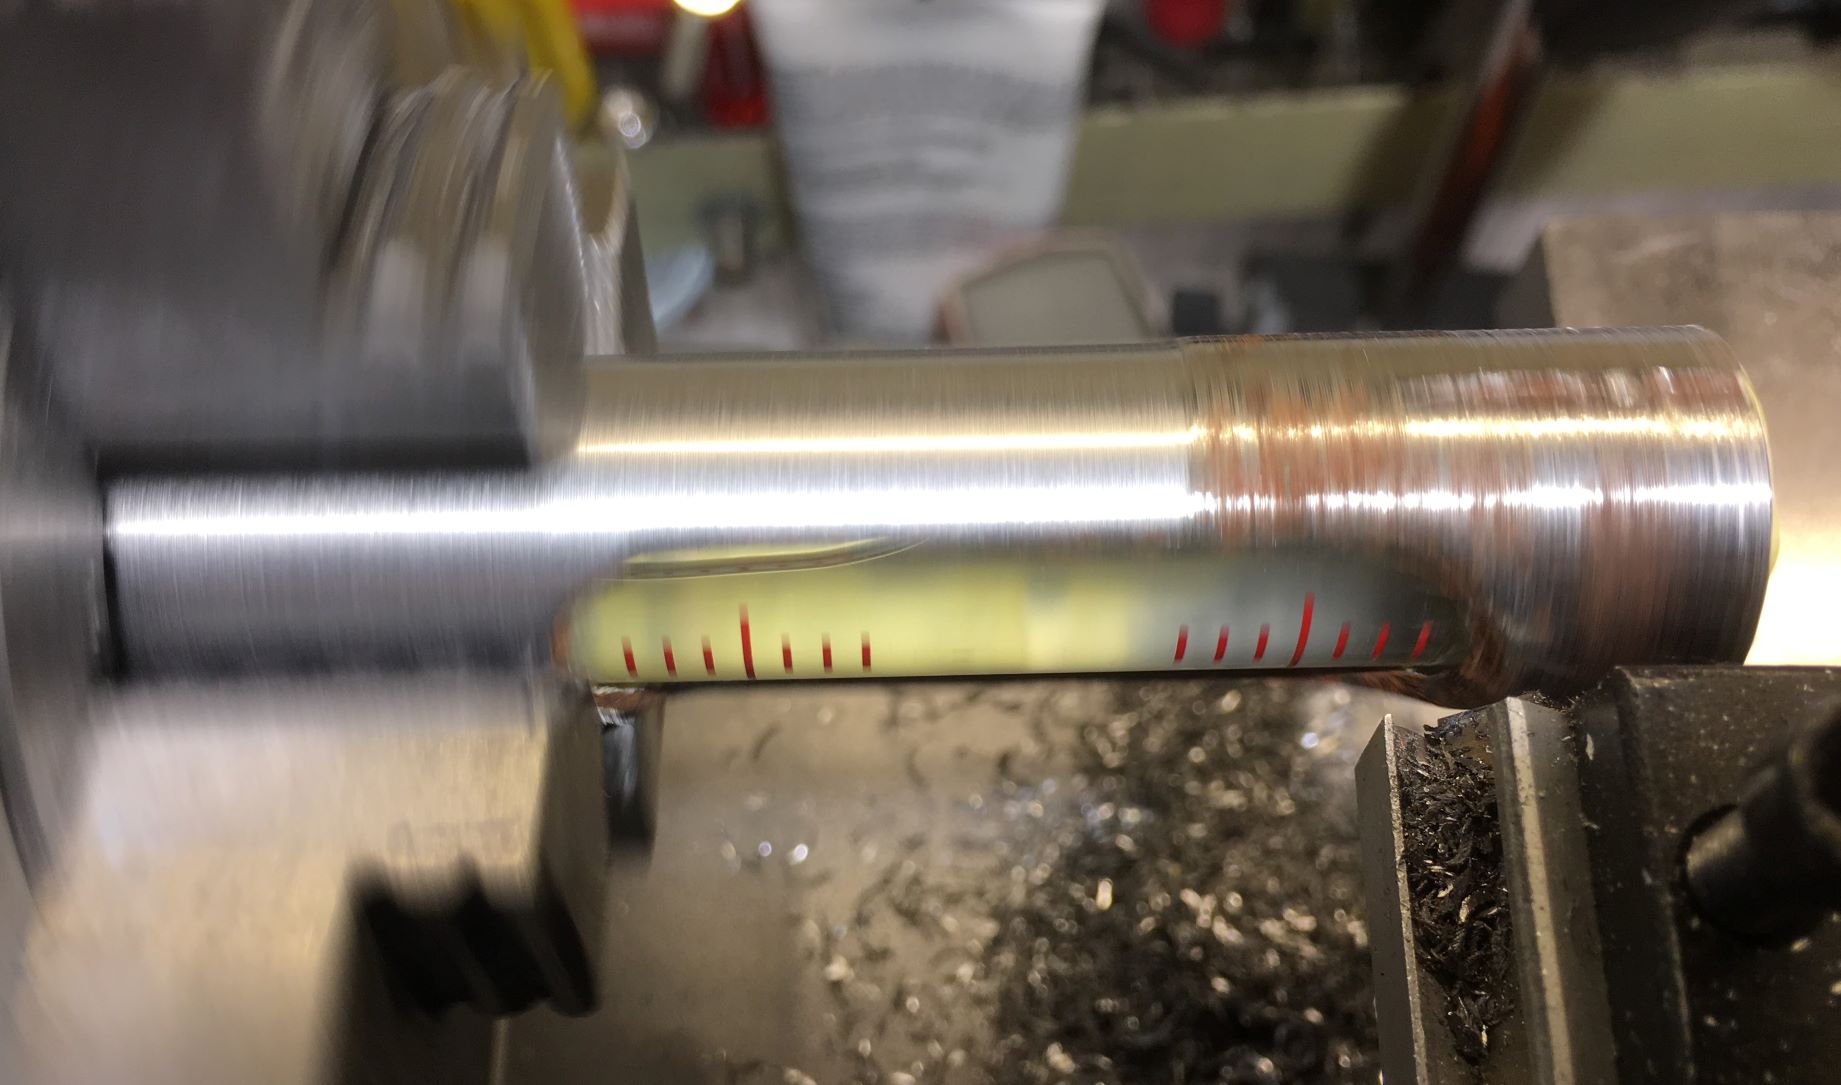
I offsetted the tube 0.25 mm (10 thou) in the 4-jaw, set up a shear tool and started:
Attachment 30896 Attachment 30897
Pic shows 2nd run, with the left, already finished half of it mounted in the chuck.
Took off half a mm (20 thou) total with the shear tool for best finish of the crummy steel,
which just about cleaned it up. Ran low rpms and slooow feed to avoid chatter.
Remains to rechuck and indicate it, drill the two pivot holes, add som rust primer to the vial tube,
cleanup the tool's inner bore and rustproof that as well. Mount and "cralibate".
More to come.
4 Attachment(s)
Drilling for level: perpendicular and peripherally
Not so much going on with this since I've had a busy semester startup at my Uni job.
But to get the vial tube properly hinged on the two set screws within the tool tube,
there's a pair of tiny holes to be drilled pretty exactly: both lengthwise and peripherally.
And as I'm not yet have a proper chuck indexing system in my walk-in closet workshop,
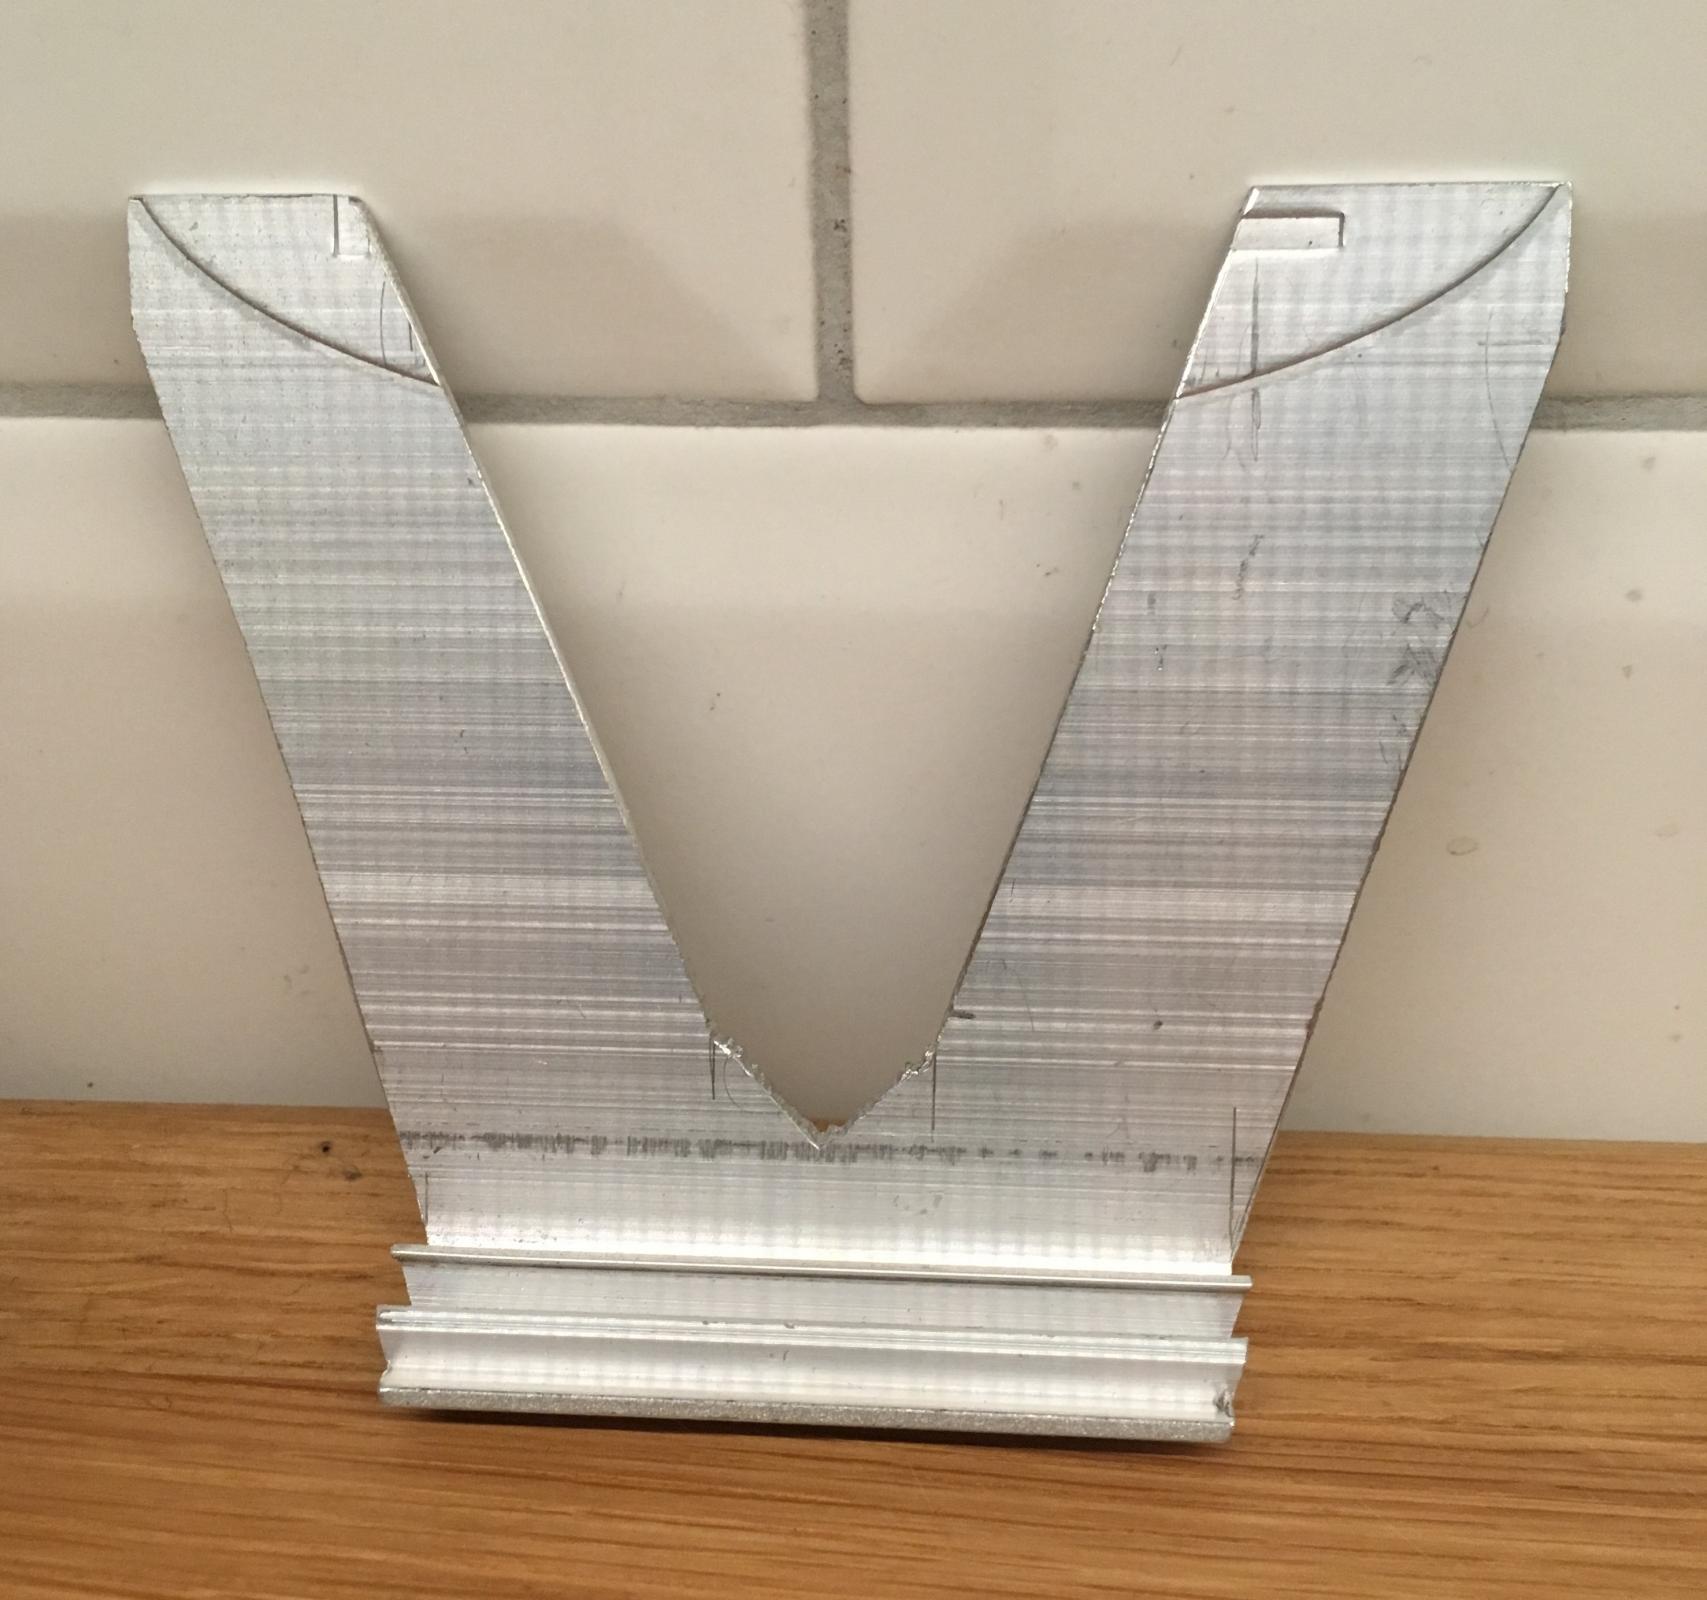
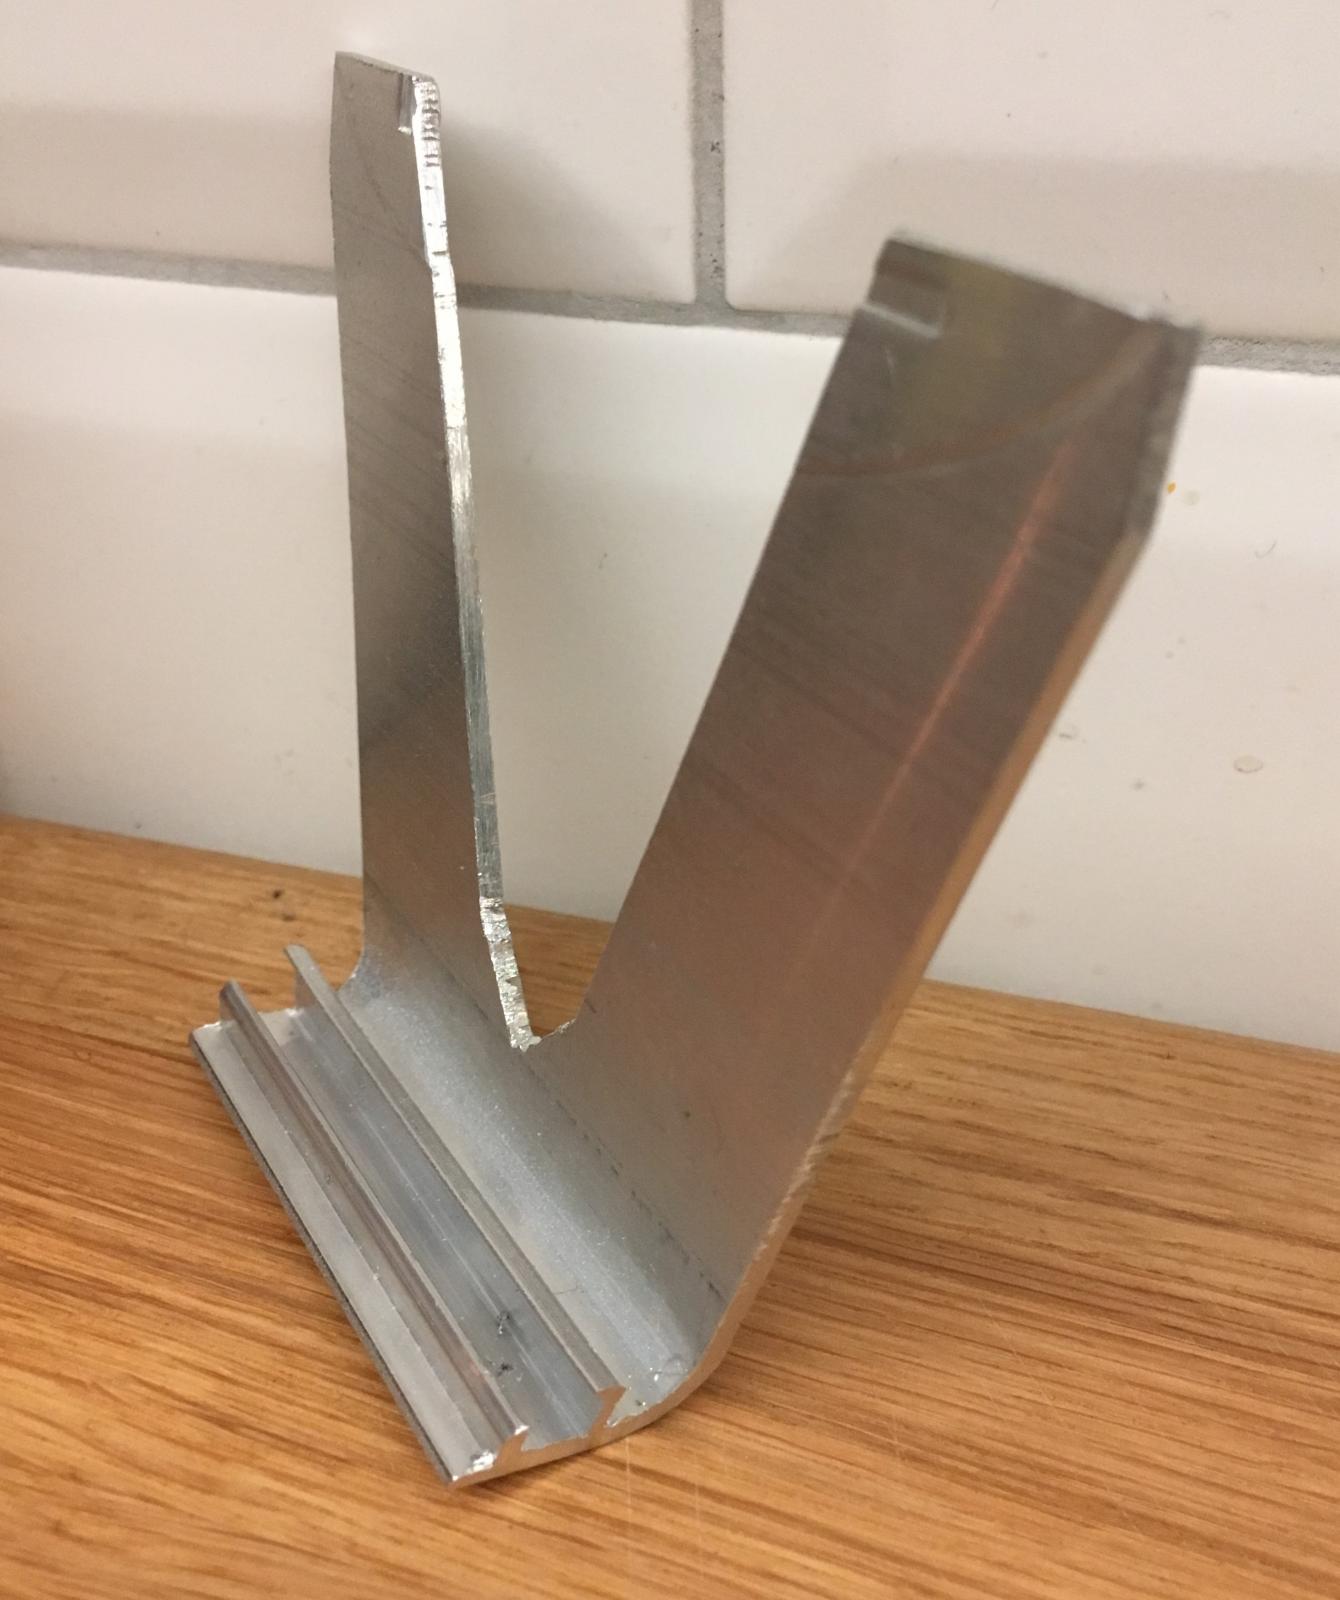
I had to wing something Q & D together, to align my 4-jaw horizontally:
Attachment 31052 Attachment 31053
Just a piece of extruded profile from a crashed hard drive, milled to 82,21 mm height.
Then crudely cut sides and notch to allow for the bottom jaw and up to max 60 mm pieces in the chuck.
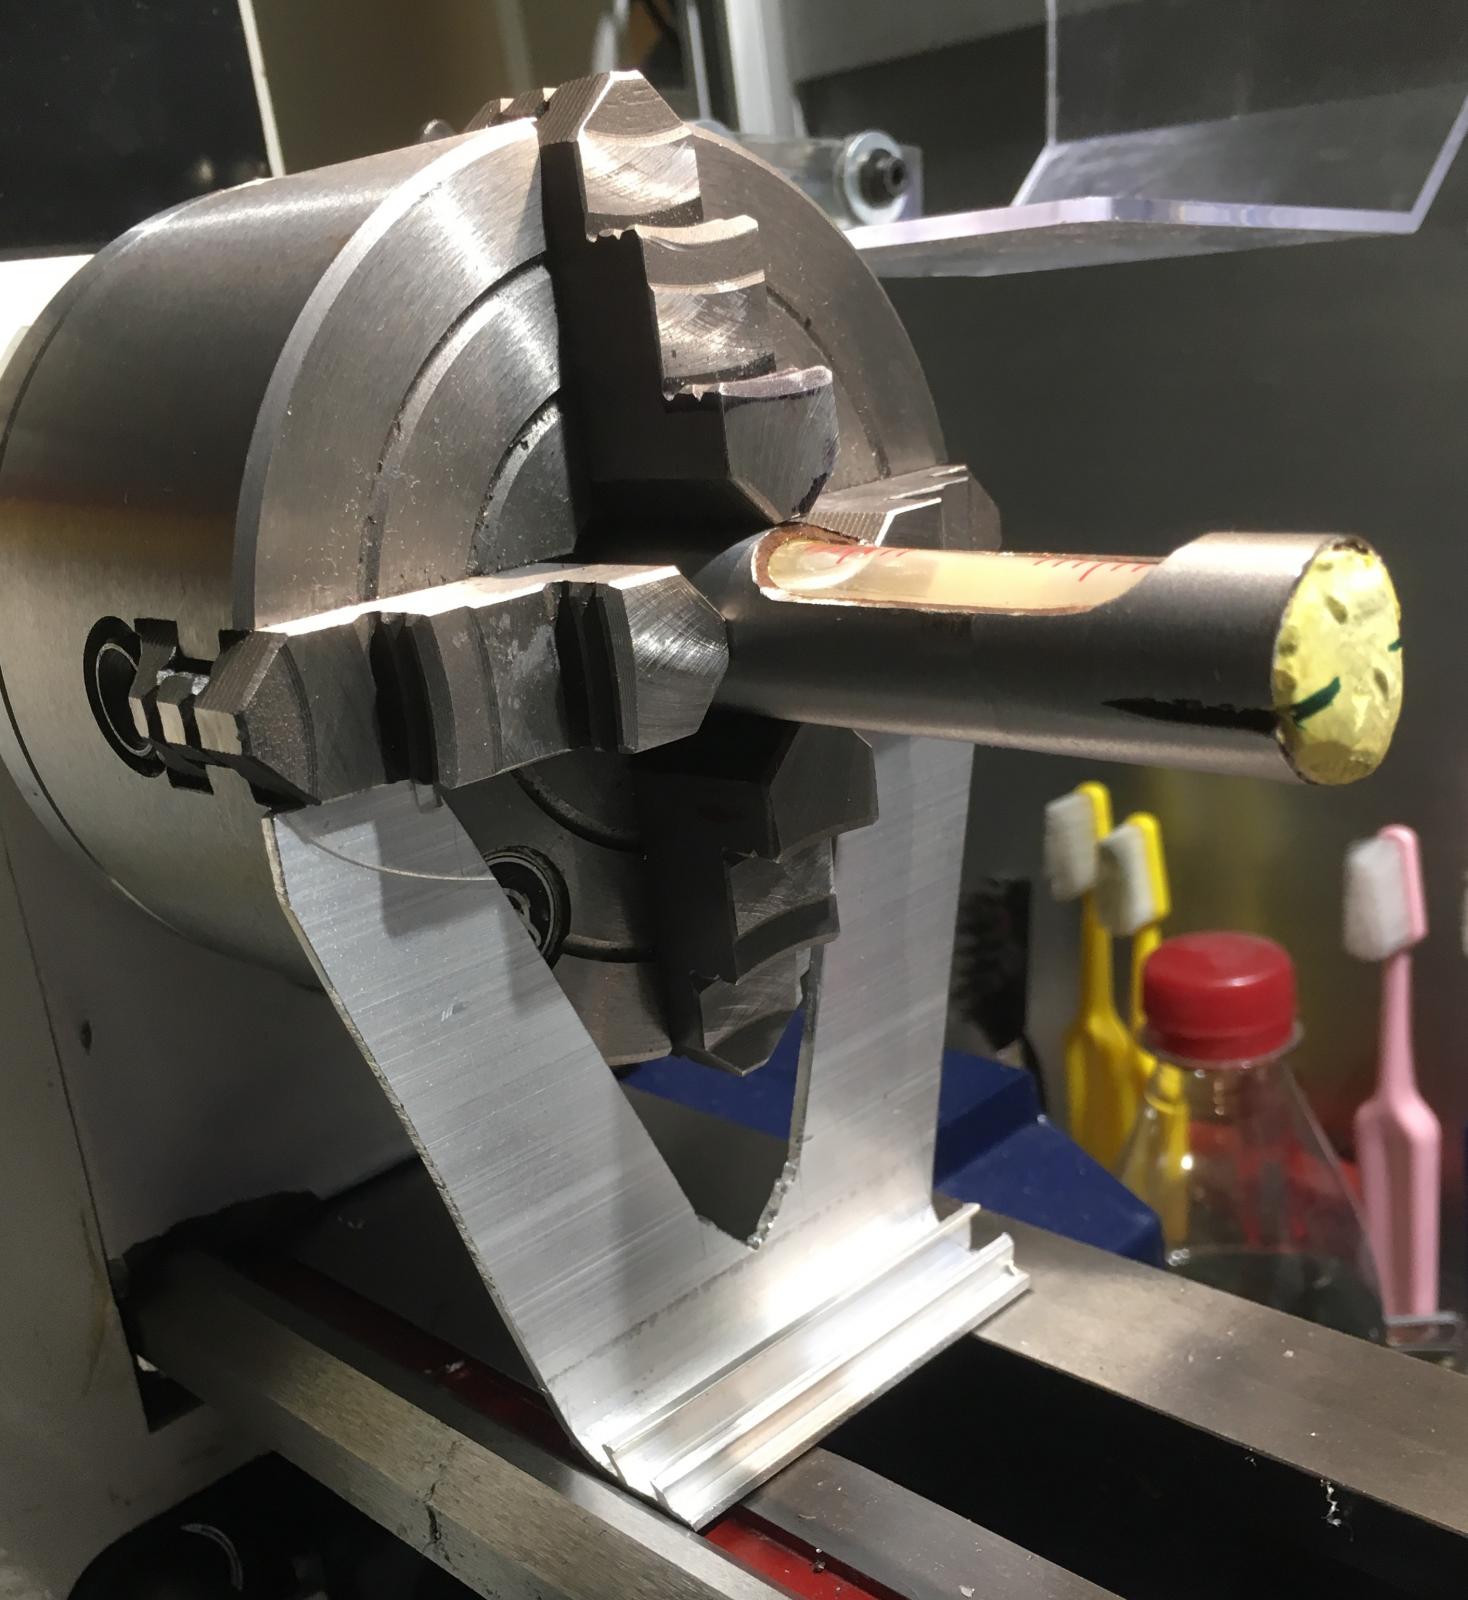
Snaps under and locks (thru the foot's springiness) the 4-jaw at 90 deg intervals:
Attachment 31054
Then, with the toolpost drill, centre drill the tube at just the right place:
Attachment 31055
Next: Mere rust prevention paint job, assembly and "cralibation".
1 Attachment(s)
Just some 20 thou more to take out from the bore
Title sez it all - overconfident that my proper drilling yesterday would suffice,
for finally getting the vial to zero out.
I hadn't considered the other Unknown Chinese Bozo fitting the vial in the tube.
The darned thing isn't even fitted centrally in the tube, rather just thrown in,
and covered up with the yellowish plaster or whatever that is.
Don't really want to make a full autopsy and refit in fear of breaking the darned vial...
Tonight's tryout shows I need to take the bore's bottom a further 20 thou down,
just to get in the ball park, and then some.
Though my surface plate's new Q&D adjustable feet works just great...
Just chuck the level's house in the 4-jaw, offset it 0.25 mm-ish and bore it out...
Attachment 31070
-It surely takes some persistance, methodology and ingenuity to stay cheap,
and finally get these "assembled kits" from overseas to work.
Somebody eager to post recommendations in buying well-renowned, expensive and US made brands instead -
you should really contain this urge, as no real, Cheapo DIY Machinist would ever follow your advice,
nor fold over such an interesting and rewarding challenge like this!
All the money we thus save, we immediately invest in other cheap tools-to-become-projects, see?
