Free 186 More Best Homemade Tools eBook:  
Get 2,000+ tool plans, full site access, and more.

User Tag List

Results 1 to 6 of 6

Thread: Birdsmouth

  1. #1
    Supporting Member mklotz's Avatar
    Join Date
    Aug 2015
    Location
    LA, CA, USA
    Posts
    3,438
    Thanks
    357
    Thanked 6,393 Times in 2,119 Posts

    mklotz's Tools

    Birdsmouth

    In my thread on my improved Panavise hook...

    Improved Panavise hook

    I mentioned adding a birdsmouth to it but never got around to doing so. Later I reconsidered and decided that a stand-alone birdsmouth would be a better tool so this thread is about making that.

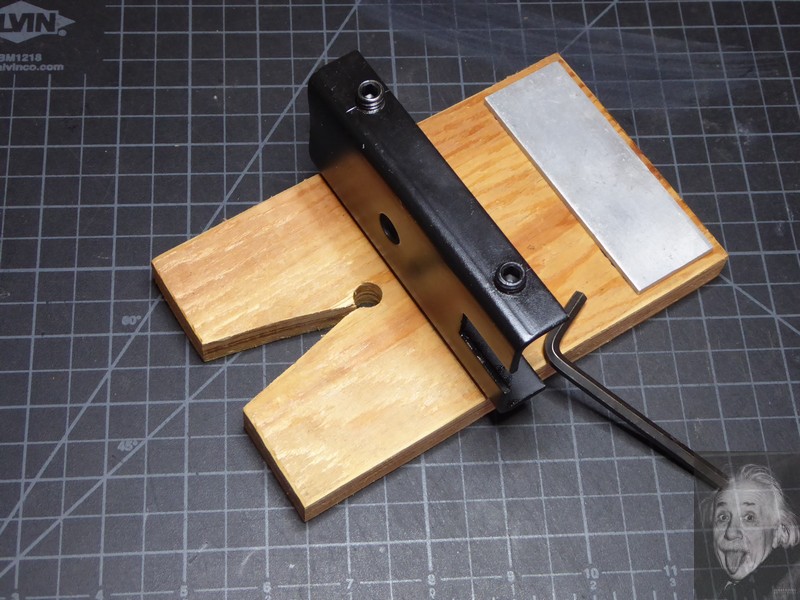
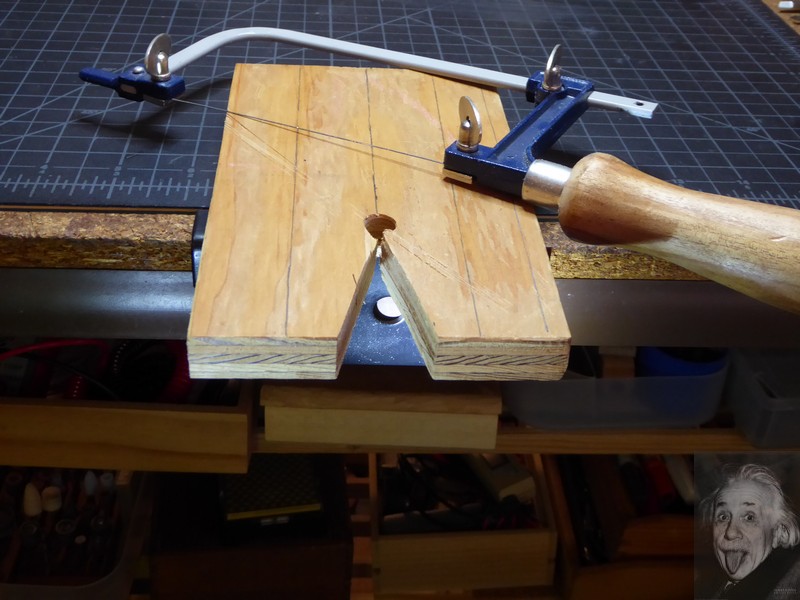
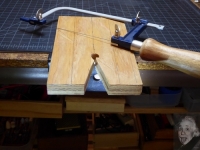
    There are undoubtedly a few out there who don't know what a birdsmouth is so I'll explain briefly. It's a tool to assist in sawing out intricate patterns and piercings with a fret saw or a jeweler's saw in the case of metal parts. Basically, it's little more than a wooden plank with a slot or slots that can take many forms although the traditional is a narrow triangular slot which looks a bit like a bird's open mouth/bill, hence the name. The saw blade is set to cut on the pull stroke* and is used vertically through the slot with the work held on the plank. In some cases the plank is attached to a frame held in the bench vise to raise the plank to a more comfortable working position; often it attaches directly to the work table (my case) so it can be used by a seated sawyer.

    Birdsmouth-birdsmouth-1.jpg

    I used 5/8" plywood for my plank with a traditional birdsmouth. In use it must be right in the center front of the worktable so it needs to be removable when not in use. I had some steel C-channel that just spans the thickness of my indoor worktable and the expendable fiberboard protector on it. This was drilled and tapped for two 3/8-16 setscrews to provide a clamping action. Conventional screws won't work here because if they project one can catch his legs/knees on them. Tightened down, the setscrews hardly project so they're the correct choice. I don't want fasteners projecting through the top of the plank so the channel was epoxied to the bottom of the plank. There's no appreciable strain on the joint so these joints should outlast me.

    Clamped in place, the C-channel raises the bottom of the plank by the channel's thickness, 1/8", so, to prevent flopping, a piece of 1/8" aluminum scrap was epoxied to the rear of the plank.

    Here's a picture of the birdsmouth in place, ready to work...

    Birdsmouth-birdsmouth-2.jpg

    Give it some thought. There's limitless latitude here for expansion and modification to fit your particular work environment.

    --
    *Most Japanese handsaws are arranged to cut on the pull stroke and the Japanese are the hands-down champions of intricate wood joinery. Try it with your saws paying close attention to the motion of your forearm while sawing. I found sufficient improvement that I converted even my hacksaws to pull-cut. [Remember that old bromide about not being able to push a rope ?]

    186 More Best Homemade Tools eBook
    ---
    Regards, Marv

    Home Shop Freeware
    https://www.myvirtualnetwork.com/mklotz

  2. The Following 8 Users Say Thank You to mklotz For This Useful Post:

    baja (Nov 4, 2020), Home-PC (Nov 3, 2020), old_toolmaker (Nov 3, 2020), Paul Jones (Nov 4, 2020), rebuilder1954 (Nov 9, 2020), rlm98253 (Nov 3, 2020), toeless joe (Nov 3, 2020), volodar (Nov 4, 2020)

  3. #2
    Content Editor
    Supporting Member
    DIYer's Avatar
    Join Date
    Aug 2013
    Posts
    3,056
    Thanks
    773
    Thanked 1,852 Times in 1,653 Posts


    Thanks mklotz! We've added your Birdsmouth to our Metalworking category,
    as well as to your builder page: mklotz's Homemade Tools. Your receipt:


    2000 Tool Plans

  4. #3
    Supporting Member old_toolmaker's Avatar
    Join Date
    Dec 2017
    Location
    Cape Coral, FL
    Posts
    579
    Thanks
    647
    Thanked 449 Times in 183 Posts

    old_toolmaker's Tools
    Hi Marv,
    I like the “birds mouth” and it is a handy accessory to have.
    It was especially interesting that you mentioned pull saws. I own two pull saws. They were a little weird to use at first, but I eventually adjusted to them. They have rather thin blades that flex easily so the pull stroke is a must but they follow a line well and saw strait. I liked your comment on converting your hack saws to pull stroke. I have a 1900 era Union hacksaw that I love. I also have reversed the blade in this as well. With only one hand on the straight round handle it is a “no brainer”. This is my favorite 8” hacksaw.
    Dick


    Links to some of my plans:

    https://www.homemadetools.net/forum/...965#post105972 OFF-SET TAILSTOCK CENTER PLANS
    http://www.homemadetools.net/forum/s...995#post112113 SMALL TURRET TOOL POST PLANS
    http://www.homemadetools.net/forum/l...994#post112111 LARGE TURRET TOOL POST PLANS
    http://www.homemadetools.net/forum/m...383#post110340 MINI-LATHE CARRIAGE LOCK PLANS
    http://www.homemadetools.net/forum/s...191#post106483 SMALL QC TOOL POST PLANS
    http://www.homemadetools.net/forum/q...849#post119345 QUICK CHANGE LATHE TURRET
    http://www.homemadetools.net/forum/m...949#post119893 MINI LATHE COMPOUND PIVOT MODIFICATION

  5. The Following User Says Thank You to old_toolmaker For This Useful Post:

    volodar (Nov 4, 2020)

  6. #4
    greenie's Avatar
    Join Date
    Dec 2018
    Posts
    197
    Thanks
    136
    Thanked 113 Times in 64 Posts

    greenie's Tools
    Marv what you have described there is actually called a "Jewellers Bench Pin ", they been around for centuries.

    Instead of using that weak plywood for the bench pin, use any timber that you use for outdoor decking, it's a hell of lot tougher timber/wood they use instead of that ply, so that it can take all sorts of weather before disintegrating.

    For those that are too lazy to bother making their own bench pin, then check out the 'evilbay', they have a variety of different shapes and different timbers to choose from as well.


    https://www.ebay.com.au/sch/i.html?_...n%2C&_osacat=0
    Last edited by greenie; Nov 3, 2020 at 09:50 PM.

  7. The Following User Says Thank You to greenie For This Useful Post:

    volodar (Nov 4, 2020)

  8. #5
    Supporting Member
    Join Date
    Jul 2020
    Posts
    48
    Thanks
    3
    Thanked 41 Times in 20 Posts
    Being raised in a family of fine custom jewelers of a business started over a hundred years ago by my grandfather, a Guild master, I never heard the bench pin called a birds mouth. Jewelers benches normally have a mortise cut into the front of the top surface - a wide rectangle - and the tenon on the back of bench pin is cut so the top of the pin is level with the top of the bench. They are normally thick at the back, over an inch usually, tapered up toward the front. It is used, of course, for sawing in the center vee cut but it used as a support for many other manual operations like filing, to support a hand held ring for stone setting, etc.

  9. The Following 2 Users Say Thank You to the harmonious blacksmith For This Useful Post:

    greenie (Nov 3, 2020), volodar (Nov 4, 2020)

  10. #6
    Supporting Member mklotz's Avatar
    Join Date
    Aug 2015
    Location
    LA, CA, USA
    Posts
    3,438
    Thanks
    357
    Thanked 6,393 Times in 2,119 Posts

    mklotz's Tools
    Quote Originally Posted by the harmonious blacksmith View Post
    ... I never heard the bench pin called a birds mouth. Jewelers benches normally have a mortise cut into the front of the top surface - a wide rectangle - and the tenon on the back of bench pin is cut so the top of the pin is level with the top of the bench. They are normally thick at the back, over an inch usually, tapered up toward the front. It is used, of course, for sawing in the center vee cut but it used as a support for many other manual operations like filing, to support a hand held ring for stone setting, etc.
    AFAIK, "birdsmouth" is not another name for a "bench pin" as used by jewelers. A bench pin is a handy tool for a jeweler but I have no need of one. What I did need was a platform for handsawing small, precise shapes from thin wood and light brass. From what little I know of woodworking, that's called a birdsmouth and hence the name of this thread.

    A good technique for fora such as this is to concentrate on the tool, its utility for the purpose built, and its possible applications to other jobs. Contrasting it with what it wasn't meant to be isn't particularly rewarding.


    186 More Best Homemade Tools eBook
    ---
    Regards, Marv

    Home Shop Freeware
    https://www.myvirtualnetwork.com/mklotz

  11. The Following User Says Thank You to mklotz For This Useful Post:

    Jon (Nov 6, 2020)

Thread Information

Users Browsing this Thread

There are currently 1 users browsing this thread. (0 members and 1 guests)

Bookmarks

Posting Permissions

  • You may not post new threads
  • You may not post replies
  • You may not post attachments
  • You may not edit your posts
  •