
 LinkBack URL
 About LinkBacks


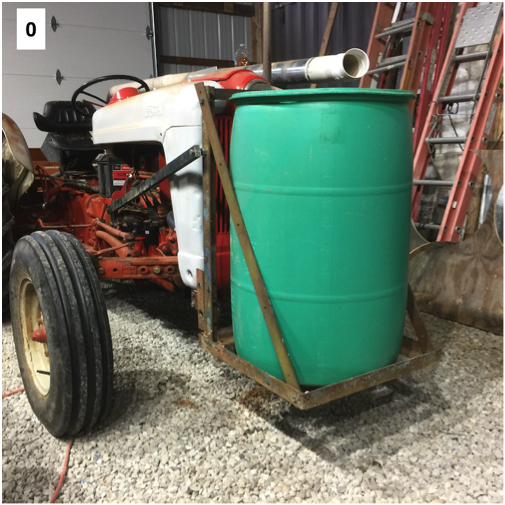
In a previous post I made a barrel mount for the front of the tractor. Now I need a chip separator for the Woods 5000, 3-point mounted, chipper shredder that is mounted on on the back.
I searched HomeMadeTools for inspiration for a chip separator. Here is a link to 27 dust collectors. I found the one called Thien Baffle by Hector Acevedo interesting. It is 2nd from the bottom on the list of 27. The Thien Baffle is a very simple idea. Chips enter a circular container at high speed. A slot around the outside bottom edge allows chips to fall into the calm space out of the air stream. I chose it for its simplicity and it has a much smaller profile than a cyclone with its long cone shape. I am blowing chips into the separator rather that sucking them into it. While I NOT trying to catch fine dust, I do need to be able to direct fine dust away from the work zone.
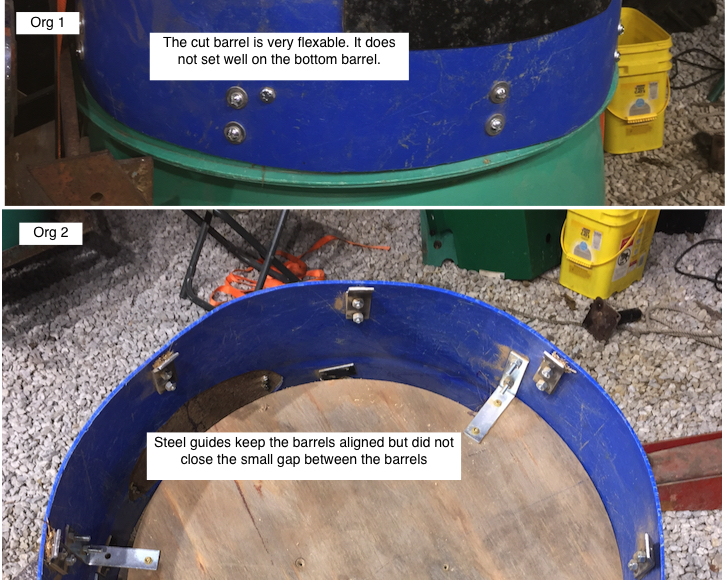
Using the top 1/2 of a 55 gallon drum, plywood, plastic pipe and some angle brackets. I made one that worked very well , but it needed some improvements. Here are the original problems.
The two barrels did not fit well enough together. Too much dust leaks out and was sucked into the radiator.
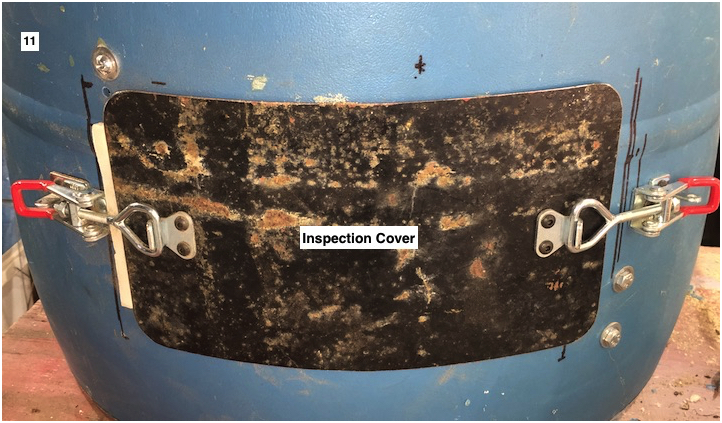
The opening I cut for the inlet pipe had an ok fit, but dust was able to leak out around the joint. In addition, I cut the inlet on the wrong side of the barrel. I fixed that by making it into an inspection port
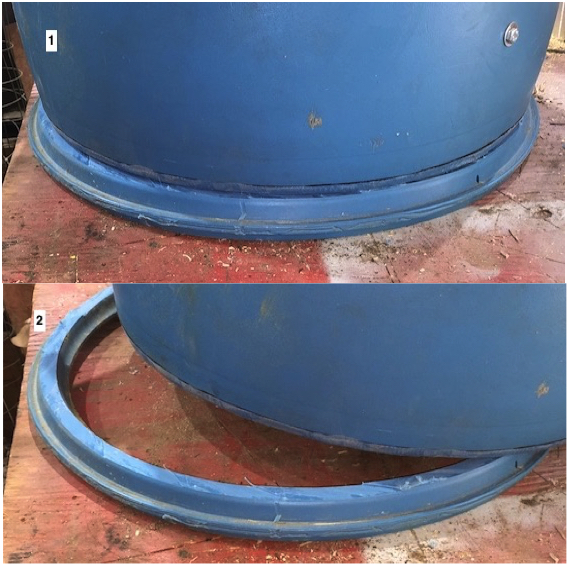
The second attempt turned out a lot better. I cut the top lip off of a barrel. The barrel tapers under the lip. I cut it at the smallest part to allow it to nest into the top of another barrel The plastic is also much thicker and more stiff at the top/
With the lip removed, the 1/2 barrel fit ok into a standard barrel, but you have to wiggle it around as most barrels are not really round. There is enough thickness to allow trimming, I used an angle grinder and abrasive disk to taper the cut edge of the barrel.
After trimming, they fit together nice and snug.
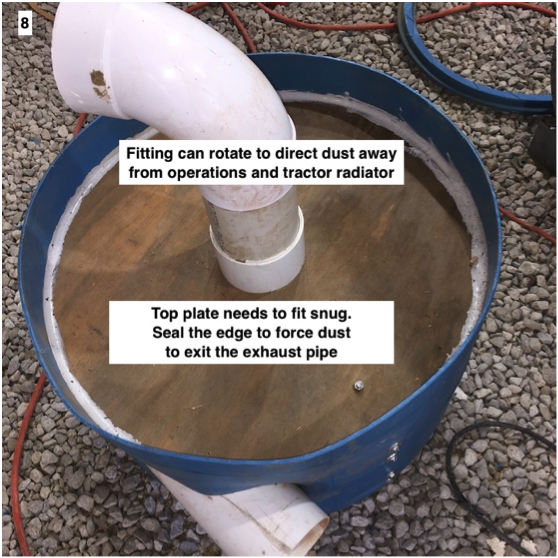
Next make the top plate and the baffle. It is a little tricky to measure the inside diameter of a barrel as they are not round. To get a good fit, I measured the outside circumference. Then divide by 3.14 to get the outside diameter. Then subtract 2 times the wall thickness of the barrel. The closer you can get to a nice snug the better. Make the top plate first. If you make it a little too small, you can use it for the baffle.
The gap in the baffle is important. Too small, the chips do not easily fall out of the air stream. Too large turbulence from the air stream will keep stirring up chips in the barrel. I found 2 to work well for my use. I just used angle brackets to attach the baffle.
Then attach the top plate. I used caulk to seal the edge of the top plate. Dust WILL try its best to escape places as it races around the inside of the separator.
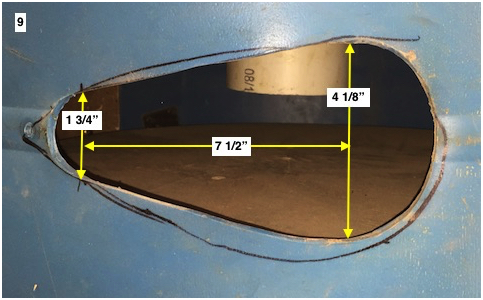
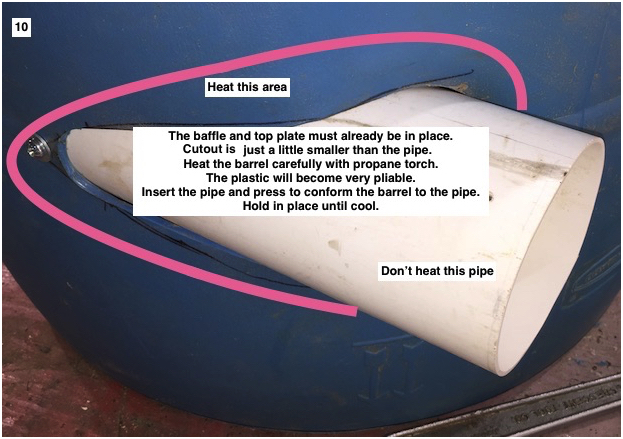
Cut the hole for the inlet pipe. I made a fancy layout of the intersection of the pipe with the barrel for the first version. But, the fit was not a good as I had hoped. For the second one, I made a layout as shown which is a little smaller than the pipe.
After cutting the hole. I heated the barrel to soften the plastic, then forced the pipe into position. This stretched the barrel to fit the pipe. The joint is tight enough dust cannot escape.
You may not need an inspection cover. My first version had one because of an error. My second has one because there no way to check the contents of the barrel. The only way to know that the barrel was full is when chips start to fly out the exhaust. By then the separation chamber has also filled with chips. The inlet pipe from the chipper can also fill with chips. It is time consuming to clean all of that out.
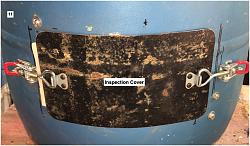
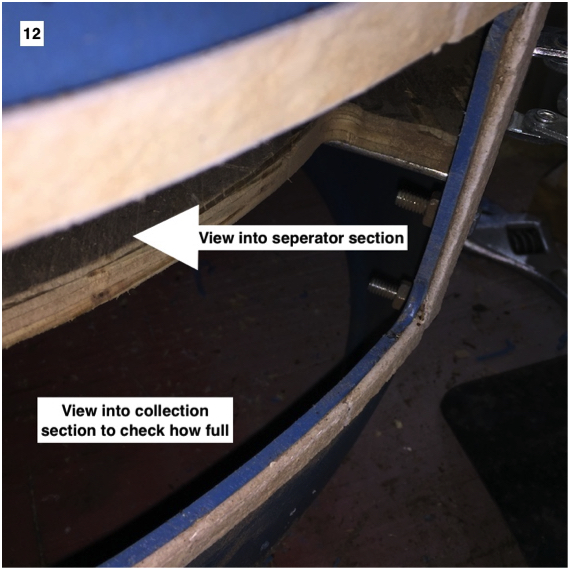
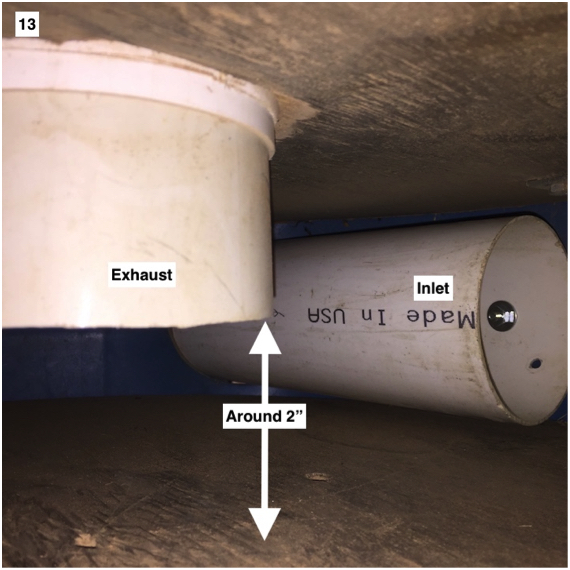
Peeking inside the inspection cover, you can see the exhaust and the inlet pipe. The exhaust pipe is about 2 above the baffle. (I am considering enlarging the exhaust to 6)
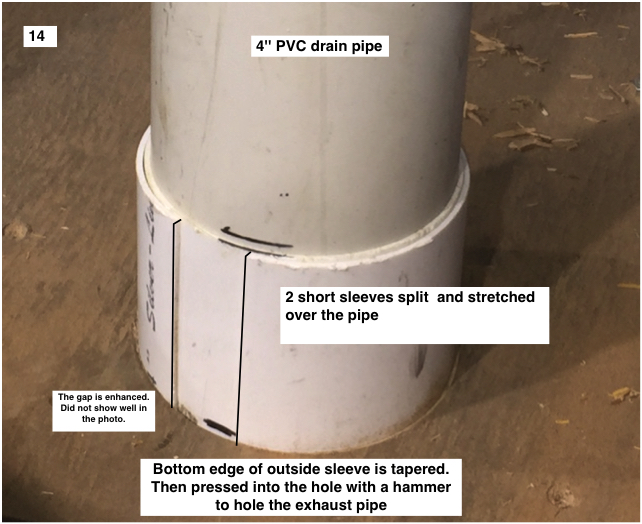
I held the exhaust in place using two short pieces of pipe. Split the pipe up one side. Stretch the pieces around the exhaust. I used the angle grinder to taper the end of one of the pieces. Then persuaded it into place with a hammer to secure the exhaust pipe.
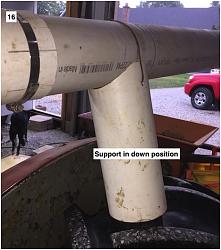
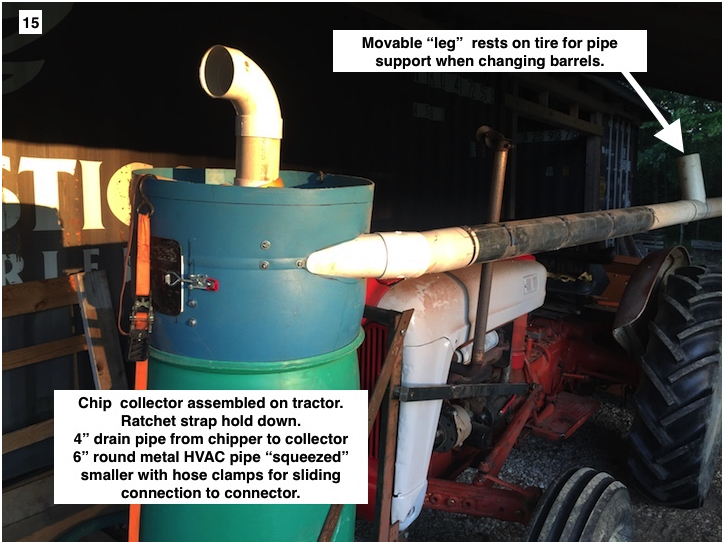
The collector mounted on the tractor. The metal pipe section is 6 round HVAC. The crimp on the one end was cut off. The snap seam was removed from one side, then hose clamps were used to squeeze it down to a sliding fit over the 4 PVC drain pipe, I am happy to report it works very well. Although it does restrict discharge from the chipper some. If I try to chip much larger than 2" branches, the discharge pipe plugs up. without the spearator I can chip 5". But I use anything over 2" for firewood. The pipe easily supports it self when it is attached at both ends.
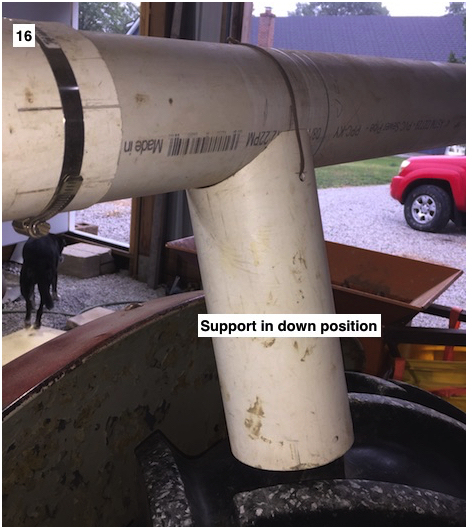
When the separator is removed for barrel replacement, a movable leg rests on the tractor tire to support the pipe..


 Reply With Quote

Bookmarks