
 LinkBack URL
 About LinkBacks

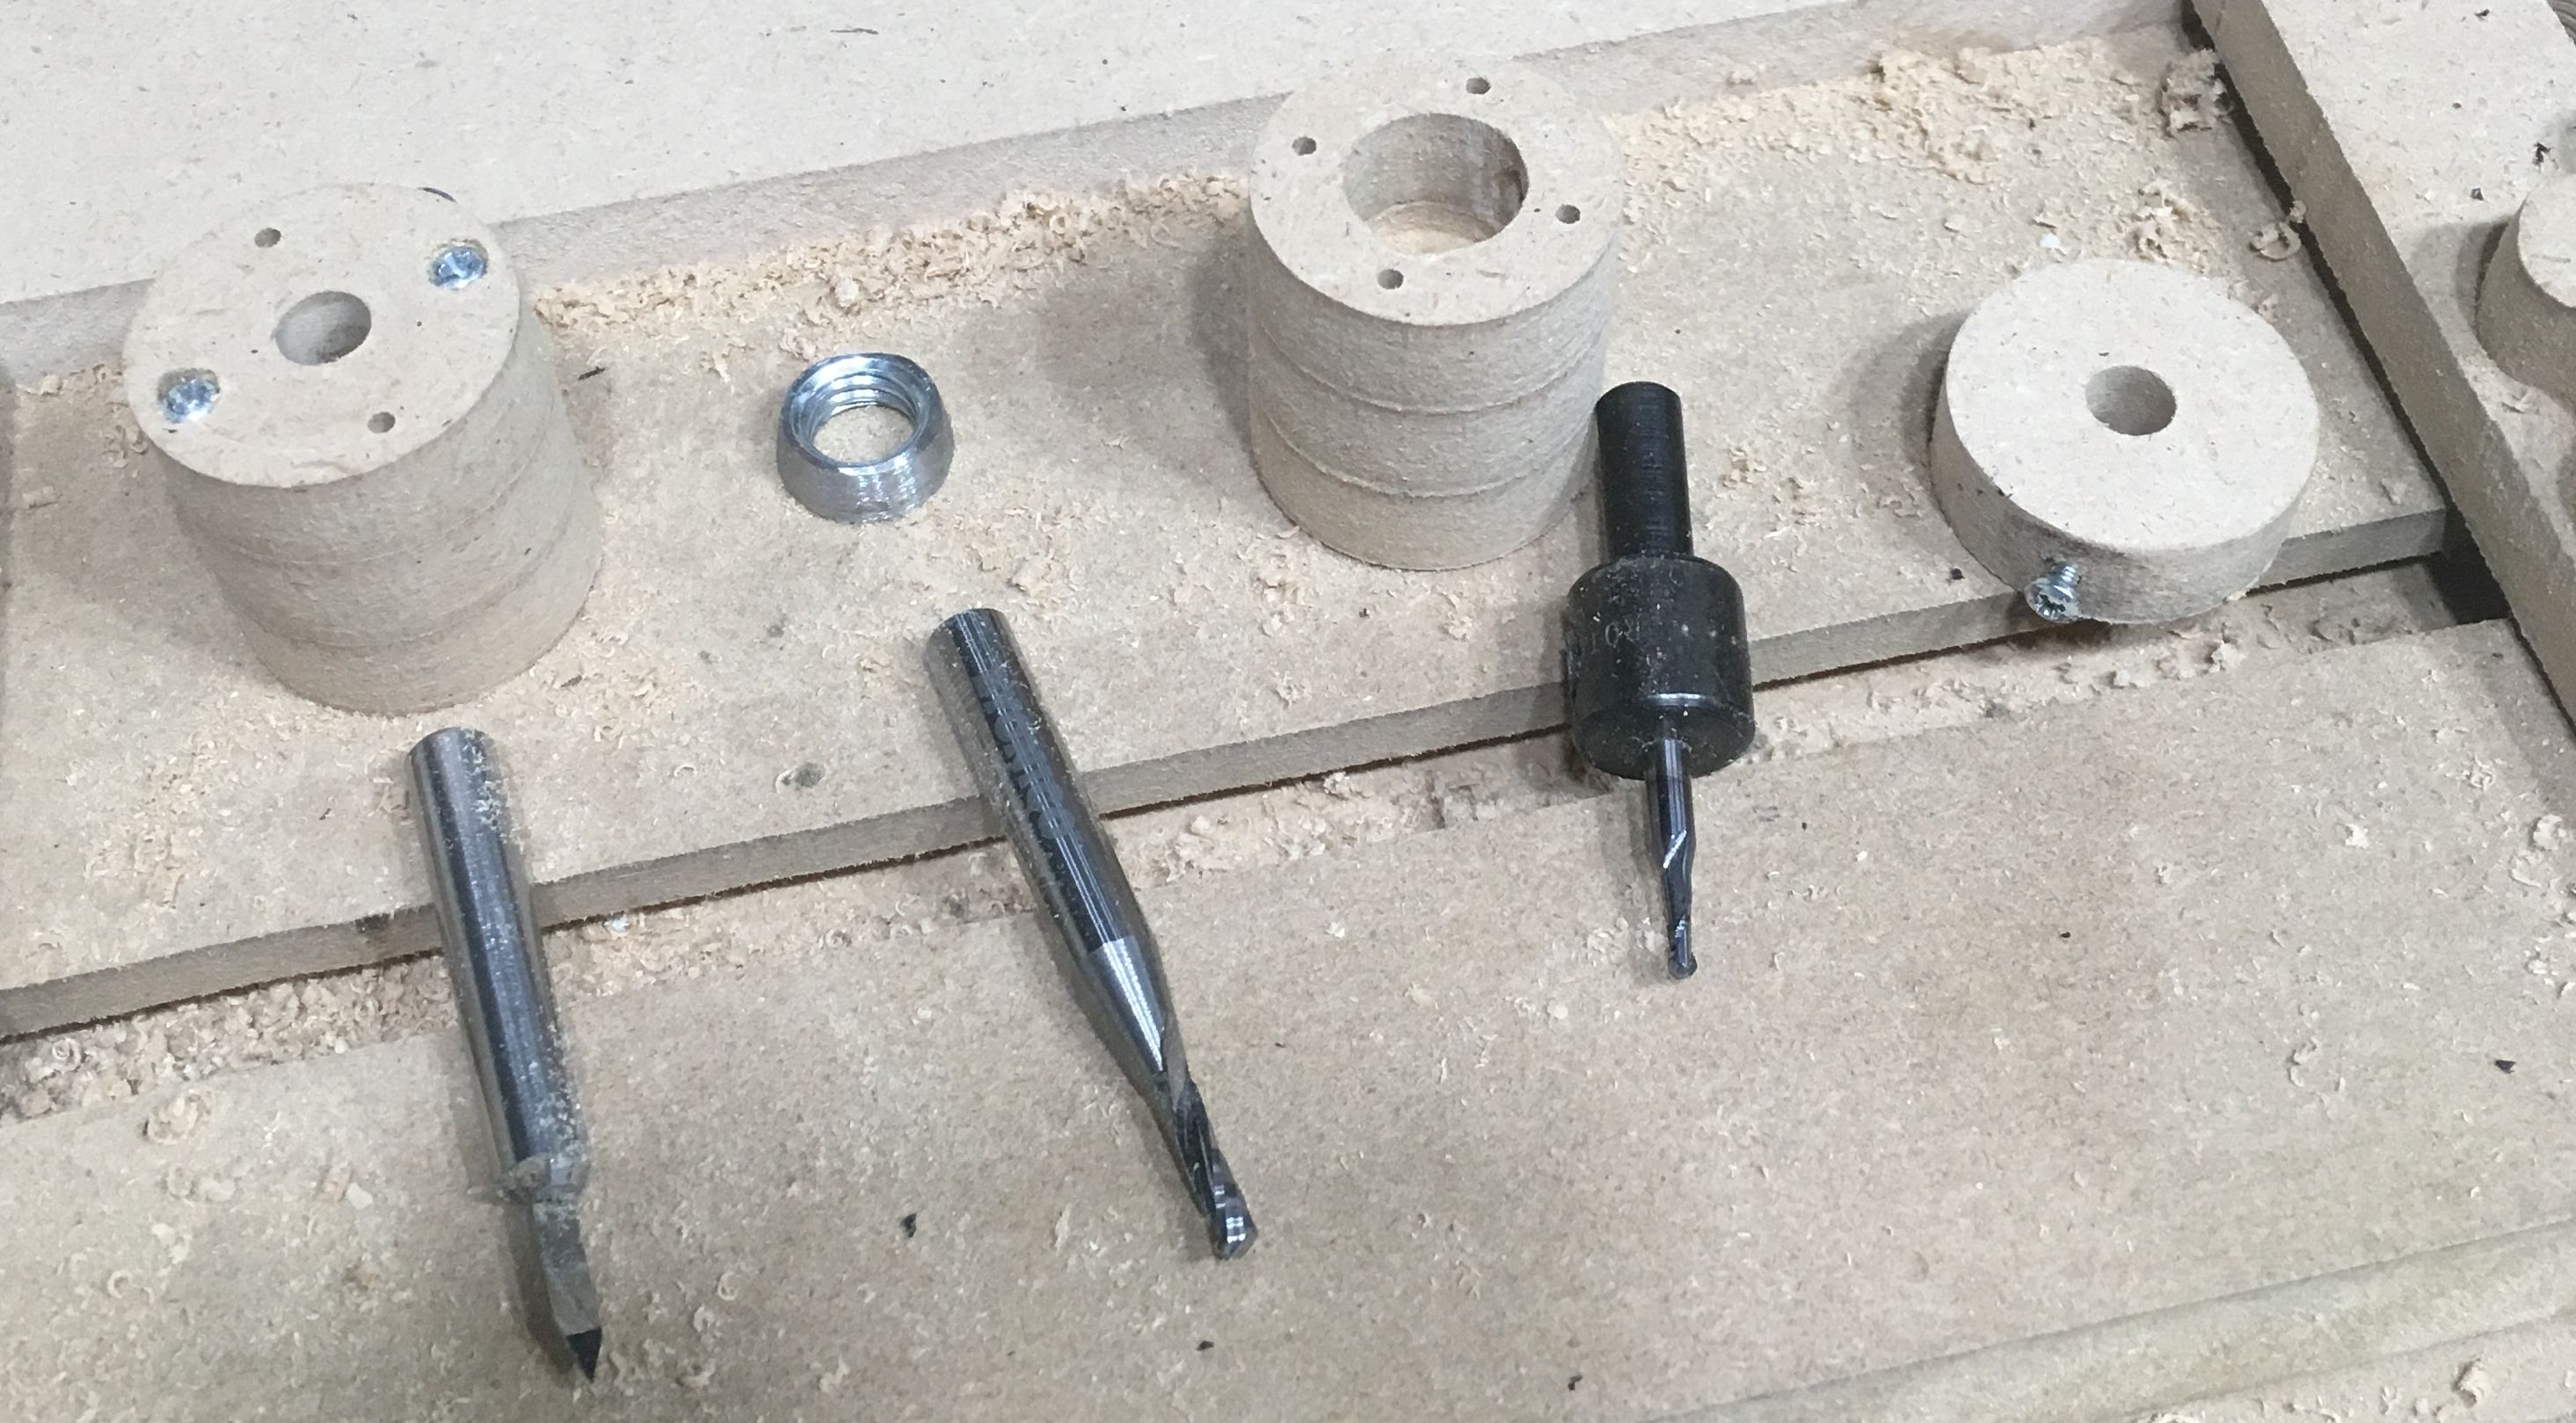
I designed these jigs so I could mount tool bits of varying length faster and more precisely on my cnc router. I use mostly bits with 1/8 and 1/4 shanks, so these jigs have not been tested with larger diameter tools. Also, from the pictures, I've tested these jigs with an engraving tool, a PCB drill, and a single flute end mill. All three tools vary in length, and the pcb drill uses a Bosch 1/4-1/8 shank adapter. The 4th round piece on the right is an mdf made locking washer to help me pull out the tool when my fingers are slippery or if the tool sits too tight in the jig.
I have two jigs for different shape tools. The jig on the right accomodates the Bosch adapter, so it has a pocket to accomodate the adapter's head.
The fourth piece on the far right is not a jig. I use it to pull the tool out of the jig when fingers are slippery or the tool is tight. I made the clearance washer from a threaded 1/4-20 nut.
Those of you who work with a cnc router know that before cutting a job, the tool needs to be "zeroed to the work surface", that is, the tip of the tool is brought just to the point where it touches the workpiece, and then the machine's Z axis DRO is set to zero. This operation is easy if one deals with only one tool, but with several tools having different lengths, it's time consuming, and sometimes causes errors in cutting depth.
An Autozero routine solves this issue. However, not everyone employs this feature, and Mach3 is not 100% reliable for this operation. Its forum is filled with people who have trouble figuring out the correct scripts and procedures, especially for multiple tool jobs. I am one of them.
Each jig matches the bit geometry, so 1/4" bits use 1/4" jigs, and so on. For 1/8" PCB drills, I use a Bosch 1/4-1/8" adapter, and for this I have its own jig.
Regardless of the bit design or respective lengths, the jigs have to be the same height, and the top of the jig needs to come in contact with the router's chuck-- not the large nut that tightens the tool bit in the chuck on the router. Due to its rotating on treads, the nut changes in height, so it's not a good, reliable stop point. A small washer ensures sufficient clearance between the base of the nut and the top of the jig during mounting and tightening of the nut. Obviously, you determine the total length of the jig based on the length of the tool and the minimum length of shank that needs to be in the chuck. In my case, I use mostly 2" long bits, so my jigs measure 1 1/4". It could be shorter, but be sure that the locking screw touches the shank and not the cutting part of the tool.
I made these jigs out of three separate mdf rings, since I work mostly with 3/8" thick mdf, so it was easy for me to cut them with my router and mount them to form one single unit. The important thing is that the hole in the jig be the same diameter of the tool bit. I made the hole at the bottom of the jig a bit smaller than the tool shank. This prevents the tool bit from accidentally slipping through the jig. However, the depth of the hole should allow some of the tool tip to stick out.
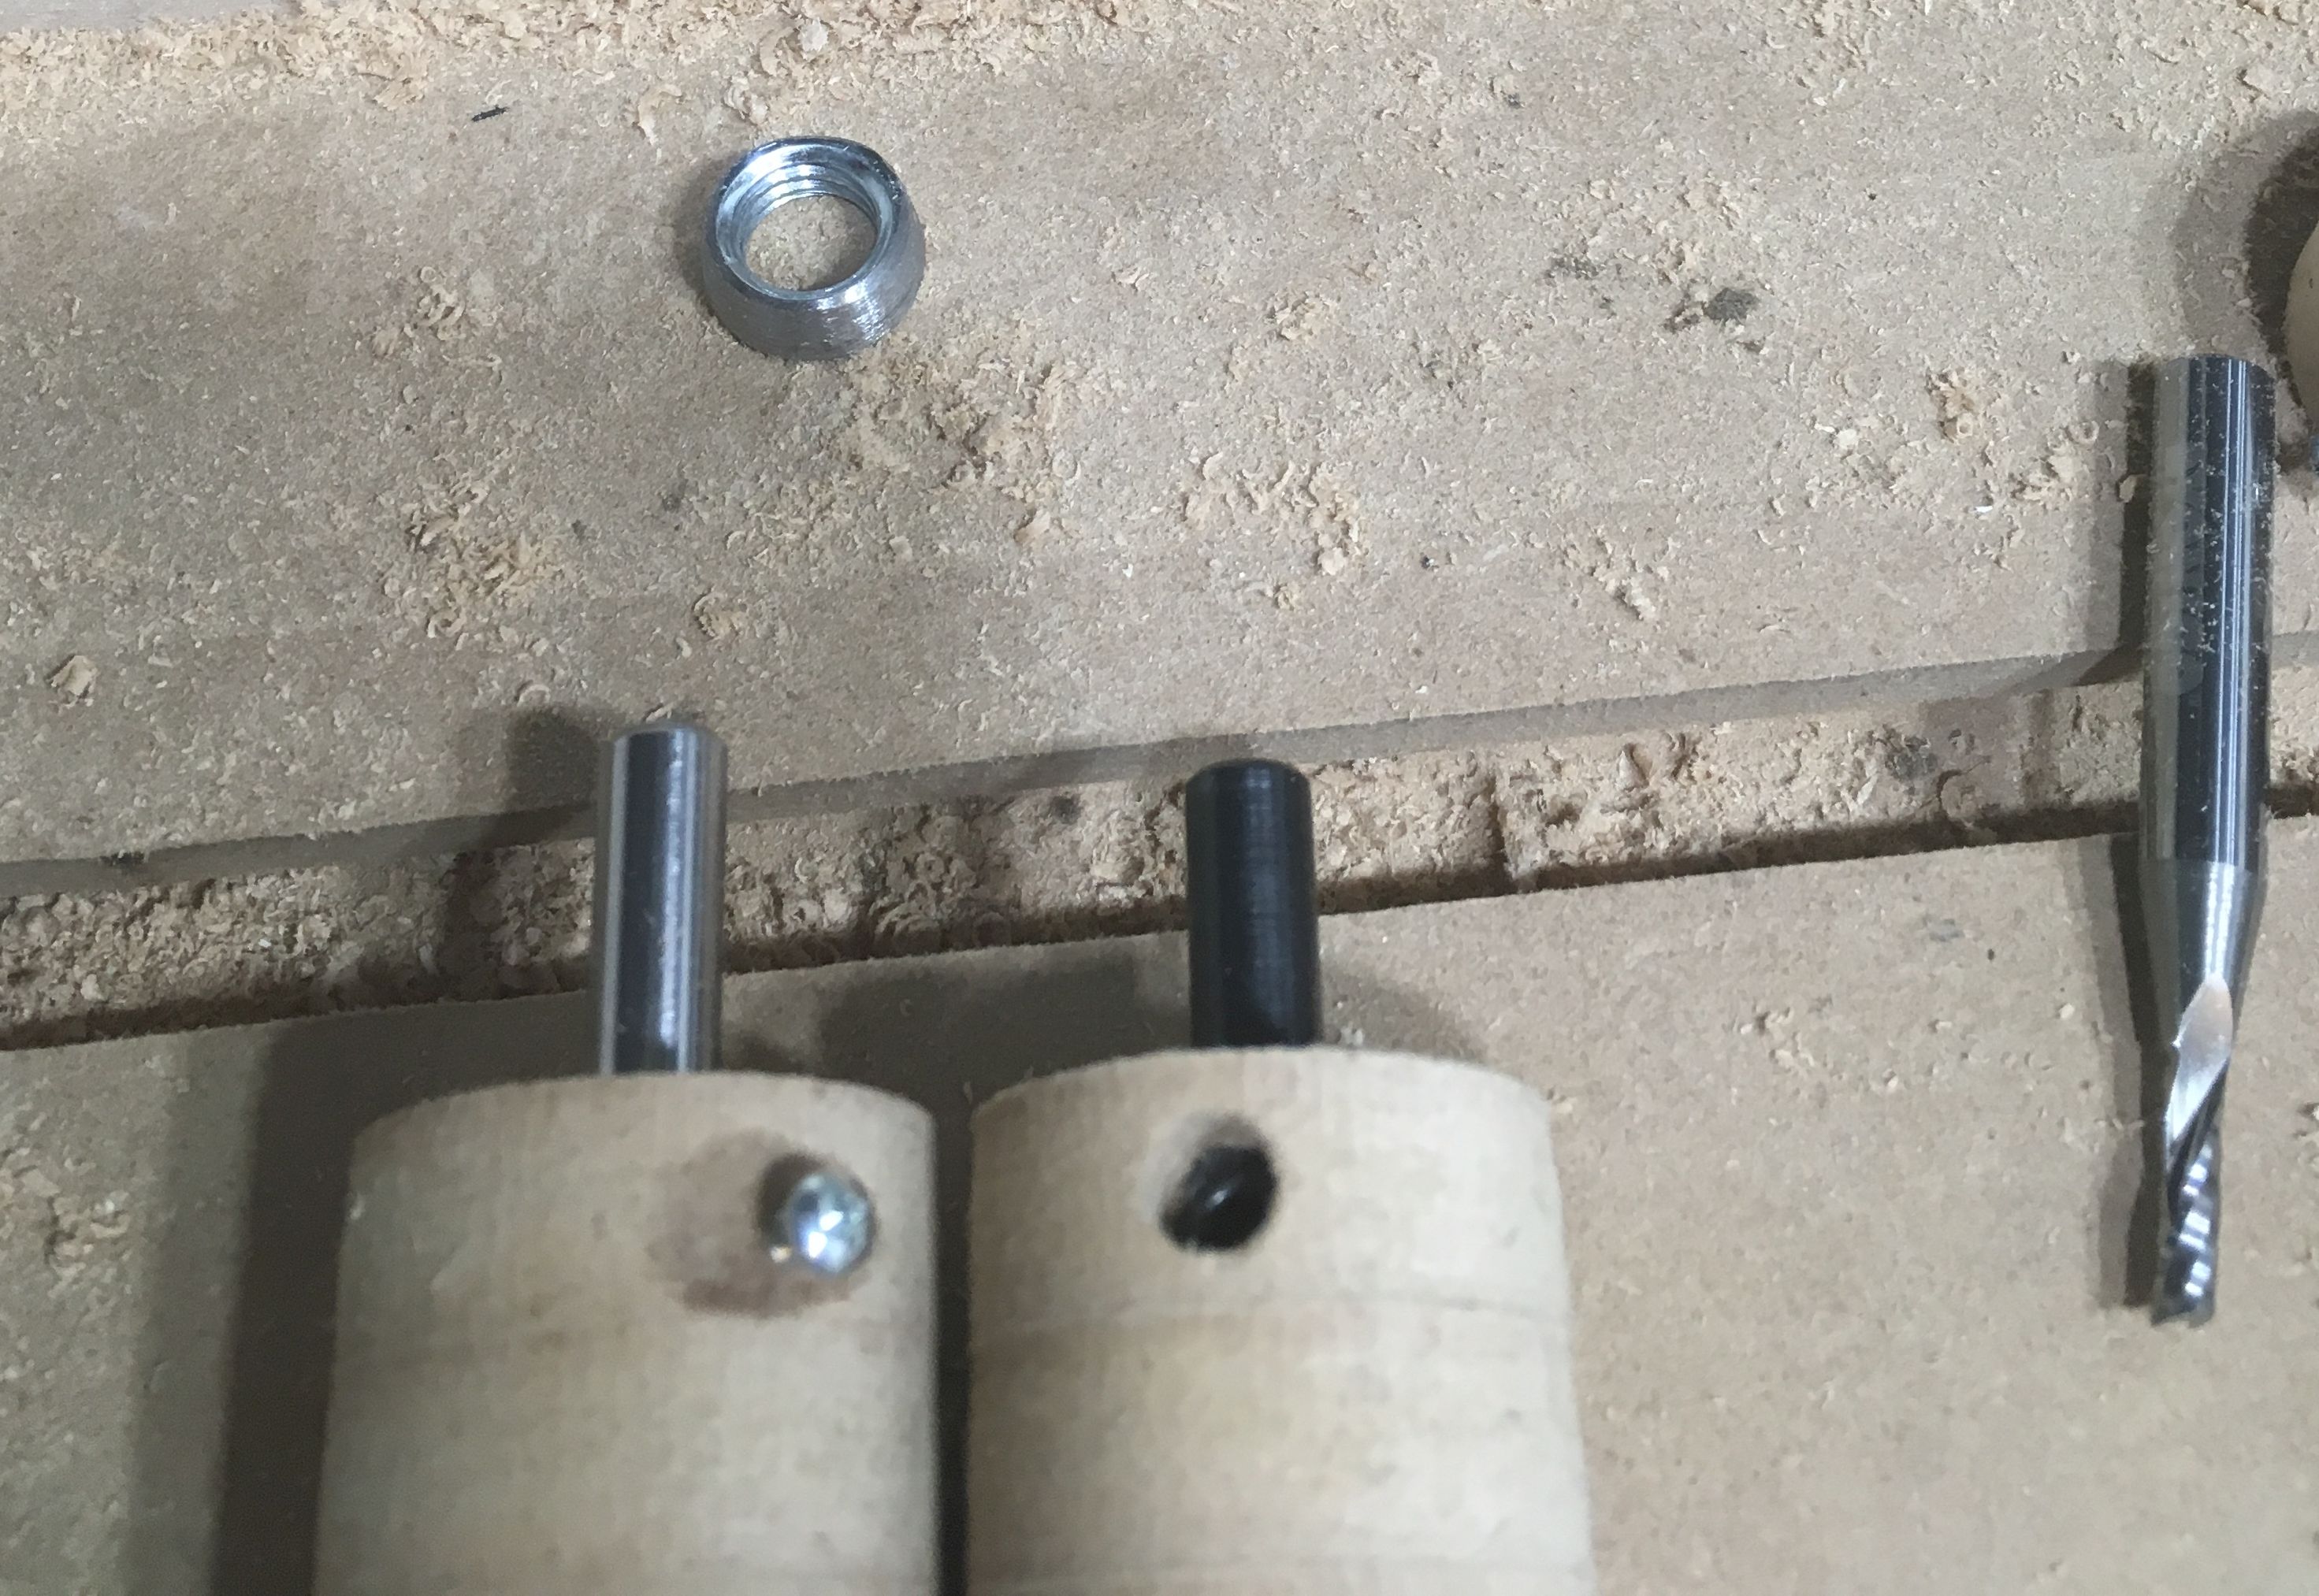
A small locking screw on the side of the jig locks the tool to the jig once it's aligned properly with the bottom. The fail proof method is to place the jig on a flat surface, and then insert the tool until its tip hits the bottom. At this point, the locking screw locks the tool in the jig.
As explained above, the small washer is then mounted for clearance purposes. The washer, too, has to be one standard thickness and its outer diameter must be smaller than the chuck nut's inner diameter.
For the Bosch adapter, the jig has a pocket that seats the head of the adapter, and a small hole on the side allows me to use an allen wrench . So to mount a small PCB drill, I place the drill loose in the adapter. Then place them in the jig, making sure that the tip sticks out from the bottom. I then place them on a flat surface, making sure that the drill tip is pushed up into the adapter. At this point, I insert the allen wrench into the side hole and tighten the locking screw. If done correctly, the drill tip and bottom of the jig will be exactly flush. The top of the jig and the adapter head will also be flush. The washer ensures that the jig will be mounted exactly the same as the other jig with the longer tool.
The jig also allows me to hold the tool bit securely and safely (no more finger cuts) while mounting it in the chuck. Once the drill is tight, I unlock the locking screw and slip the jig out. Make sure that the washer comes out , too.
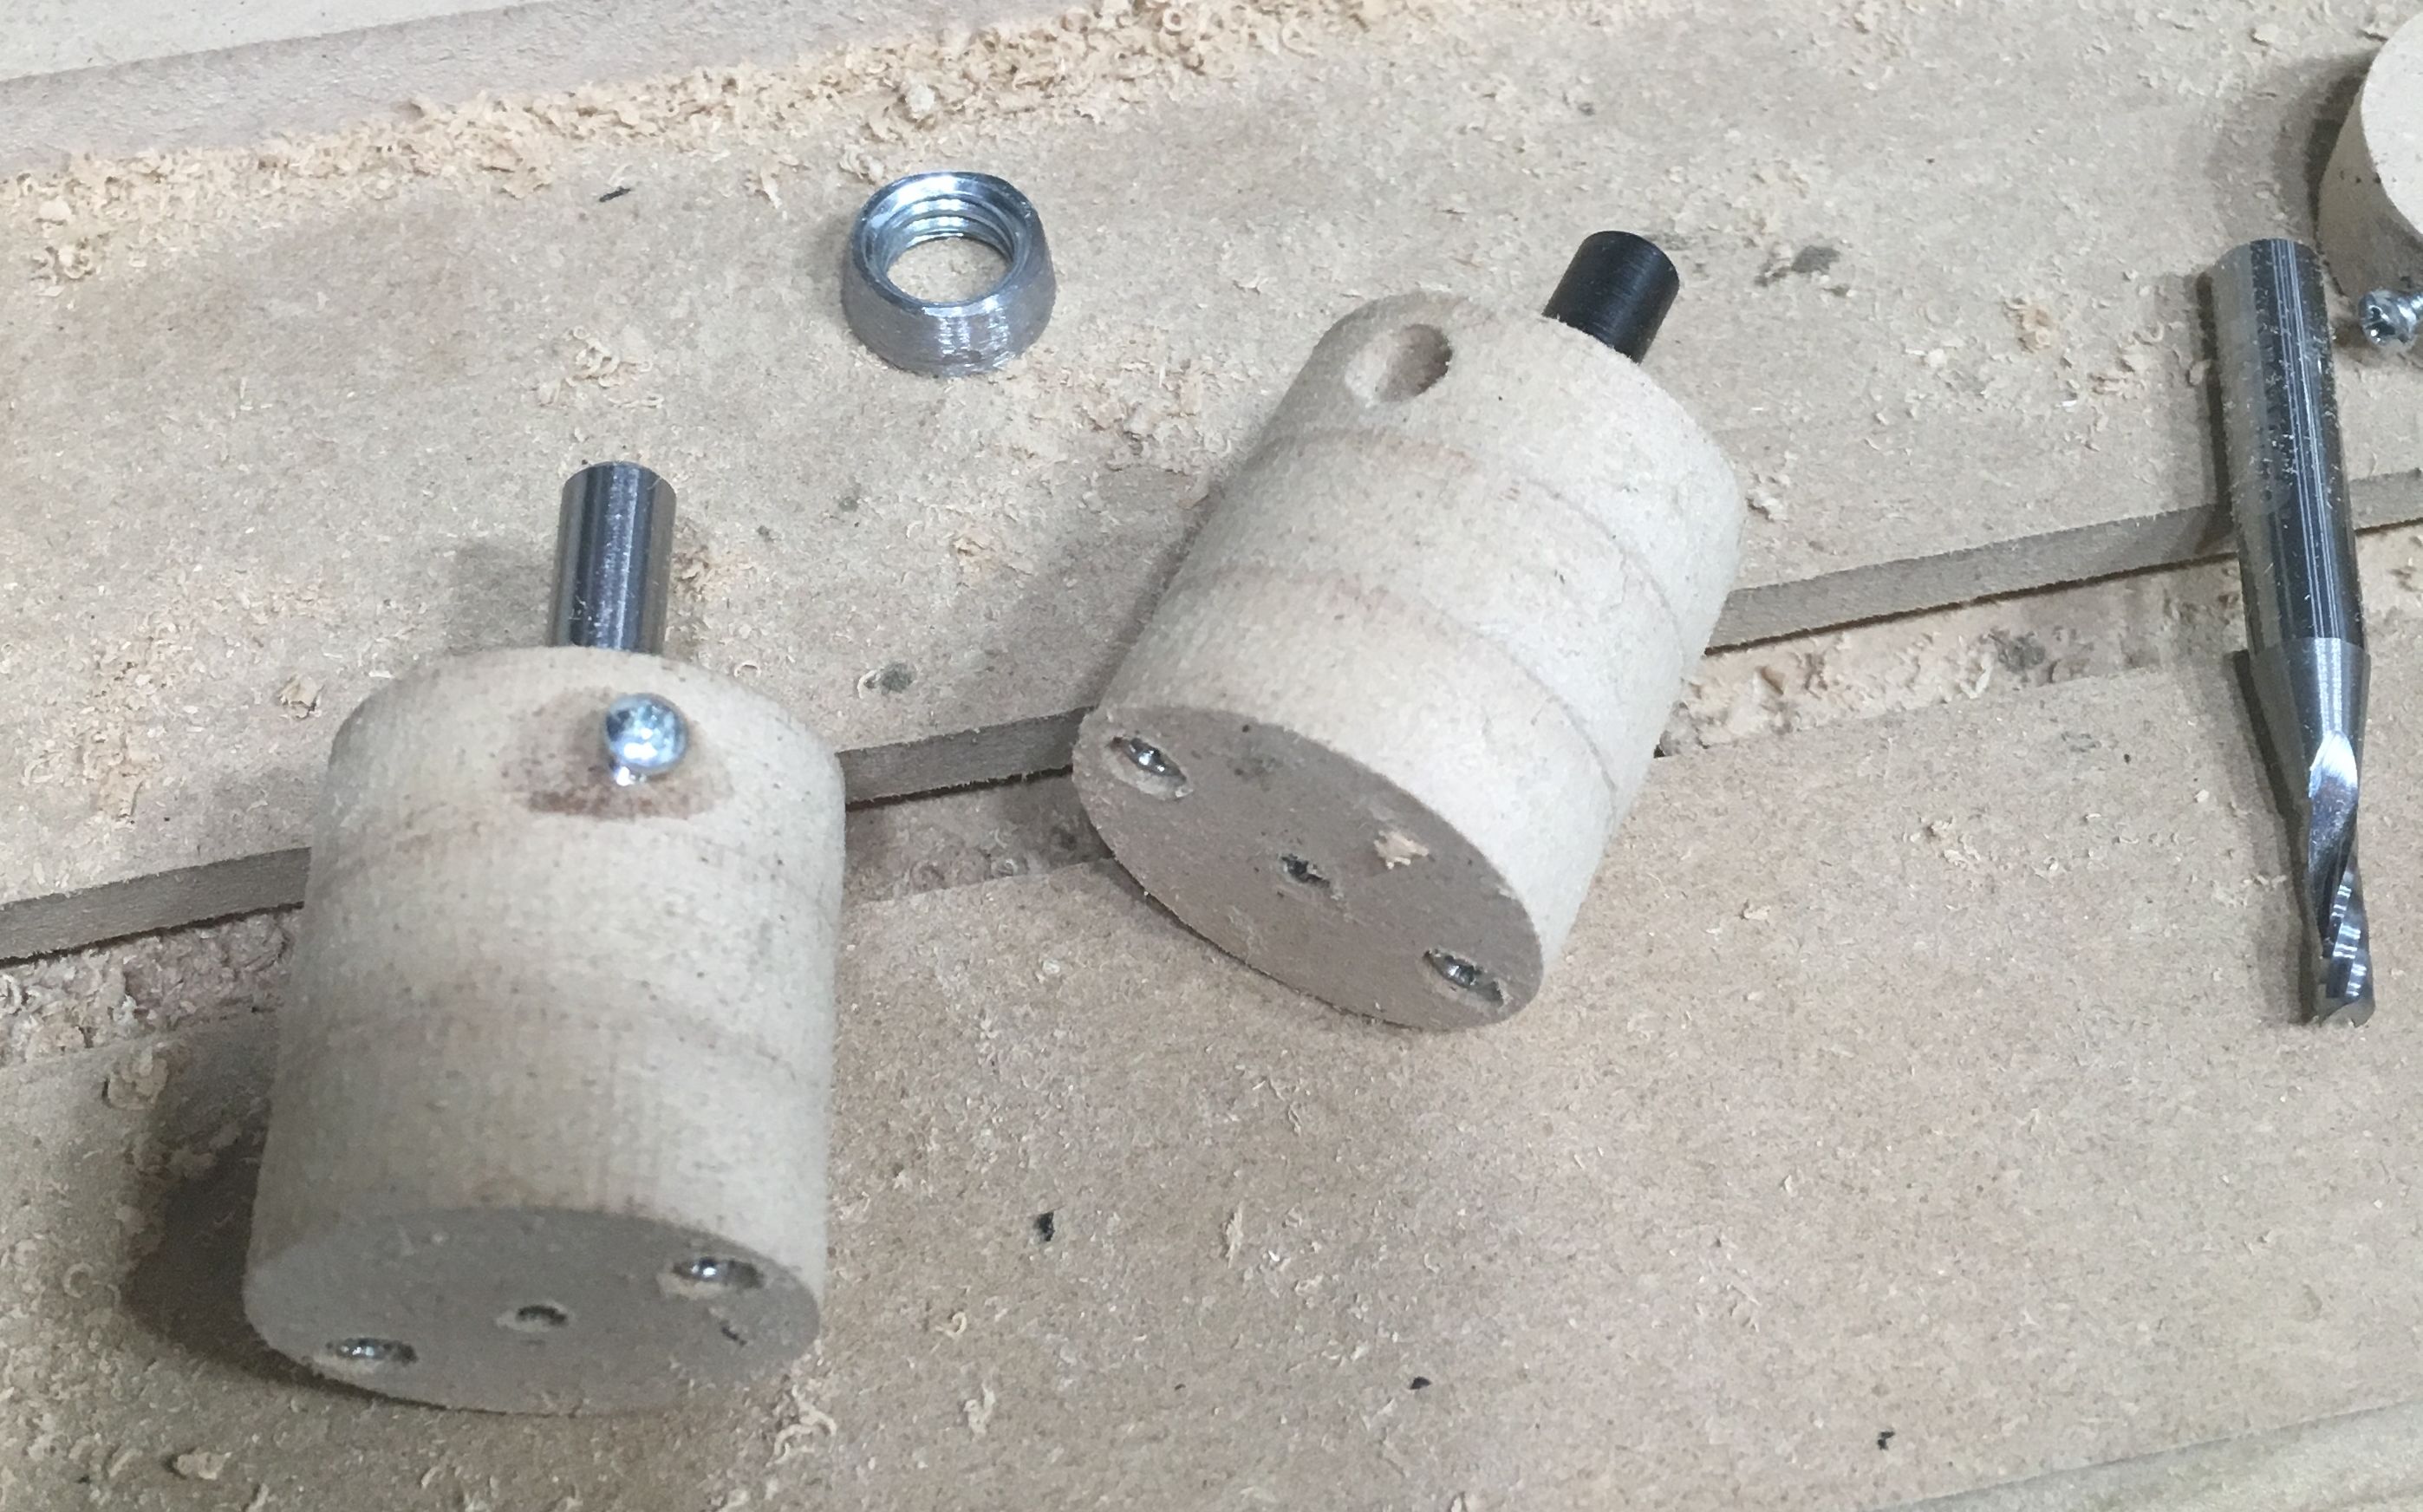
The two jigs with tools inside. Notice the tool tips flush with the bottom of the jig. Washer is in center.
Jigs are all the same height. Notice different length of tool. Also, notice locking screw on left jig, and access hole on right jig.
Washer sitting on top of jig before mounting tool in chuck.
It's important to note that these jigs need to be designed for specific tools and router chucks in order to work correctly. These work very well on my Hitachi MV12.


 Reply With Quote


Bookmarks