-
2 Attachment(s)
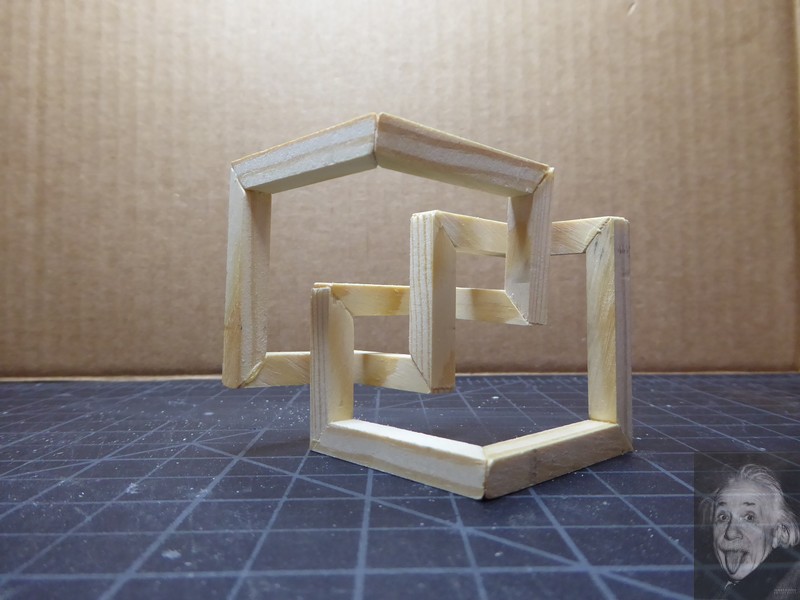
Cubic trefoil
My latest project, a trefoil knot,
(described more fully here: https://en.wikipedia.org/wiki/Trefoil_knot )
done using only linear segments and right angles, hence a cubic trefoil.
Deciding how to cut the 15 pieces was the easy part although they are not all the same. The real test comes during assembly. Each of the glued miter joints has to be 90 degrees and coplanar. Accomplishing this involved using a purpose-made right angle former with the assembly held in a jeweler's vise to guarantee a coplanar join.
Even with this care and waiting 12 hours for each joint to dry, error build-up was inevitable. The last joint required some fine-tuning with a sanding wand to make it fit.
It was a fun project but I don't recommend it if you are easily frustrated.
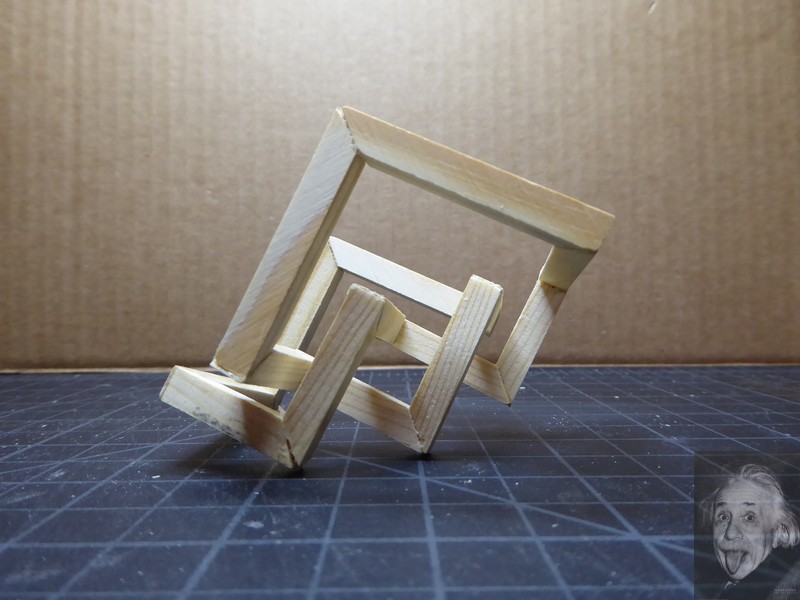
Next project will be the infinity cube...
https://grabcad.com/library/infinity-cube-6
Not as visually interesting but a lot easier to make.
Attachment 45097
Attachment 45098
-
I've known people who had the patience and skill to carve these out of a solid piece of material usually very soft wood. Some were extremely complex works of are with quite interesting changes in visual shape when viewed from the correct angles.
A great project, thanks for sharing.
-
1 Attachment(s)
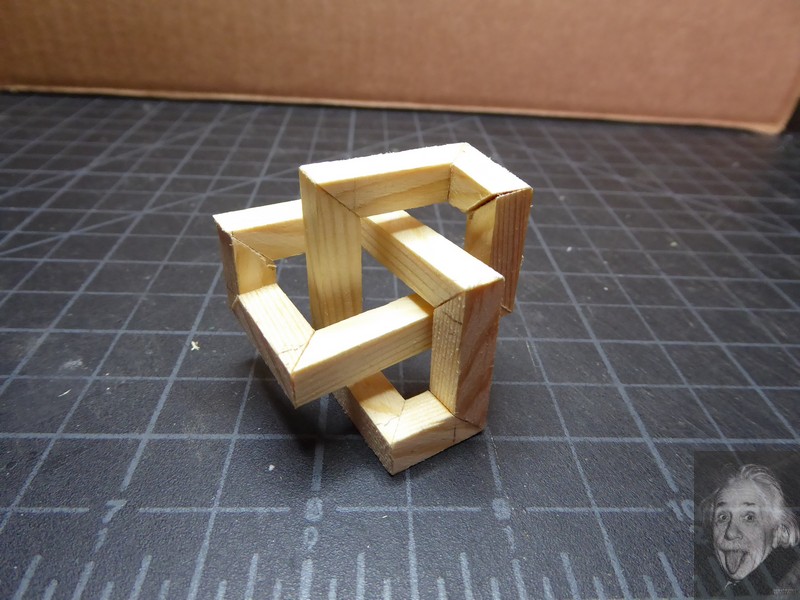
My den (known to my family as the Den of Antiquity) has very little display space left so I decided to make a miniature trefoil with mitered joints. My stock is 1/4" and the whole structure would fit in a 1.5" cube.
I started out using wood glue because, despite my distaste for the brown stuff, has worked well in the past for me. But constructing jigs to hold everything in place for the long time it takes for the glue to dry thoroughly so it can be built upon exhausted my patience. I switched to super glue and just held the pieces until the glue dried. If anyone wants to attempt one of these, super glue is the way to go.
Attachment 45145
-
1 Attachment(s)
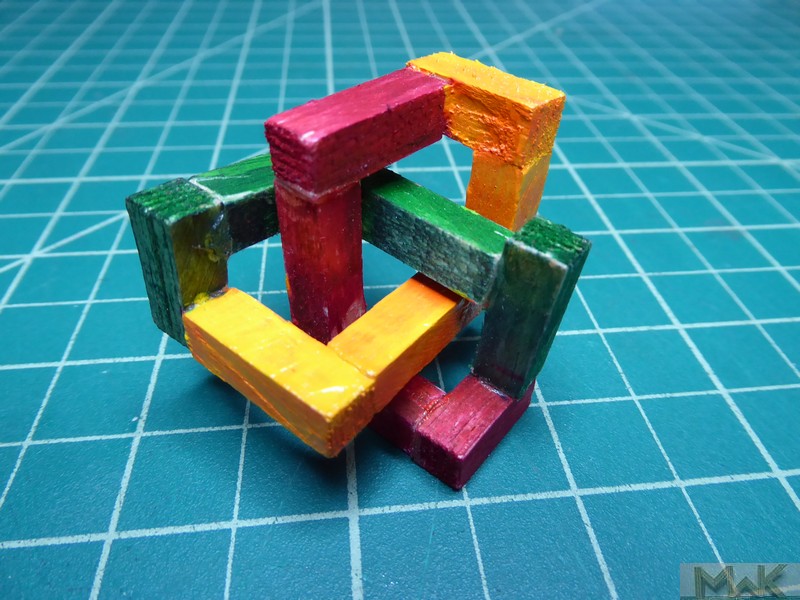
It occurred to me that the trefoil must be composed of three identical structures. If true, that would considerably simplify gluing the joints. One would make three simpler, identical forms, their simplicity simplifying gluing. Then, these three structures would be interwoven and glued into the final form. With more firm structure to clamp onto, this final assembly would be easier.
To assure myself that I knew what I was talking about, I took one of my earlier butt jointed failures (a glued joint slipped and froze in the wrong place) and painted the three structures. As one can see from the photo, the three structures are topologically identical, just as I imagined.
So, keep this simplification in mind if you decide to make one.
Attachment 49431