https://www.youtube.com/watch?v=F_w92CEMlT4
Printable View
Please tell us you've got plans in the works for this! There's no end to the amount of usefulness that we could get out of it. I'm about to start a new career in machining, and have been told time and again having a home shop to hone your skills while off work, especially when you want to build your own stuff, is indespensible. I would love to have a tool like this, if only to learn more about gearing and the math involved!
A very nicely made example of this tool, I enjoyed your video and explanation of the workings of it. I have the Ivan Law book but have not yet made the Eureka tool, I have been using the 4 tooth offset method you mention at around 15 mins and have made many usable cutters with that system the last ones were for my milling attachment.Attachment 27850
Thanks tmoore4748...Ivan Law's book Gears and Gear Making has a set of plans on the last 3 or so pages of the book. I used these drawing to build the tool. There are no building details there though. The project is pretty straight forward. I am putting a construction video together right now as I took lots of video while I was building. It will be a "show and tell" video as there are lots of approaches to this build. Then I am going back to my grasshopper clock build for a bit (see my U Tube Channel) but will then make a 3rd video on the Eureka tool where I'll make an involute gear cutter with a button tool and the Eureka tool. Thanks again for your interest...bob
A wonderful piece of engineering, need just to be retired for making pinions like that, I hope to have the time to make this tool in the future, now I'm just making it with a single teeth cutter which is really less elegant than with that solution.:hattip:
Okapi Thanks...single tooth gear cutters work just fine and it is nice to be retired and work on projects. I often wonder how I had enough time to stick work into my daily schedule:)
There is always the same problem when you're working for customers and on old mechanisms with pinions, the relation between the costs and what your customer is able to pay…:angry:
I can just take time to work on my own collection items but it can take years before I repair or just clean some of them.
That's spot on...within my sight I have 5 nice clocks and in a drawer several old pocket watches...all saved for my retirement...3 of the clocks have made it to test stands and seem to be running fine...but this Eureka tool is just so interesting I took time from a grasshopper escapement build to get a good look at it...I'm retired and I still can't keep up:)...Man I'm having fun!
<!-- BEGIN /var/www/html/homemadetools/protected/modules/zeus/views/tool/postUpdate.php -->
Thanks robertt4522! We've added your Gear Cutter to our Machining category,
as well as to your builder page: robertt4522's Homemade Tools. Your receipt:
<div id="blocks"> <div class="block b1 pngfix"> <div class="bimg"> <div> <a href="http://www.homemadetools.net/homemade-gear-cutter-7"> <img src="/uploads/220633/homemade-gear-cutter-7.jpeg"/> </a> </div> </div> <div class="head pngfix"></div> <div class="left pngfix"></div> <div class="right pngfix"></div> <div class="blockover b1 pngfix"> <div class="title"> <a href="http://www.homemadetools.net/homemade-gear-cutter-7">Gear Cutter</a> <span> by <a href="http://www.homemadetools.net/builder/robertt4522">robertt4522</a></span> </div> <div class="tags">tags: <a href='http://www.homemadetools.net/tag/cutting'>cutting</a>, <a href='http://www.homemadetools.net/tag/gears'>gears</a> </div> </div> </div> </div>
<!-- END /var/www/html/homemadetools/protected/modules/zeus/views/tool/postUpdate.php -->
<!-- BEGIN /var/www/html/homemadetools/protected/modules/zeus/views/tool/postUpdate.php -->
Thanks olderdan! We've added your Mill Gear Cutting Attachment to our Machining category,
as well as to your builder page: olderdan's Homemade Tools. Your receipt:
<div id="blocks"> <div class="block b1 pngfix"> <div class="bimg"> <div> <a href="http://www.homemadetools.net/homemade-mill-gear-cutting-attachment"> <img src="/uploads/220637/homemade-mill-gear-cutting-attachment.png"/> </a> </div> </div> <div class="head pngfix"></div> <div class="left pngfix"></div> <div class="right pngfix"></div> <div class="blockover b1 pngfix"> <div class="title"> <a href="http://www.homemadetools.net/homemade-mill-gear-cutting-attachment">Mill Gear Cutting Attachment</a> <span> by <a href="http://www.homemadetools.net/builder/olderdan">olderdan</a></span> </div> <div class="tags">tags: <a href='http://www.homemadetools.net/tag/cutting'>cutting</a>, <a href='http://www.homemadetools.net/tag/gears'>gears</a> </div> </div> </div> </div>
<!-- END /var/www/html/homemadetools/protected/modules/zeus/views/tool/postUpdate.php -->
If you enjoyed watching the Eureka Tool in my first video, I thought you might enjoy a bit more in depth look at the tool. Ive made 4 more videos to give you a much more complete look at the tool. The first 2 a simply construction videos, then in the 3rd video I make a cutter from beginning to end and the last video is a more detailed look at the button tool.
https://www.youtube.com/watch?v=XQ8w691ZfFE
https://www.youtube.com/watch?v=a85cuy7MLDk&t=142s
https://www.youtube.com/watch?v=5X0hUJYmPcc&t=1235s
https://www.youtube.com/watch?v=mDkK05OcMiY&t=1229s
I have watched these videos on you tube and would like to thank you for such an excellent and well detailed explanation and the clear filming. Truly a monumental effort and greatly appreciated.
Thanks a lot...I really enjoyed making this series...I really learned a lot...bob
Thanks a lot for these great videos and excellent workmanship! I've finally understood the inner workings of this tool.
Now I've just gottta get my head clear enough to try to adapt that method for relieving my upcoming 38DP 20PA 14 mm dia hob project, cut on my metric mini lathe.
Interesting problems and hard fun ahead.
Cheers, Johan
Thanks Johan...I made a 48DP 20PA hob to cut the gears for my thread cutting attachment featured on another of my videos...I used an end mill to cut the back relief about .0625" back from the cutting edge...I made 18 aluminum gears with that hob and they run together great...I believe I could cut CRS gears as easily with a sharpening step included...that hob was great and the type of relief the Eureka Tool creates is nice and professional looking, but you might just want to try a simple back relief and see if you like it....I have a video out on hob making too...it was one of my early videos...but you might find it helpful...no matter what...good luck and have fun cutting your gears...bob
Thanks, Bob for your tips and encouragement. As you say, mill relieving the hob blank's teeth is usually "good enuff", but...
I'm thinking along the following lines:
Relieving the rear of the hob's tooth, you (merely) mill away the teeth TOPS,
while at the root, the flanks will still cut/ rub the top of the gear-to-be, right?
The Eureka tool jabs the form tool into the blank - relieving the top ONLY by deepening the bottom flanks.
Here I might be barking up the wrong tree - as the eventual rubs would be of only marginal importance?
Now, a Eureka for hob making (though in my small scale mini lathe) would be quite a cumbersome project for my "closet shop", SO:
I'm thinking in perhaps trying to have my rigid tool-post grinder setup with a 40 deg rotary HSS file, AND
making a quick-and-dirty cross slide infeed eccentric synchronized w the spindle,
so as to make this infeed 4 times per spindle rev - thus relieving ONLY the hob's bottom flanks.
Then it would be easy to relieve the tops by merely filing axially.
Any thought on this would be much appreciated. Johan
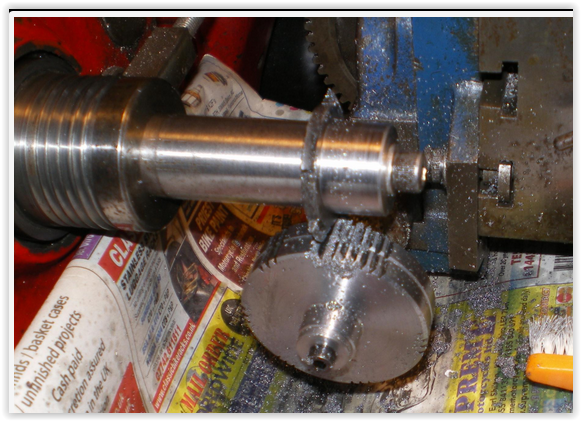
Johan...making a hob is quite quick and easy...the plunge cuts are the only cuts that need to be right on the mark and any plunge cut on a small lathe can be a bit trying but is doable once you get a hang on it with your lathe...how you relieve the back of the teeth can be how you want to do it...I set up my hob with a tail-stock center now and form the relief with a slitting saw...I've stopped using an end mill...it does not make a better hob it just is a better set up for me...get your plunge cuts right and how you relieve the cutting edge is what works best for you...a small patch of material behind the cutting edge will rub but I've never had any problem with this...I've made several hobs and all worked very well...also the multi-tooth cutters I use for clocks have the cutting edge relieved the same way with no problems......bob
Thanks Bob - I guess you were absolutely right:
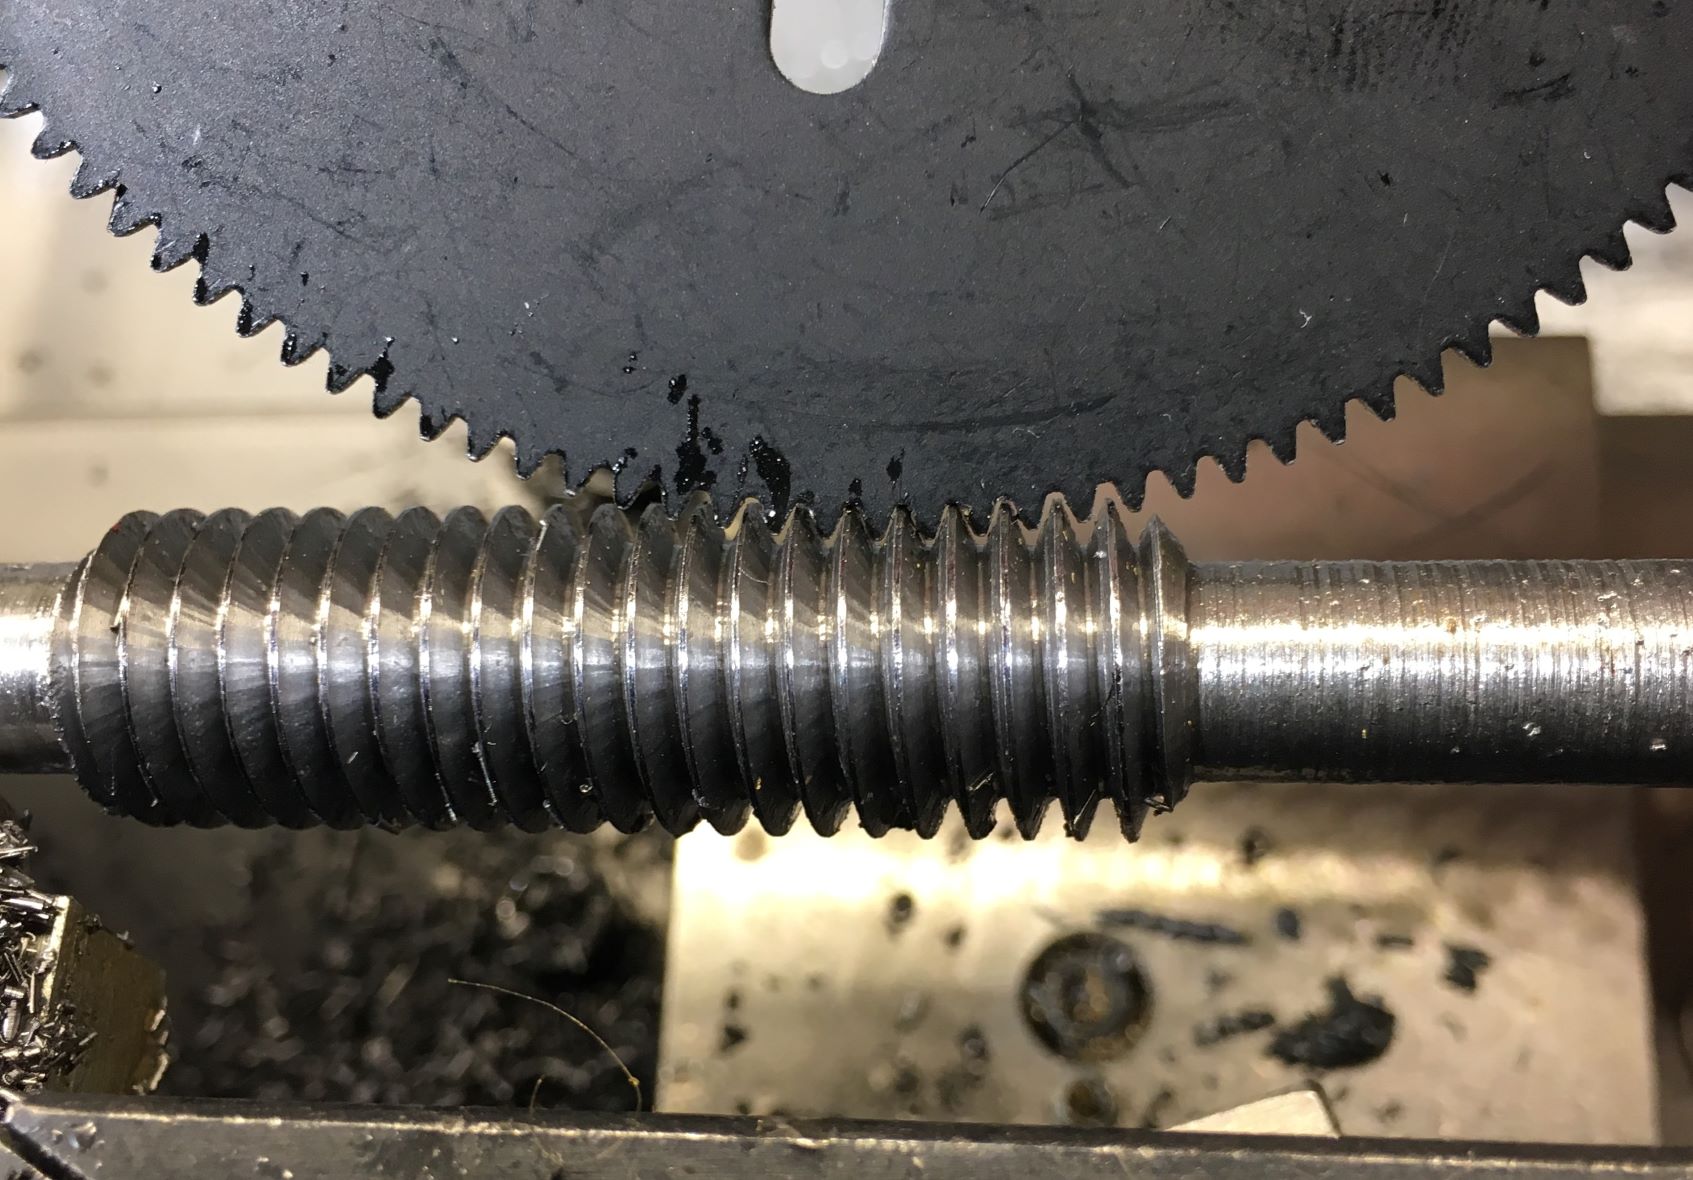
Attachment 29850
Proof of concept in making and checking an operational hob from a piece of BMS-
half an hour for setup the homegrown & 3D printed 12 TPI change gears, the 20 deg compound angle and 40 deg tool,
and another half hour in cutting, by feeding in the compound 95 thou (2,42 mm).
Worked consistently throughout, with only minor chatter problems.
Guess the traveling steady will help against that when all-treading the 250 mm x 14 mm drill rod, parting, relieving etc.
Thanks for your encouragement!
Johan
Great stuff...very nice to see it...thanks...bob
It seems to me that I have seen the Eureka tool used to cut the back clearance on the teeth of wheel cutters. I'm not sure how one could use it to cut gear teeth.