27 Attachment(s)
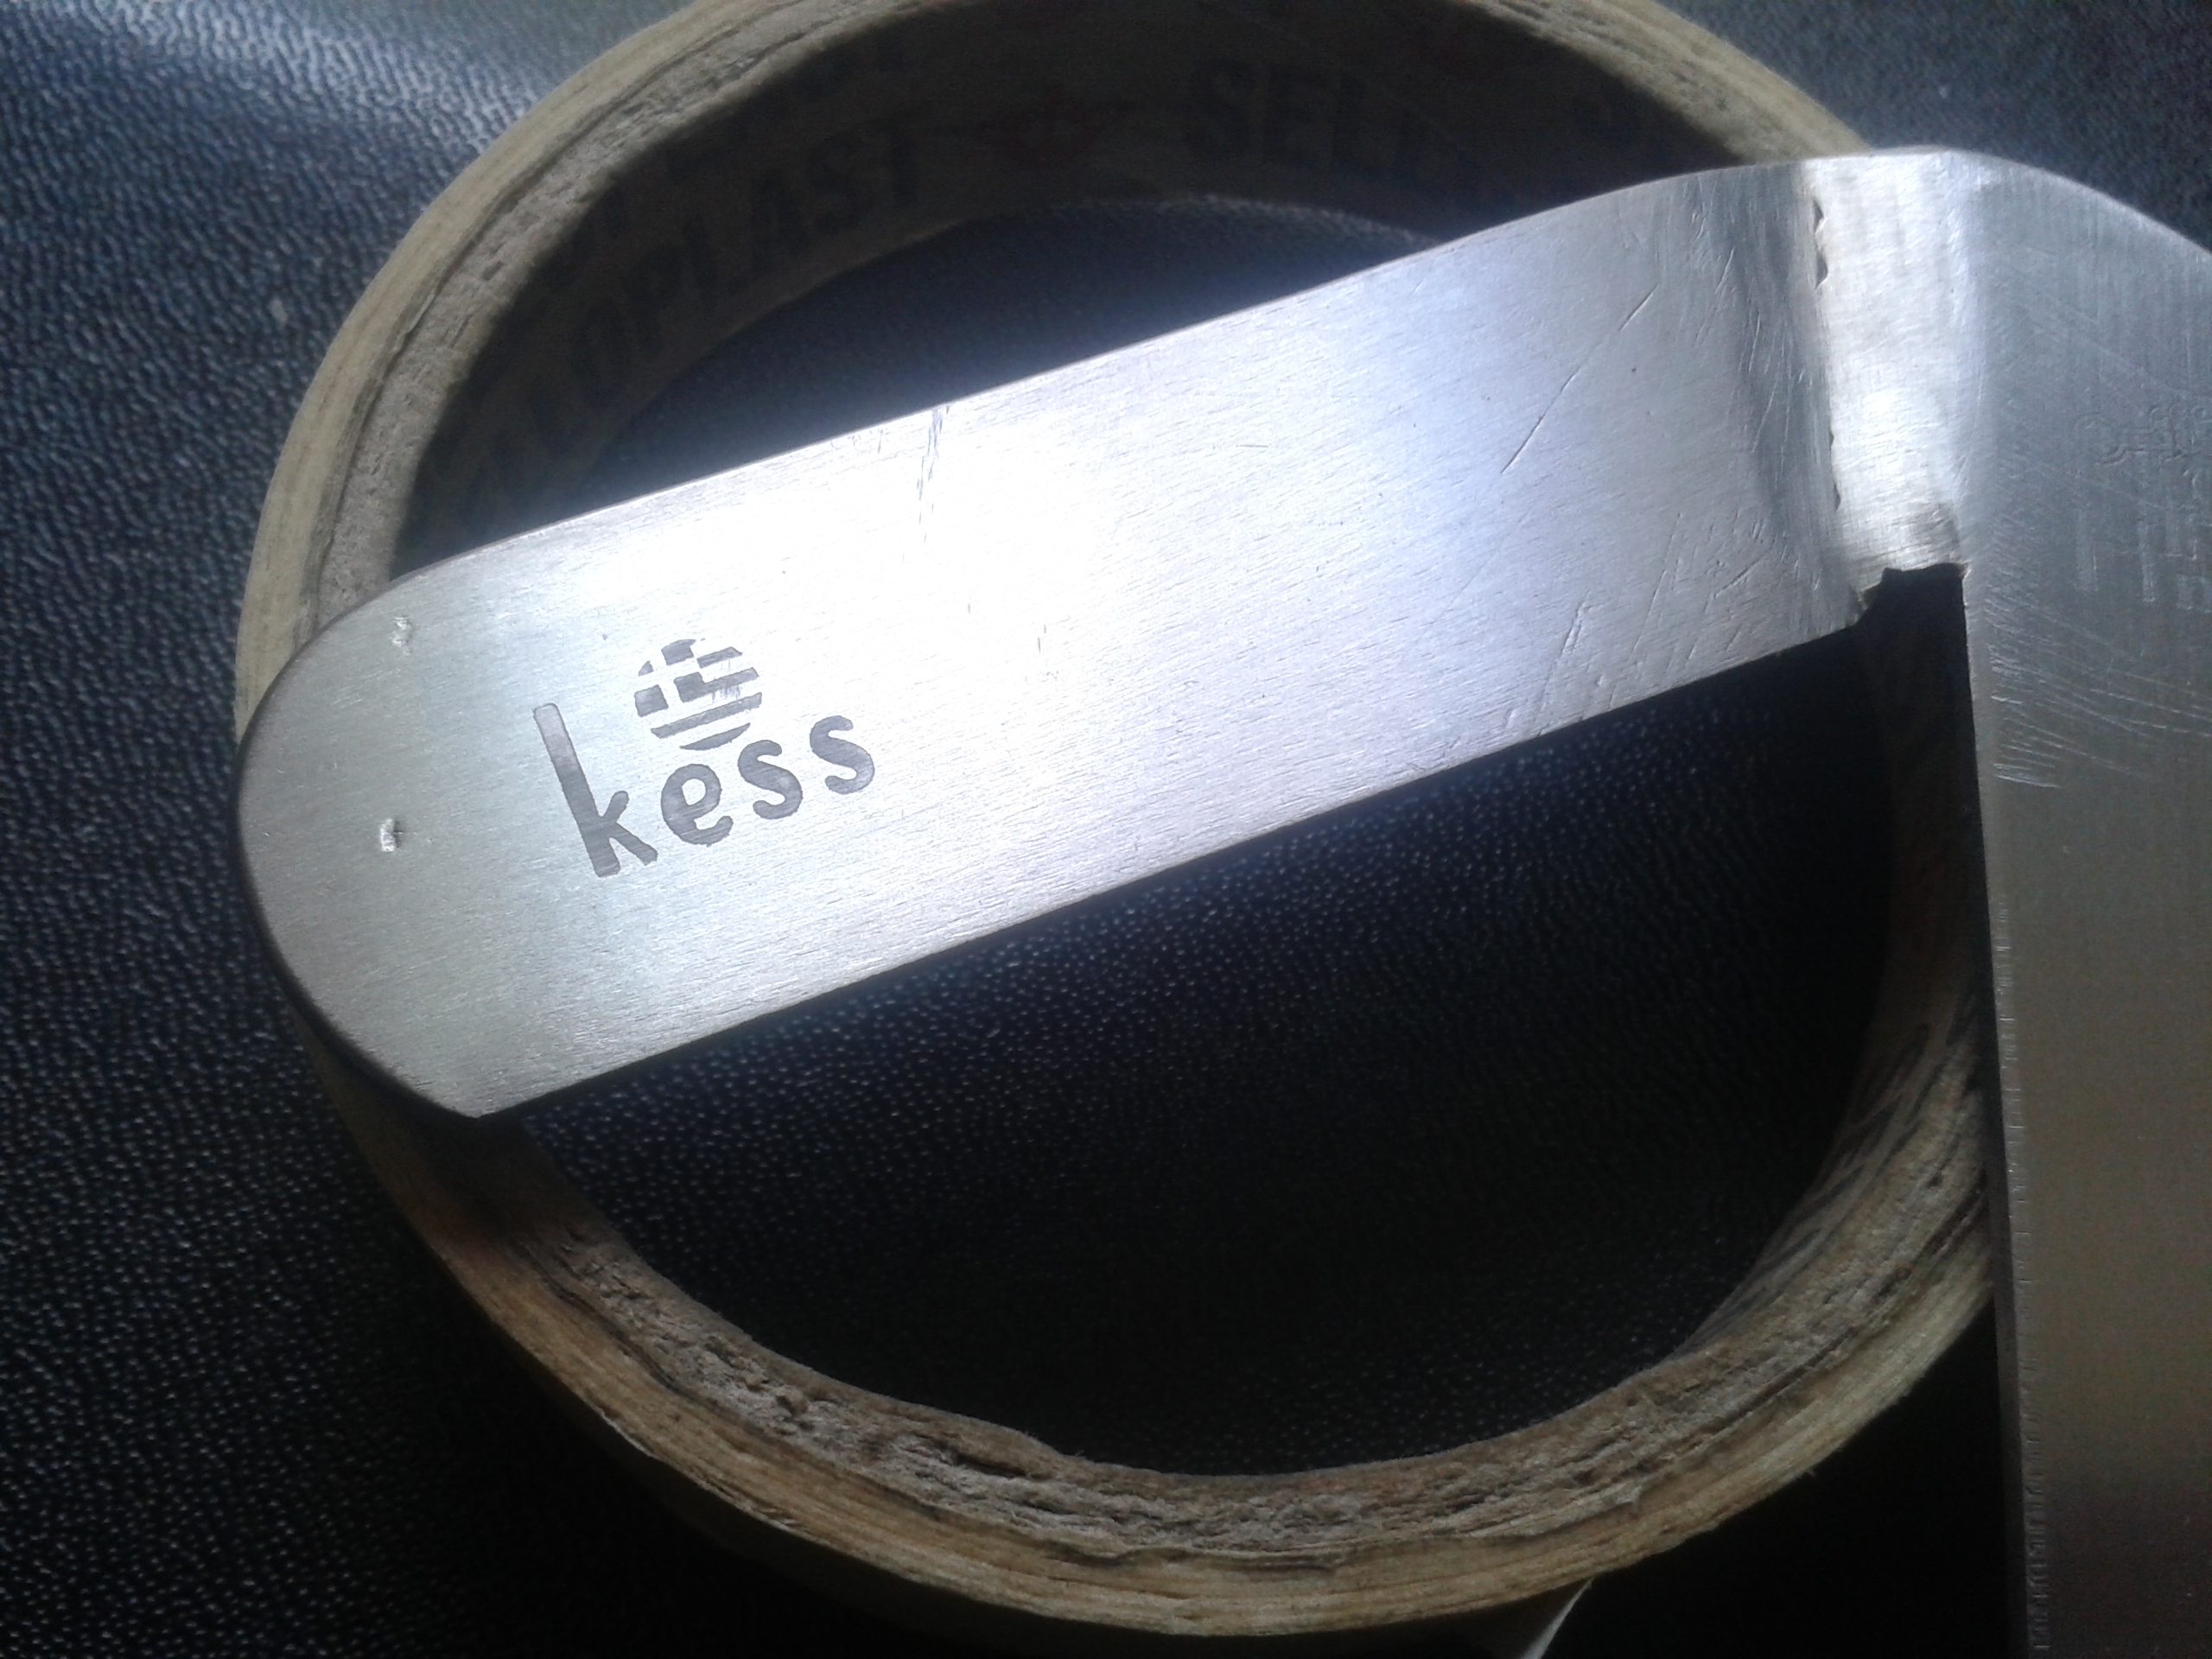
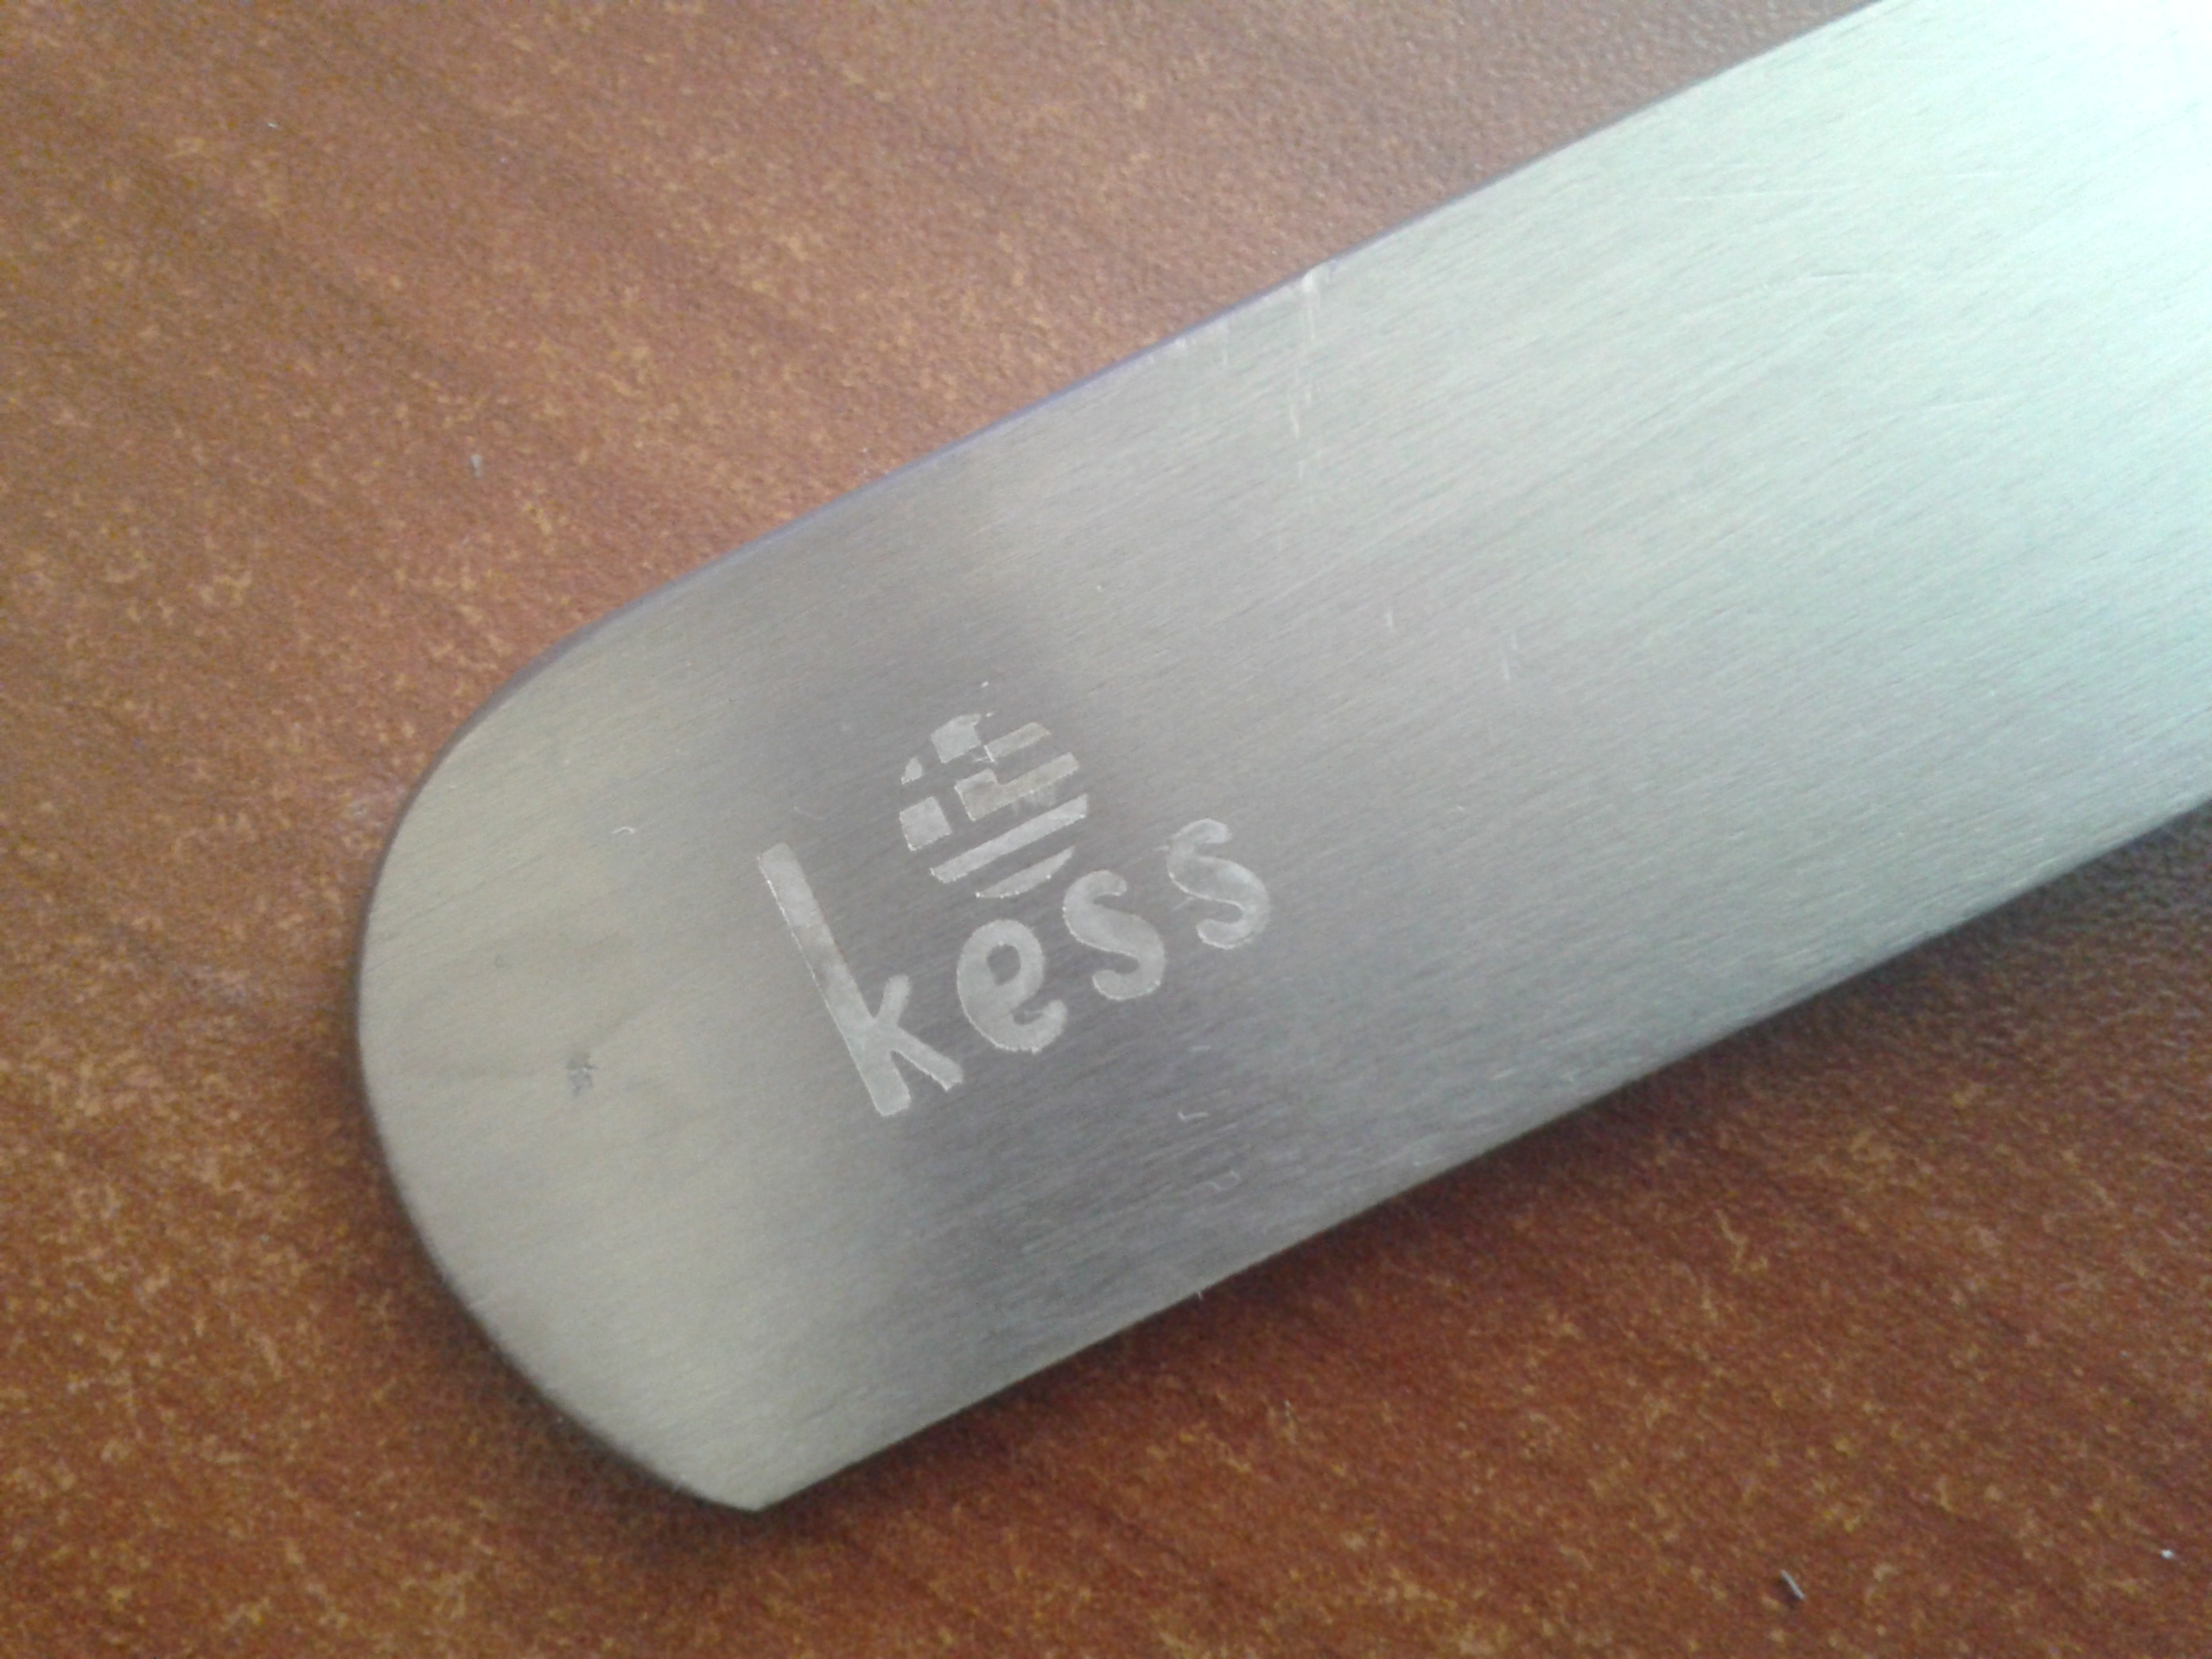
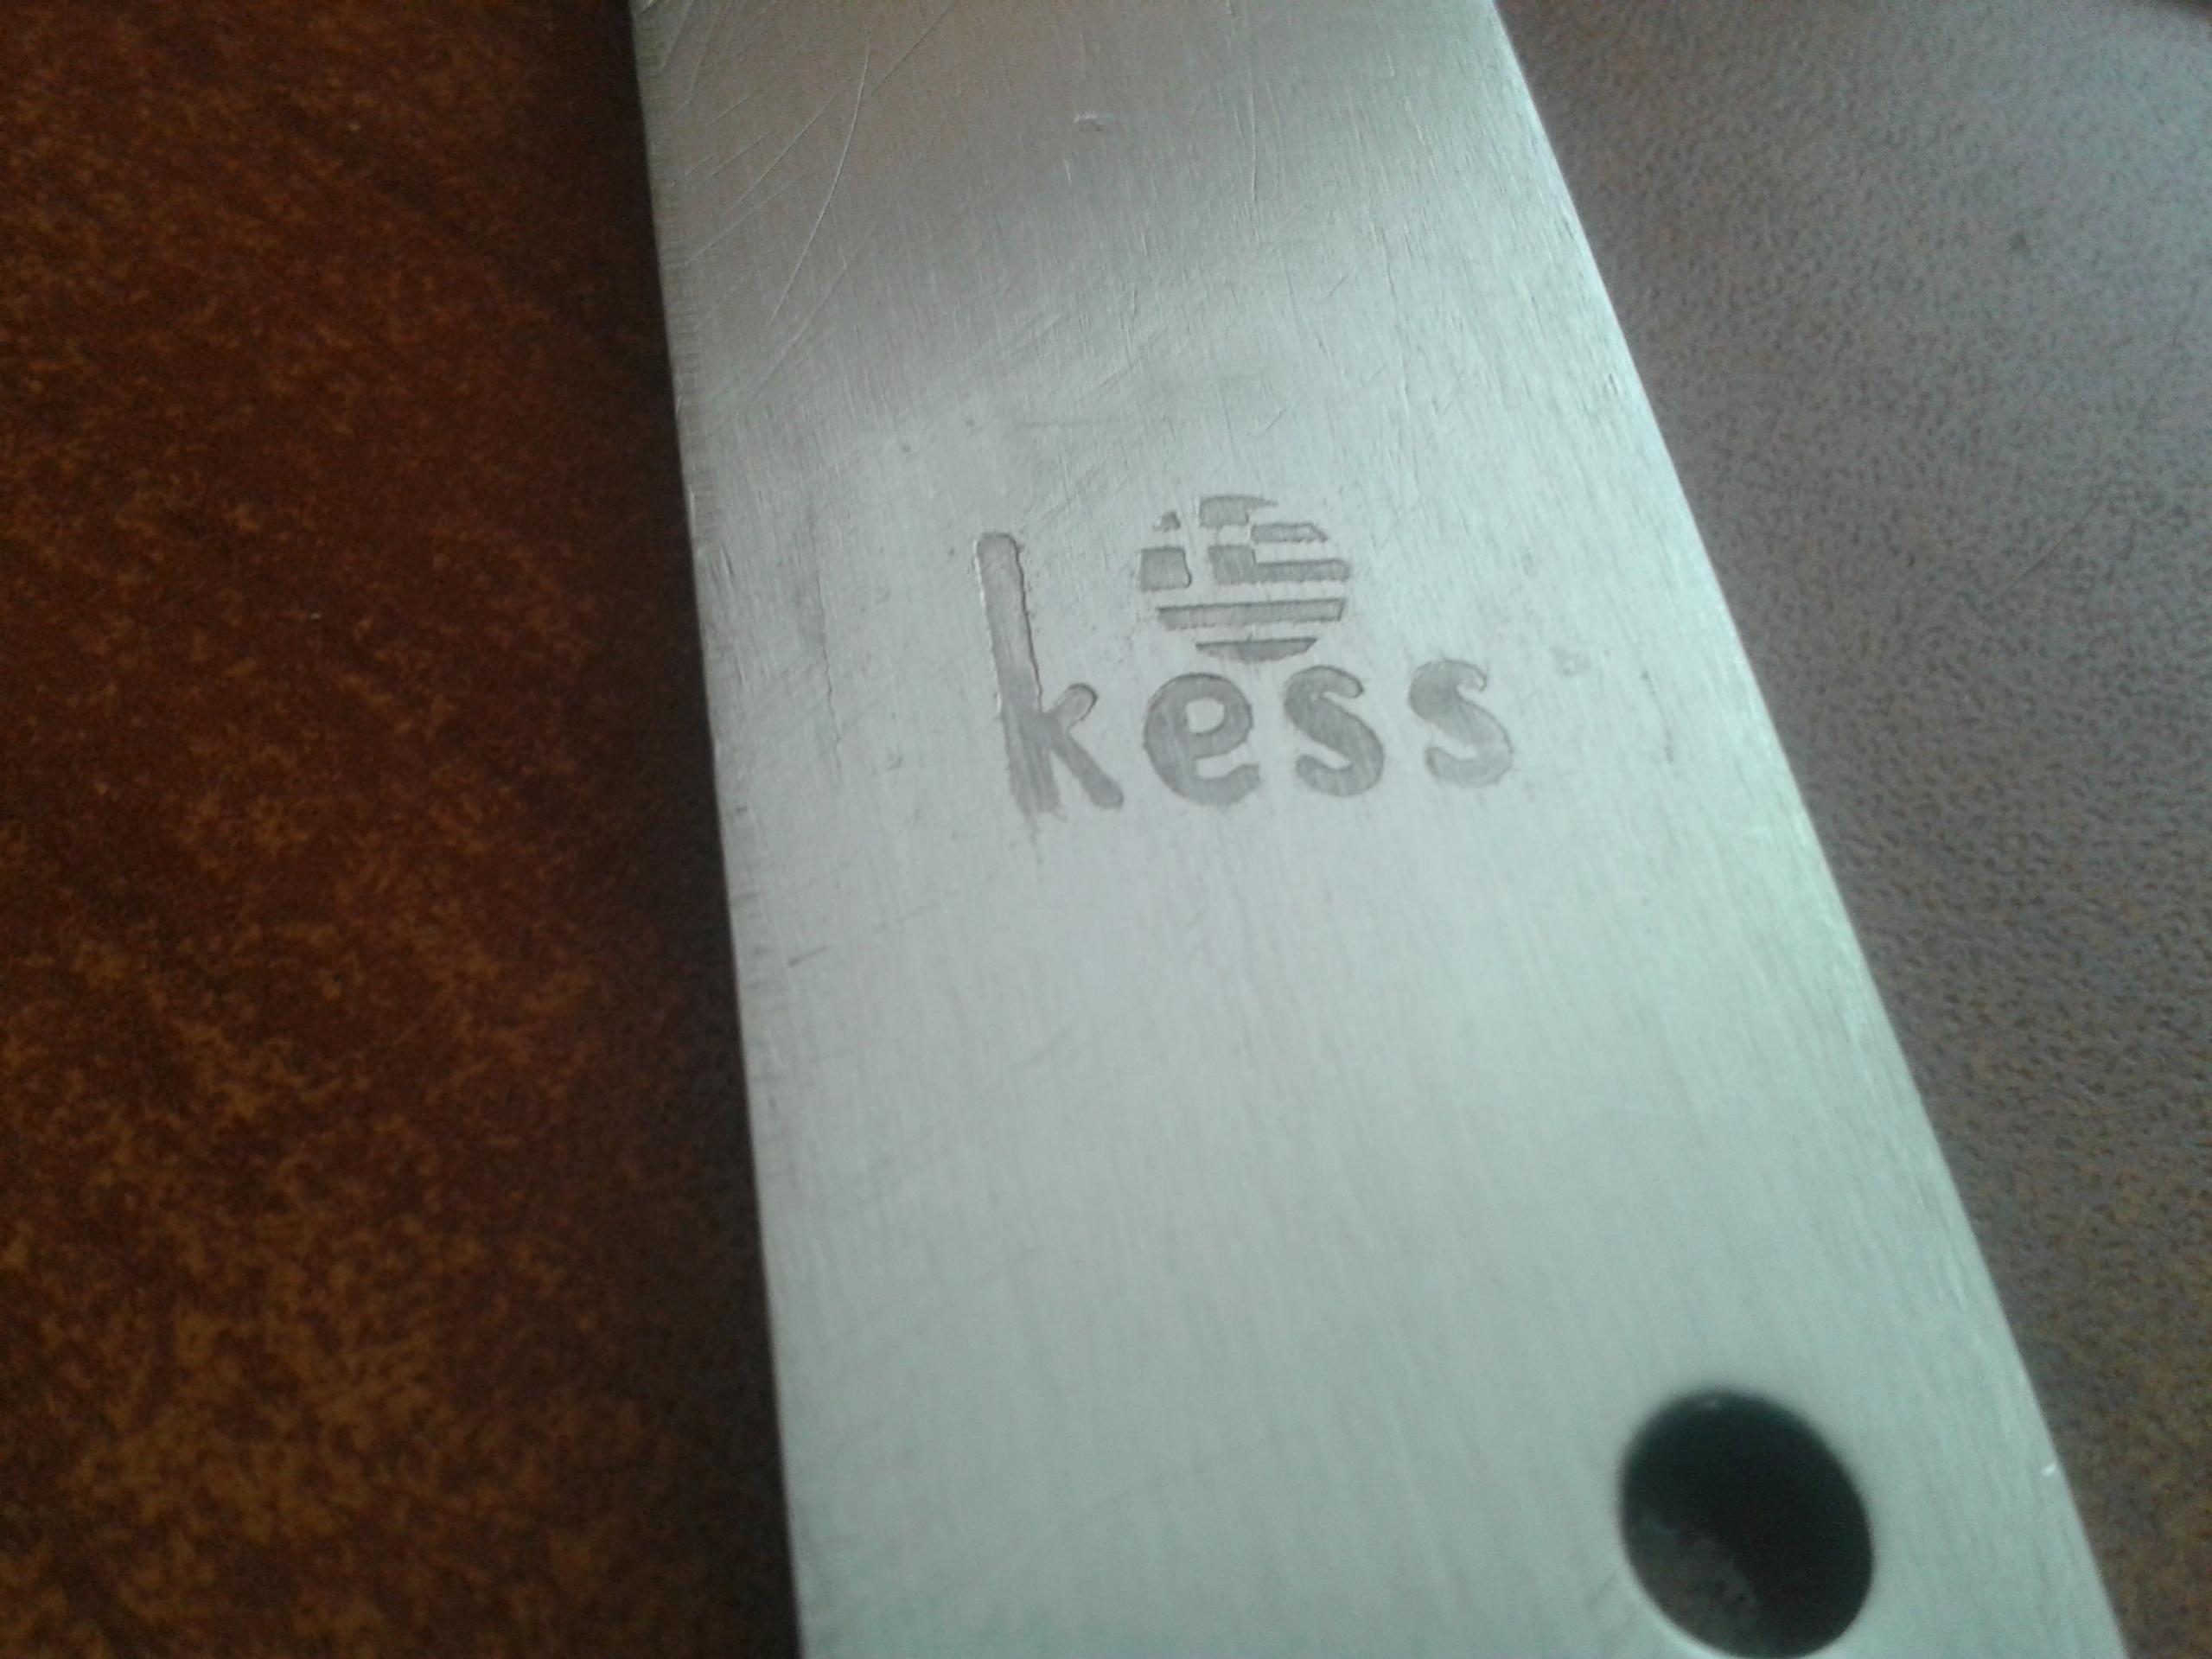
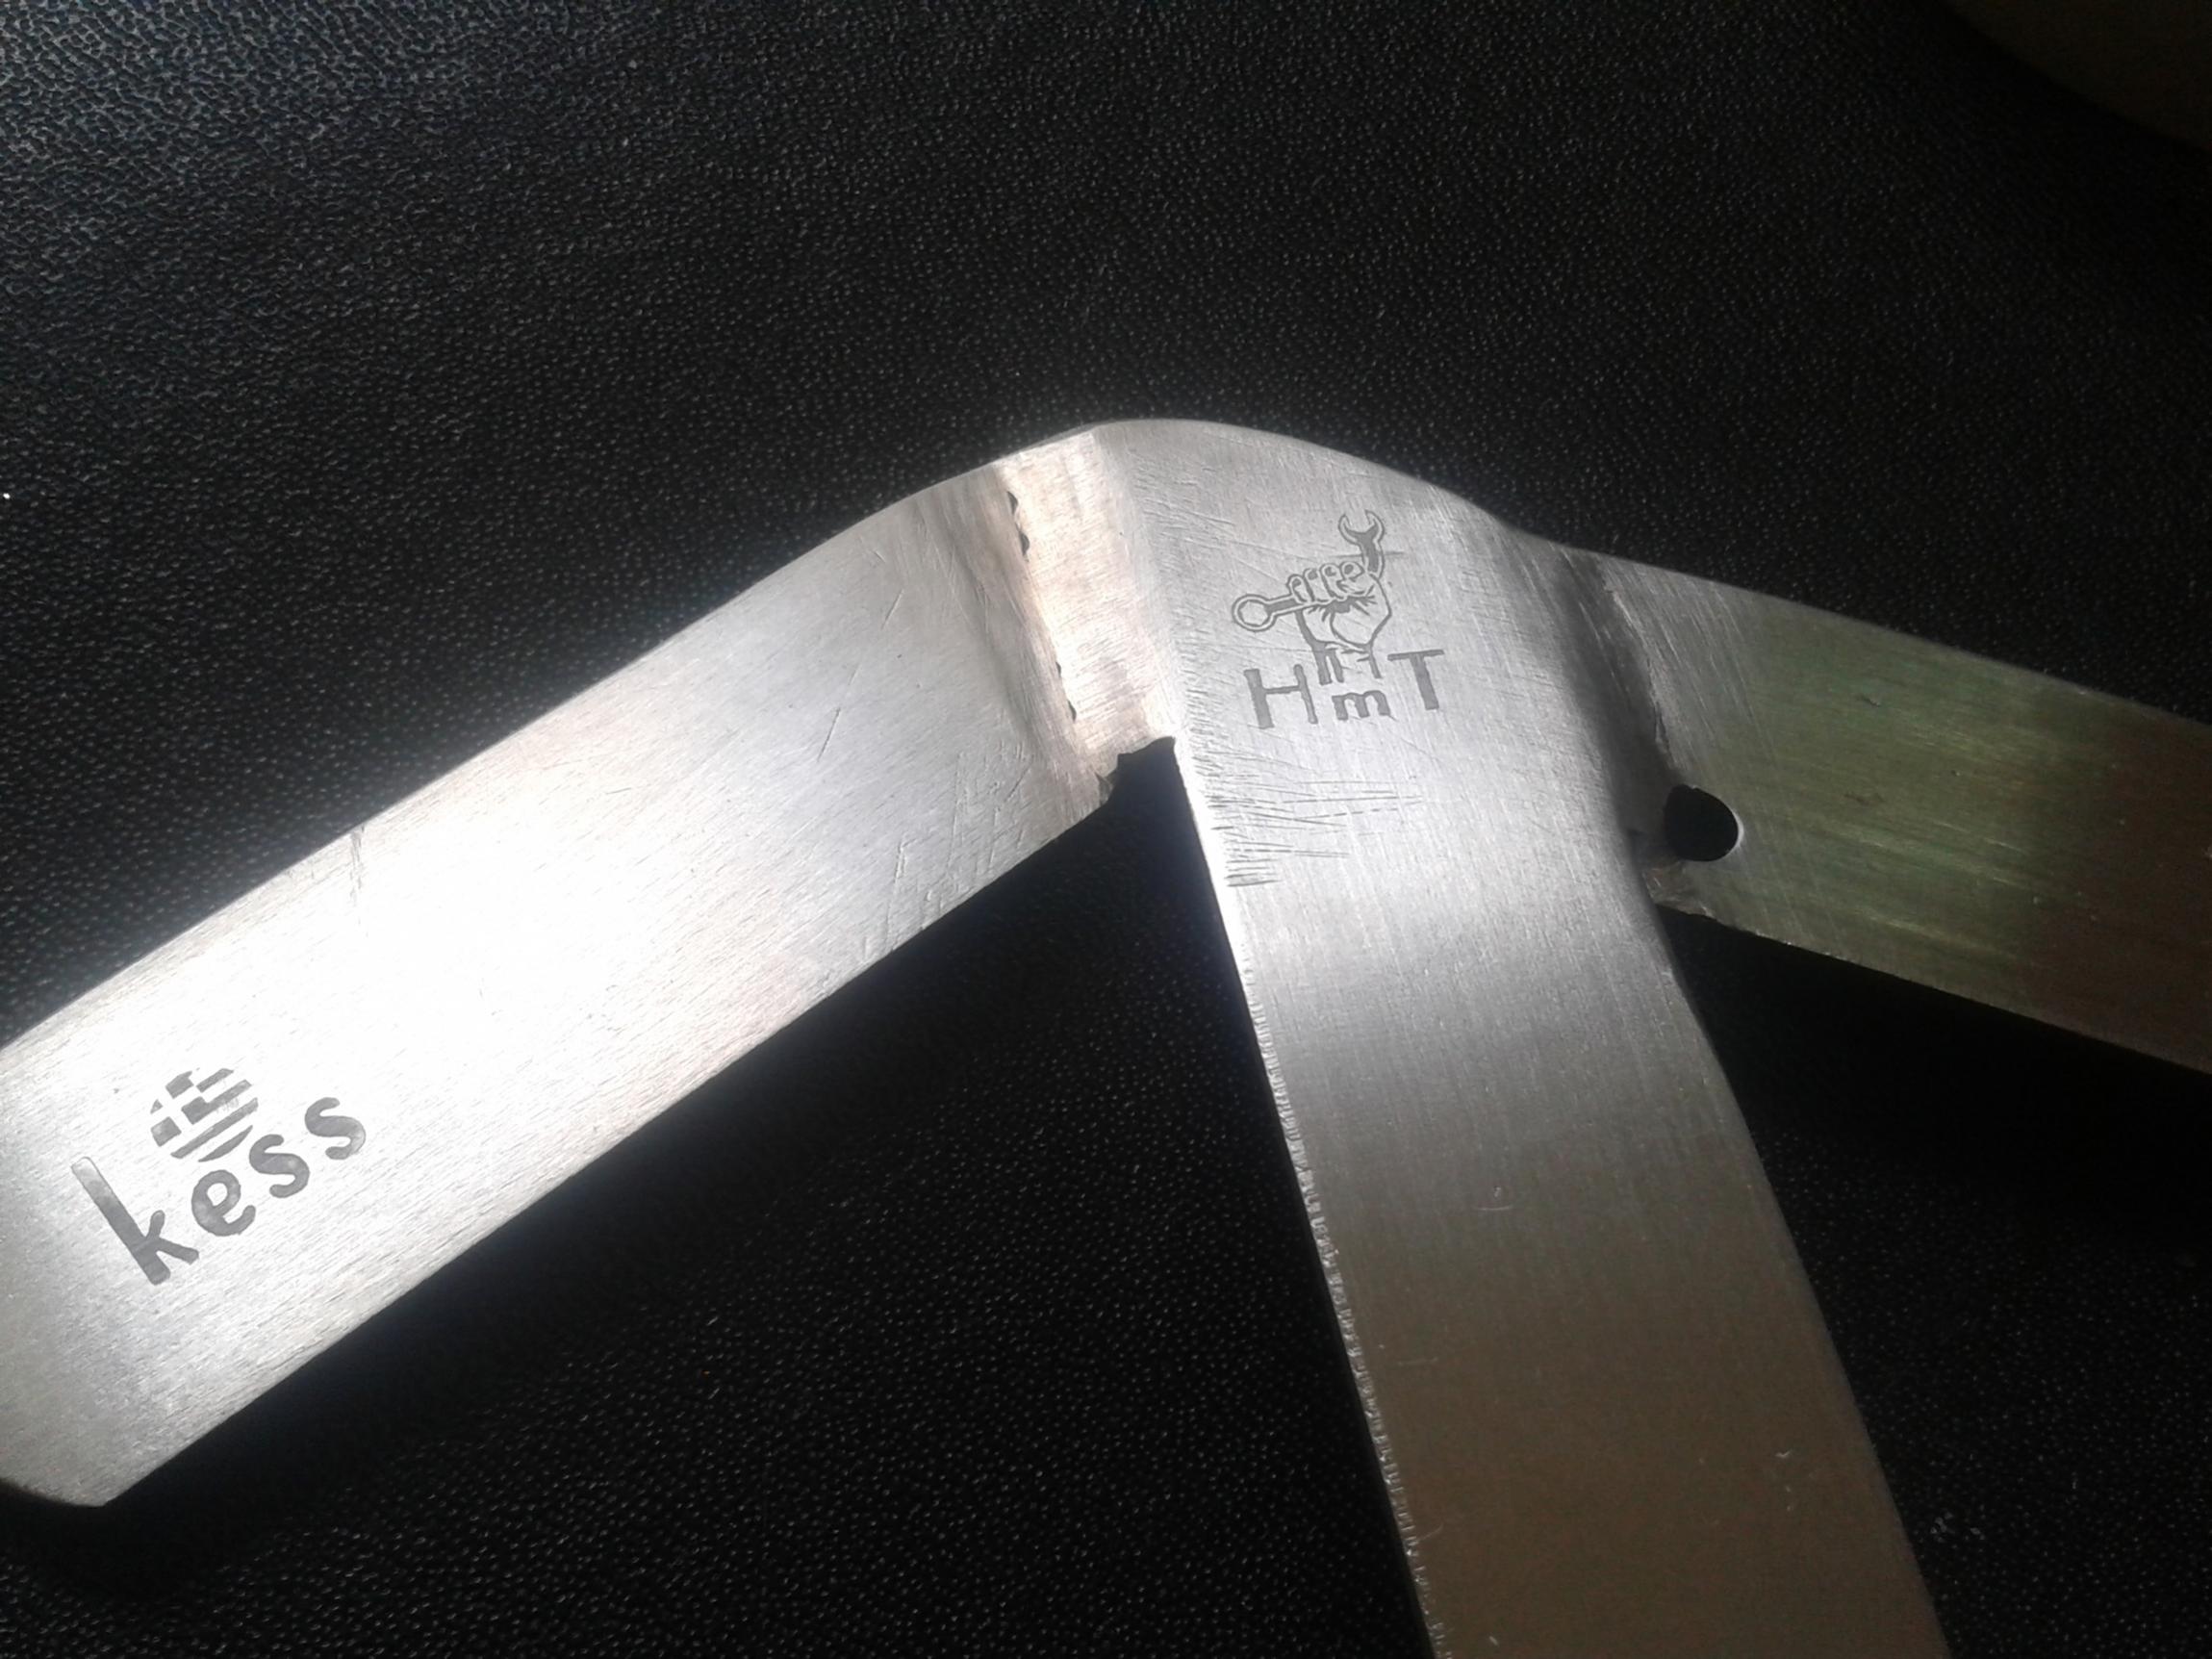
Engrave your logo by electrolysis.
https://youtu.be/-PqZiZm9xaw
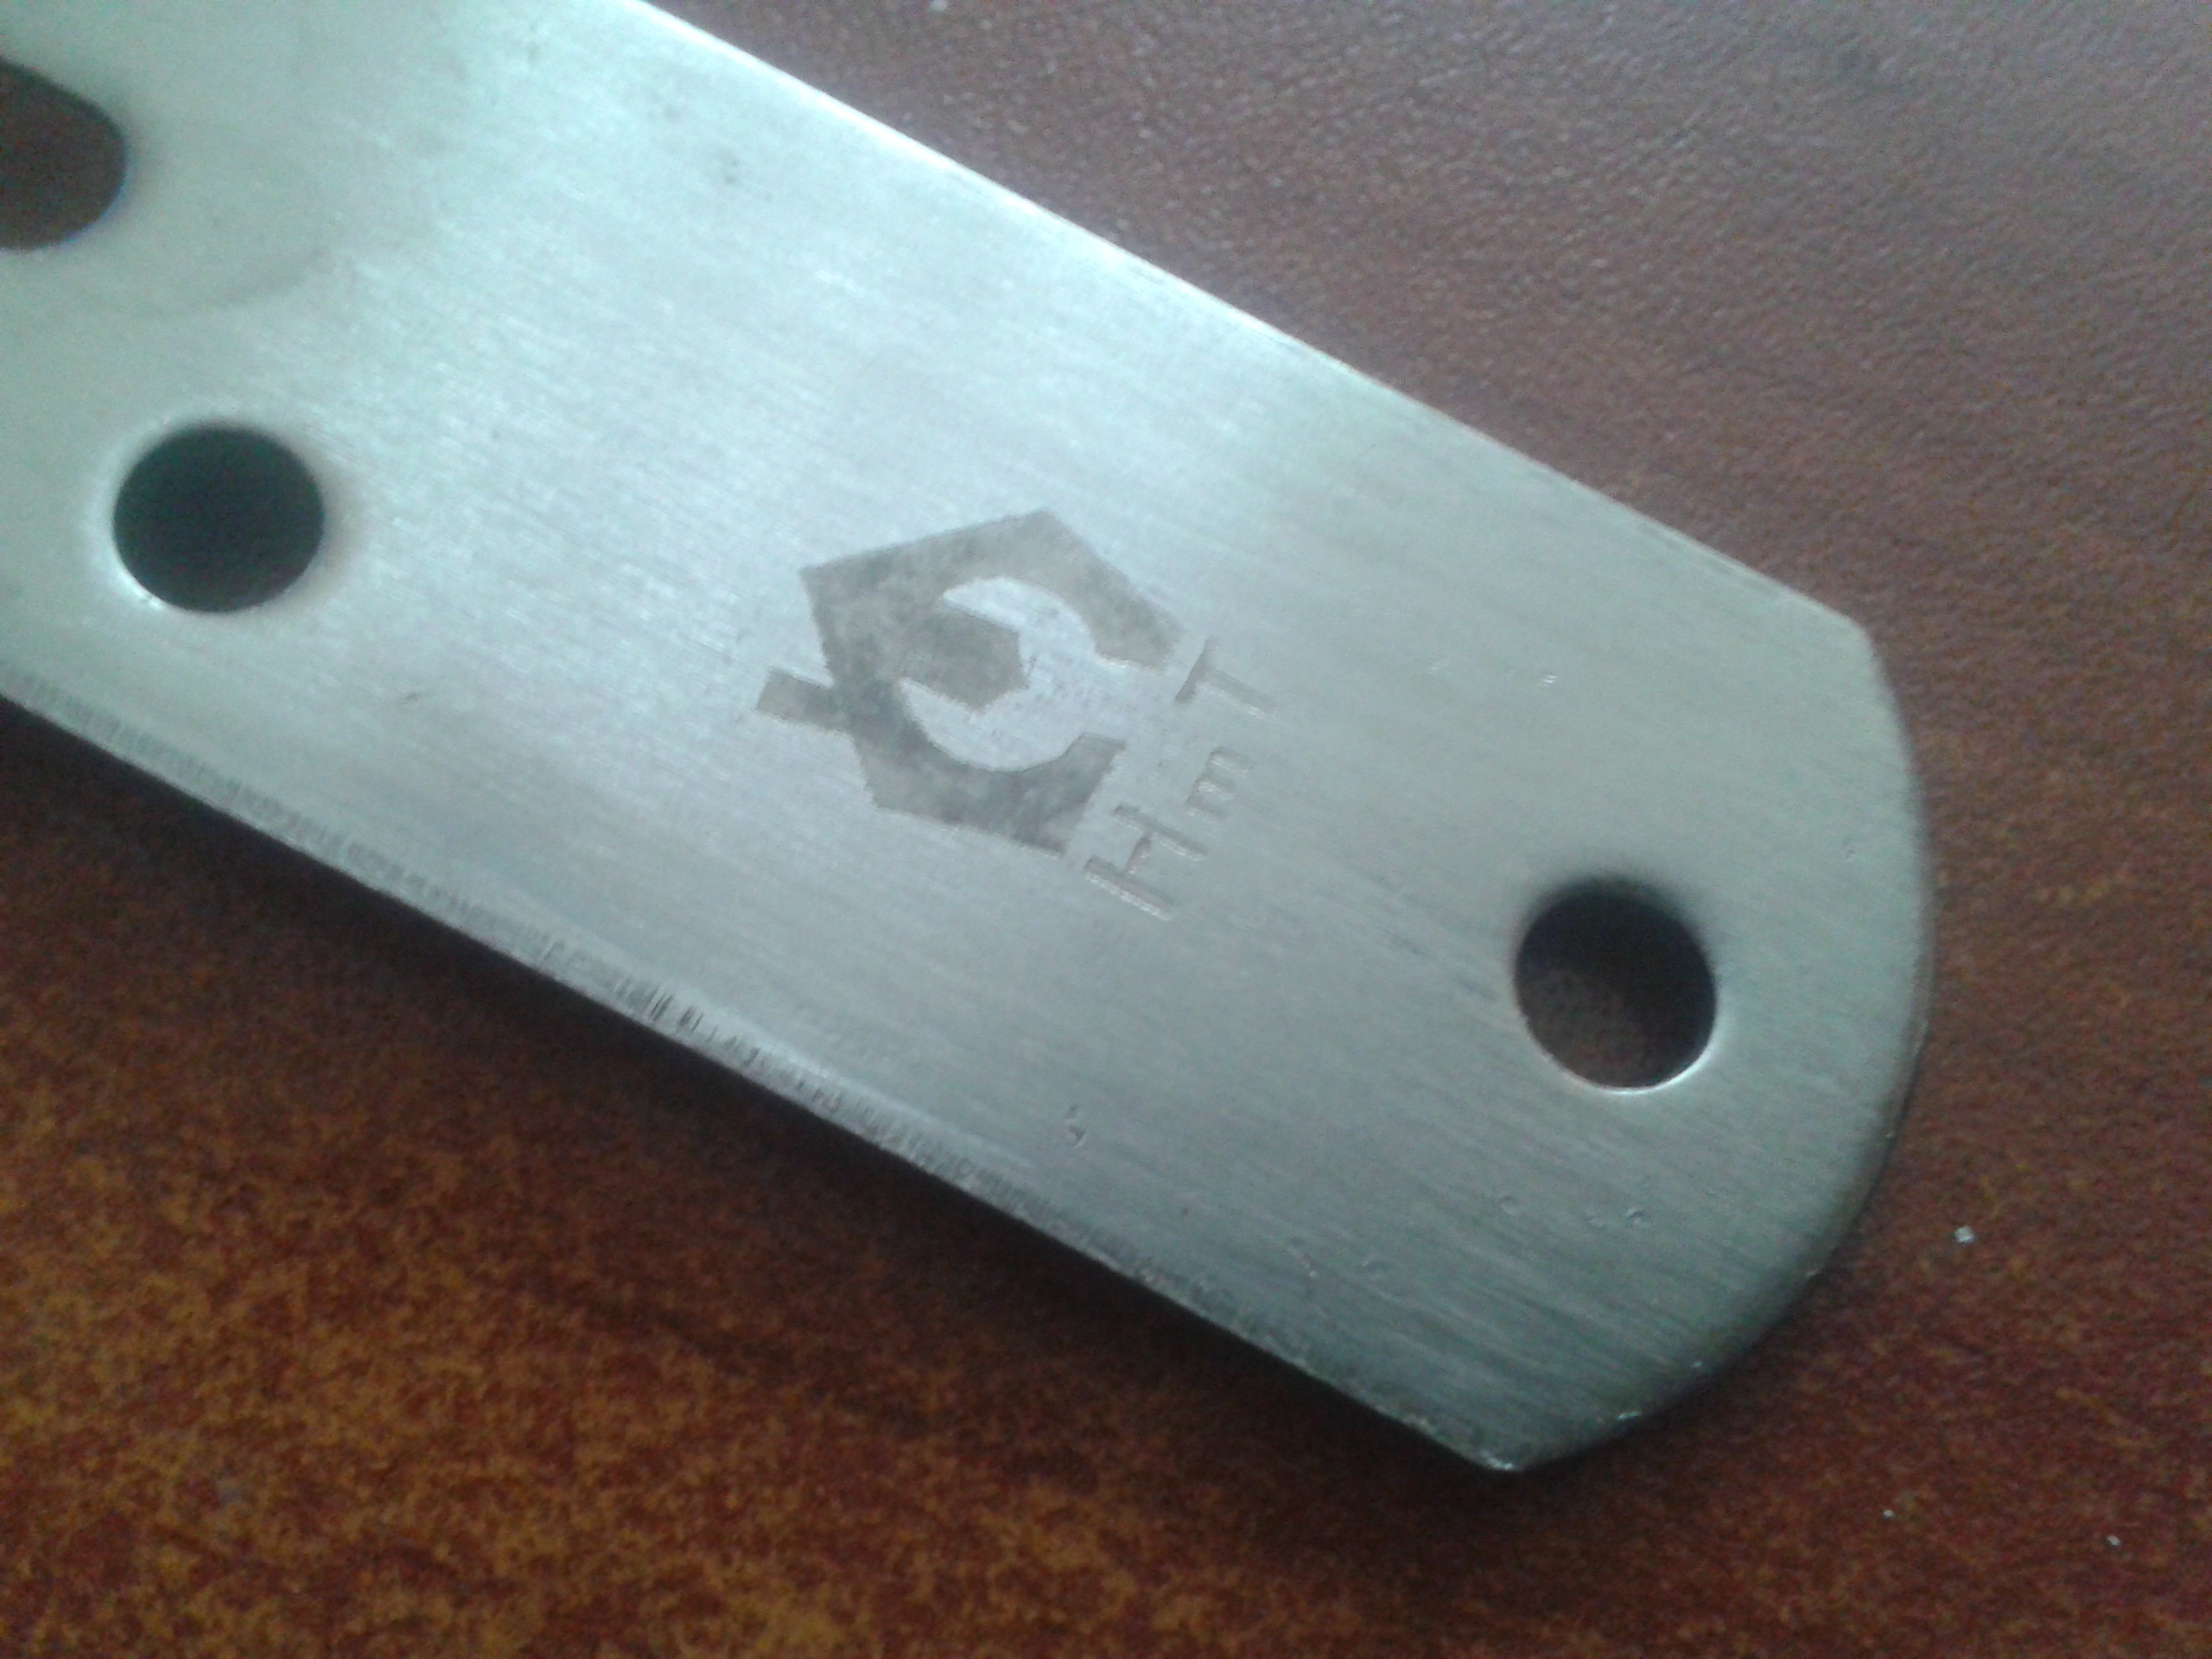
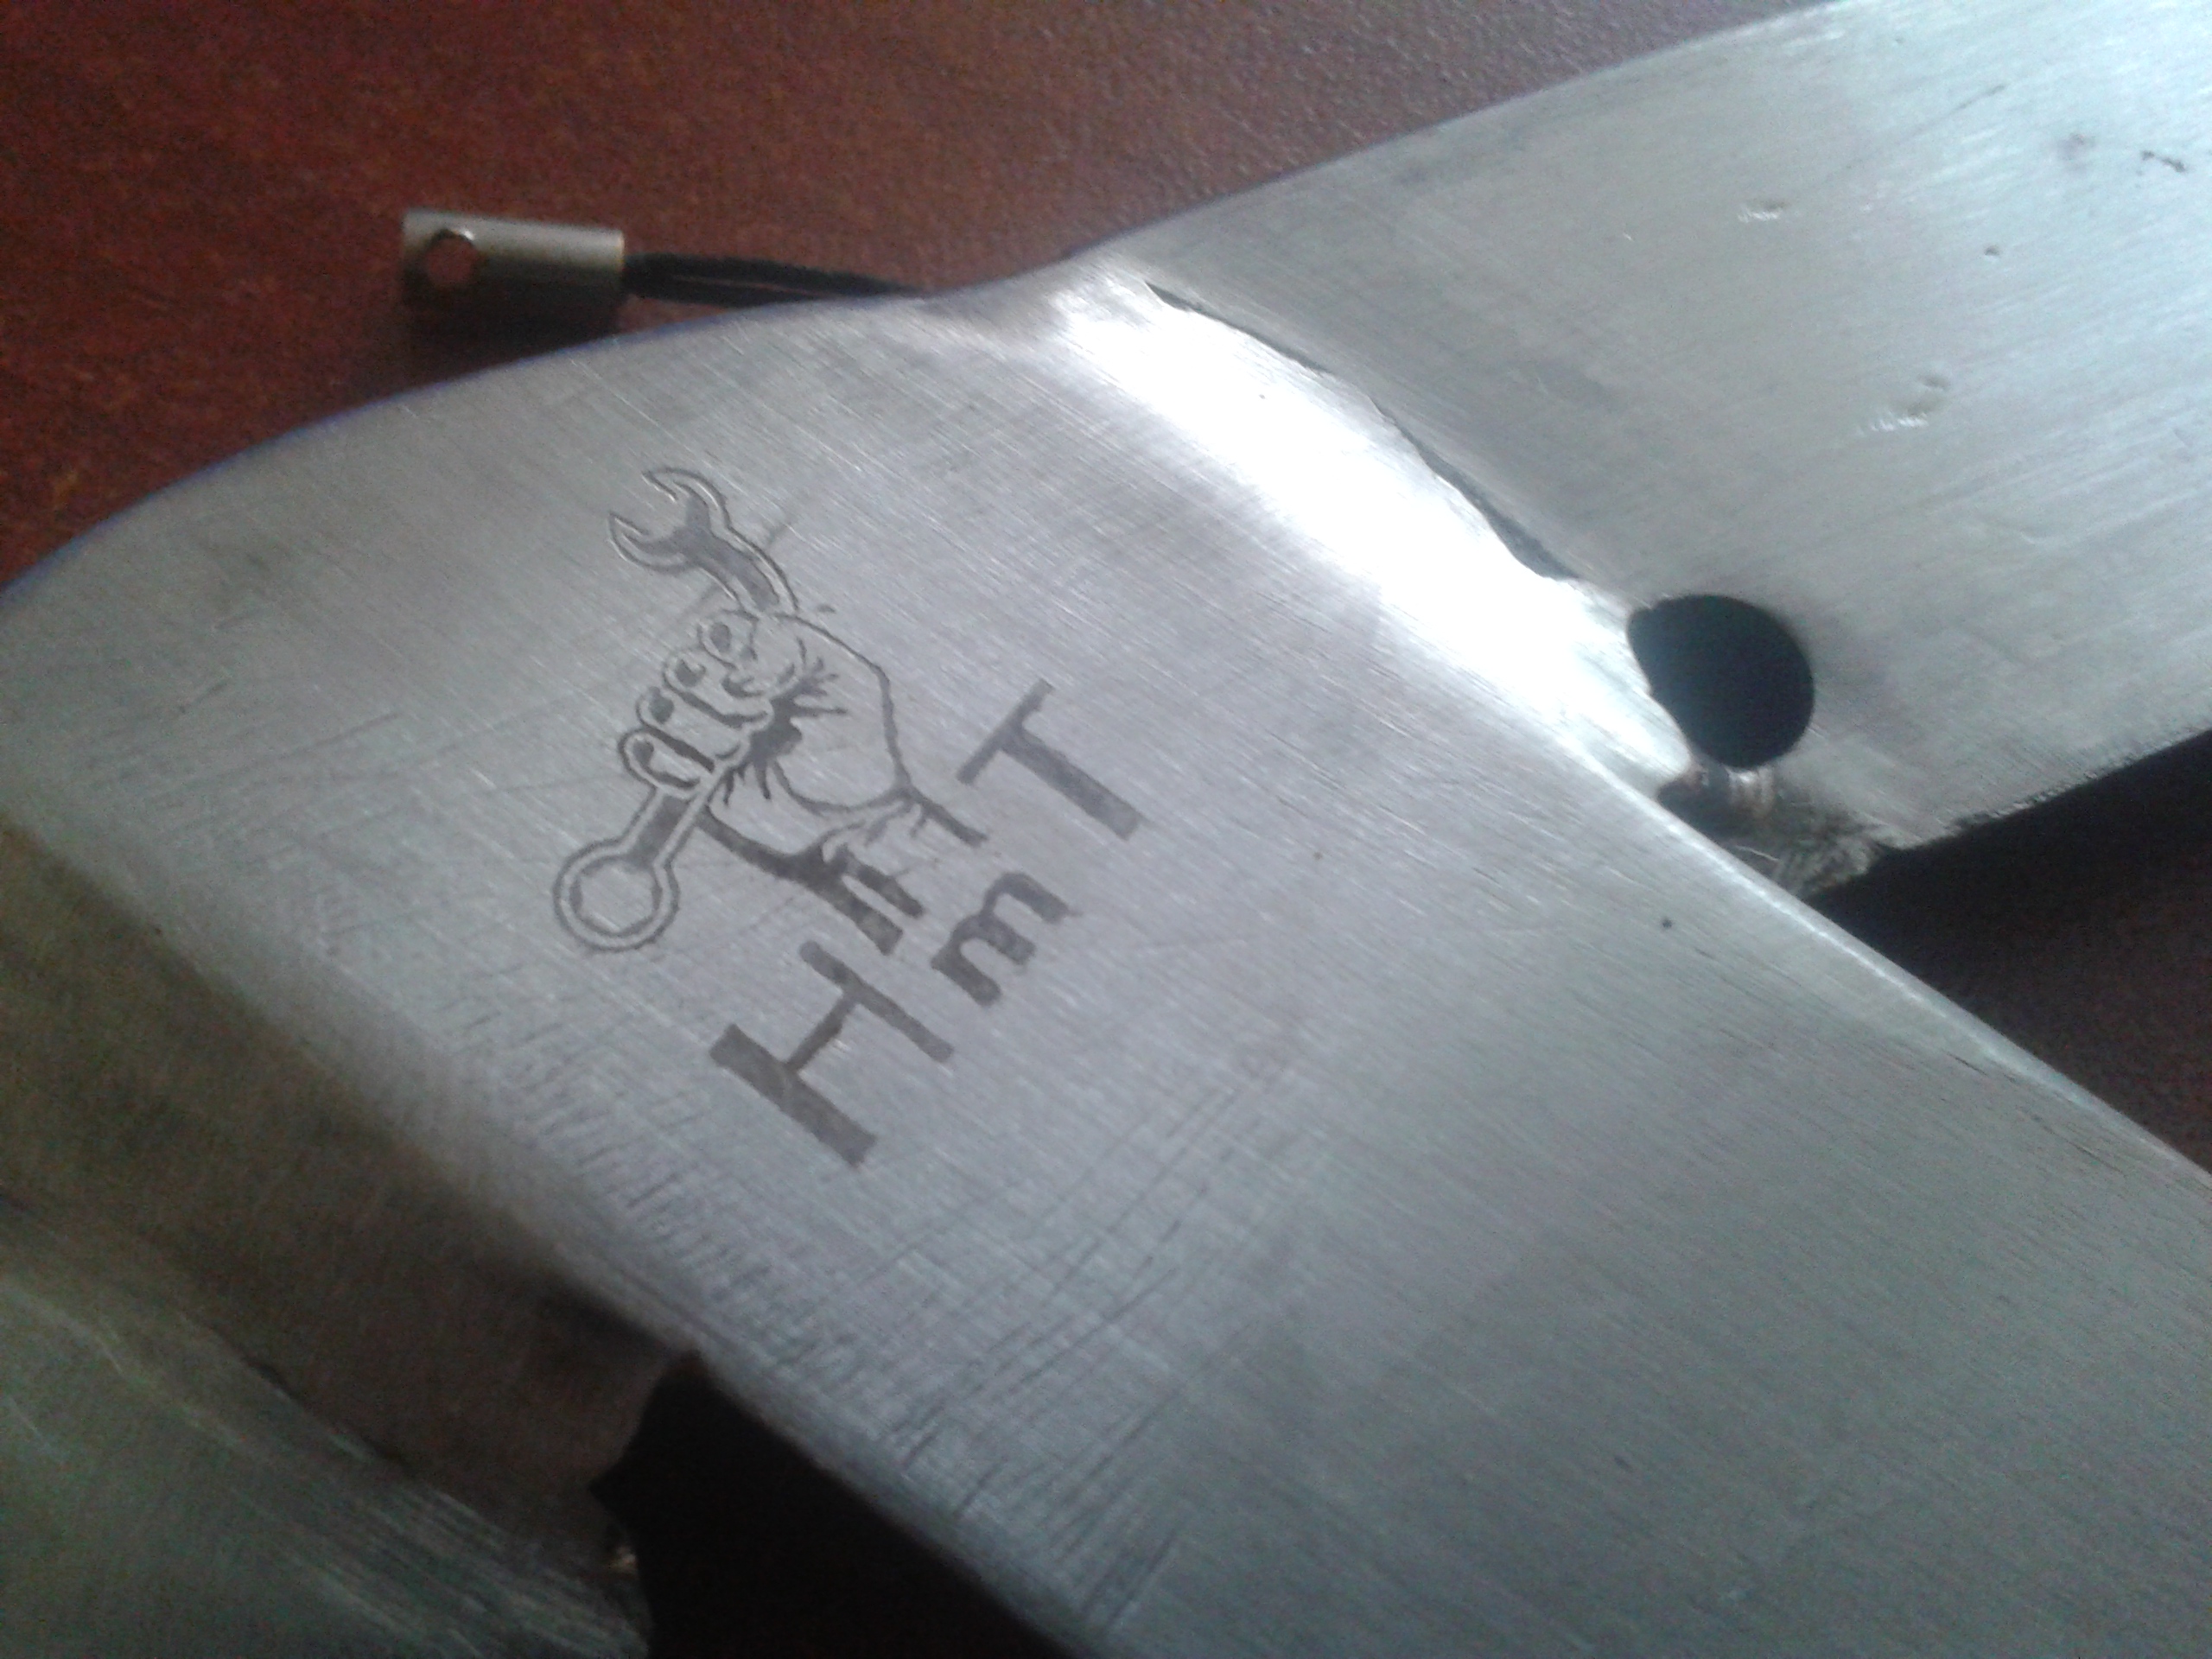
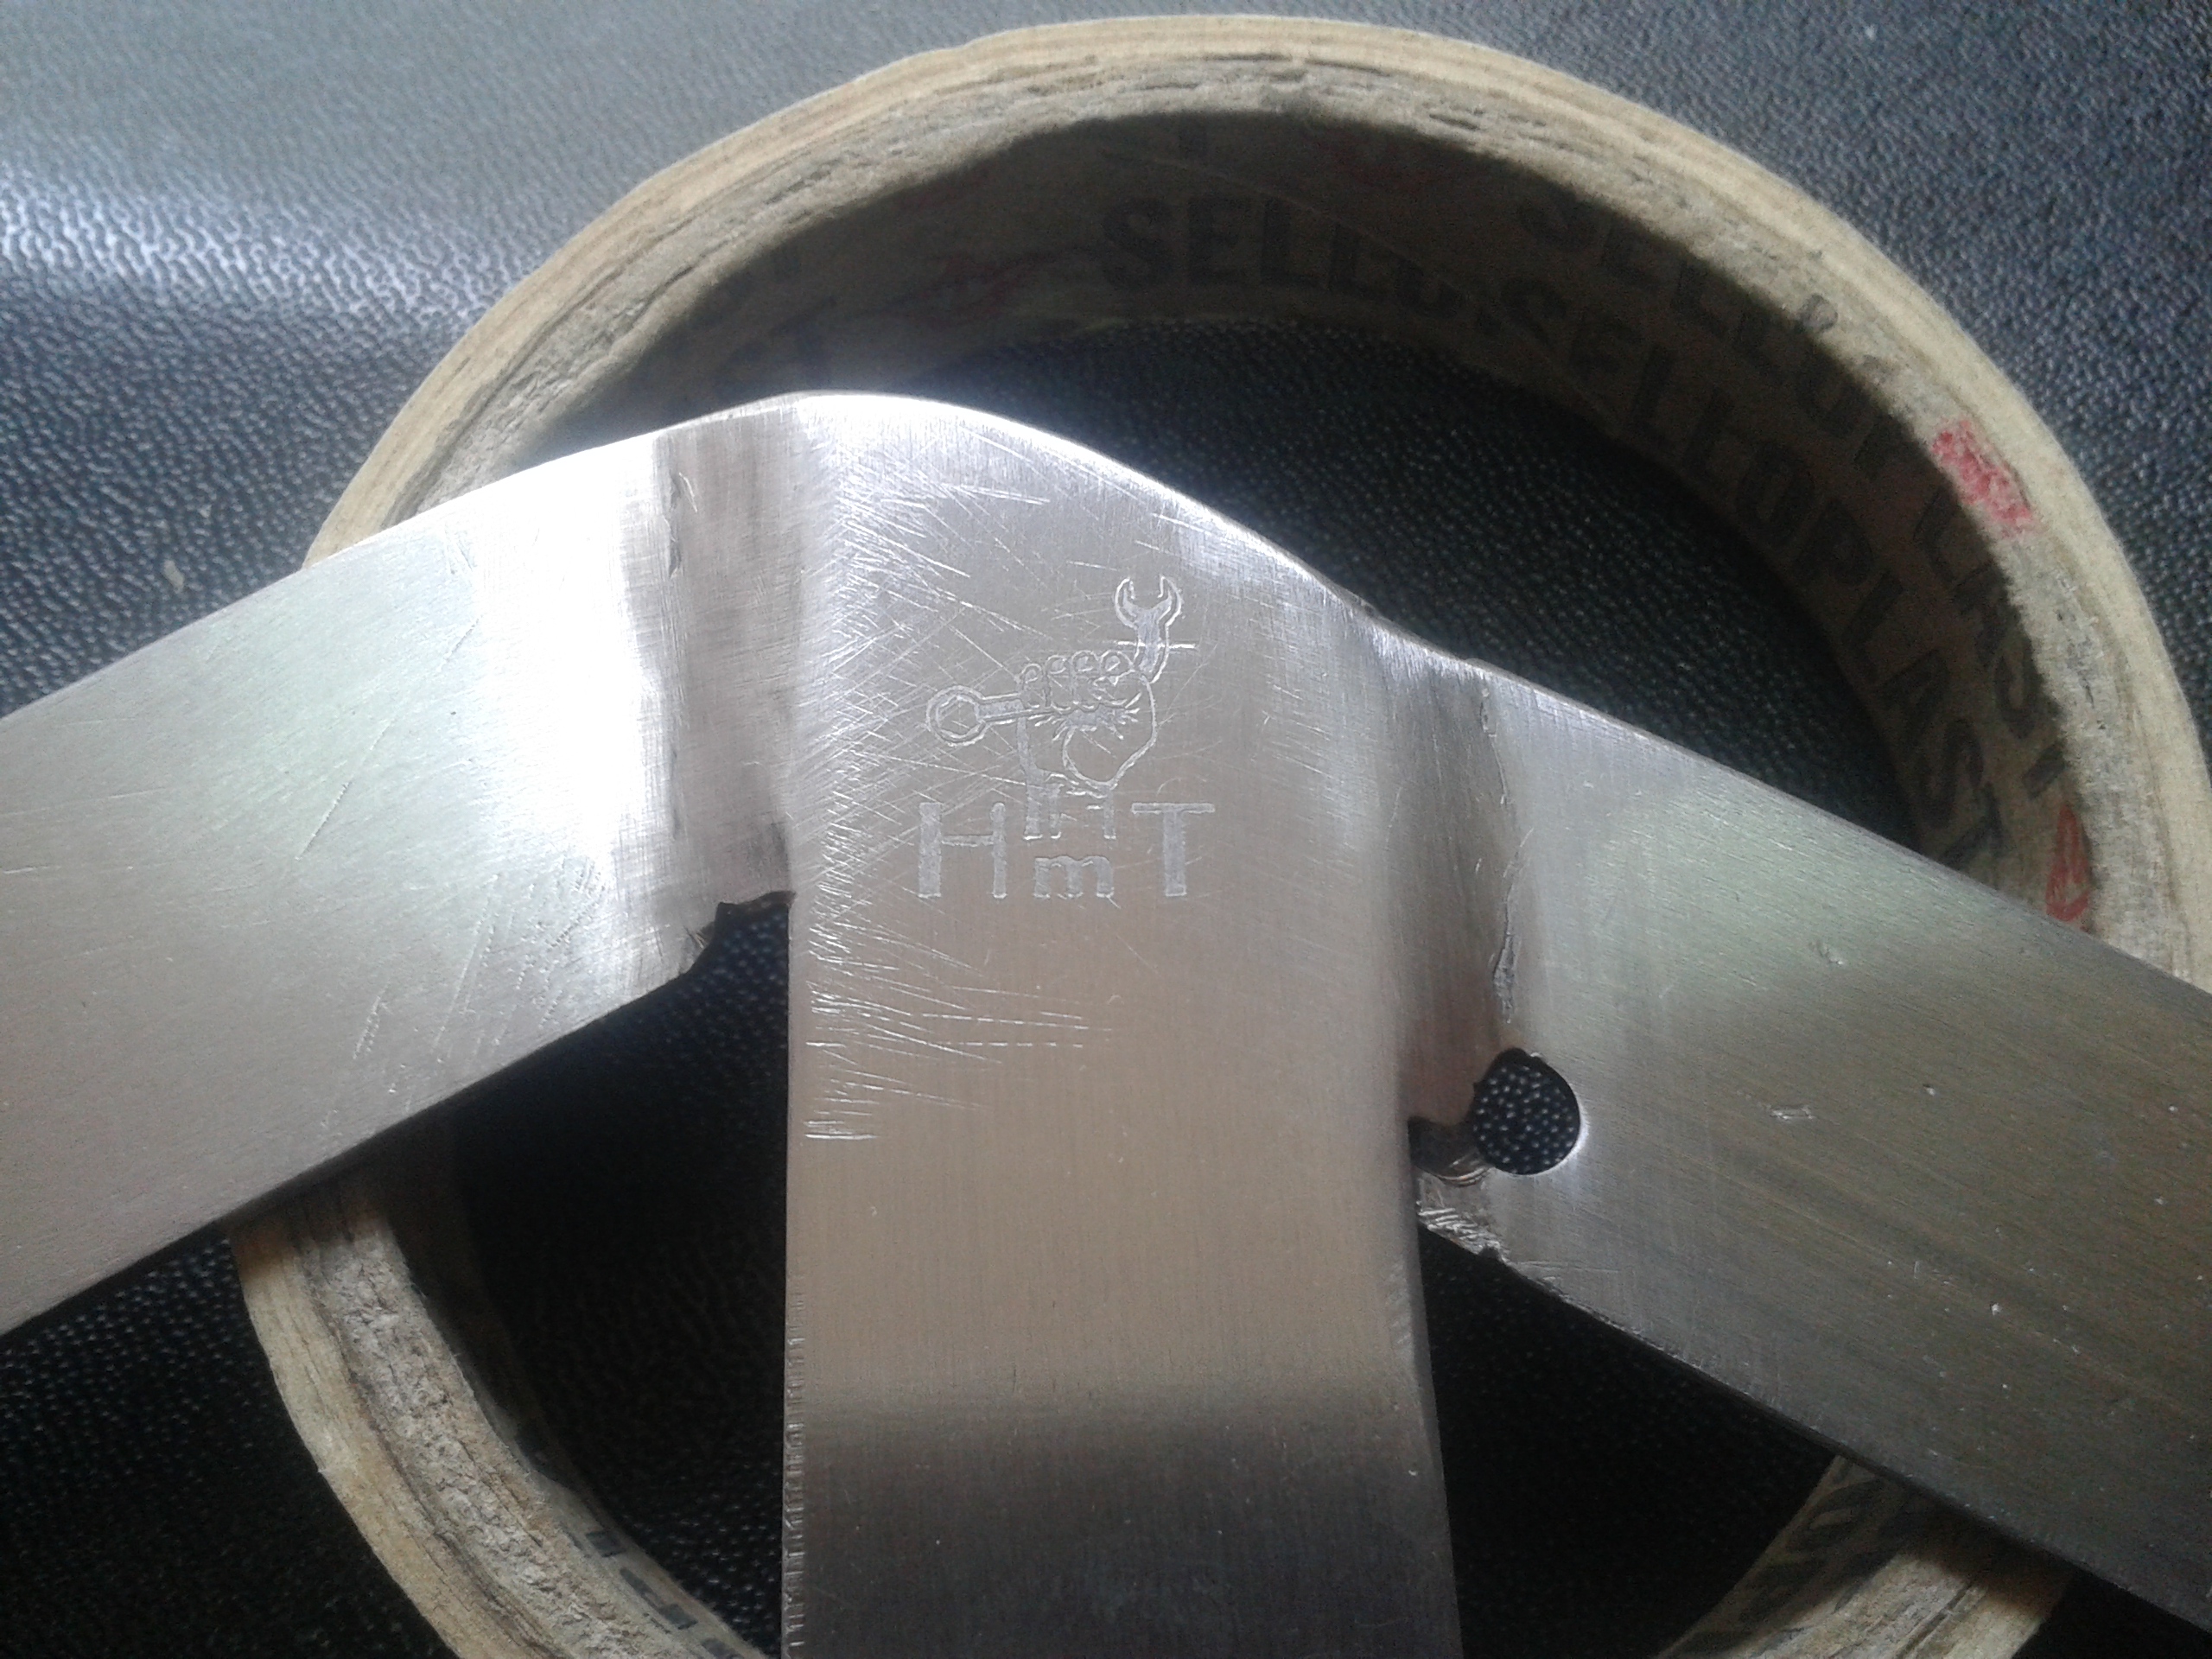
Someday back at 2016 I decided to give a try to engrave my logo onto a tool that I had made.
A method that will not needed a special machine; it was the only suitable solution for me.
So I decided to try to engraving my logo by electrolysis method (Perhaps the correct terminology is Etching but I am not sure).
I had some experience from the gold-plating at stainless steel utensils and thinking, that if I reverse the polarity at electrolysis process, then the material particles could start to move to the electrode.
I am not a chemical engineer and my thought may be wrong, but at reality it worked for me.
Attachment 27068 Attachment 27069 Attachment 27070 Attachment 27074
Attachment 27071 Attachment 27072 Attachment 27073 Attachment 27075 Attachment 27103
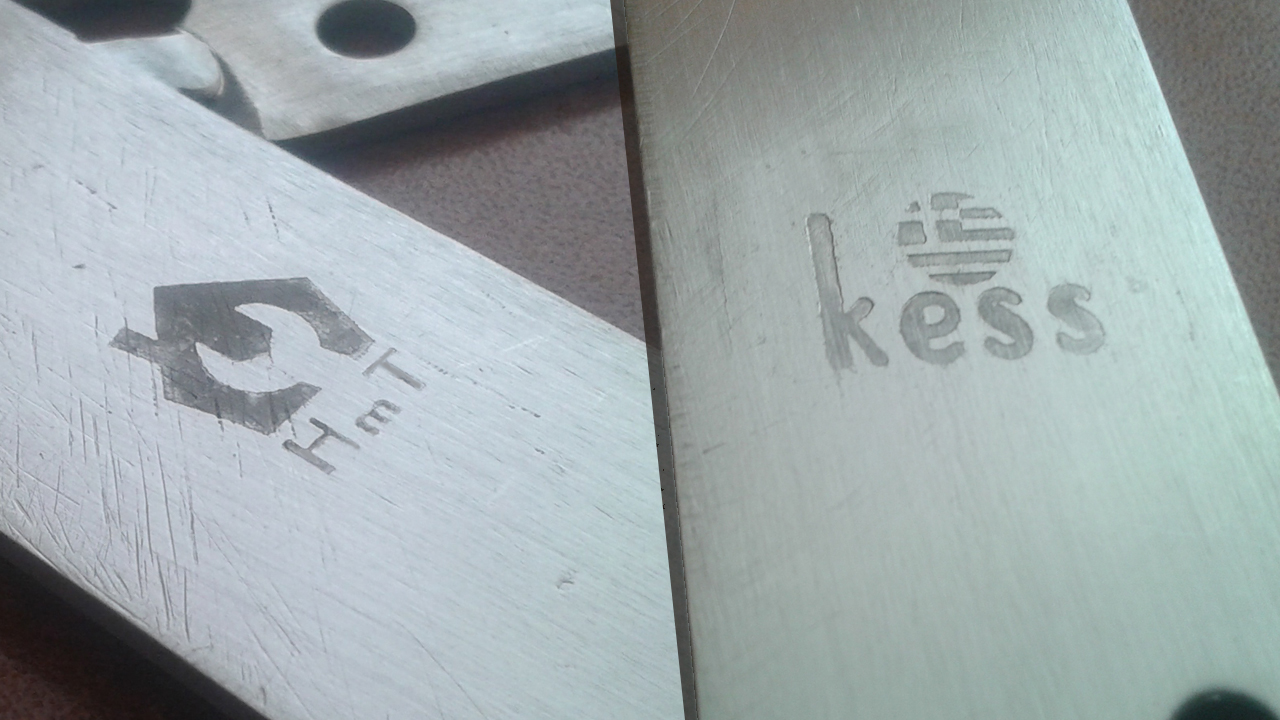
I have test it and it work at stainless steel, steel, aluminum, & brass, but not at the copper.
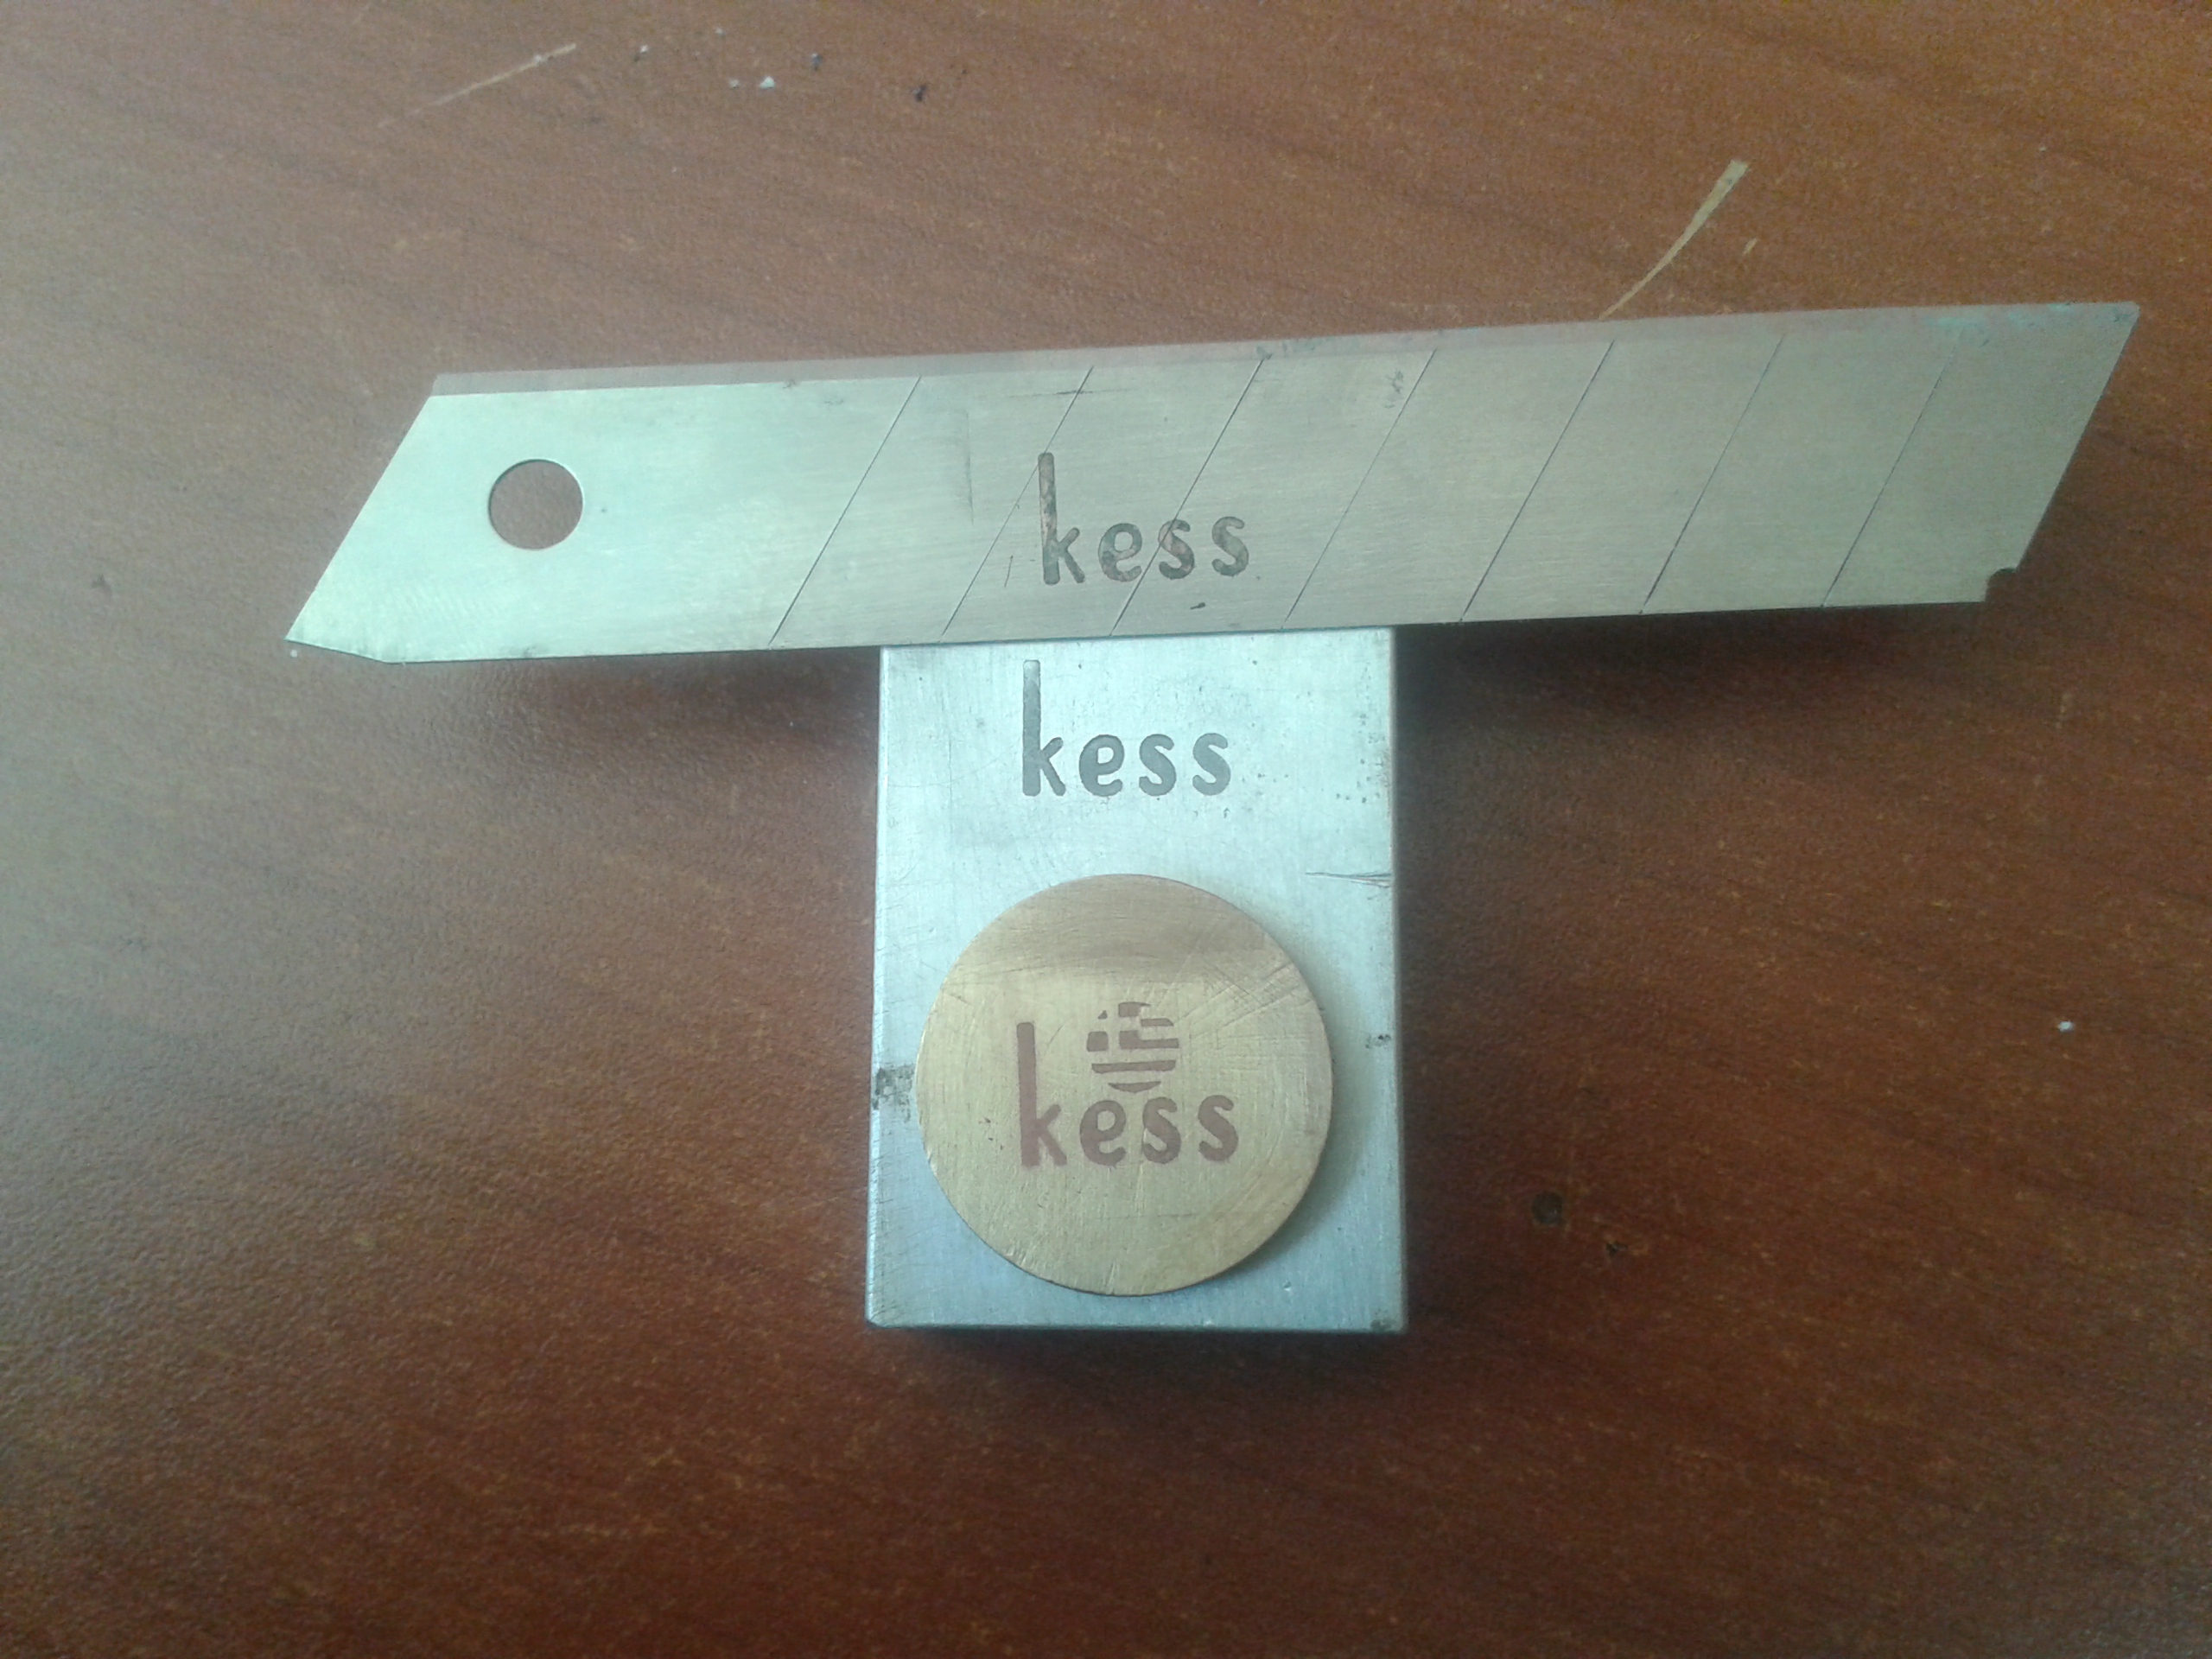
Physical Dimensions length / height: kess with flag 12x8mm, HTM with wrench 12x15mm, HTM home 10x12mm
Attachment 27064
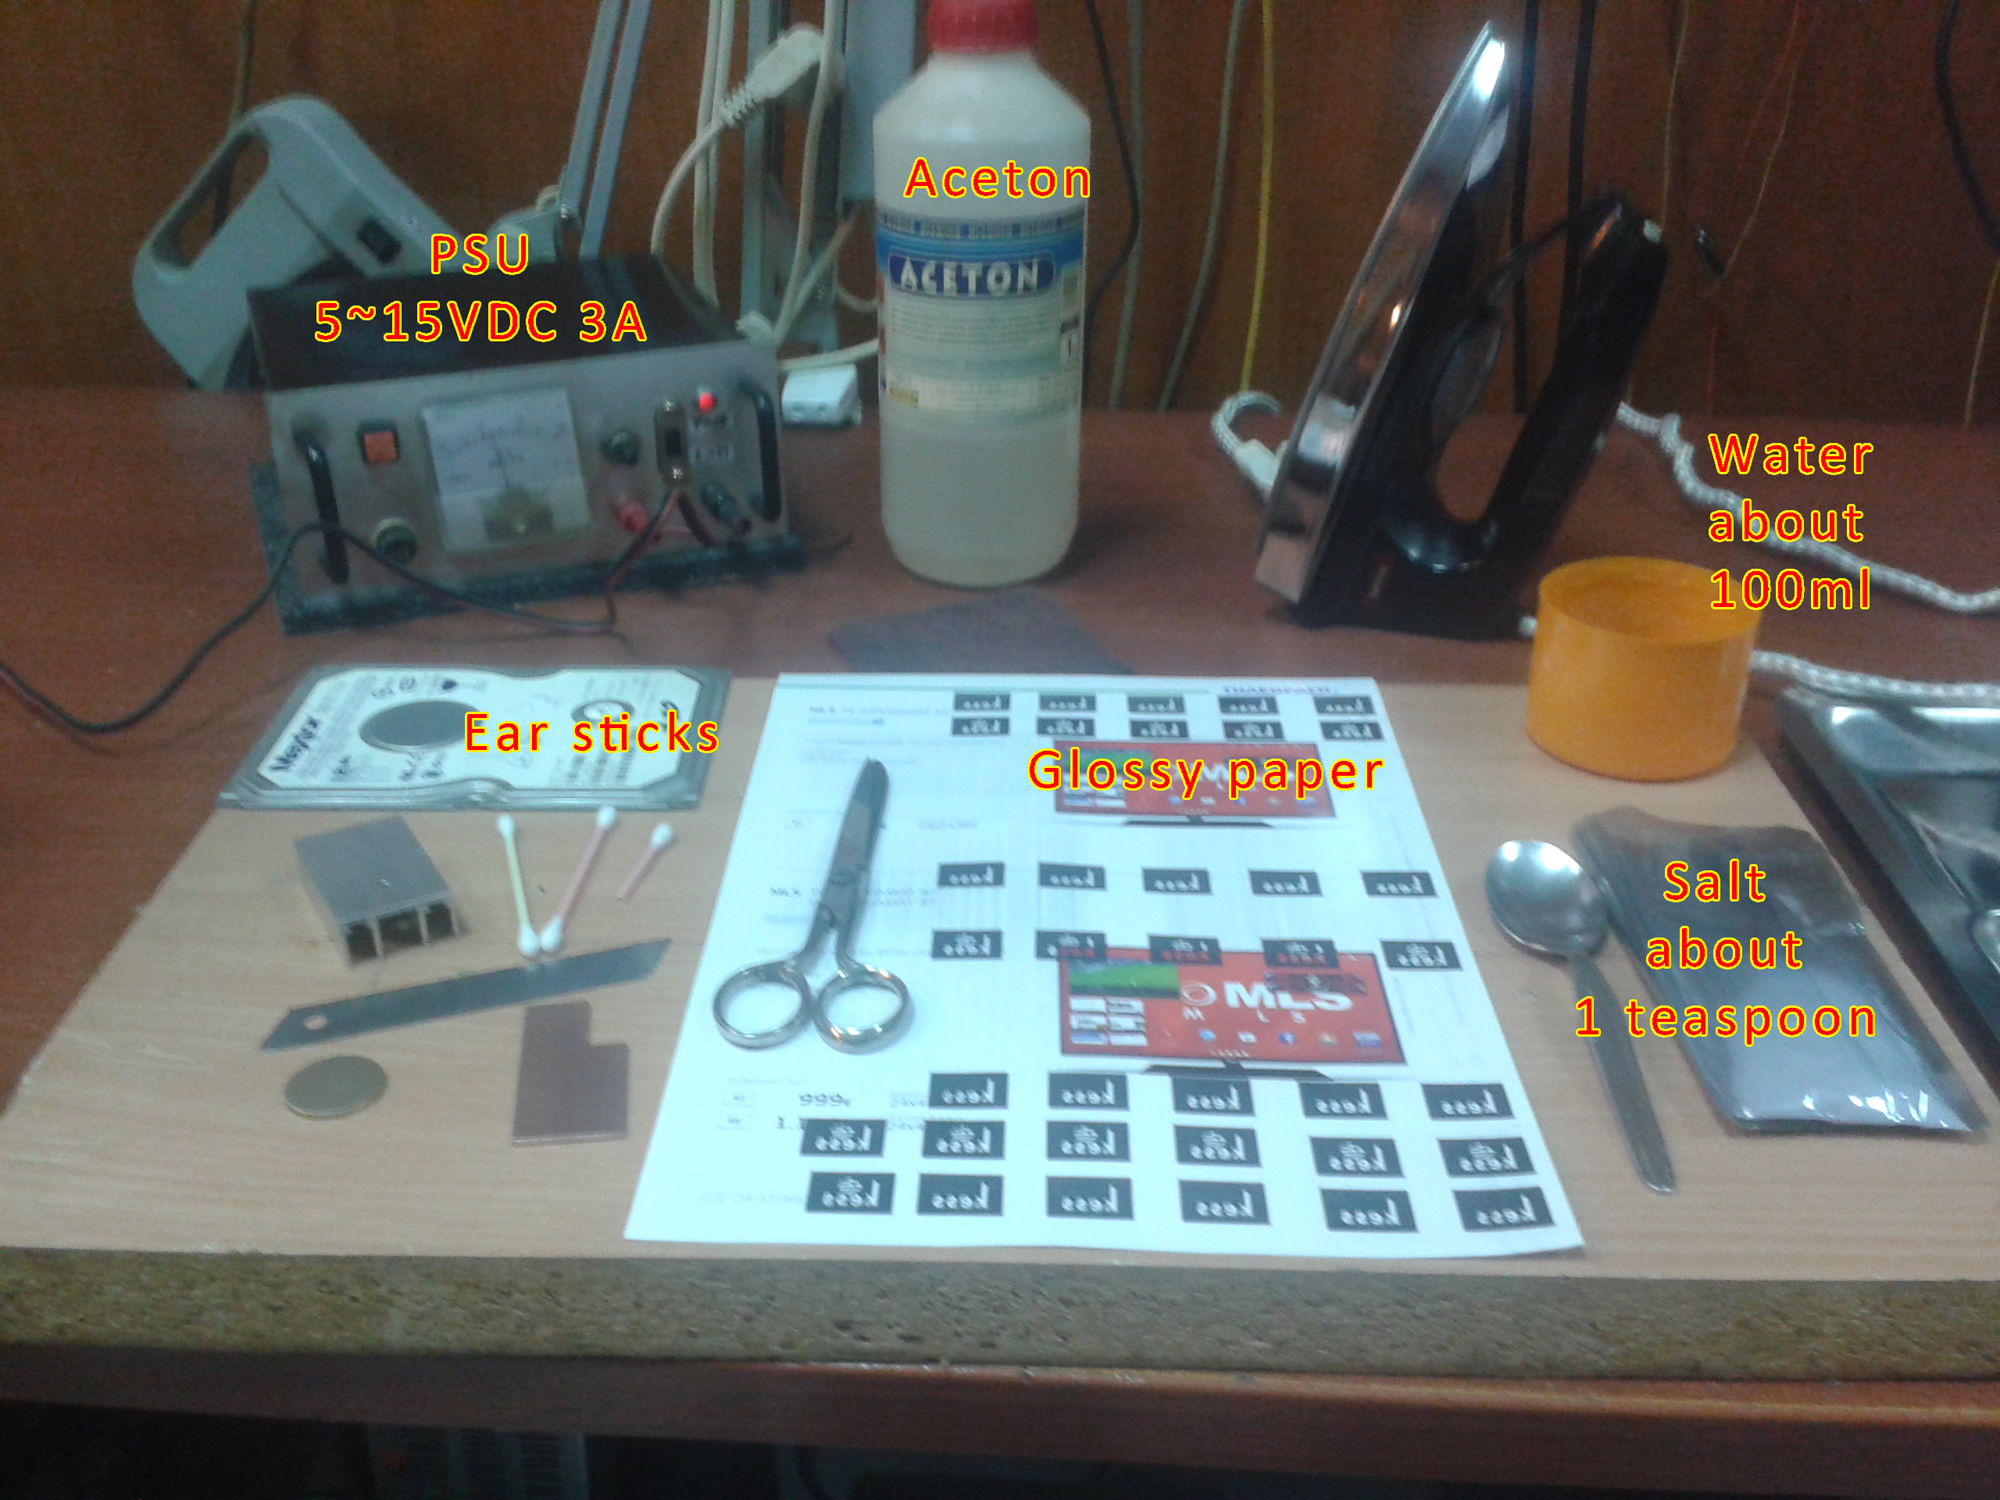
I have use a power supply 5~15VDC 3A.
At normal room temperature need 10~12Vdc.
For electrolyte I used saline solution (100ml water and 1 teaspoon salt).
Attachment 27063
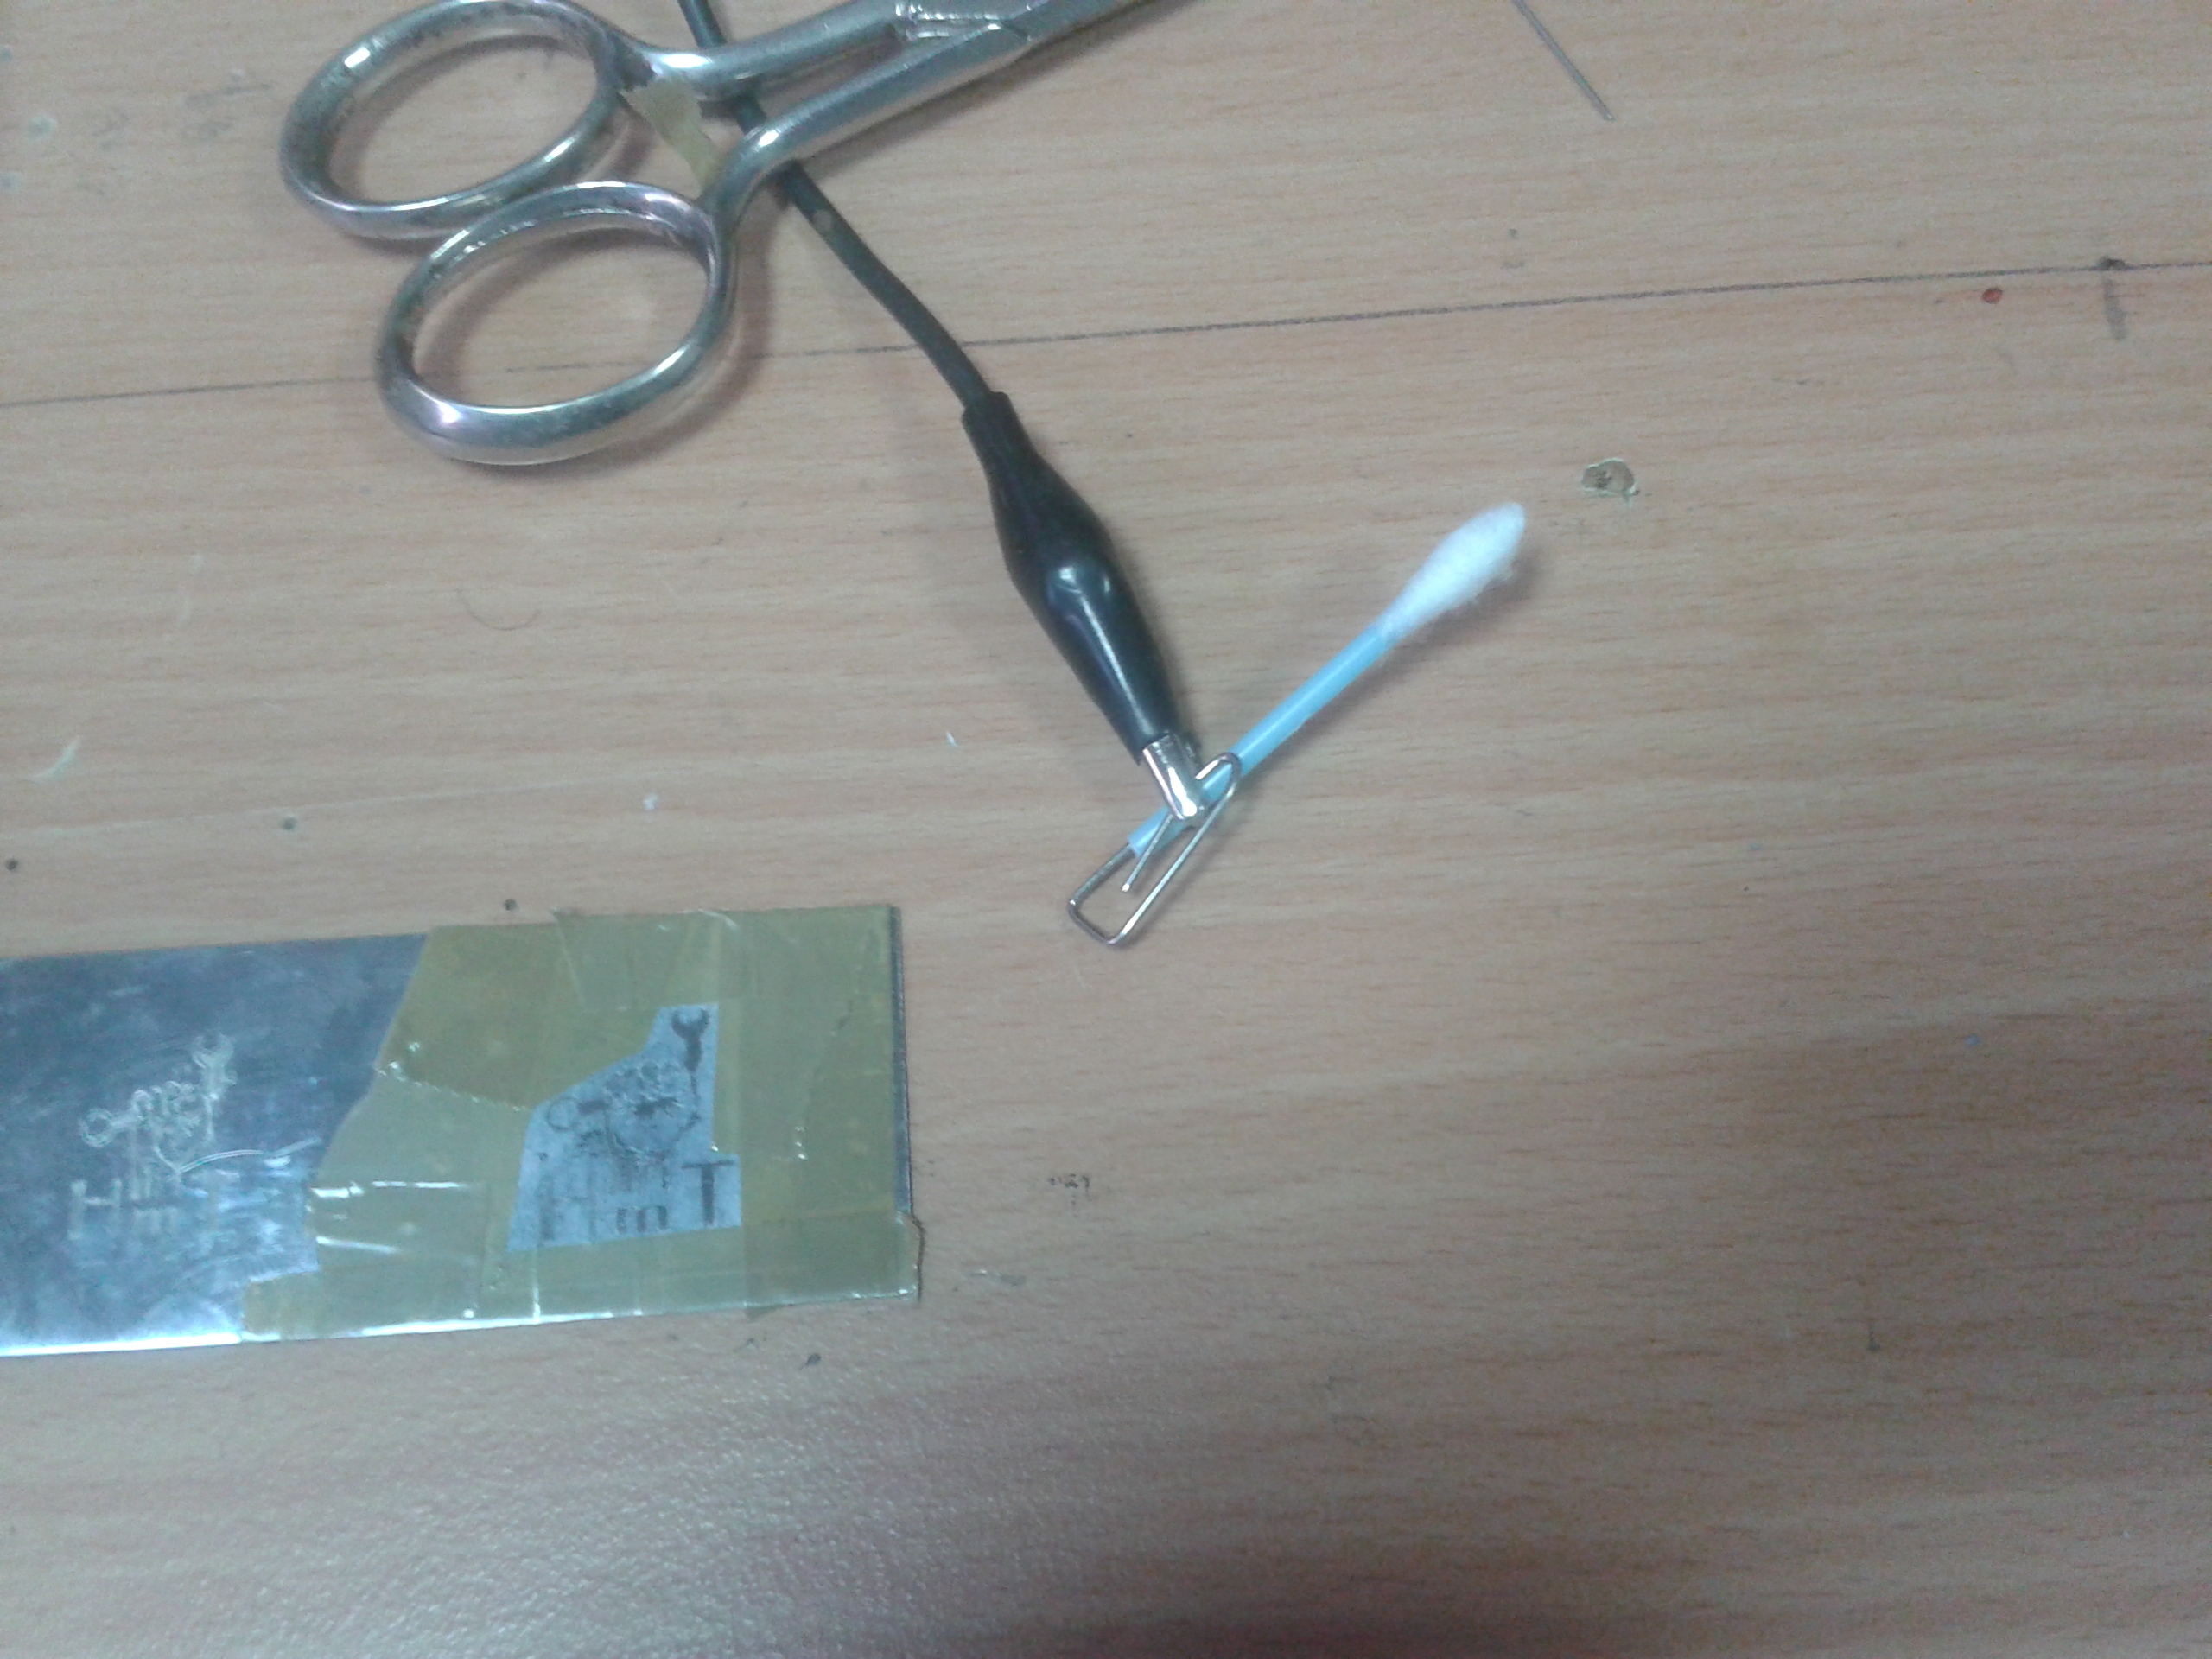
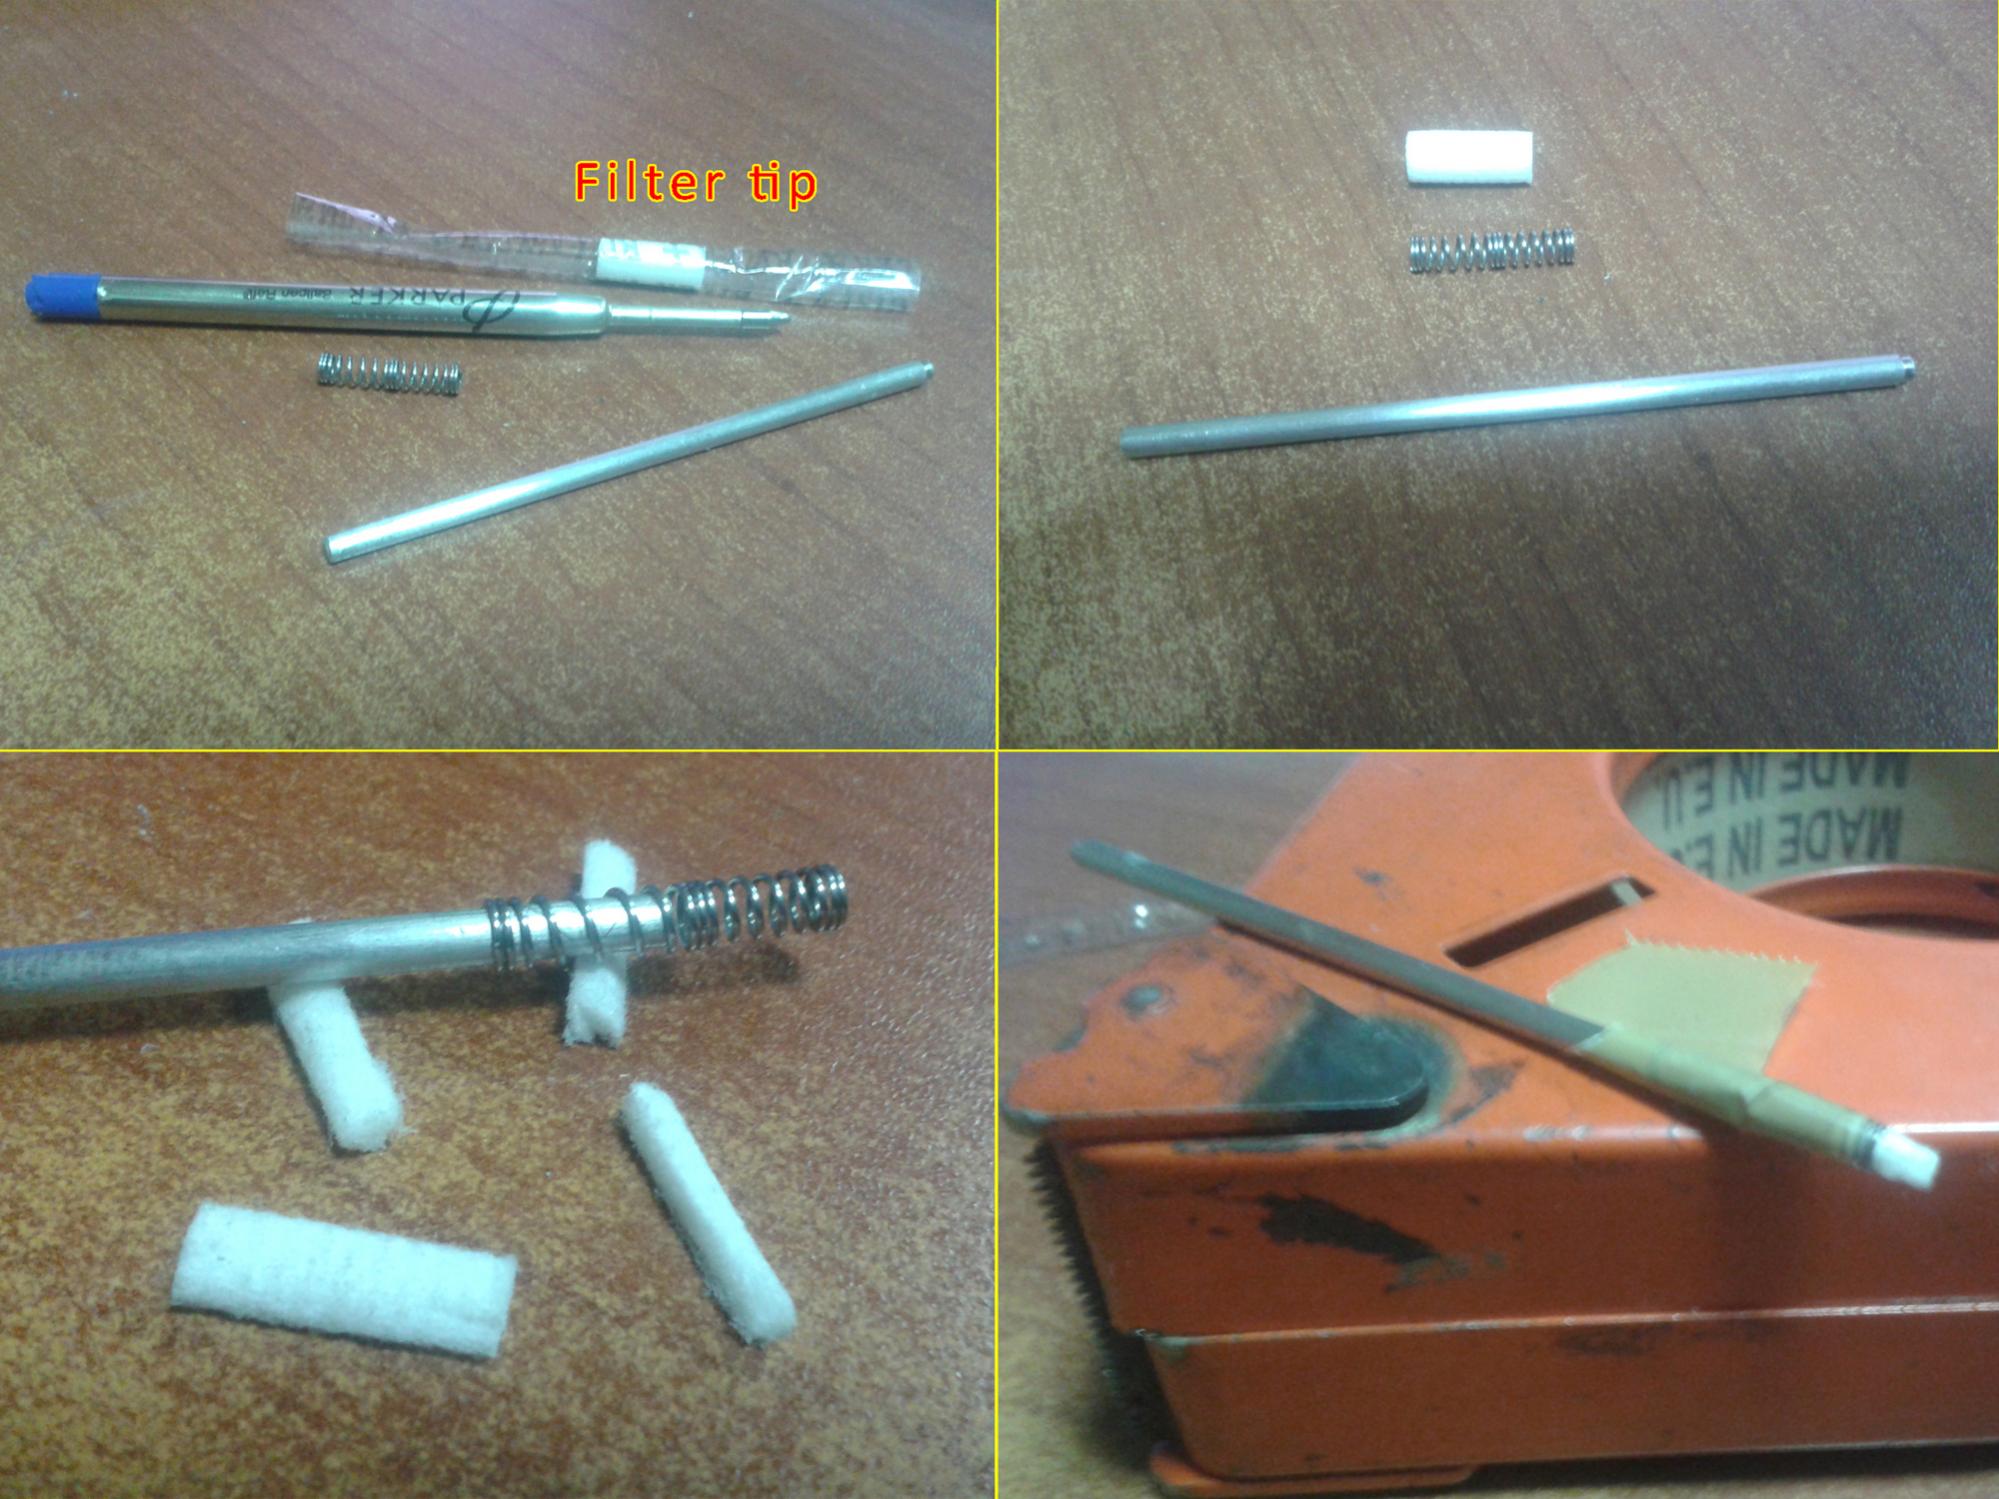
For electrode at first I used an ear stick but not satisfied me.
Attachment 27060 Attachment 27061 Attachment 27062
So I started to try different ways.
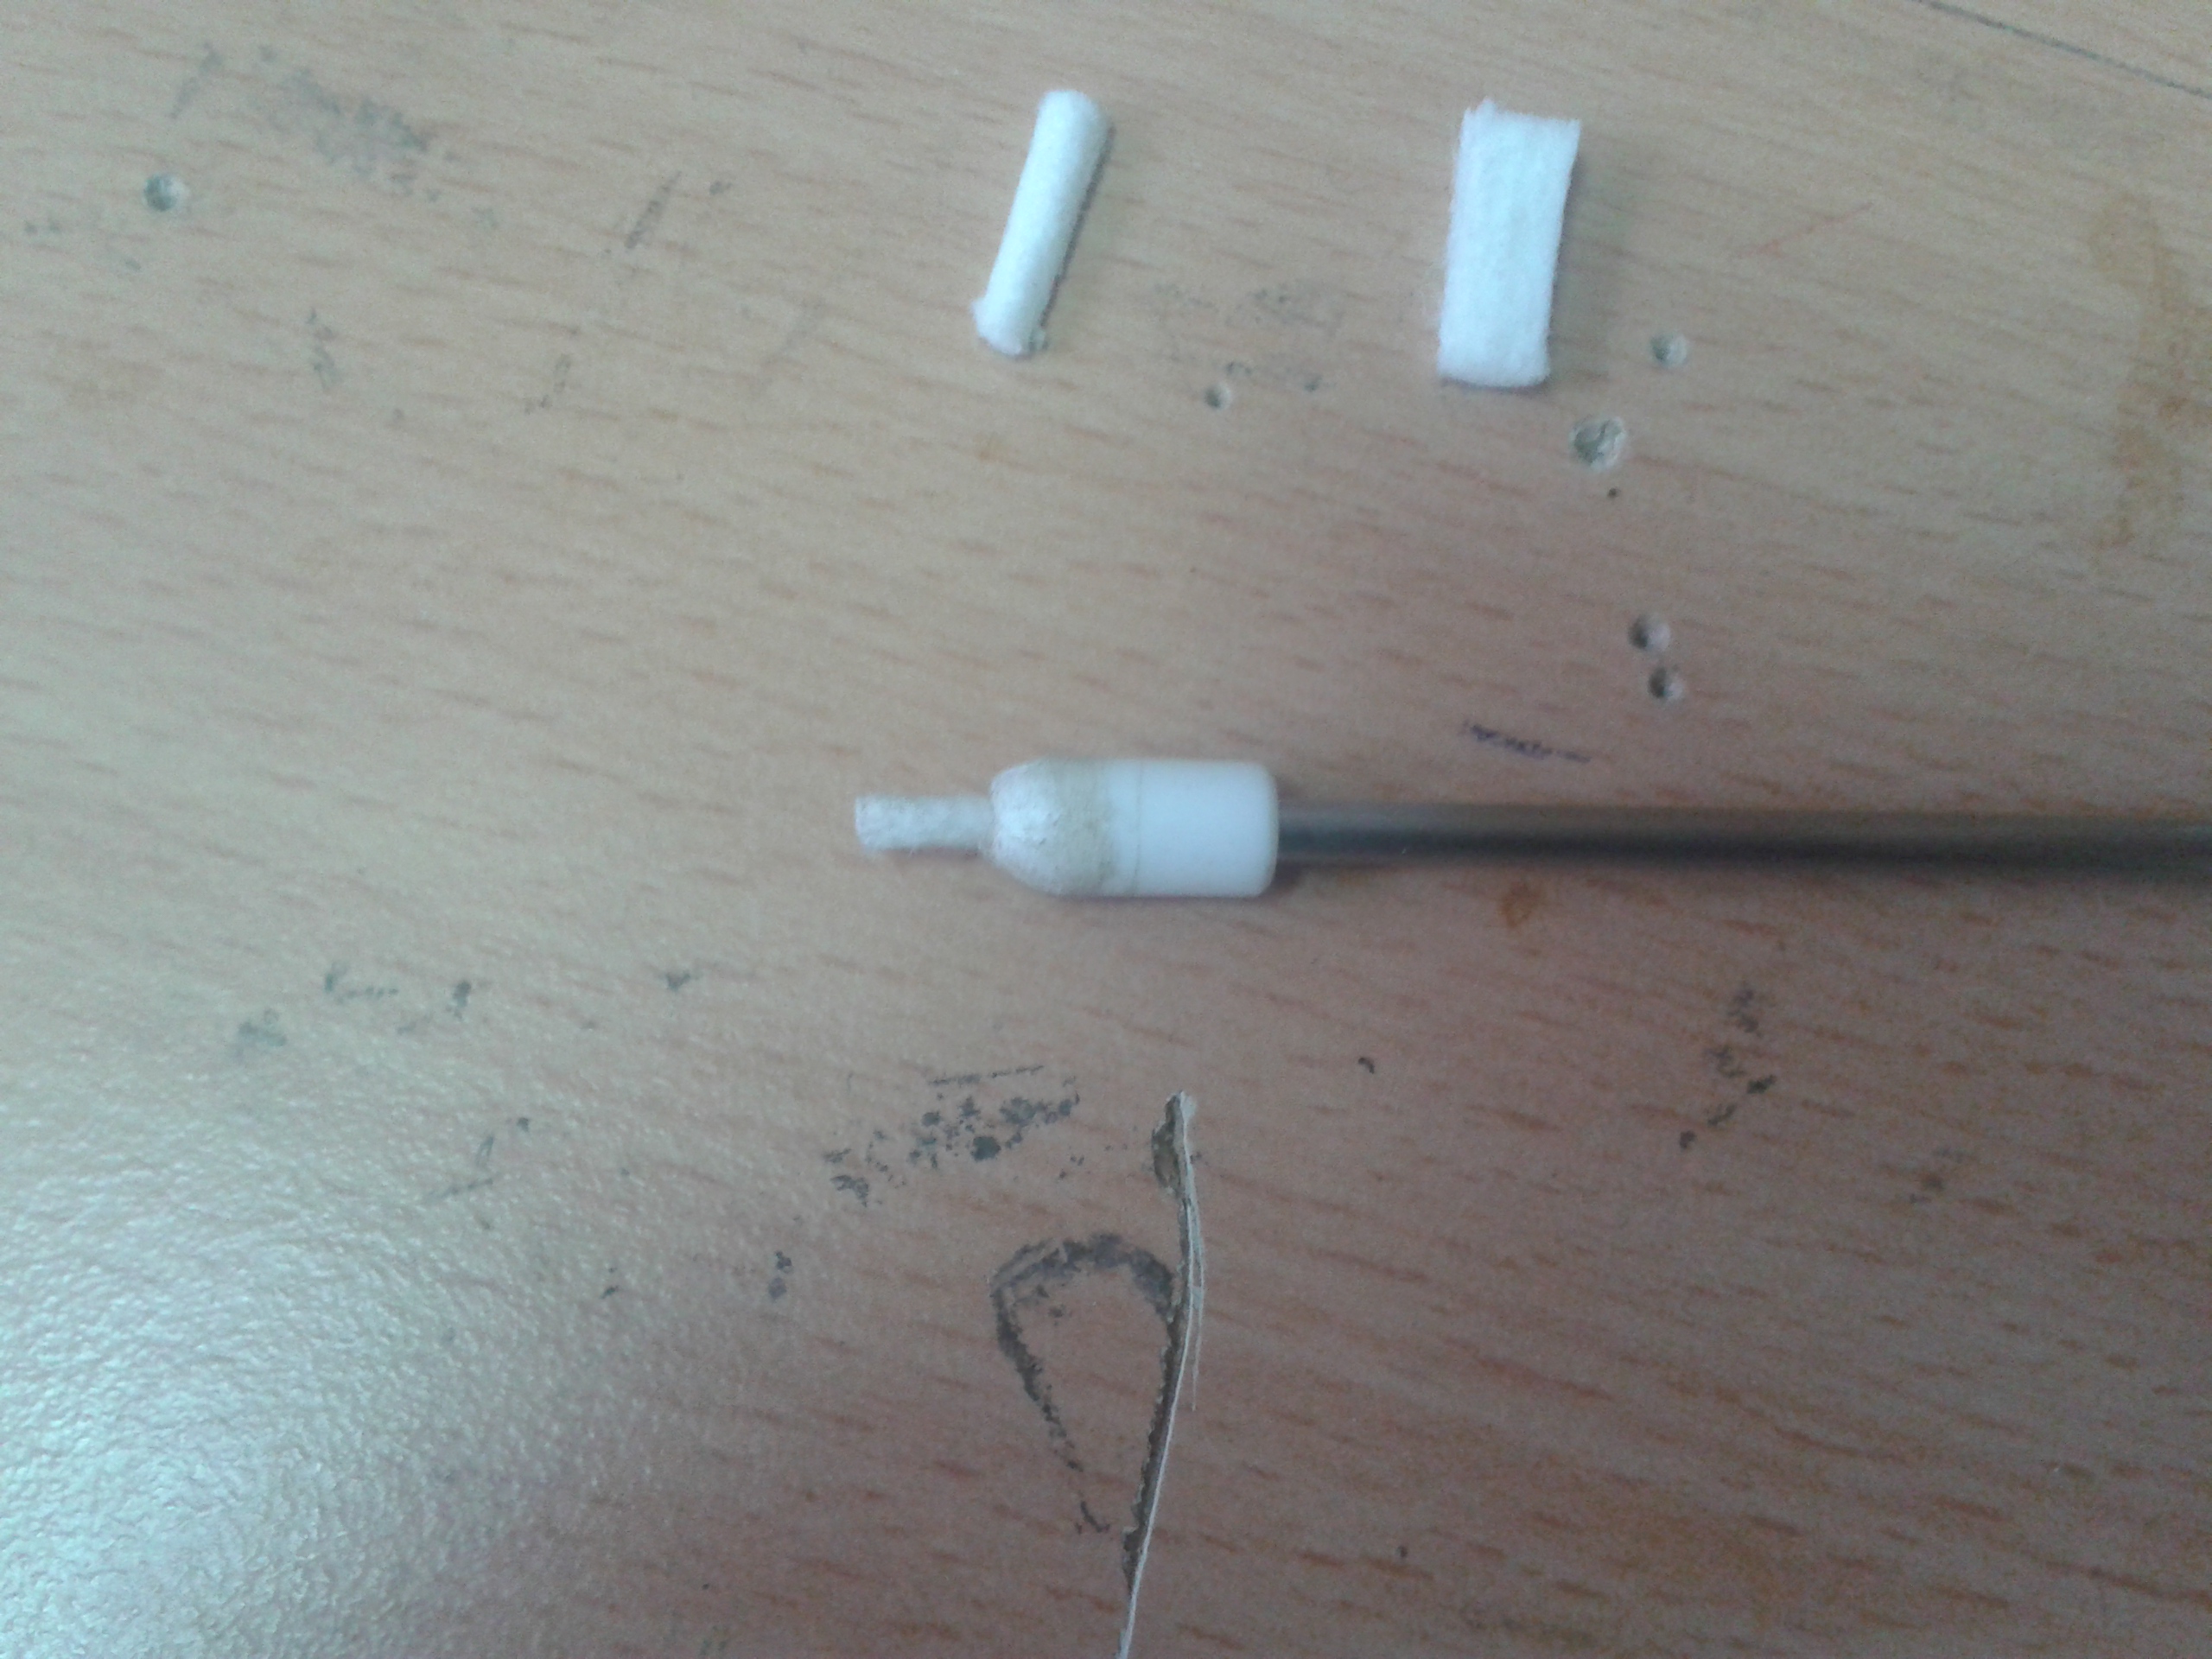
The better one was a stainless steel rod a piece of cigarette filter a spring from pencil and plastic or PVC tape, but not the best.
The best choice believes that is to replacing the filter with a piece of felt (cotton and filter polymerized too quickly).
Attachment 27058 Attachment 27059
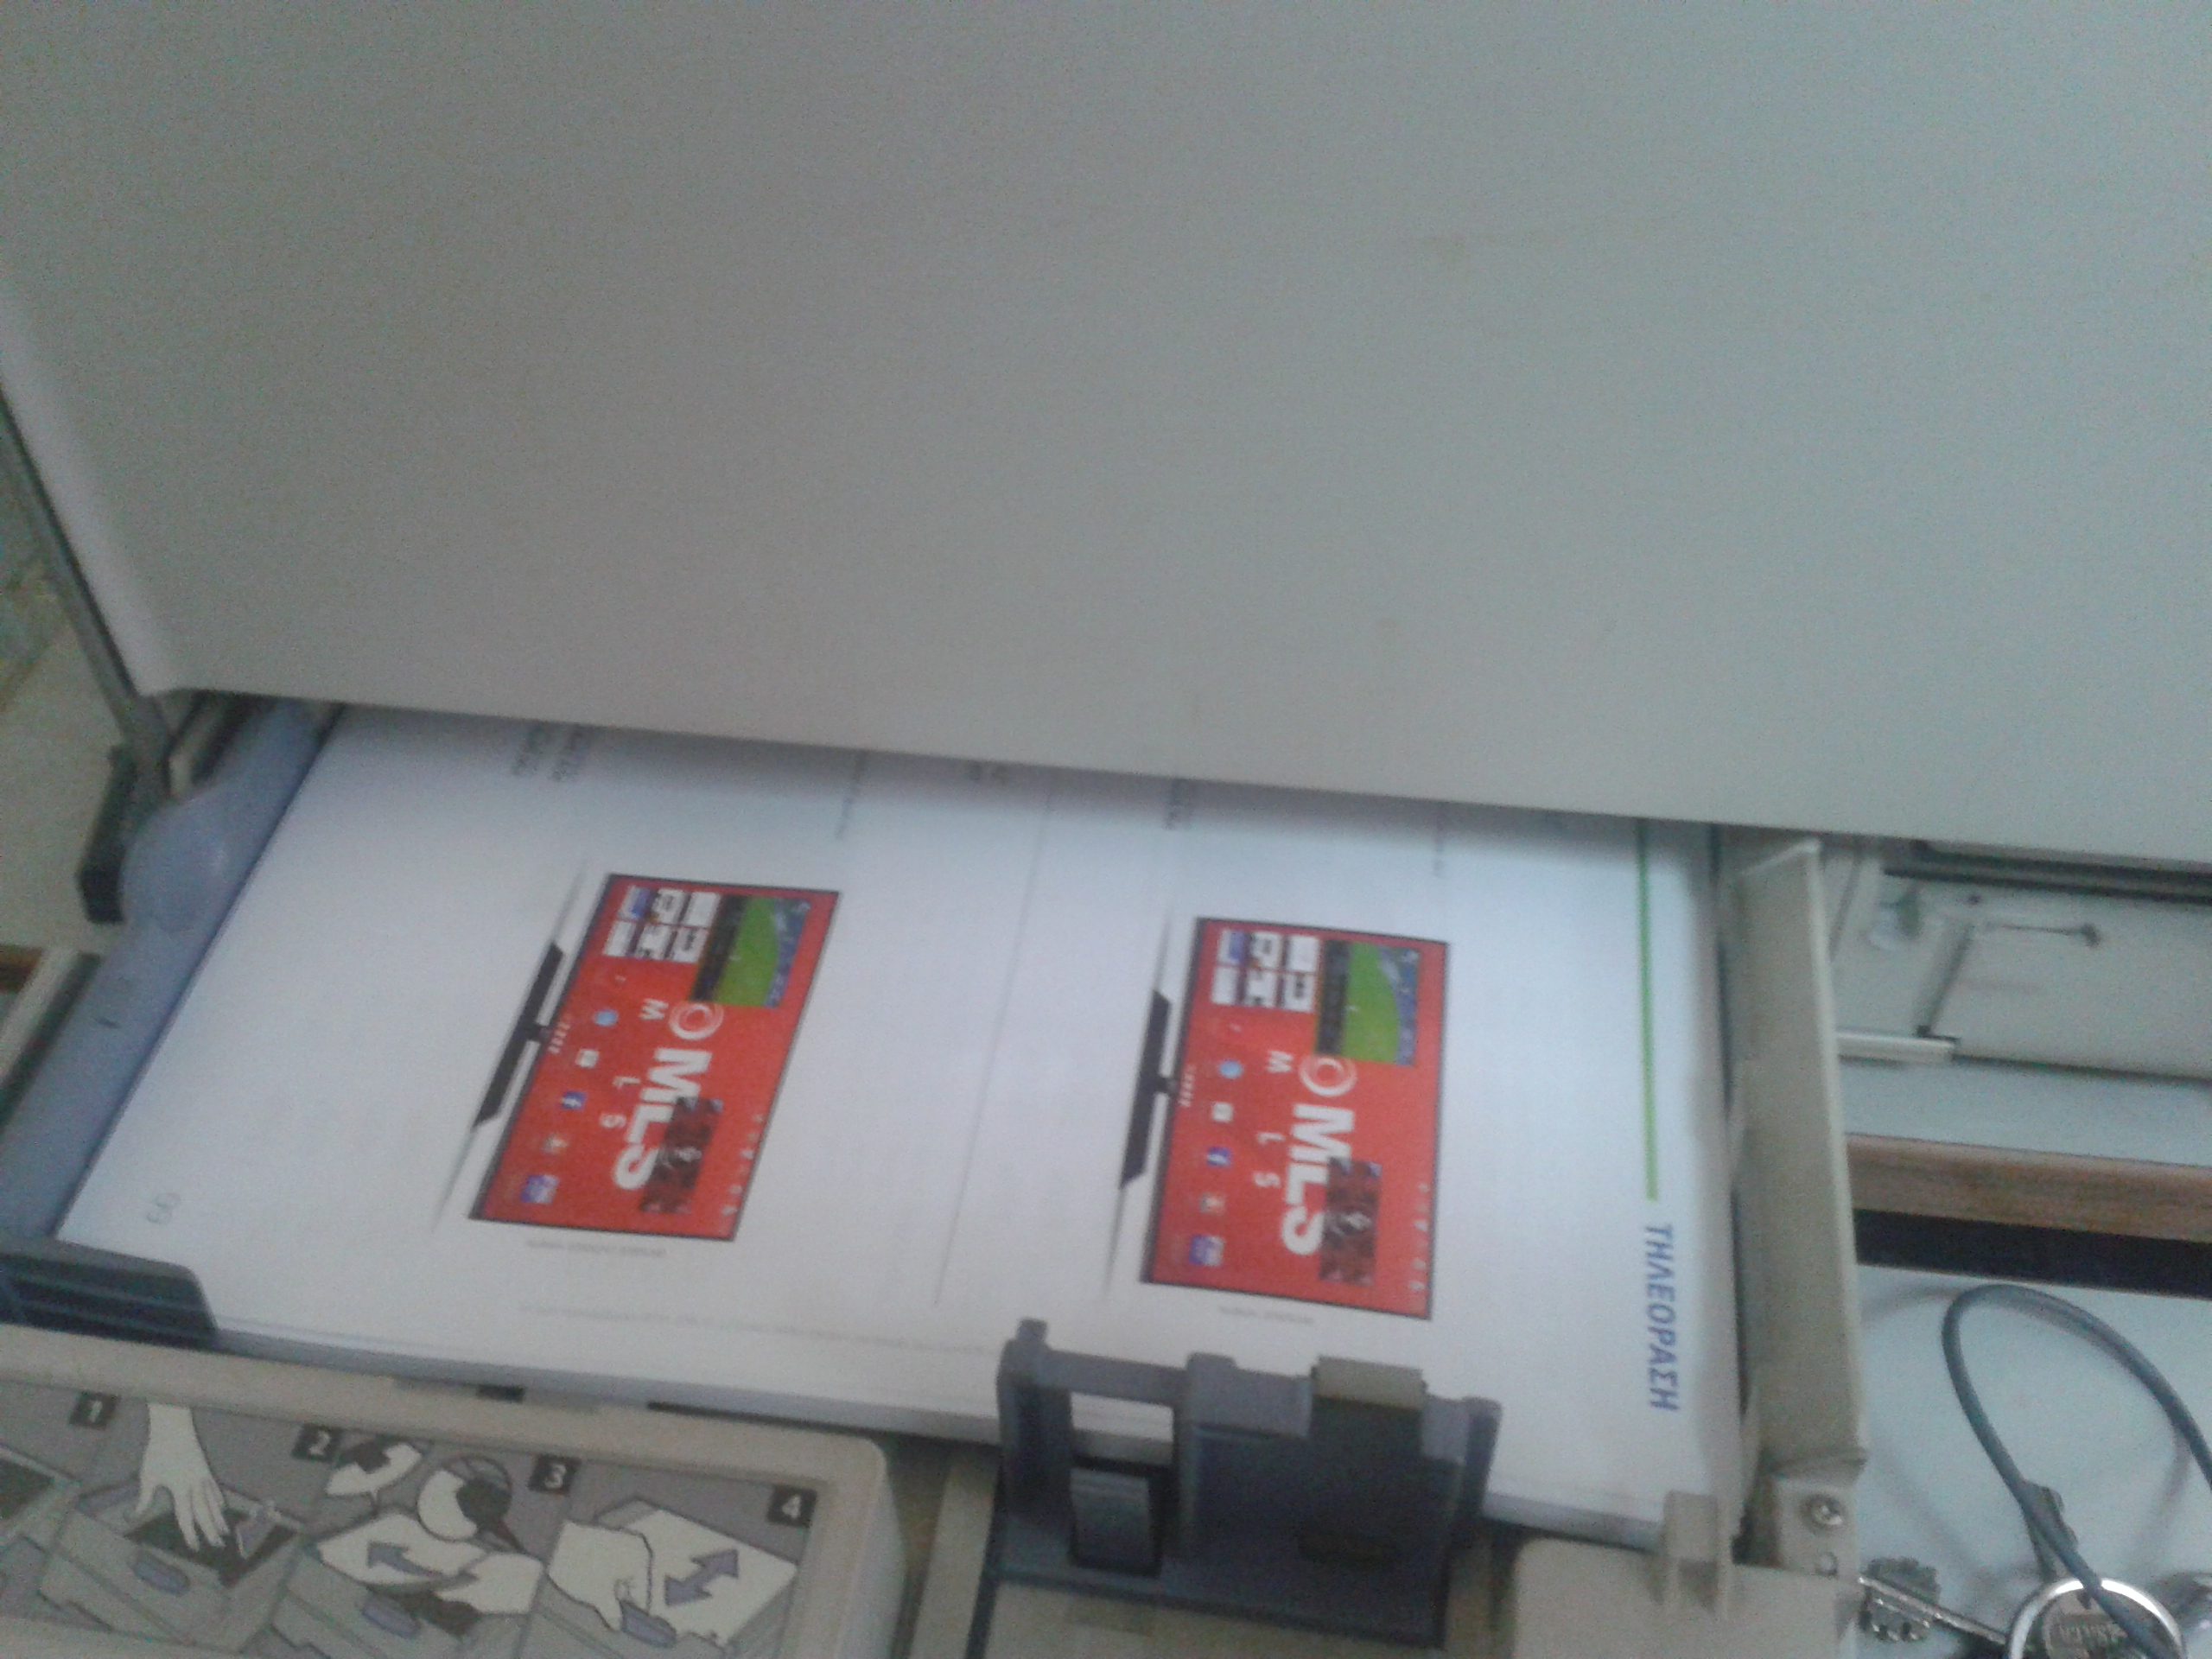
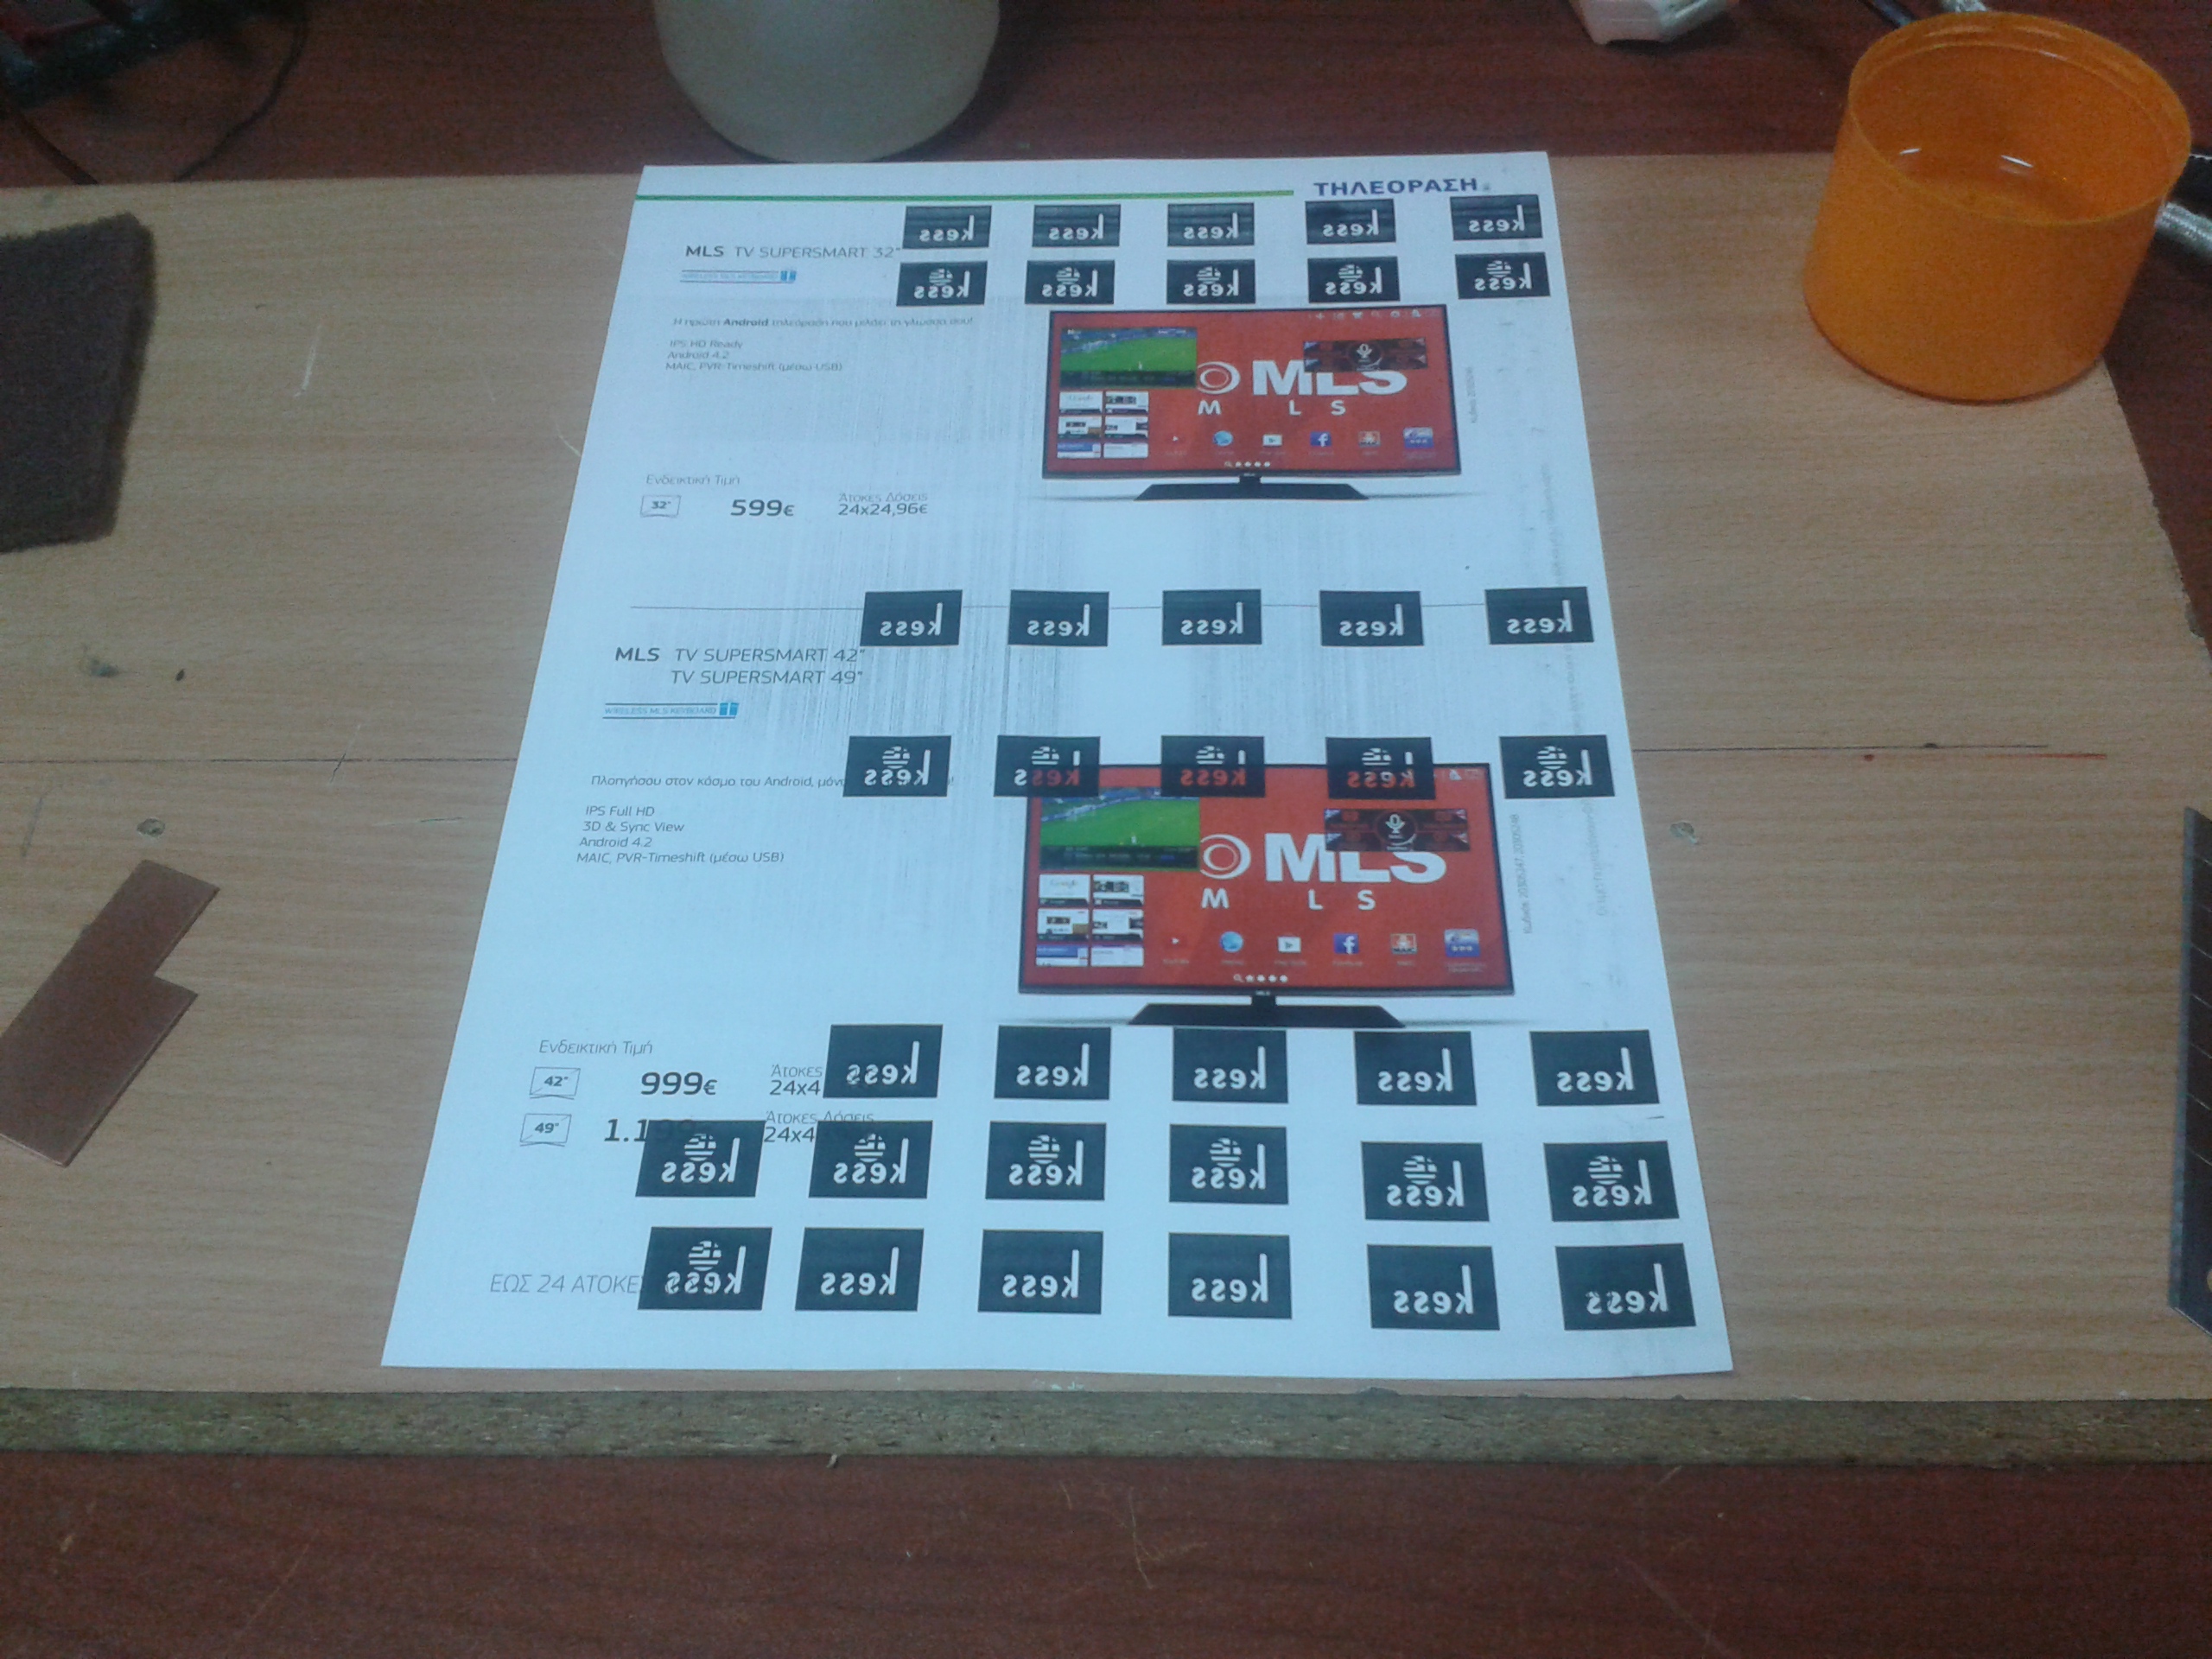
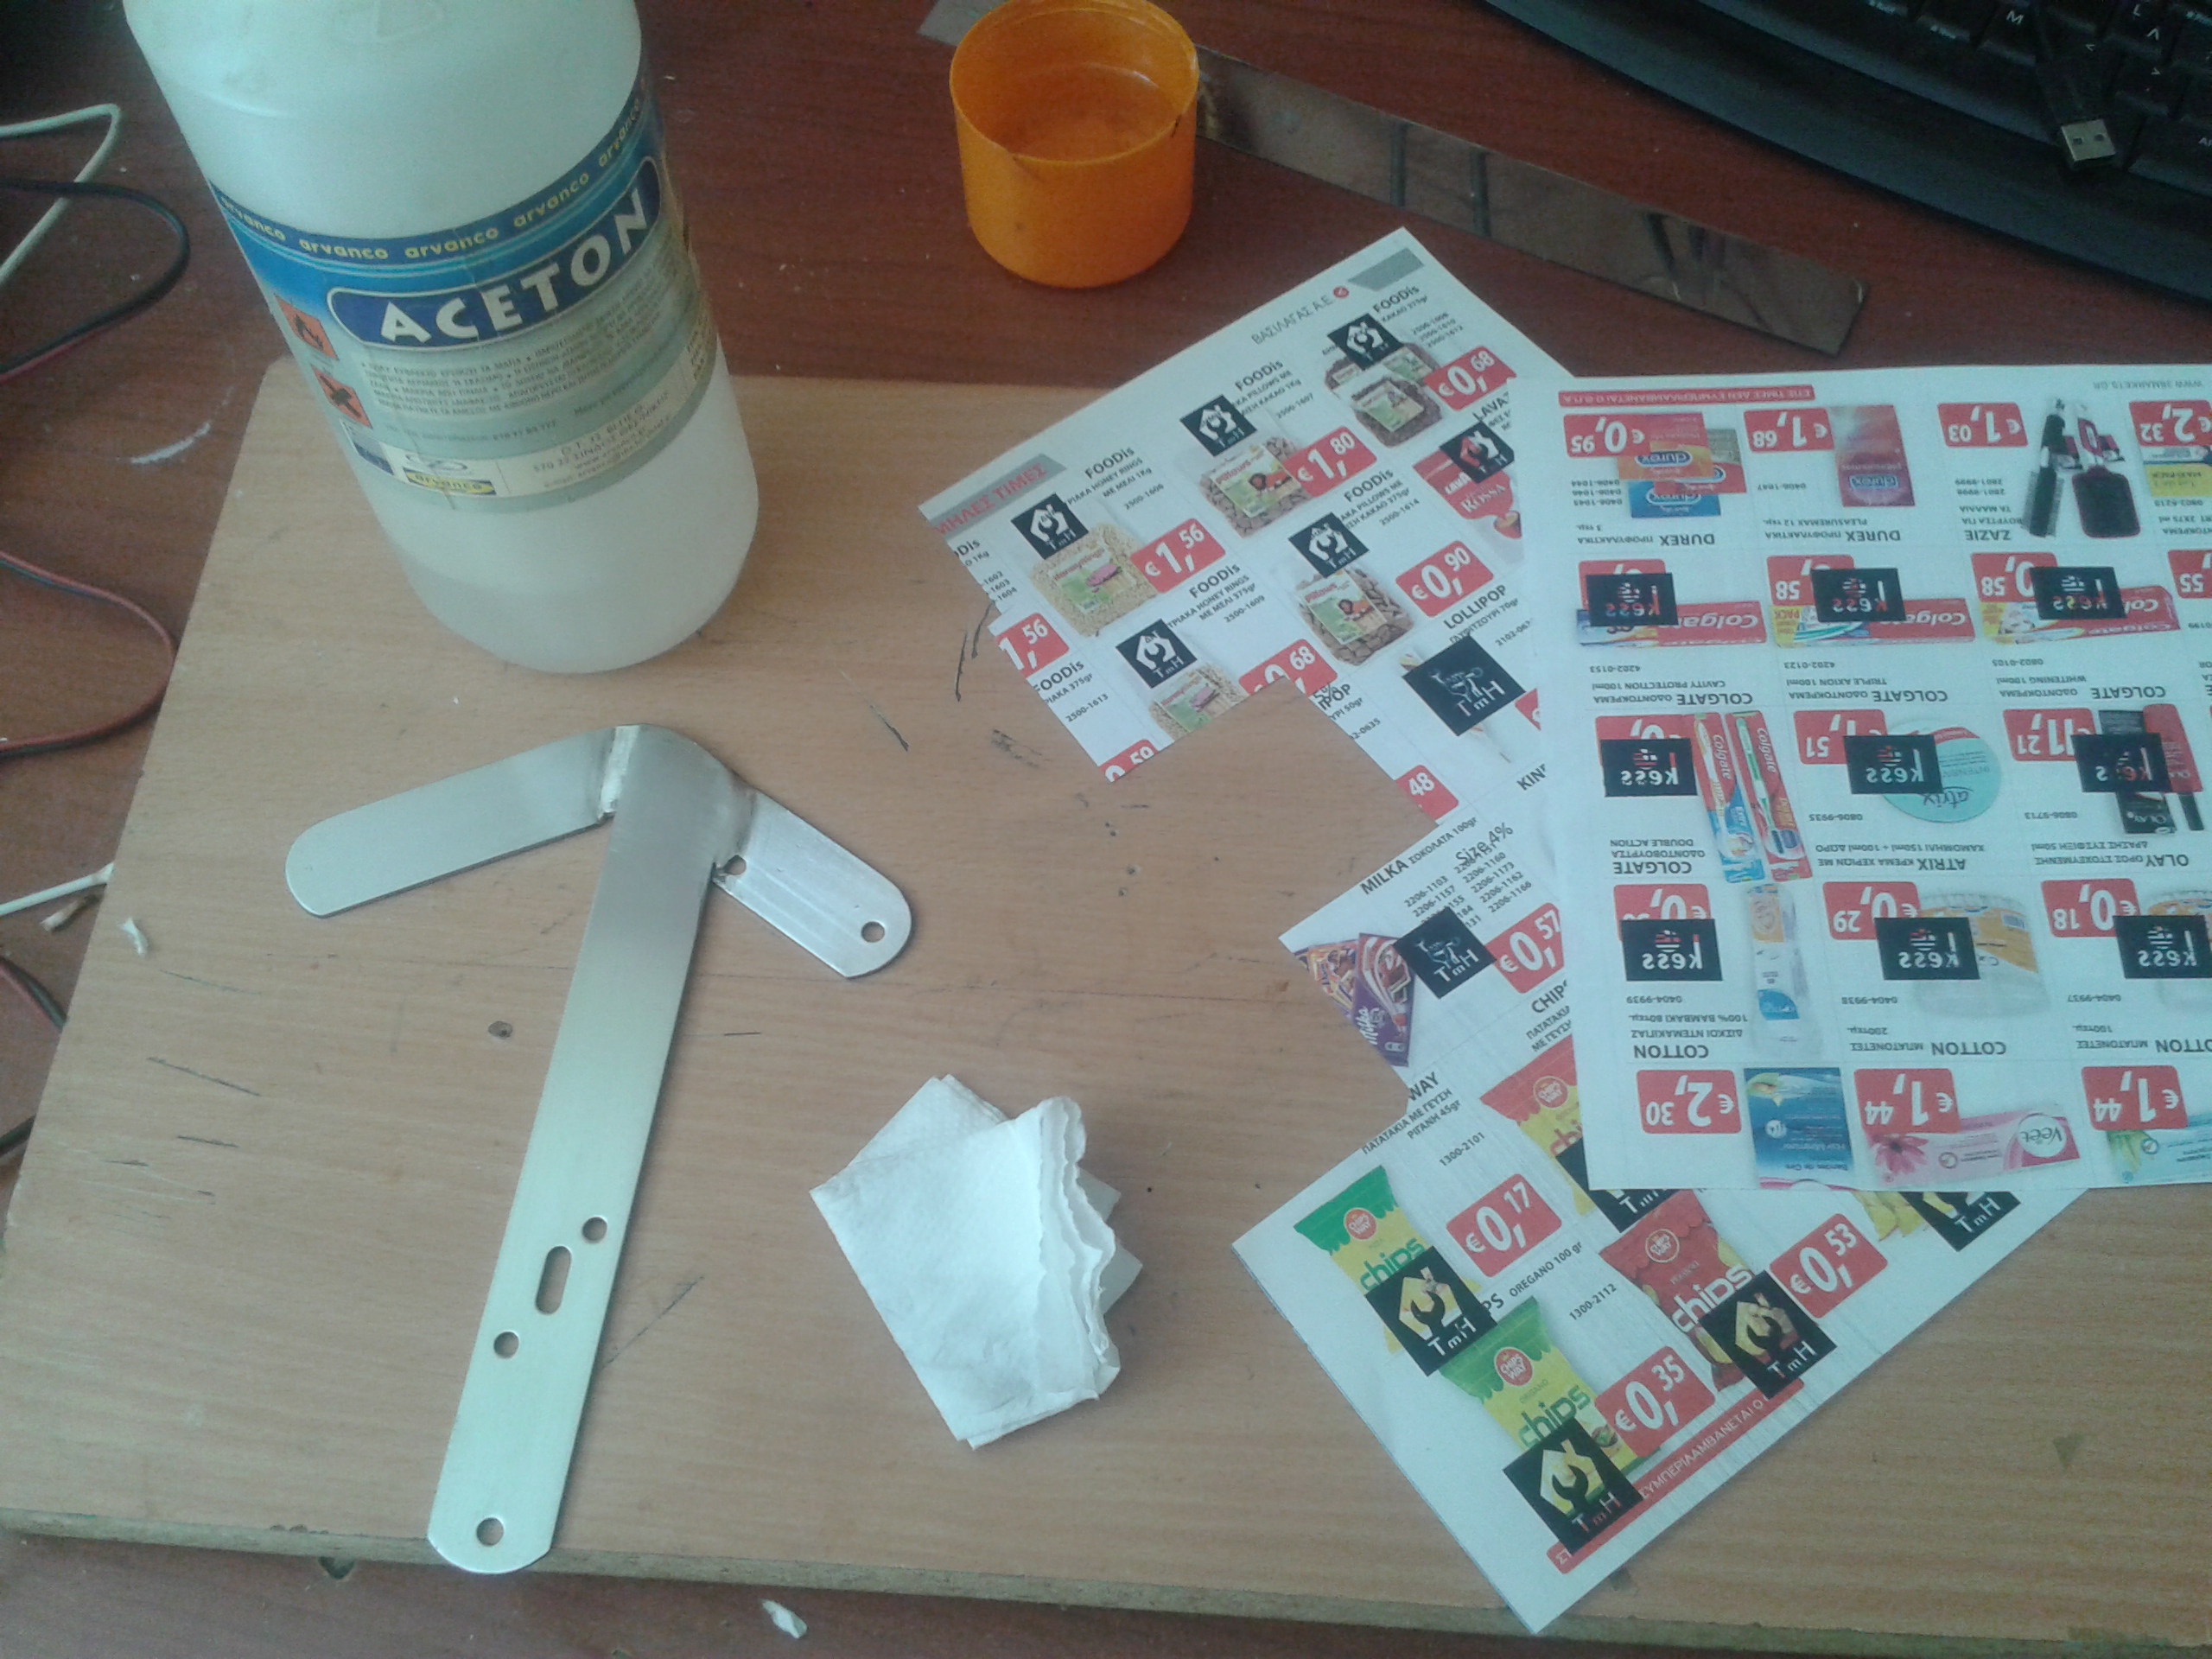
Also a laser printer and glossy paper is needed
(some glossy pages from a magazine can do the job as well)
Attachment 27055 Attachment 27056 Attachment 27057
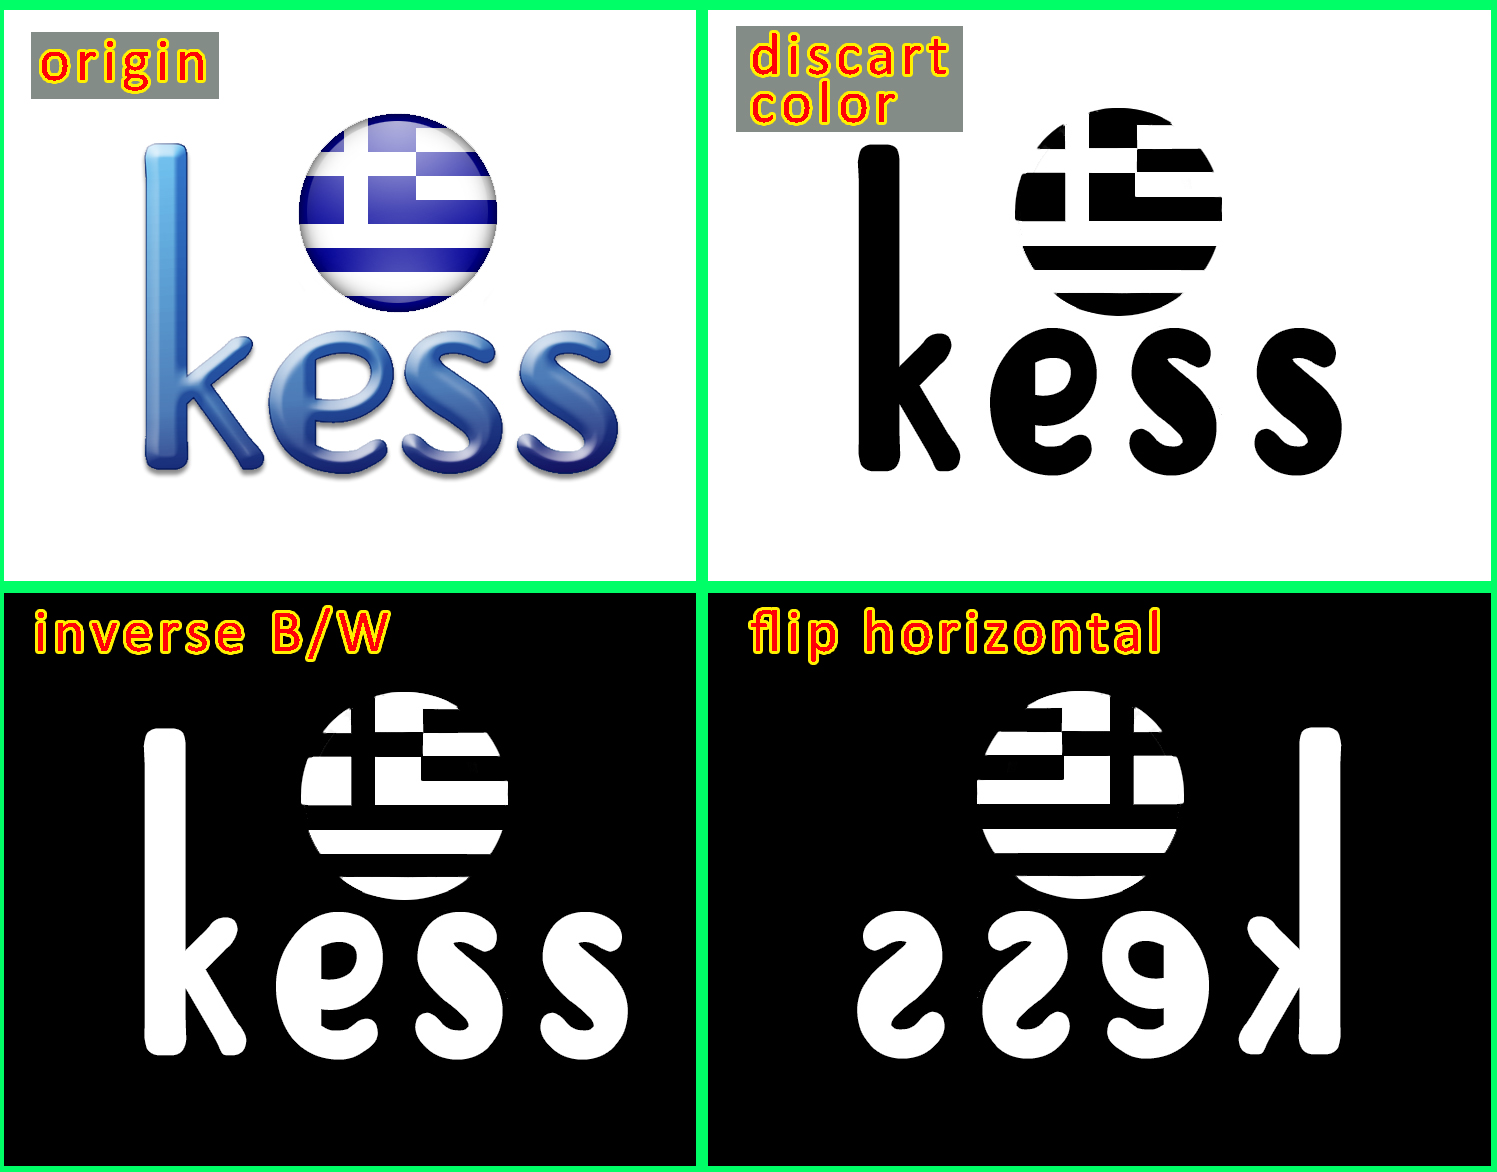
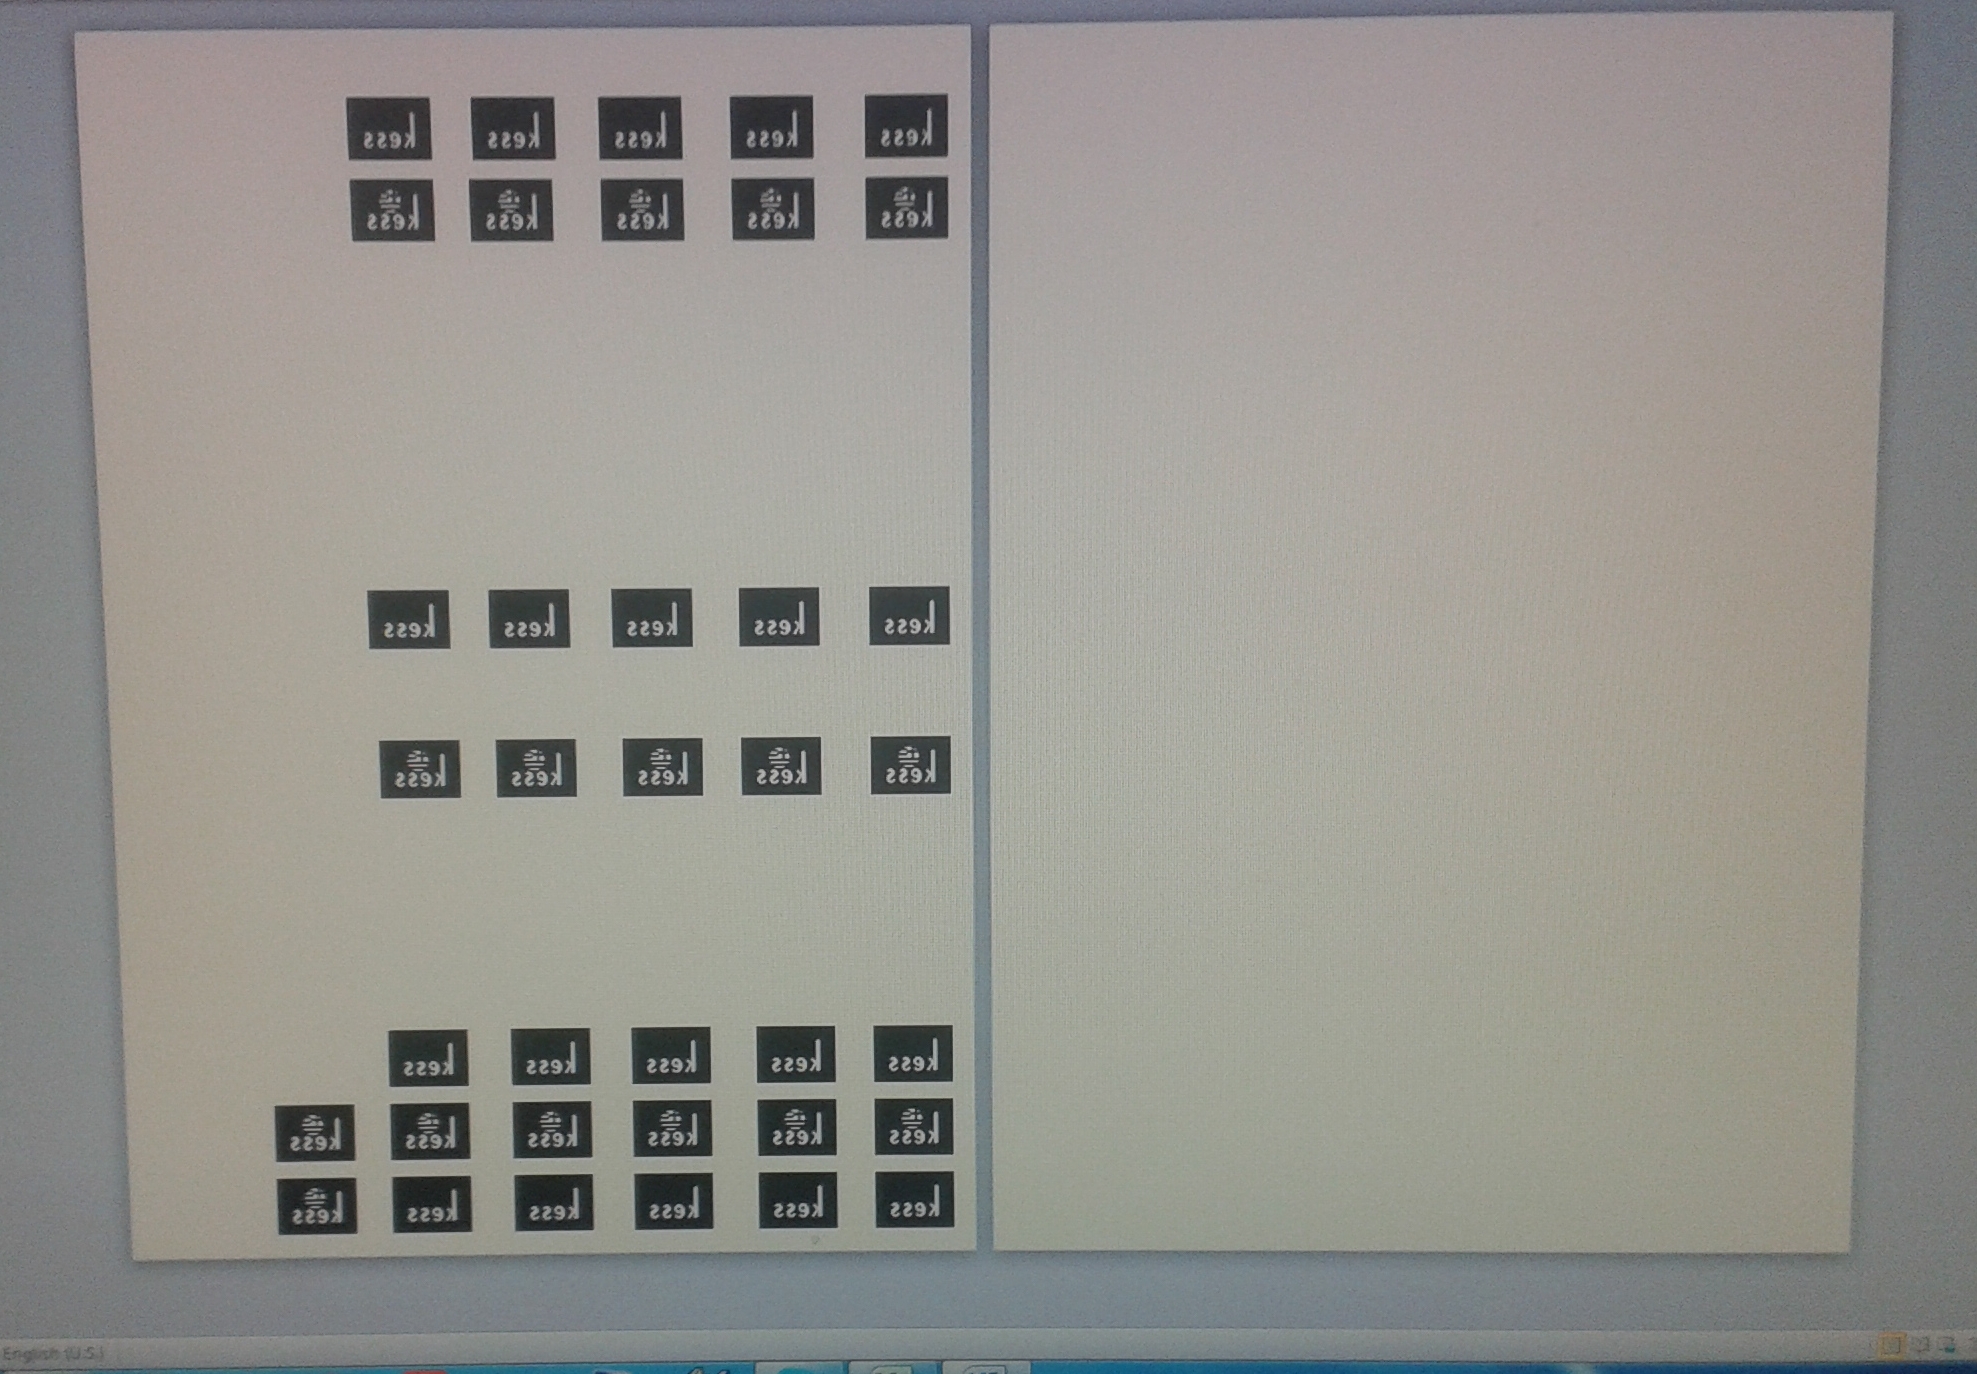
step1 Preparing logo
Attachment 27051 Attachment 27052 Attachment 27053 Attachment 27054
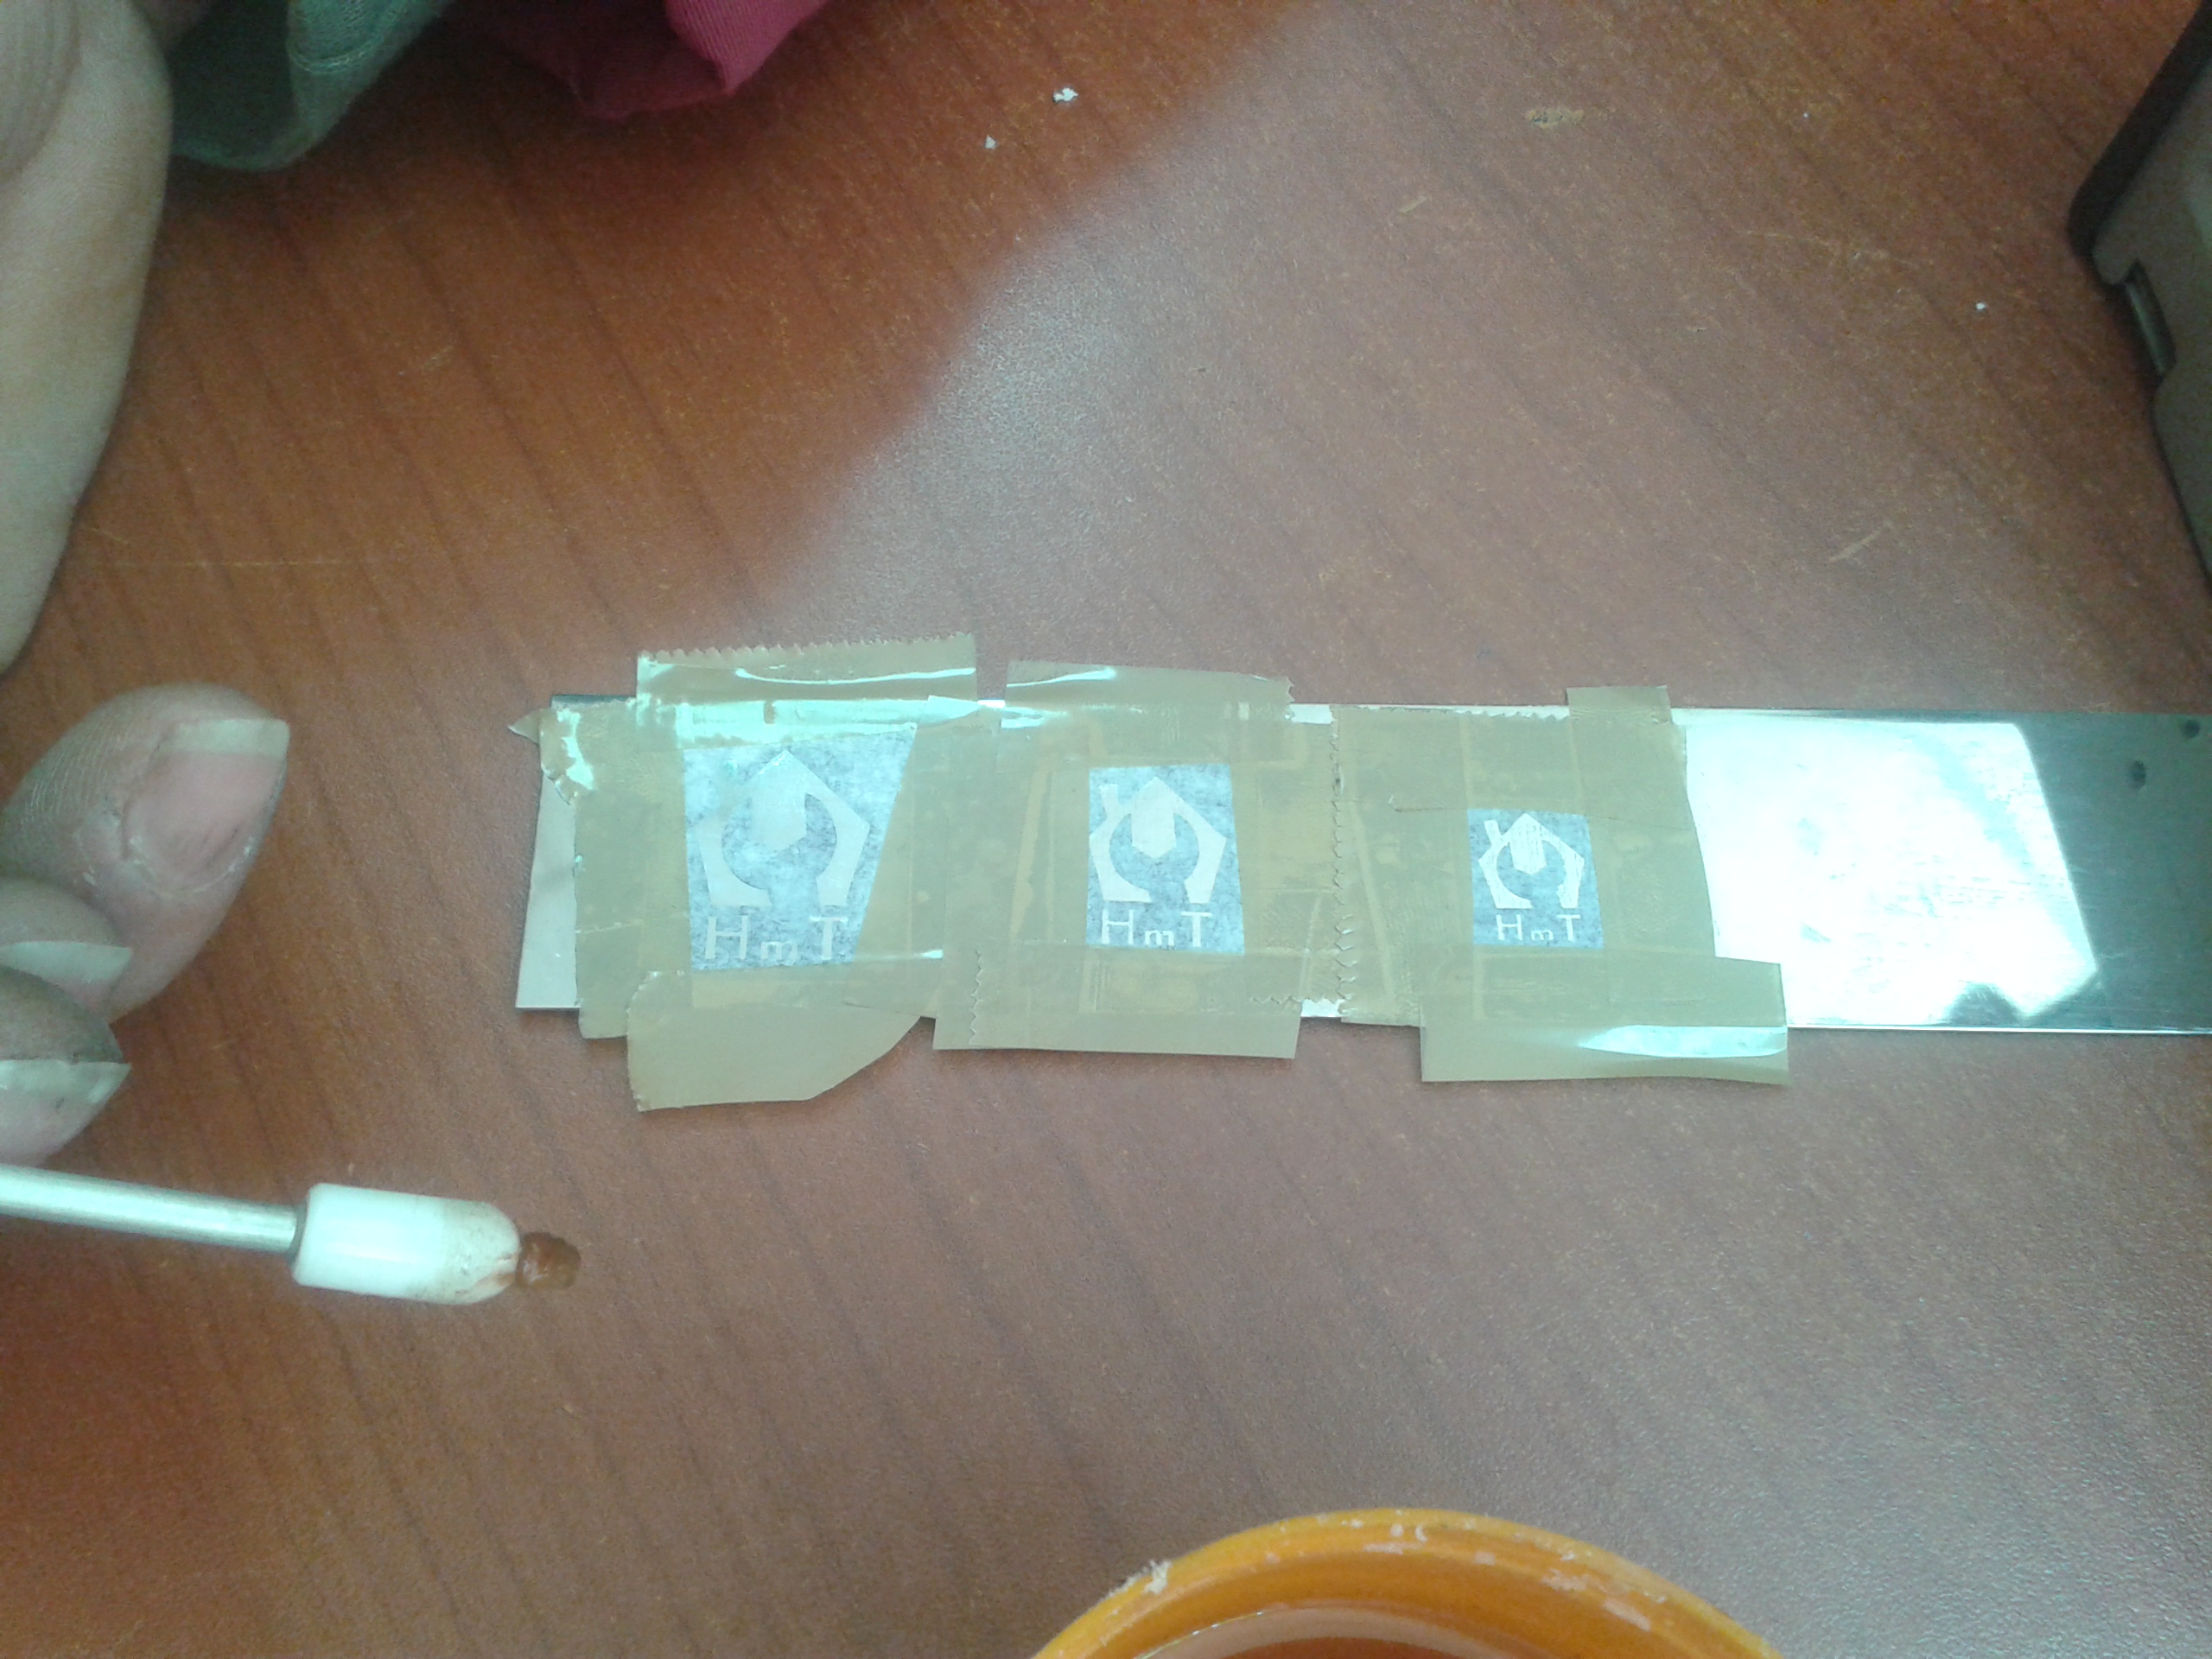
step2 Use your document editor to make a page with logos. Print the page and cut some pieces. Use small pieces of paper tape to keep the logos at place. Cover with cotton cloth and proceed to ironing.
Attachment 27065
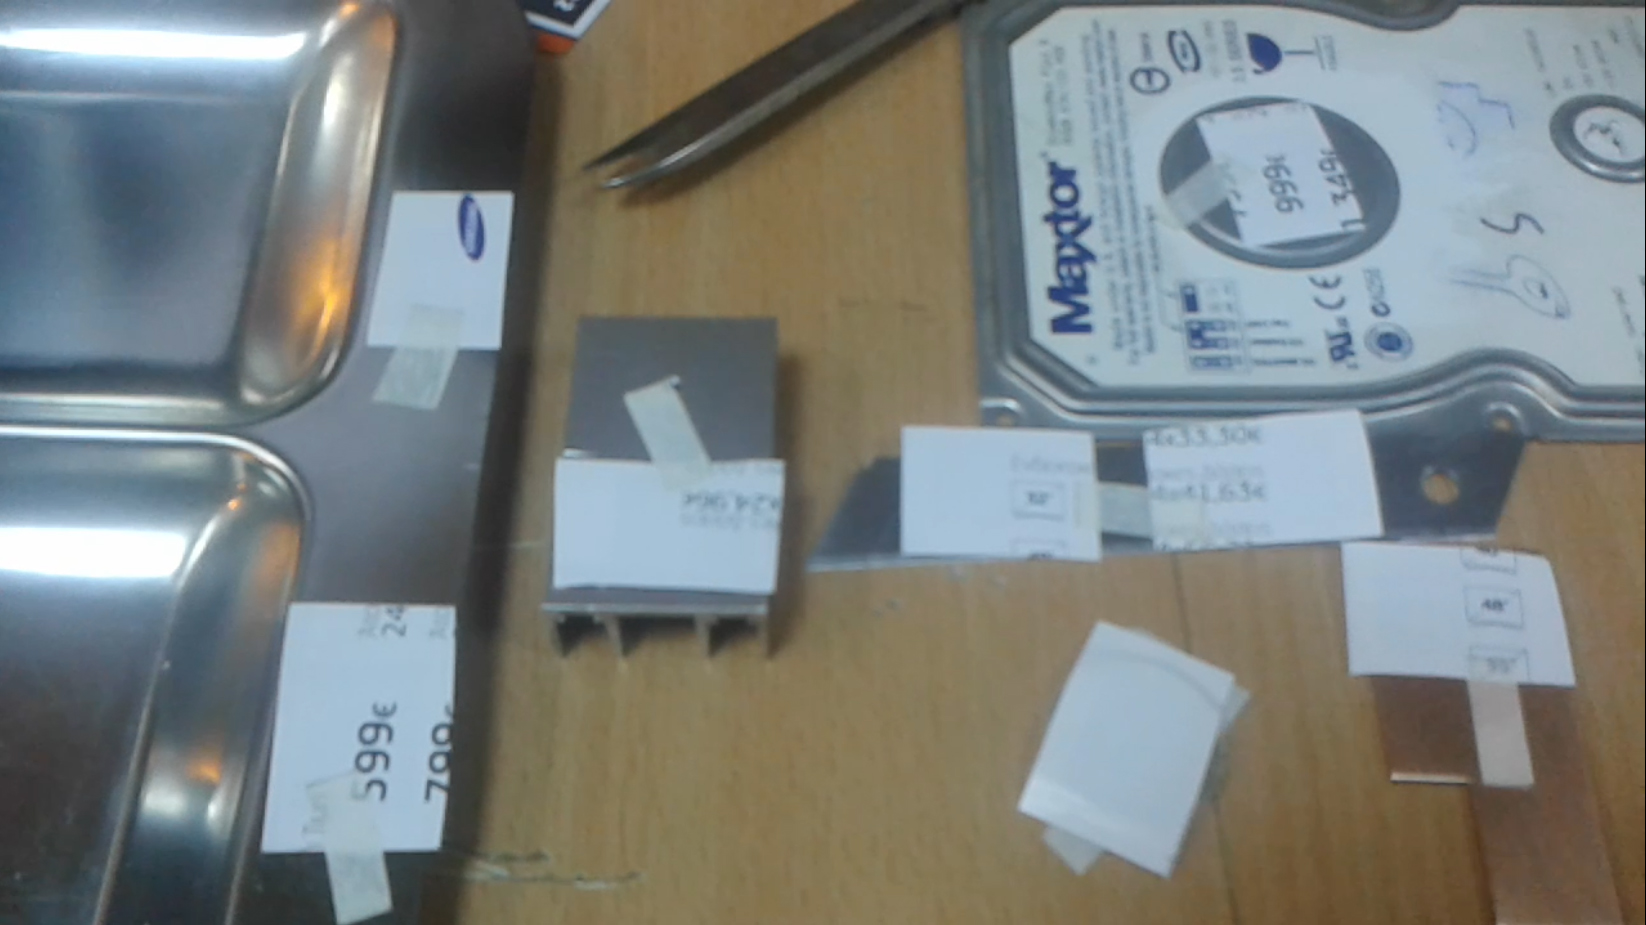
step3 After ironing put the pieces in lukewarm water until the paper is soaked. Rub with your finger until you remove all the paper.
Attachment 27066
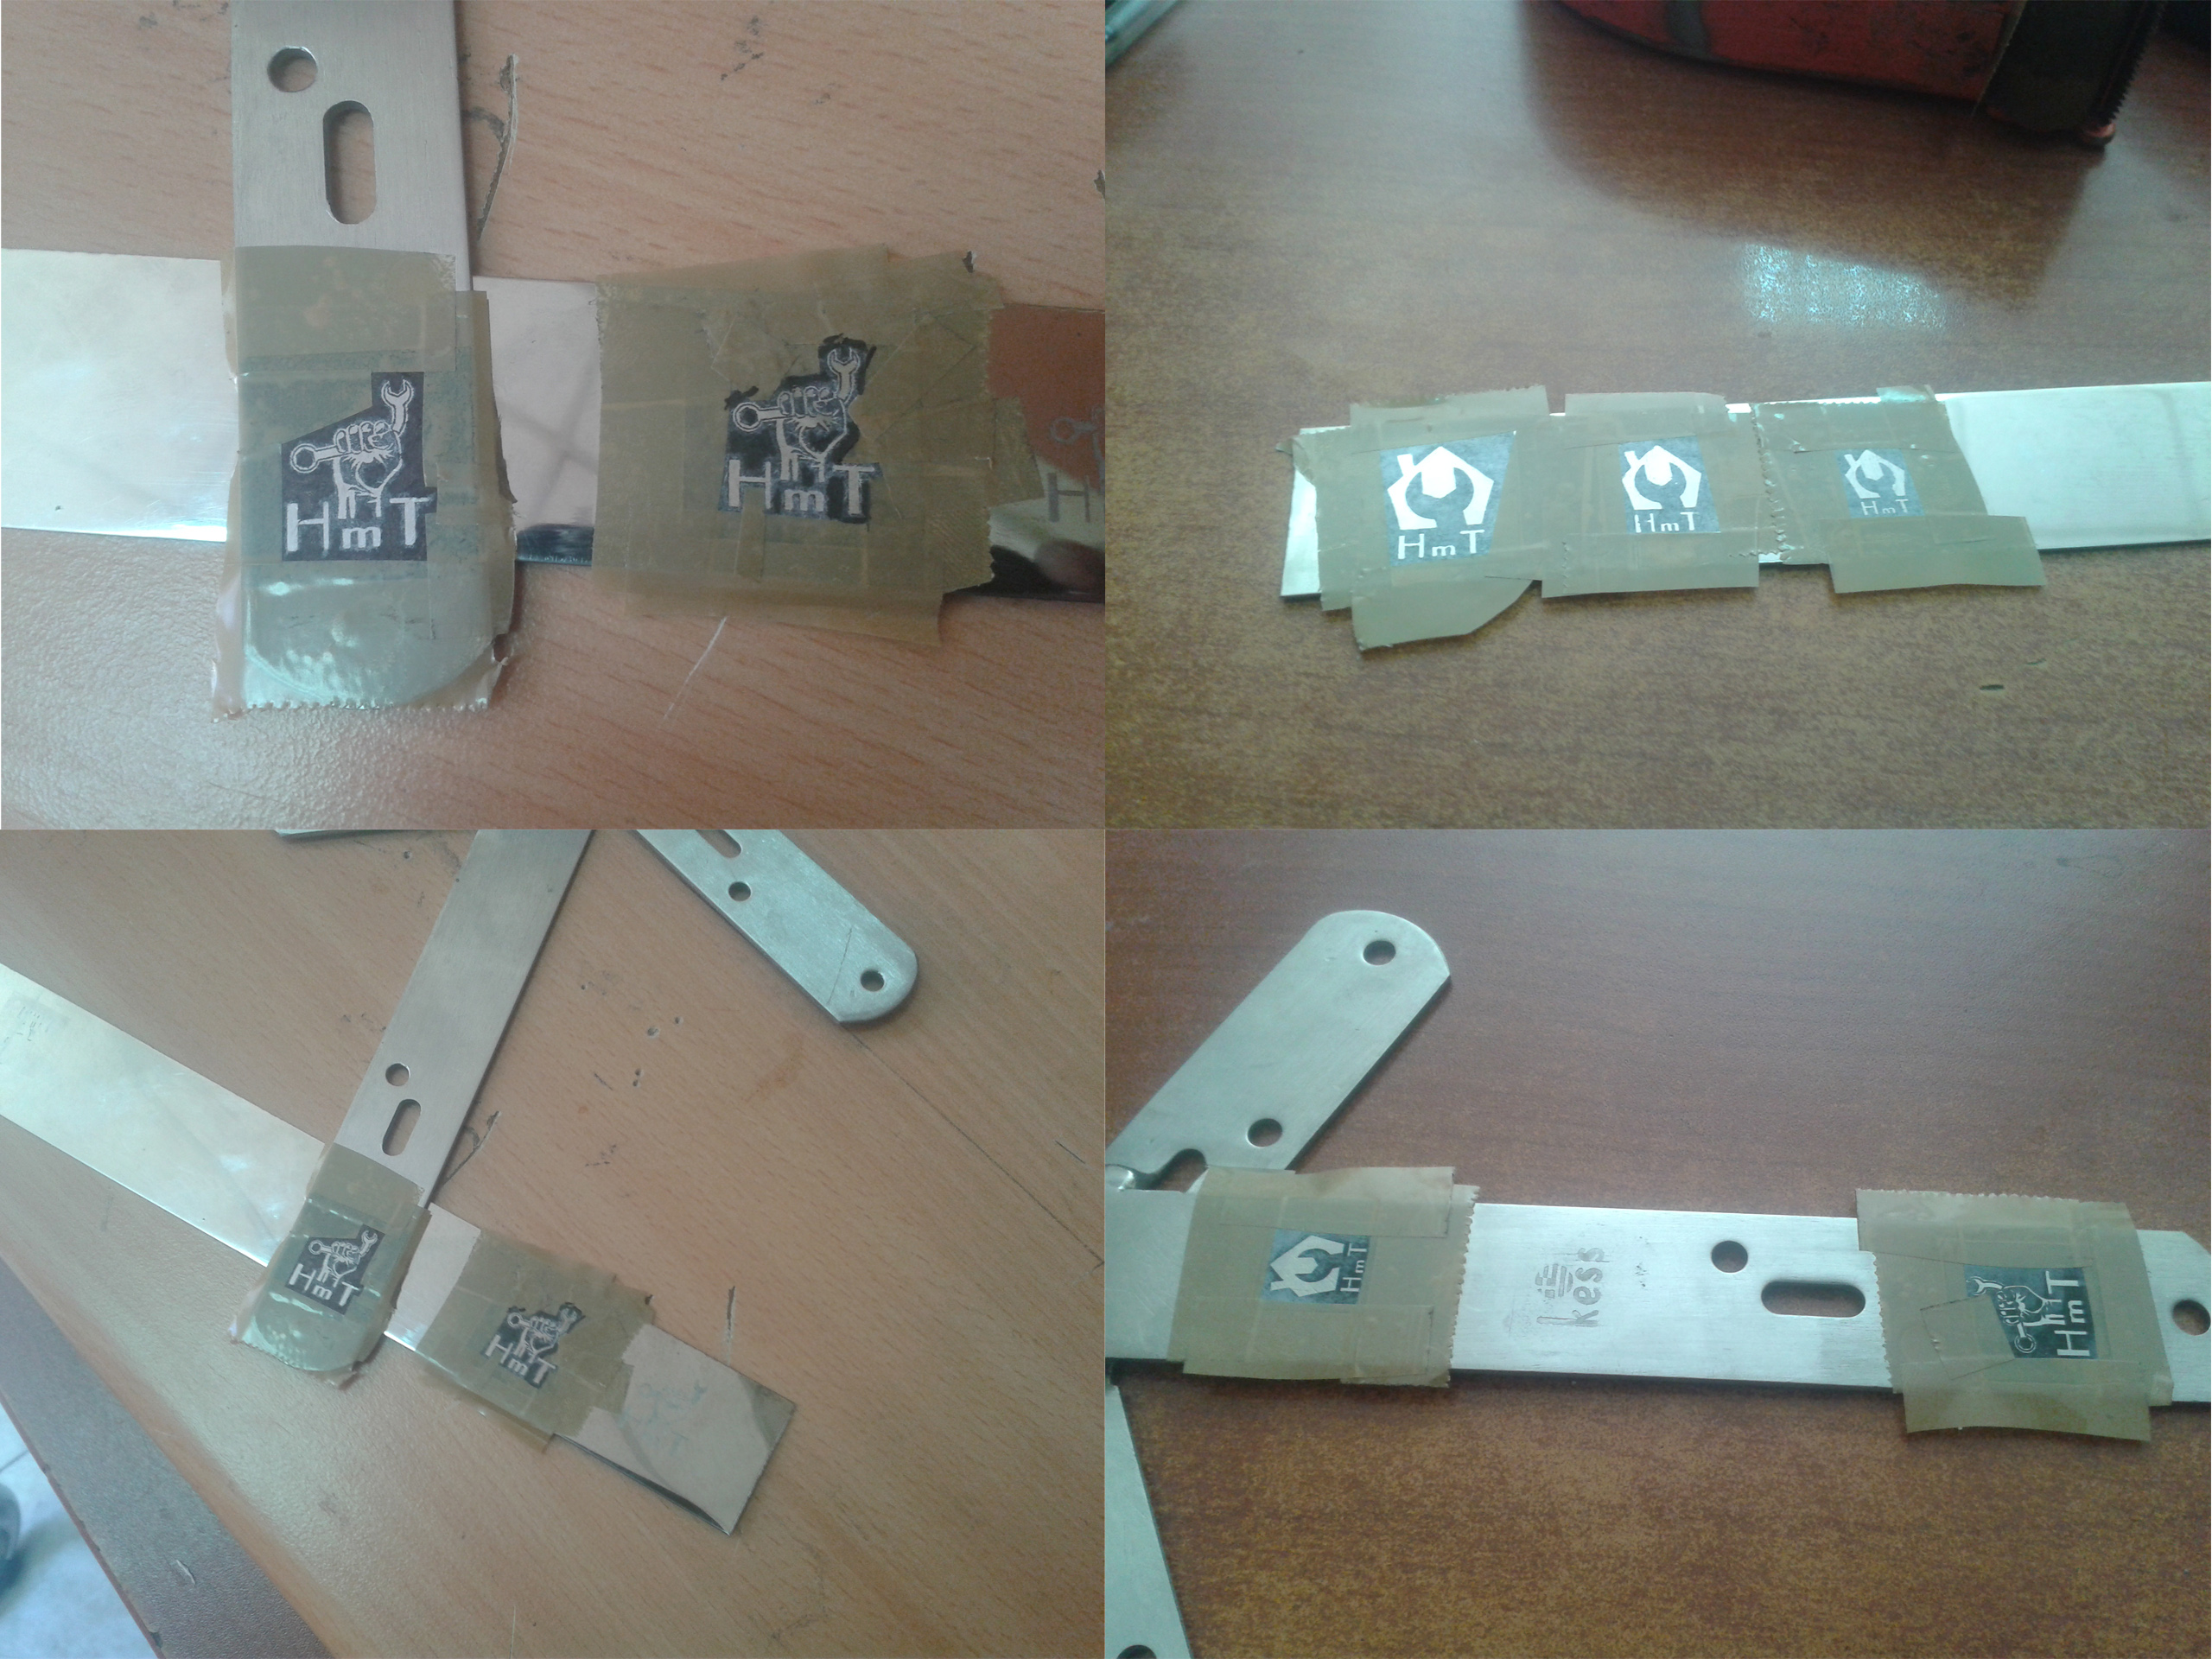
step4 Cover with plastic or PVC tape the places around of the engraving space to protect the tool.
Attachment 27067
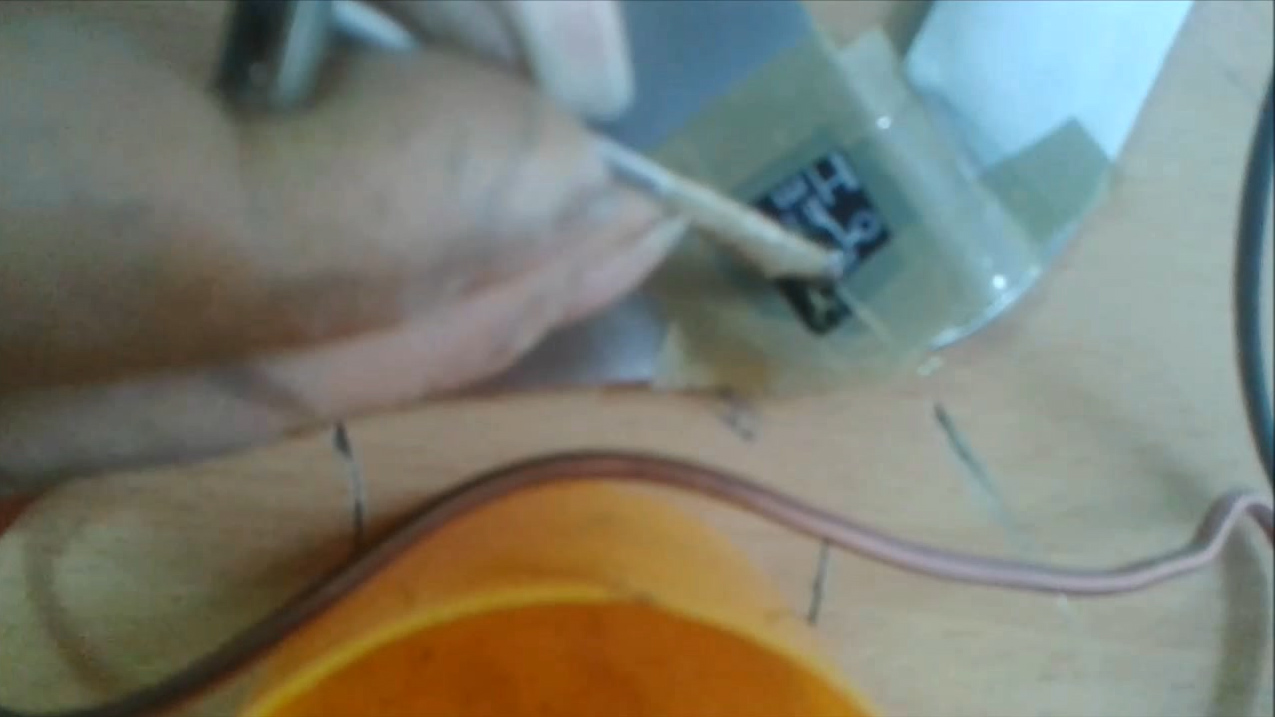
step5 Proceed to engraving
Dip the electrode into the electrolyte solution and then transfer it onto the surface you want to engrave. With small continuous movements, we move the drop of the electrolyte across the surface.
Attachment 27076