Part 1 - me looking at the parts and thinking about what goes where....
https://youtu.be/14naszCneBU
Printable View
Part 1 - me looking at the parts and thinking about what goes where....
https://youtu.be/14naszCneBU
Now me installing the z-axis:
https://youtu.be/Vt09J0f9l0o
and mounting the display....
Specifications and some additional images of the installation of the kit: Sieg SX2.7 DRO Installation
I will run some further tests on each axis and plot the comparisons.
Plus, you may have heard in the video me talking about increasing the column stiffness. I'm ordering some parts today and this will be my next modification to improving this mill.
Finally I have finished the installation, now I have a DRO that reads down to 0.005mm in X, Y and Z - and I can switch to imperial at the touch of a button
https://youtu.be/DhjQ6_Itpgk
I now need to get back to making models, hopefully now with more accuracy on the milling machine :)
<!-- BEGIN /var/www/html/homemadetools/protected/modules/zeus/views/tool/postUpdate.php -->
Thanks editor@glue-it.com! We've added your X and Y Axis Encoder Installation to our CNC category,
as well as to your builder page: editor@glue-it.com's Homemade Tools. Your receipt:
<div id="blocks"> <div class="block b1 pngfix"> <div class="bimg"> <div> <a href="https://www.homemadetools.net/homemade-x-and-y-axis-encoder-installation"> <img src="/uploads/249186/homemade-x-and-y-axis-encoder-installation.jpeg"/> </a> </div> </div> <div class="head pngfix"></div> <div class="left pngfix"></div> <div class="right pngfix"></div> <div class="blockover b1 pngfix"> <div class="title"> <a href="https://www.homemadetools.net/homemade-x-and-y-axis-encoder-installation">X and Y Axis Encoder Installation</a> <span> by <a href="https://www.homemadetools.net/builder/editor%40glue-it.com">editor@glue-it.com</a></span> </div> <div class="tags">tags: <a href='https://www.homemadetools.net/tag/cnc'>CNC</a> </div> </div> </div> </div>
<!-- END /var/www/html/homemadetools/protected/modules/zeus/views/tool/postUpdate.php -->
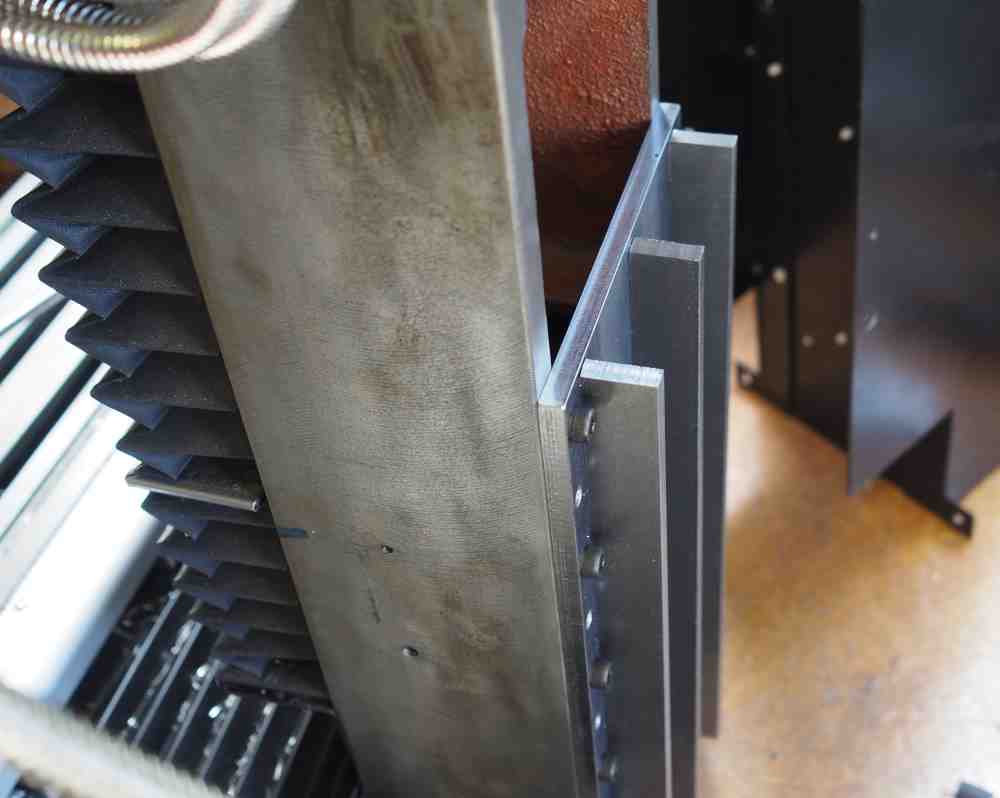
Whilst fitting the DRO you will have seen that I created a space between the column and the power supply case.
Enough space for a bracket.
And so I created a Sieg SX2.7 stiffening bracket
Attachment 39730
This has increased the static stiffness by 1.5x :lol:
and yet another video....
https://youtu.be/4G09lW0Bf0g
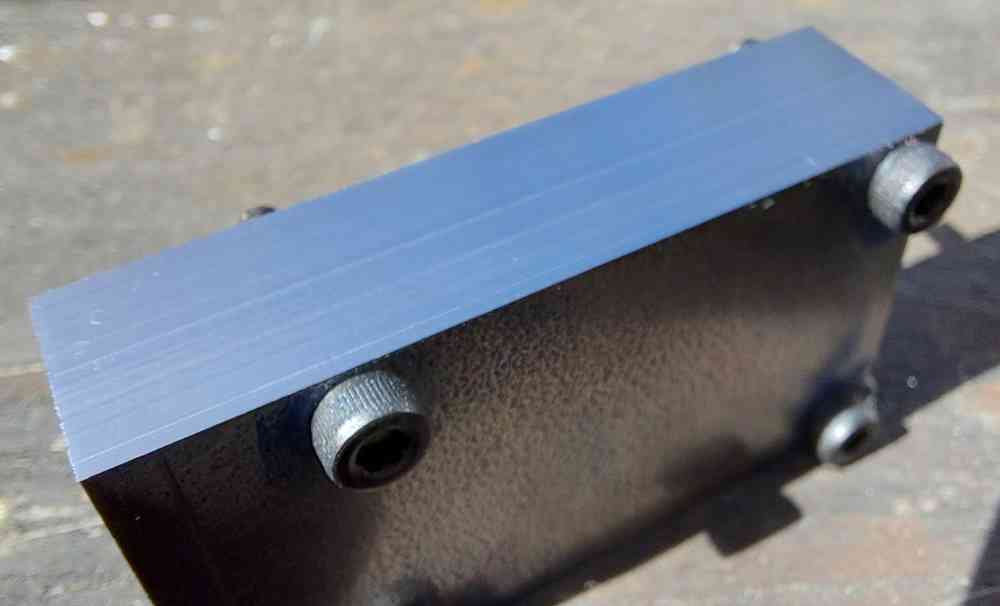
Mill Stiffness = Top Finish is definitely true, I made this end mill cut on 2 off 1/4" thick mild steel plates bolted together. I can feel that the vibration on the column is significantly reduced with the bracket fitted and when making this type of cut.
Attachment 39771