
 LinkBack URL
 About LinkBacks


It certainly is an adventure moving halfway around the planet (for Flat Earthers, i moved to the flip side).
As the first Americans in this region (krai) setting up a business, the paperwork has kept our lawyer busy. Most officials have no idea how to handle American owning a Russian corporation, but... we did it. We have incorporated as OOO << Durand Interstellar >> (Durand Interstellar, Ltd. for westerners).
We're also teaching business and technology so that takes a bit of time, too.
So, what about the shop you ask? I'll list what we have so far and what the plans are.
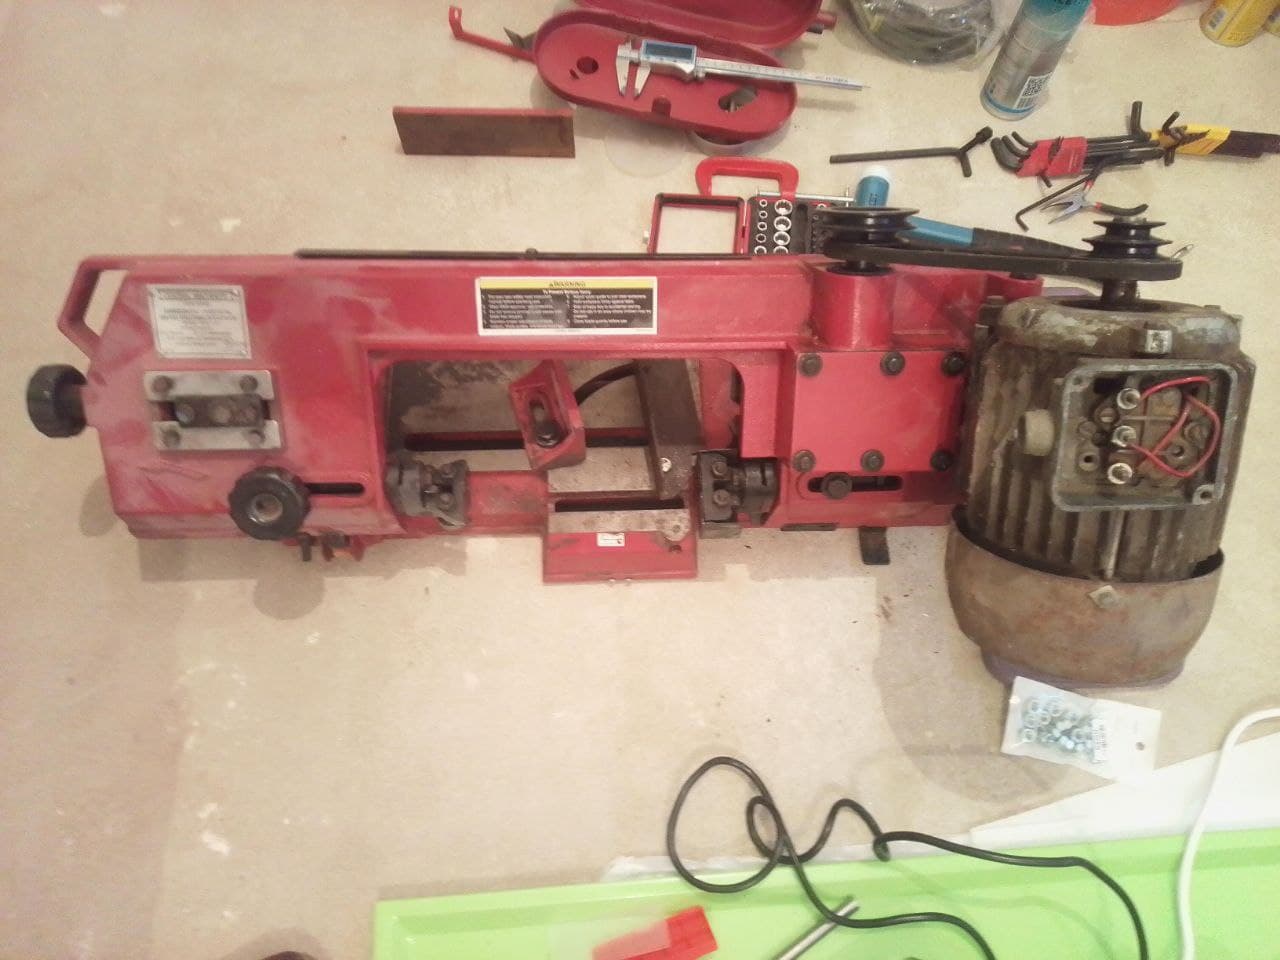
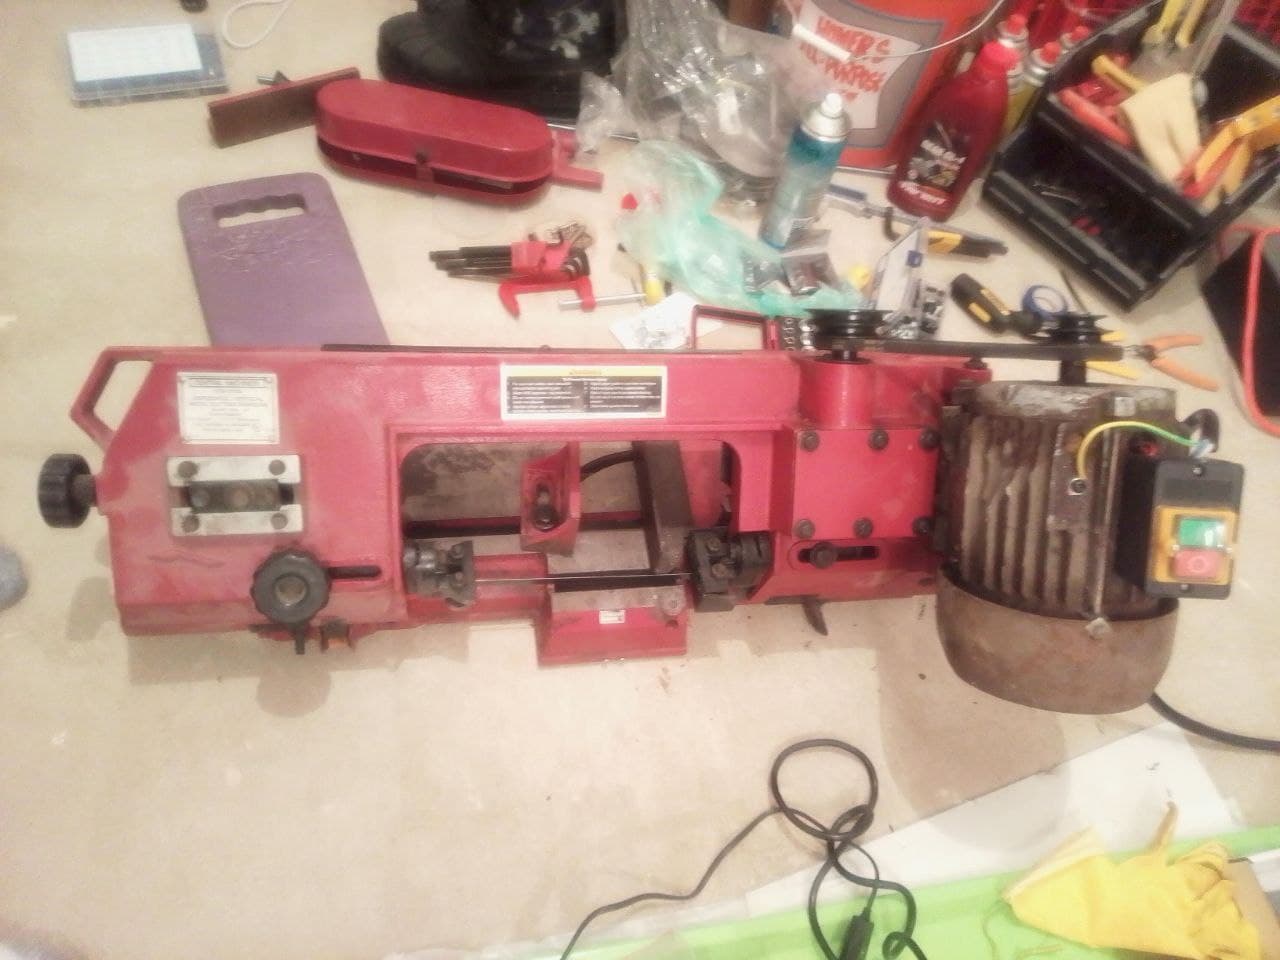
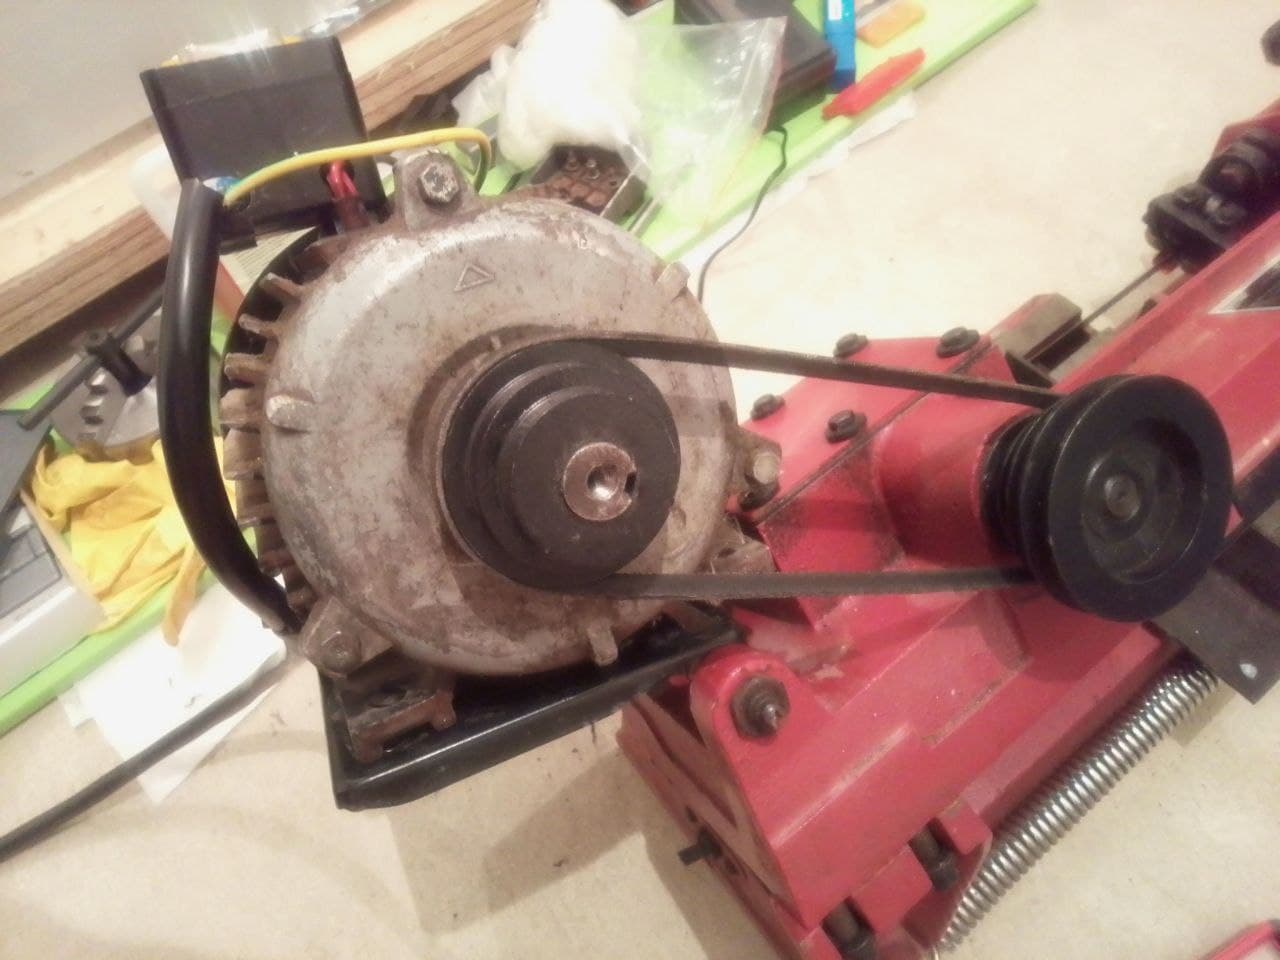
We brought a 4x6 band saw with us in kit form. No motor, no stand, and disassembled so the movers had a better chance of not breaking it. A friend here gave me an OLD Soviet 3 phase motor for it just before he died (vaccination caused clot).
I've got the motor Jerry-rigged so we can start cutting steel to make stands, benches, etc. as needed. But, every 6 months we have to leave the country to satisfy the officials so we spent last week in the Middle East. Never ever had that much trouble getting through customs to get OUT of the Middle East and then again to get INTO Russia.
Anyway, here's the band saw, I had to bore out the pulley so it would fit the motor and don't look too closely at how the motor is mounted. I need to make a new motor mount that fits this one.
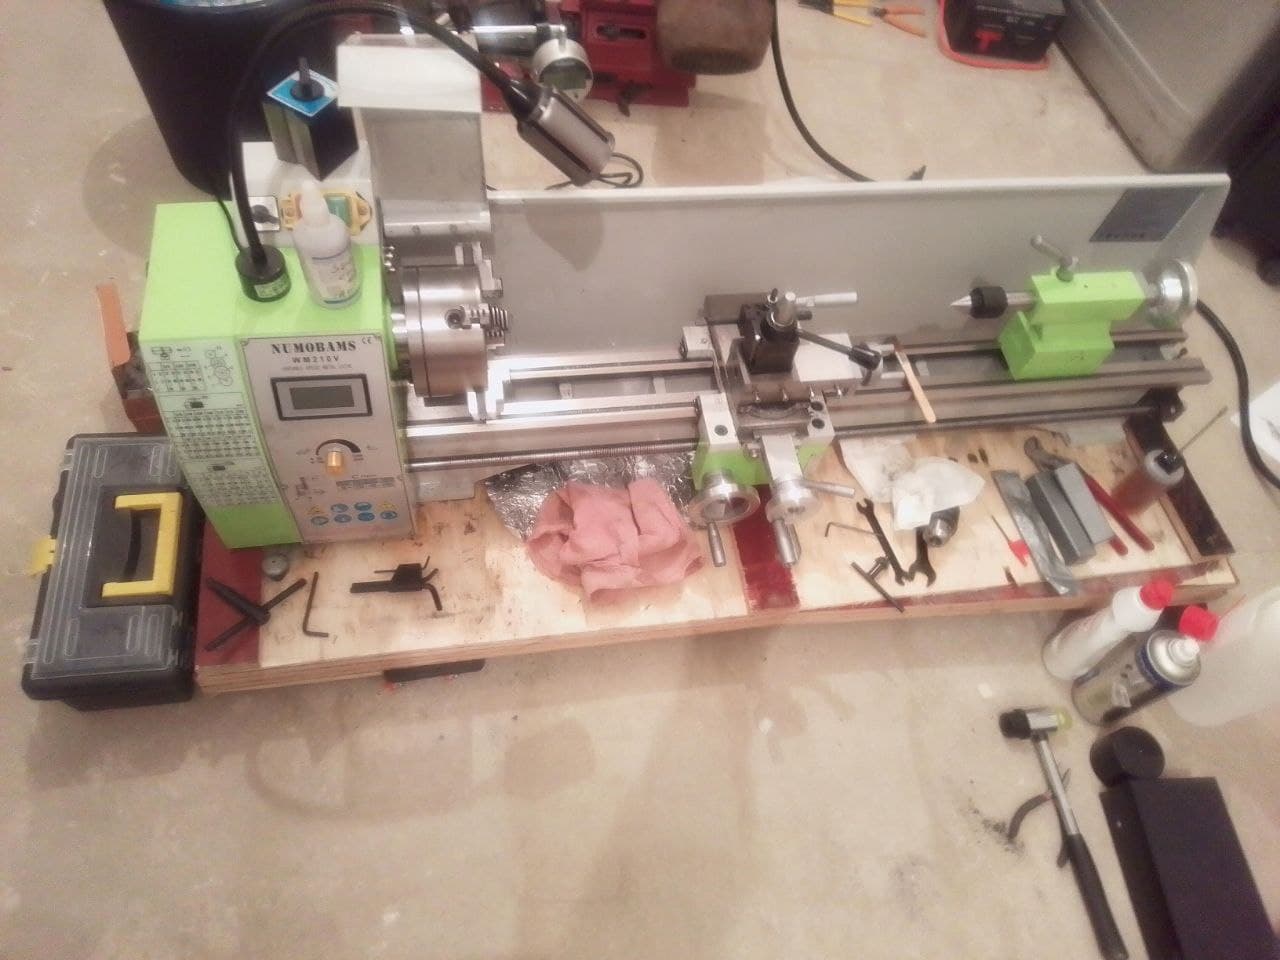
Here's our lathe, it's really hard on the legs sitting on the floor to use this, need a stand for it SOON.
That's actually the second lathe, the shipping company misplaced the first one.
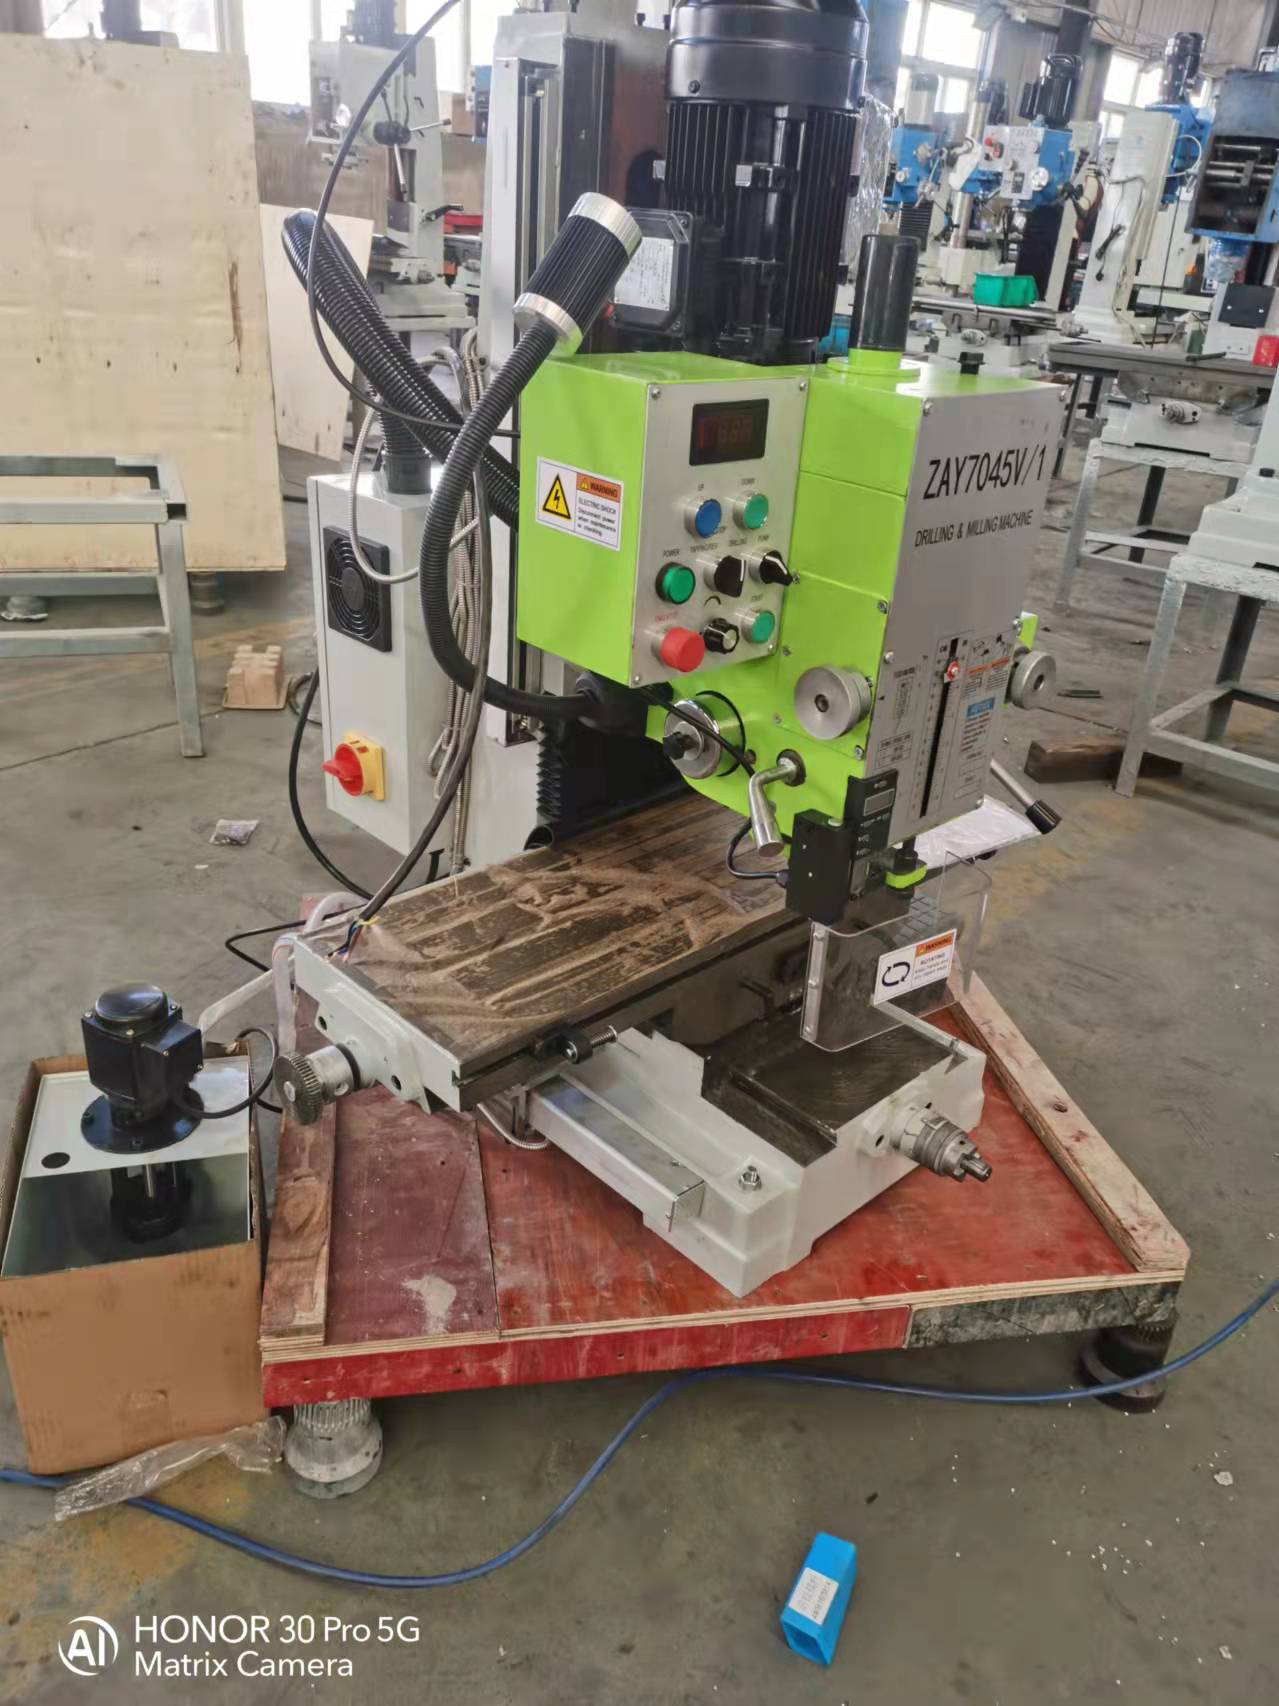
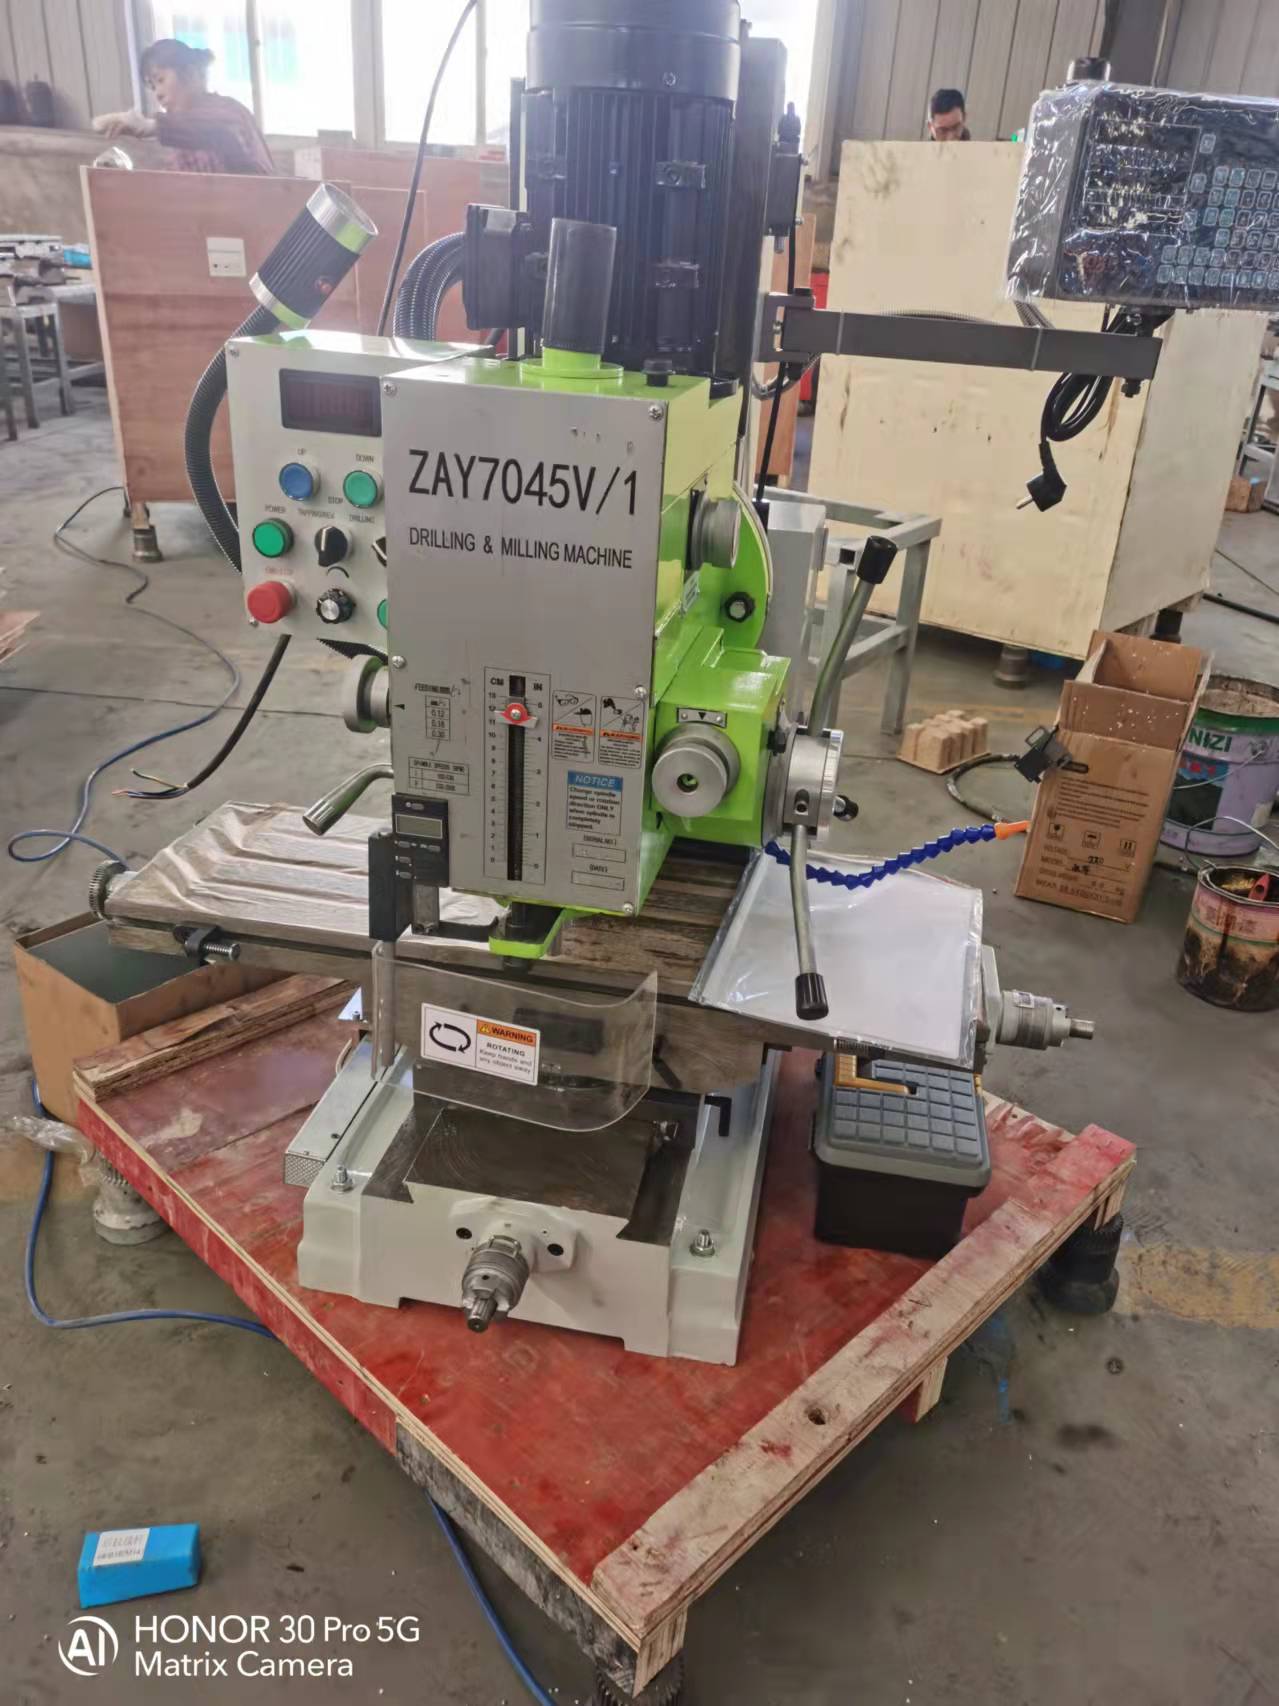
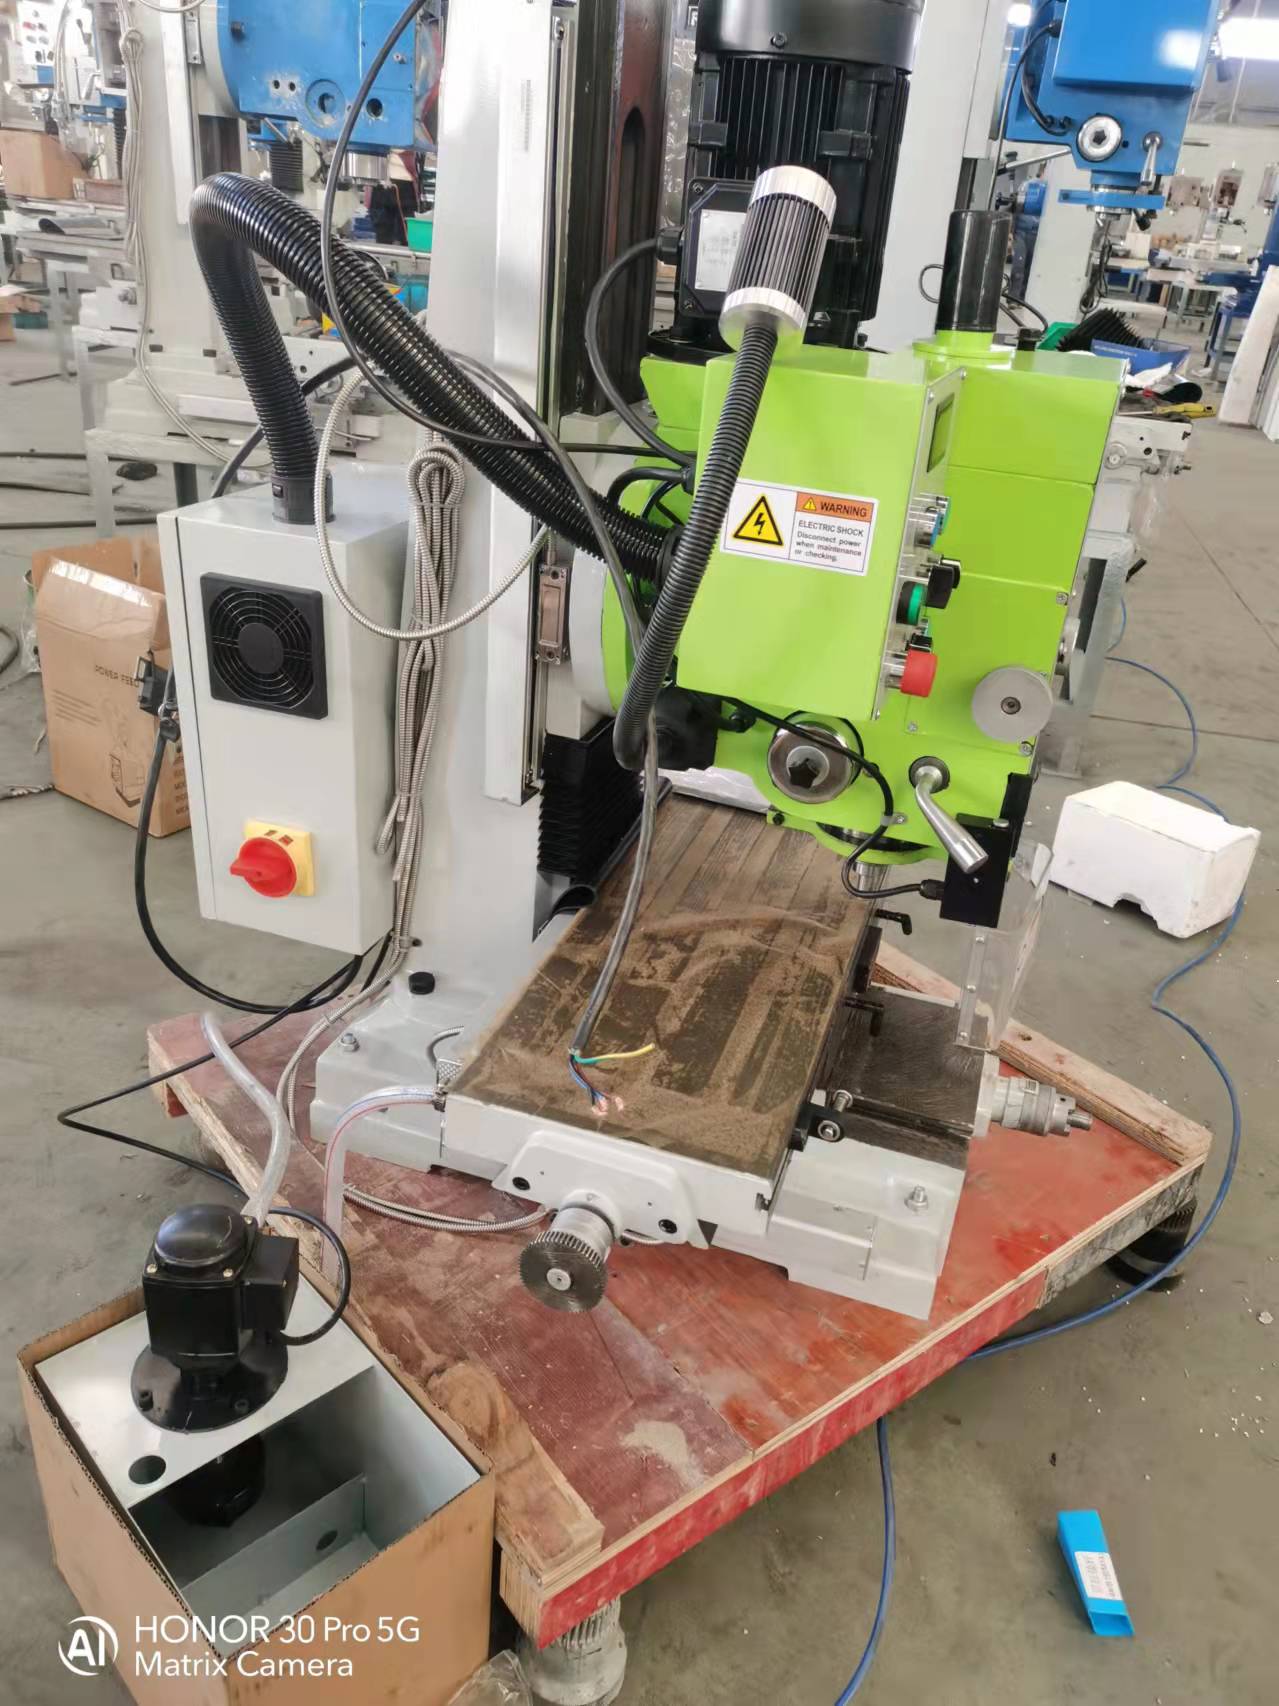
And we have a milling machine on order. It should be arriving in Moscow right about now and then will be shipped here when they find a truck/train coming this way. The machine was made to order in China.
For some reason our electrician used really heavy gauge solid 5 conductor wire so it's going to be a real joy hooking up the three 3-phase items here. For now I just have a couple of 5 pin sockets hanging off the end of the wire, they certainly aren't going anywhere.
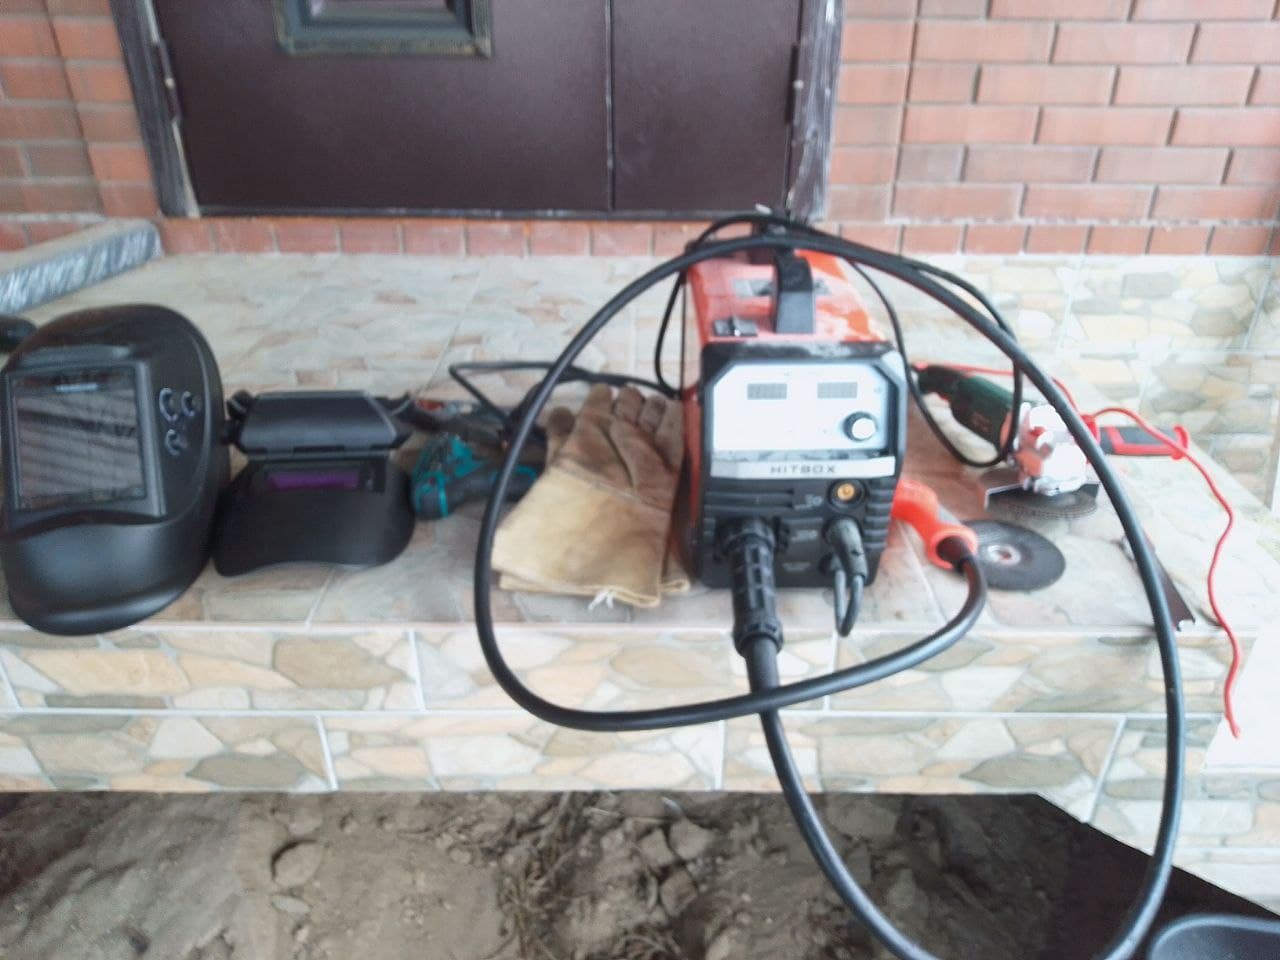
I did get to try out the new Hitbox inverter welder, the guy who made our fences and driveway roof got seriously injured on another job so someone else finished up. Well, our walkway gate top hinge broke off. During the heaviest snow storm here for decades. Just before we had to leave the country. So, put a spool of flux core wire in the machine, switch it to no-gas, get up on a step ladder and weld the gate back together with freezing hands and damp snow falling on me.
I must say it worked really well and these inverter welders are sure lighter than my old transformer ones. My previous welders were the huge 250 amp AC-DC stick and a flux-core machine that I used most of the time. Only that one had a flaky wire feed but I wasn't about to spend $200 for a new feed, so just kept fixing it so it would work a bit longer. But, that showed in weld quality.
Haven't tried the plasma cutter yet, no plasma to cut.
Probably head out in the next week and pick up a load of steel, there's a few places in walking distance from here but the better prices are across town. They use a lot of 20x40mm hot rolled tube around here and also 50mm square. So, you might be seeing my stands and benches made of that tube.
We have a ton grate to make to cover the storm drain out front. The contractors only covered the driveway and walkway, but we'll want guests to be able to pull off the road without falling into the drain so we're going to run it the whole length of the property. You can see a section of it here, 20 x 40 tube and angle iron, so no big thing to make. Just a lot of welding.
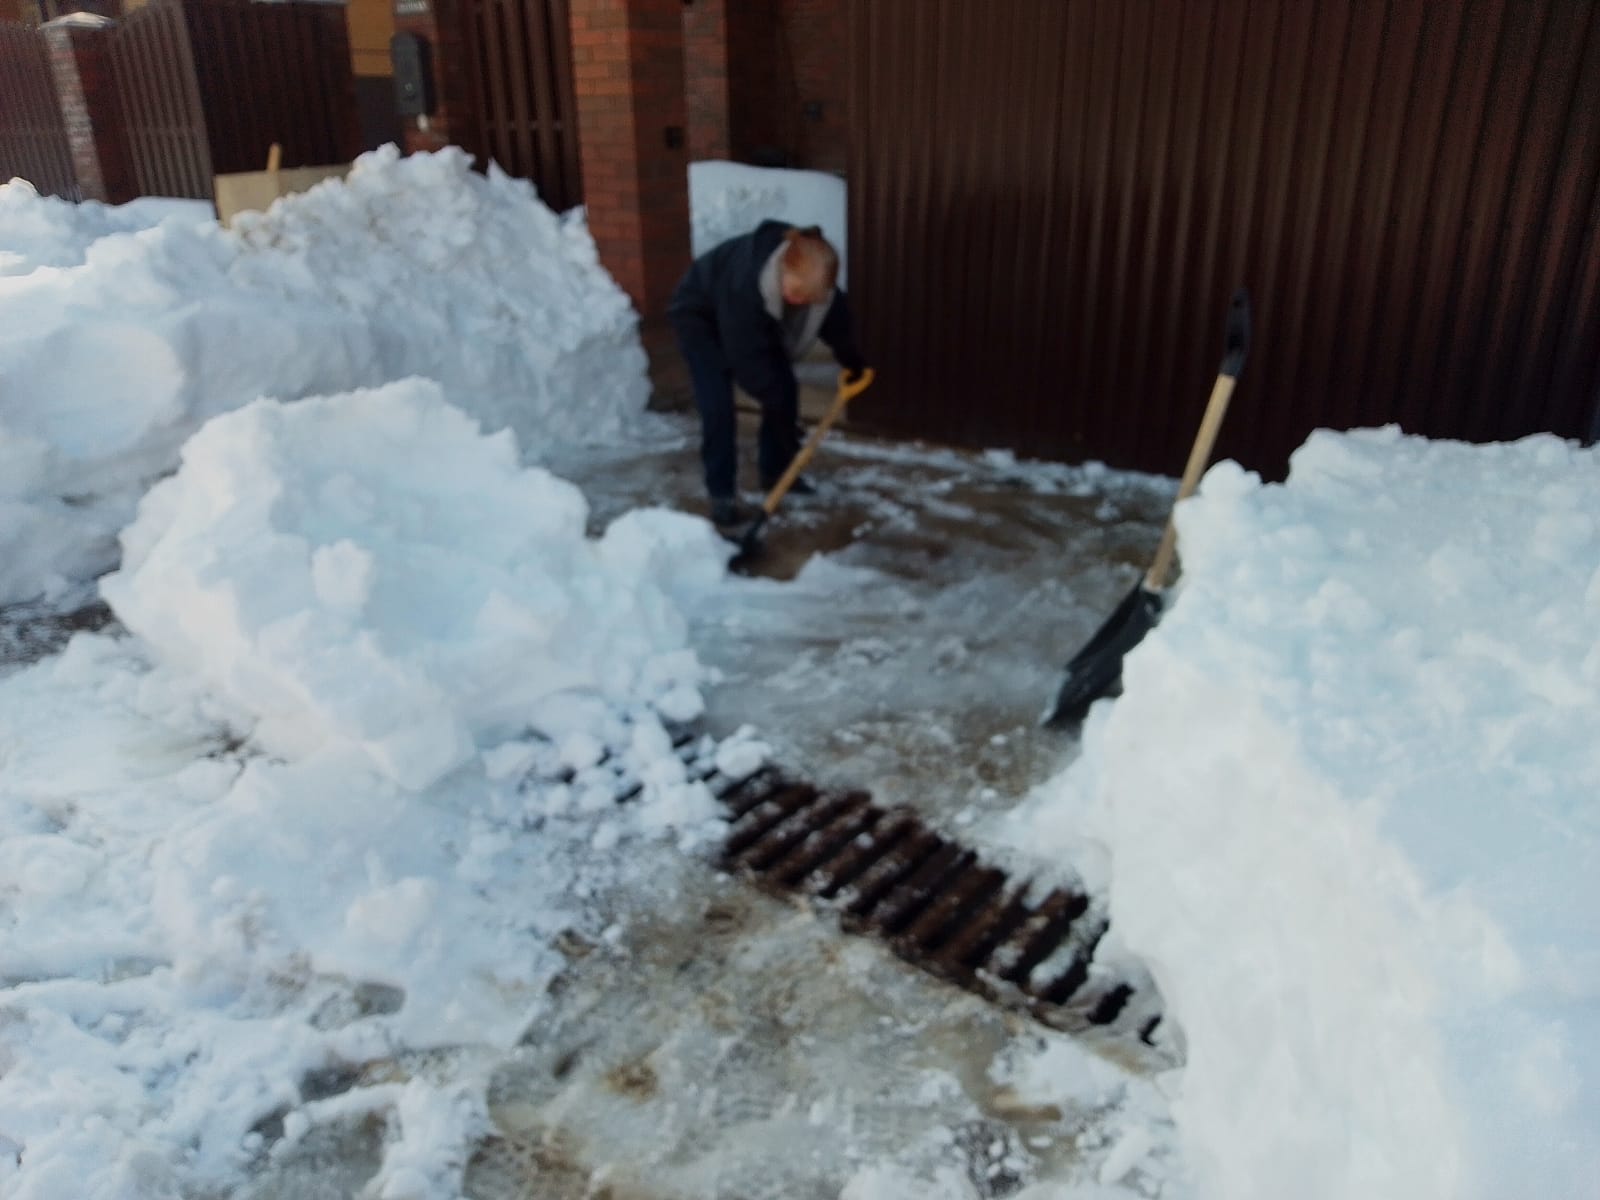
That's my wife helping to dig out.
That's about it for now, will try to get back on here more. I miss all the tool talk!


 Reply With Quote

Bookmarks