
 LinkBack URL
 About LinkBacks


As you know by now We have a drought and all forms of water conservation is per sued. I even have 2 buckets in the shower, one is used for the toilet and the other for the pot plants. This is only 50% effective as a normal shower is suppose to use 50L of water and I only managed to catch about 20L of water this way.
So the normal thing was to install a grey water recovery system.
It was pretty easy as both the shower outlet and the scullery outlet goes into the same drain.
I did not want to post my system before it did not run for at least 3 months and I was sure there are no hidden gremlins.
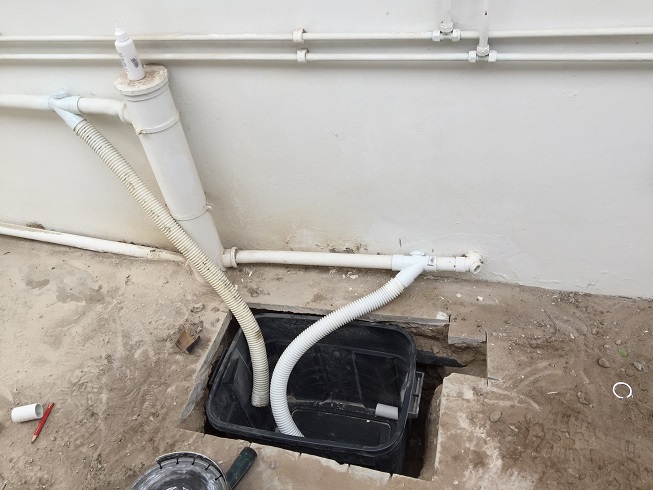
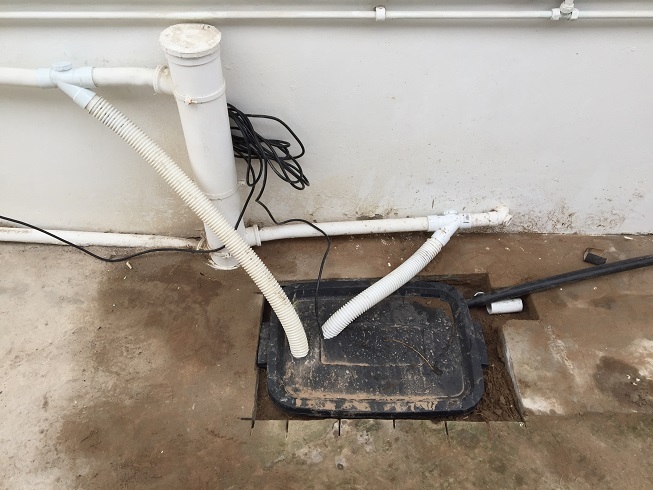
The system uses a 75L plastic storage bin as reservoir. Important to try and keep the bin smaller than the amount of water used per session. You want the pump to come on every time and pump the water out. Grey water can stink terribly after just 2 days.
A 550L/Min submergible pump with float switch. If you can find one designed for grey water it is best, but I found it not to be a knock out factor.
Some 40mm Y connectors, swimming pool corrugated pipes and PVC weld.
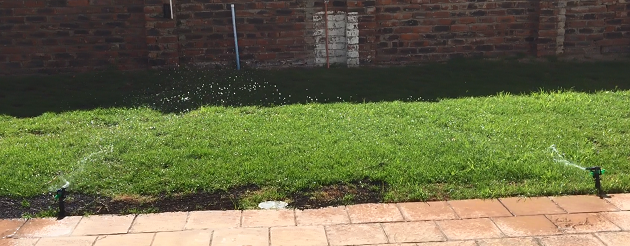
32mm black arrogation pipe, fittings, clamps and sprinklers. I found the initial micro sprinklers blocked up and changer to the more agricultural type.
1) I started by cutting the concrete where I wanted to install the reservoir, keeping in mind where the foundations are so I do not end up on top of them and not being able to get the reservoir deep enough.
2) Installed the pump in such a manner that the float does not foul the sides.
3) Connected the black pipe to the lawn and fitted the sprinklers
4) Next I cut the 40mm brain pipes from the shower and scullery to allow me to fit the Y pieces. Try and fit them as close as possible to the main prain pipe to minimise the water that will stay in these pipes. You can fit propped shut off valves, but I ended up blocking the drains to the main pipe with some squash ball and a plastic bag wrapped around them. For ease of removal I attached a piece of fishing line to the balls so if the system has to be restored to normal for some reason it is a simple matter of pulling a string.
5) The swimming pool pipes were then connected to the Y pieces and fed to the reservoir through some holes in the lid. I used some of wifies old stockings as coarse filters on these pipes to stop the bigger unwanted items.
6) Electricity is via a normal wall socket in the scullery.
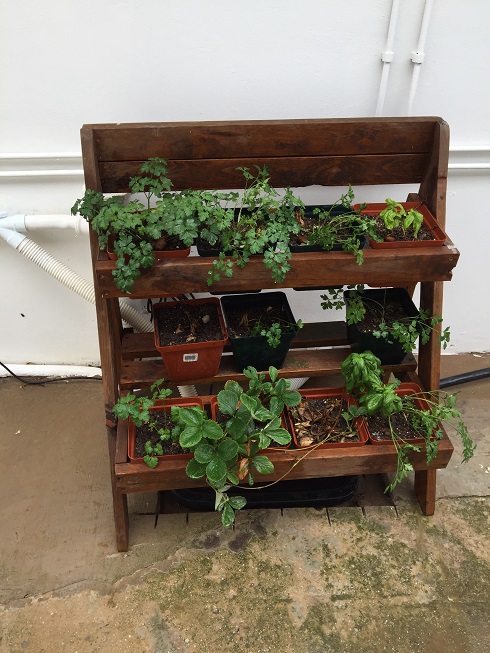
7) And to finish it off, wifies herb stand was moved to cover the reservoir and piping.
It has been running now for 3 months without a glitch, only problem is I have to cut the grass twice a week, so for that reason I thought it is safe to post and every DIYer will be able to install.


 Reply With Quote

Bookmarks