Free 186 More Best Homemade Tools eBook:  
Get 2,000+ tool plans, full site access, and more.

User Tag List

Results 1 to 8 of 8

Thread: Hammer Restoration

  1. #1
    Supporting Member buddyman100's Avatar
    Join Date
    Dec 2018
    Location
    USA
    Posts
    66
    Thanks
    2
    Thanked 39 Times in 24 Posts

    buddyman100's Tools

    Hammer Restoration

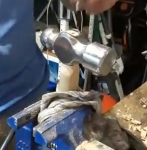
    In this video I restore an old hammer I found. If you have any questions about the build feel free to leave a question in the comment section of the video. If you like seeing content like this check out my youtube channel.
    https://www.youtube.com/channel/UCRL...confirmation=1


    186 More Best Homemade Tools eBook
    Last edited by buddyman100; Jan 18, 2019 at 08:54 AM.

  2. #2
    Supporting Member Radioman's Avatar
    Join Date
    Jun 2018
    Location
    Massachusetts
    Posts
    209
    Thanks
    11
    Thanked 87 Times in 53 Posts

    Radioman's Tools
    Unsafe handle. Don’t put a handle on your hammer using this technique! Ask a pro to teach you the correct way!

    2000 Tool Plans

  3. #3
    Supporting Member buddyman100's Avatar
    Join Date
    Dec 2018
    Location
    USA
    Posts
    66
    Thanks
    2
    Thanked 39 Times in 24 Posts

    buddyman100's Tools
    How would you of done it?

  4. #4
    Supporting Member Philip Davies's Avatar
    Join Date
    Dec 2015
    Location
    Reading, Berks, UK
    Posts
    876
    Thanks
    1,194
    Thanked 1,022 Times in 343 Posts

    Philip Davies's Tools
    Hope you have many happy, productive hours with your hammer.
    I winced to see you holding the handle with your hand while sawing, though.
    While it’s not unusual for me to remove stock with a saw, you must bear in mind that most hammers (claws usually excepted), have tapered eyes, so the stub also needs to be tapered. You want a snug, but not an over-tight, fit. You can remove material using a spokeshave, or half round rasp, or a flap disc. I always mark the hammer and the handle when trying the fit, so they fit they same way for the next trial. Lampblack in the socket shows high spots. The first wedge is inserted in a saw cut oriented in the swing direction. You need wood that’s not too soft and not too hard. I like to use walnut. But why did you use a nail? If your handle breaks, the nail will make it difficult to punch out the remainder. No, you want a proper steel wedge, 2 for that size. You can flatten mild steel cold, but it’s better to use commercial ones.
    If the fit is too tight, the wood may crumb when you try to insert the handle. This has happened to me more than once!

  5. The Following User Says Thank You to Philip Davies For This Useful Post:

    Jon (Dec 25, 2018)

  6. #5
    Supporting Member buddyman100's Avatar
    Join Date
    Dec 2018
    Location
    USA
    Posts
    66
    Thanks
    2
    Thanked 39 Times in 24 Posts

    buddyman100's Tools
    Thank you for the guide. I think I'm going to do another video about making a new and putting the handle on. For the nail I was trying to use it as a small steel wedge because I didn't have one. But thank you for the guide!

  7. The Following User Says Thank You to buddyman100 For This Useful Post:

    Philip Davies (Dec 25, 2018)

  8. #6
    Supporting Member mklotz's Avatar
    Join Date
    Aug 2015
    Location
    LA, CA, USA
    Posts
    3,437
    Thanks
    357
    Thanked 6,391 Times in 2,118 Posts

    mklotz's Tools
    Quote Originally Posted by Philip Davies View Post
    ...I winced to see you holding the handle with your hand while sawing, though....
    As did I !

    Also, using a chisel with your other hand in line with the blade. If it slips (and, inevitably it will) you can easily sever a nerve, not to mention getting a whole lot of your blood on the project.

    And make yourself some proper soft jaws for your vise (or, better, get a proper woodworking vise). That rag and the resulting sloppy grip is going to cost you some time in the emergency room. Using power tools around that rag-grip is another recipe for disaster.
    ---
    Regards, Marv

    Home Shop Freeware
    https://www.myvirtualnetwork.com/mklotz

  9. The Following User Says Thank You to mklotz For This Useful Post:

    Jon (Dec 25, 2018)

  10. #7
    Supporting Member buddyman100's Avatar
    Join Date
    Dec 2018
    Location
    USA
    Posts
    66
    Thanks
    2
    Thanked 39 Times in 24 Posts

    buddyman100's Tools
    Yea. When I did it I was super slow and careful while holding it. It's sped up 4 or 8 times so it looks like I'm going fast but I was taking my time.

  11. #8
    Content Editor
    Supporting Member
    DIYer's Avatar
    Join Date
    Aug 2013
    Posts
    3,056
    Thanks
    772
    Thanked 1,852 Times in 1,653 Posts


    Thanks buddyman100! We've added your Hammer Restoration to our Hammers category,
    as well as to your builder page: buddyman100's Homemade Tools. Your receipt:


    186 More Best Homemade Tools eBook

Thread Information

Users Browsing this Thread

There are currently 1 users browsing this thread. (0 members and 1 guests)

Tags for this Thread

Bookmarks

Posting Permissions

  • You may not post new threads
  • You may not post replies
  • You may not post attachments
  • You may not edit your posts
  •