-
6 Attachment(s)
Heat treat oven
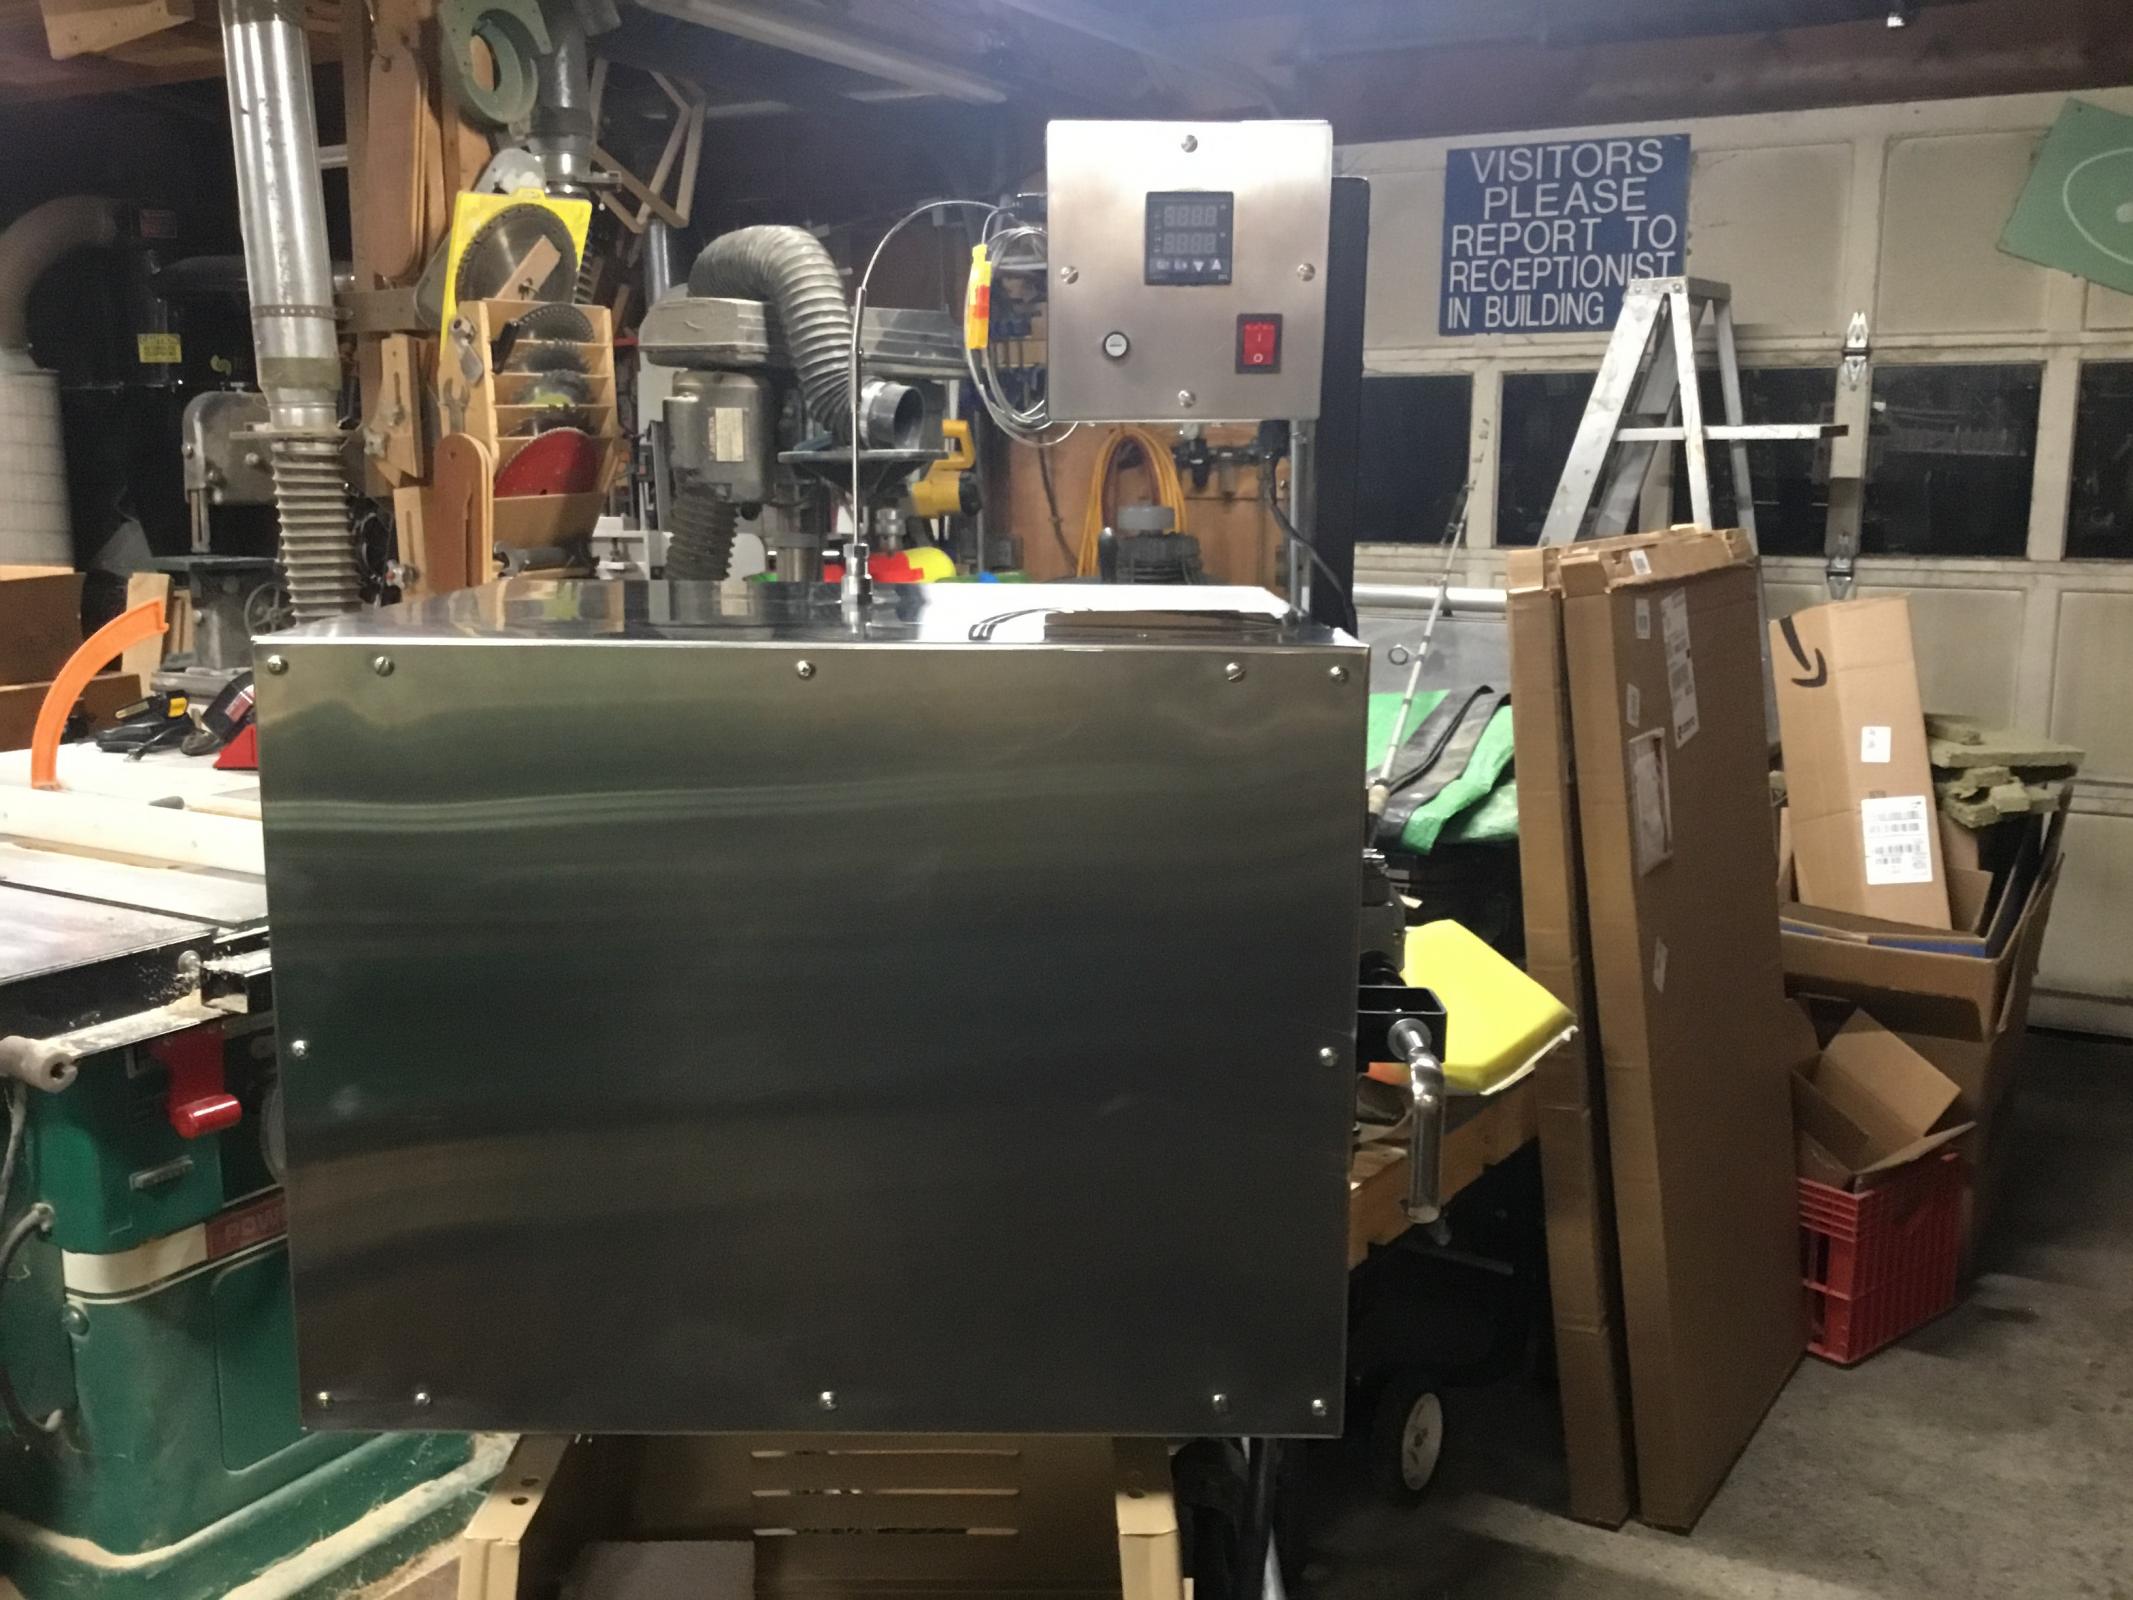
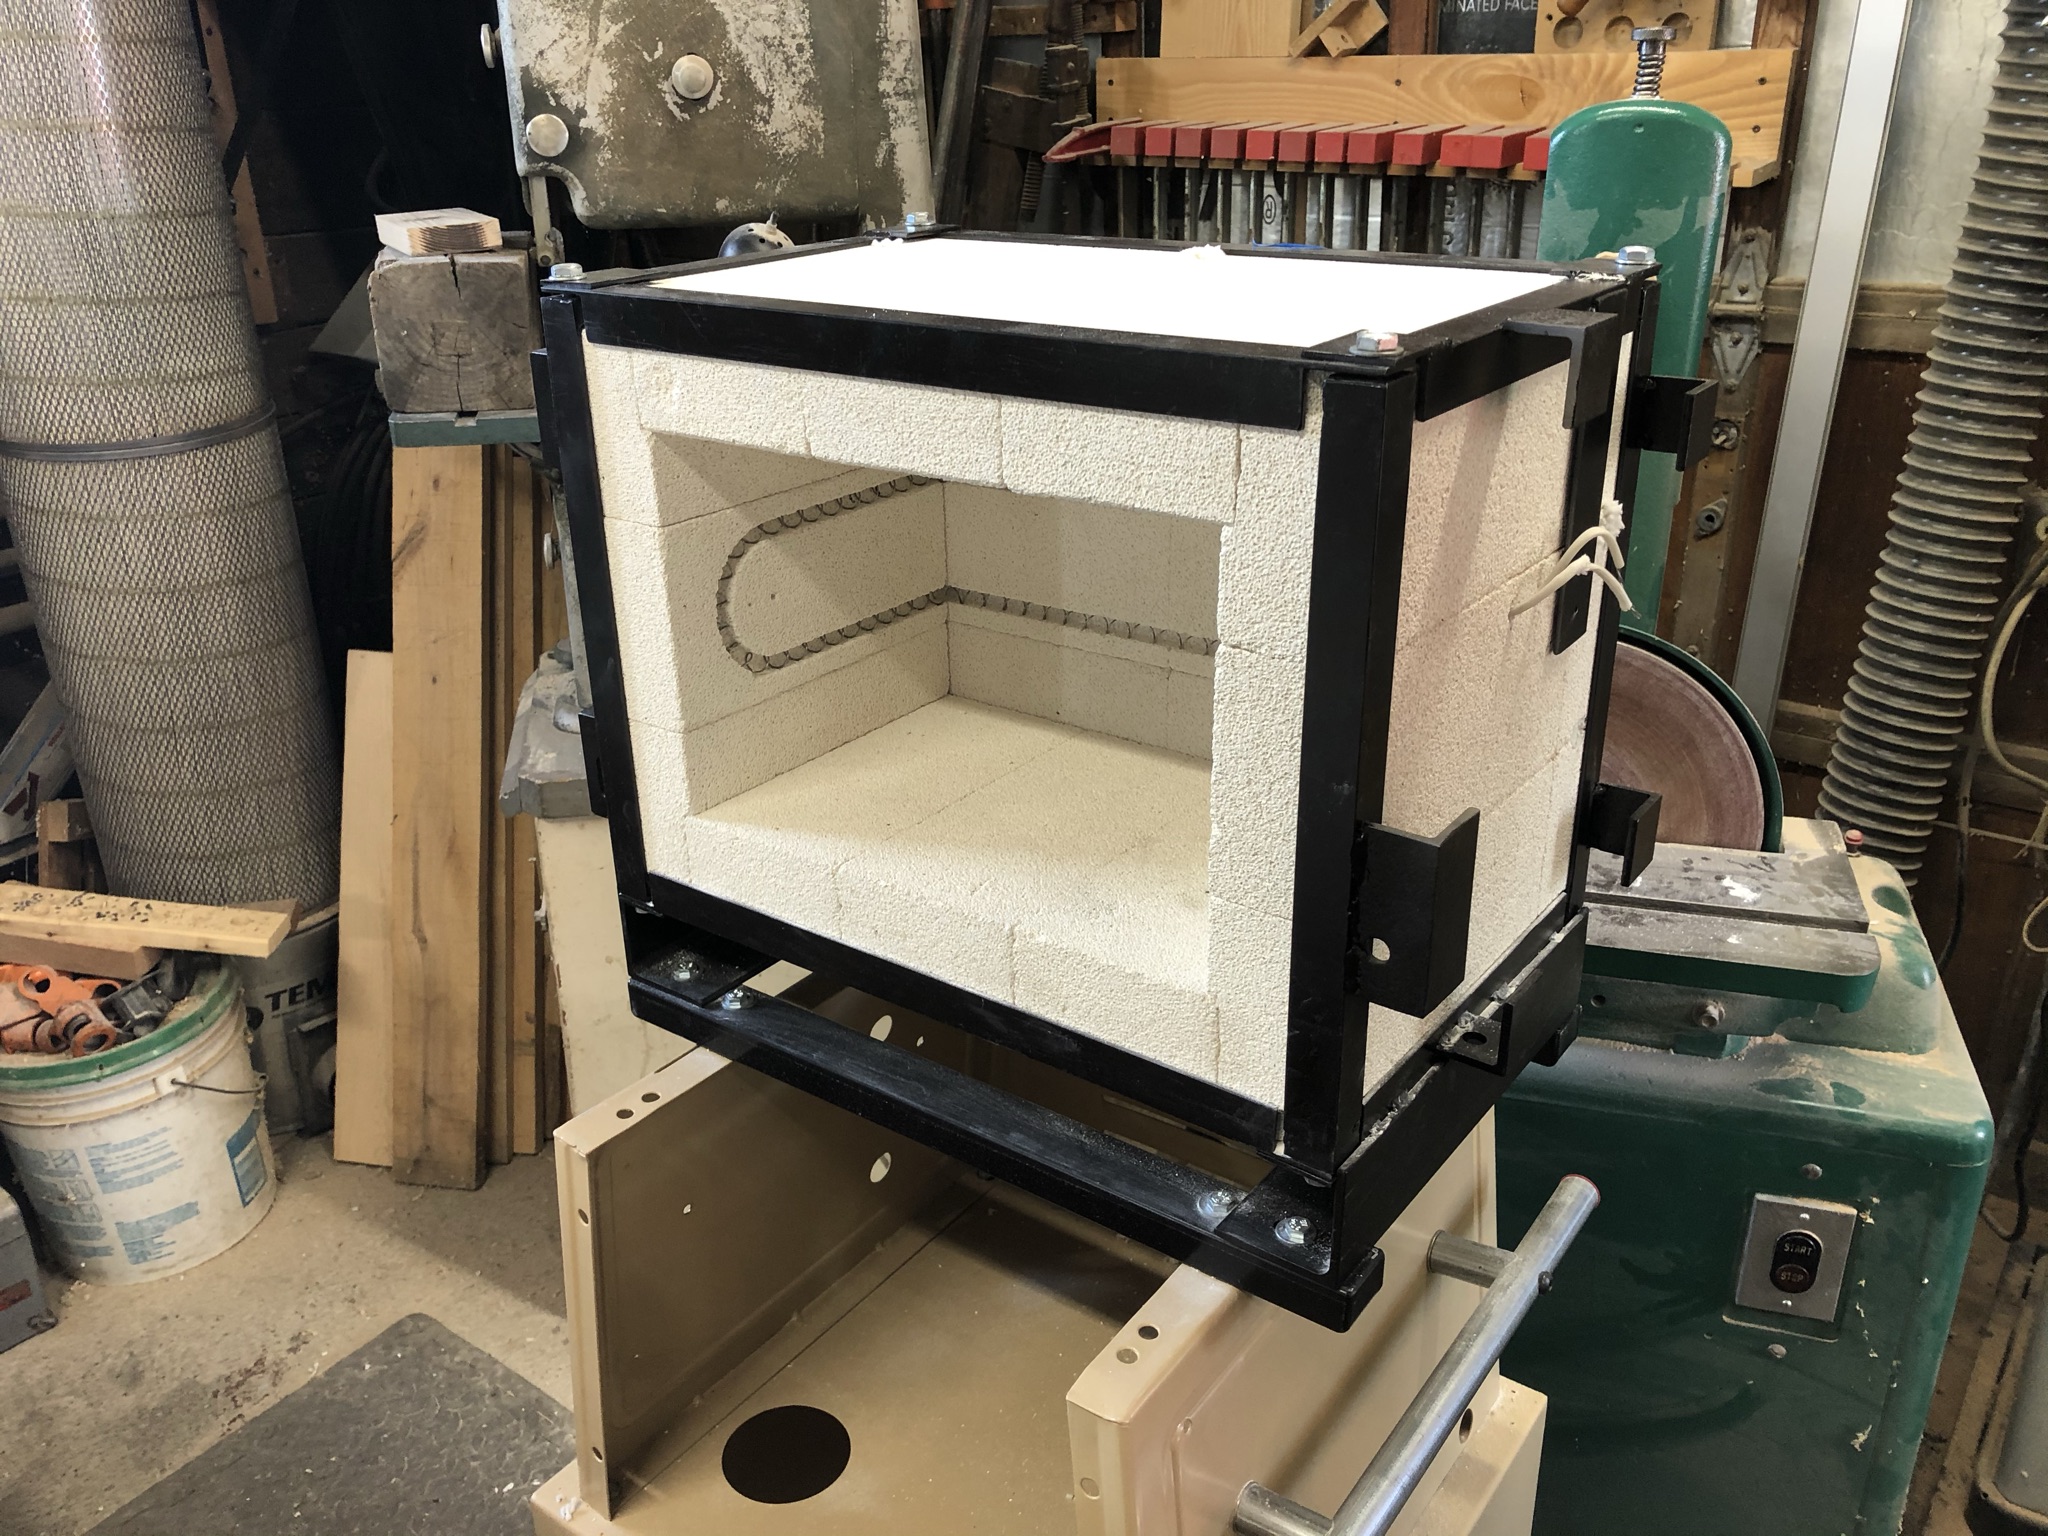
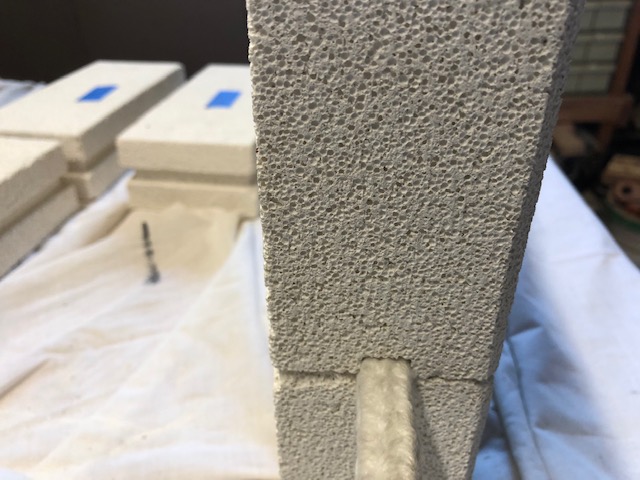
Attachment 37238 I decided that I needed a more controlled method of heat treating than a torch so this is what I came up with. I didnt want to glue the bricks so I used gasket rope in a dado to insure a seal and made the frame so that it clamped the bricks. The unit has one inch of insulation around the bricks and seems to work as the outside temperature at 2000 degrees is less than 200 degrees with no detectable leakage around the door.Attachment 37233
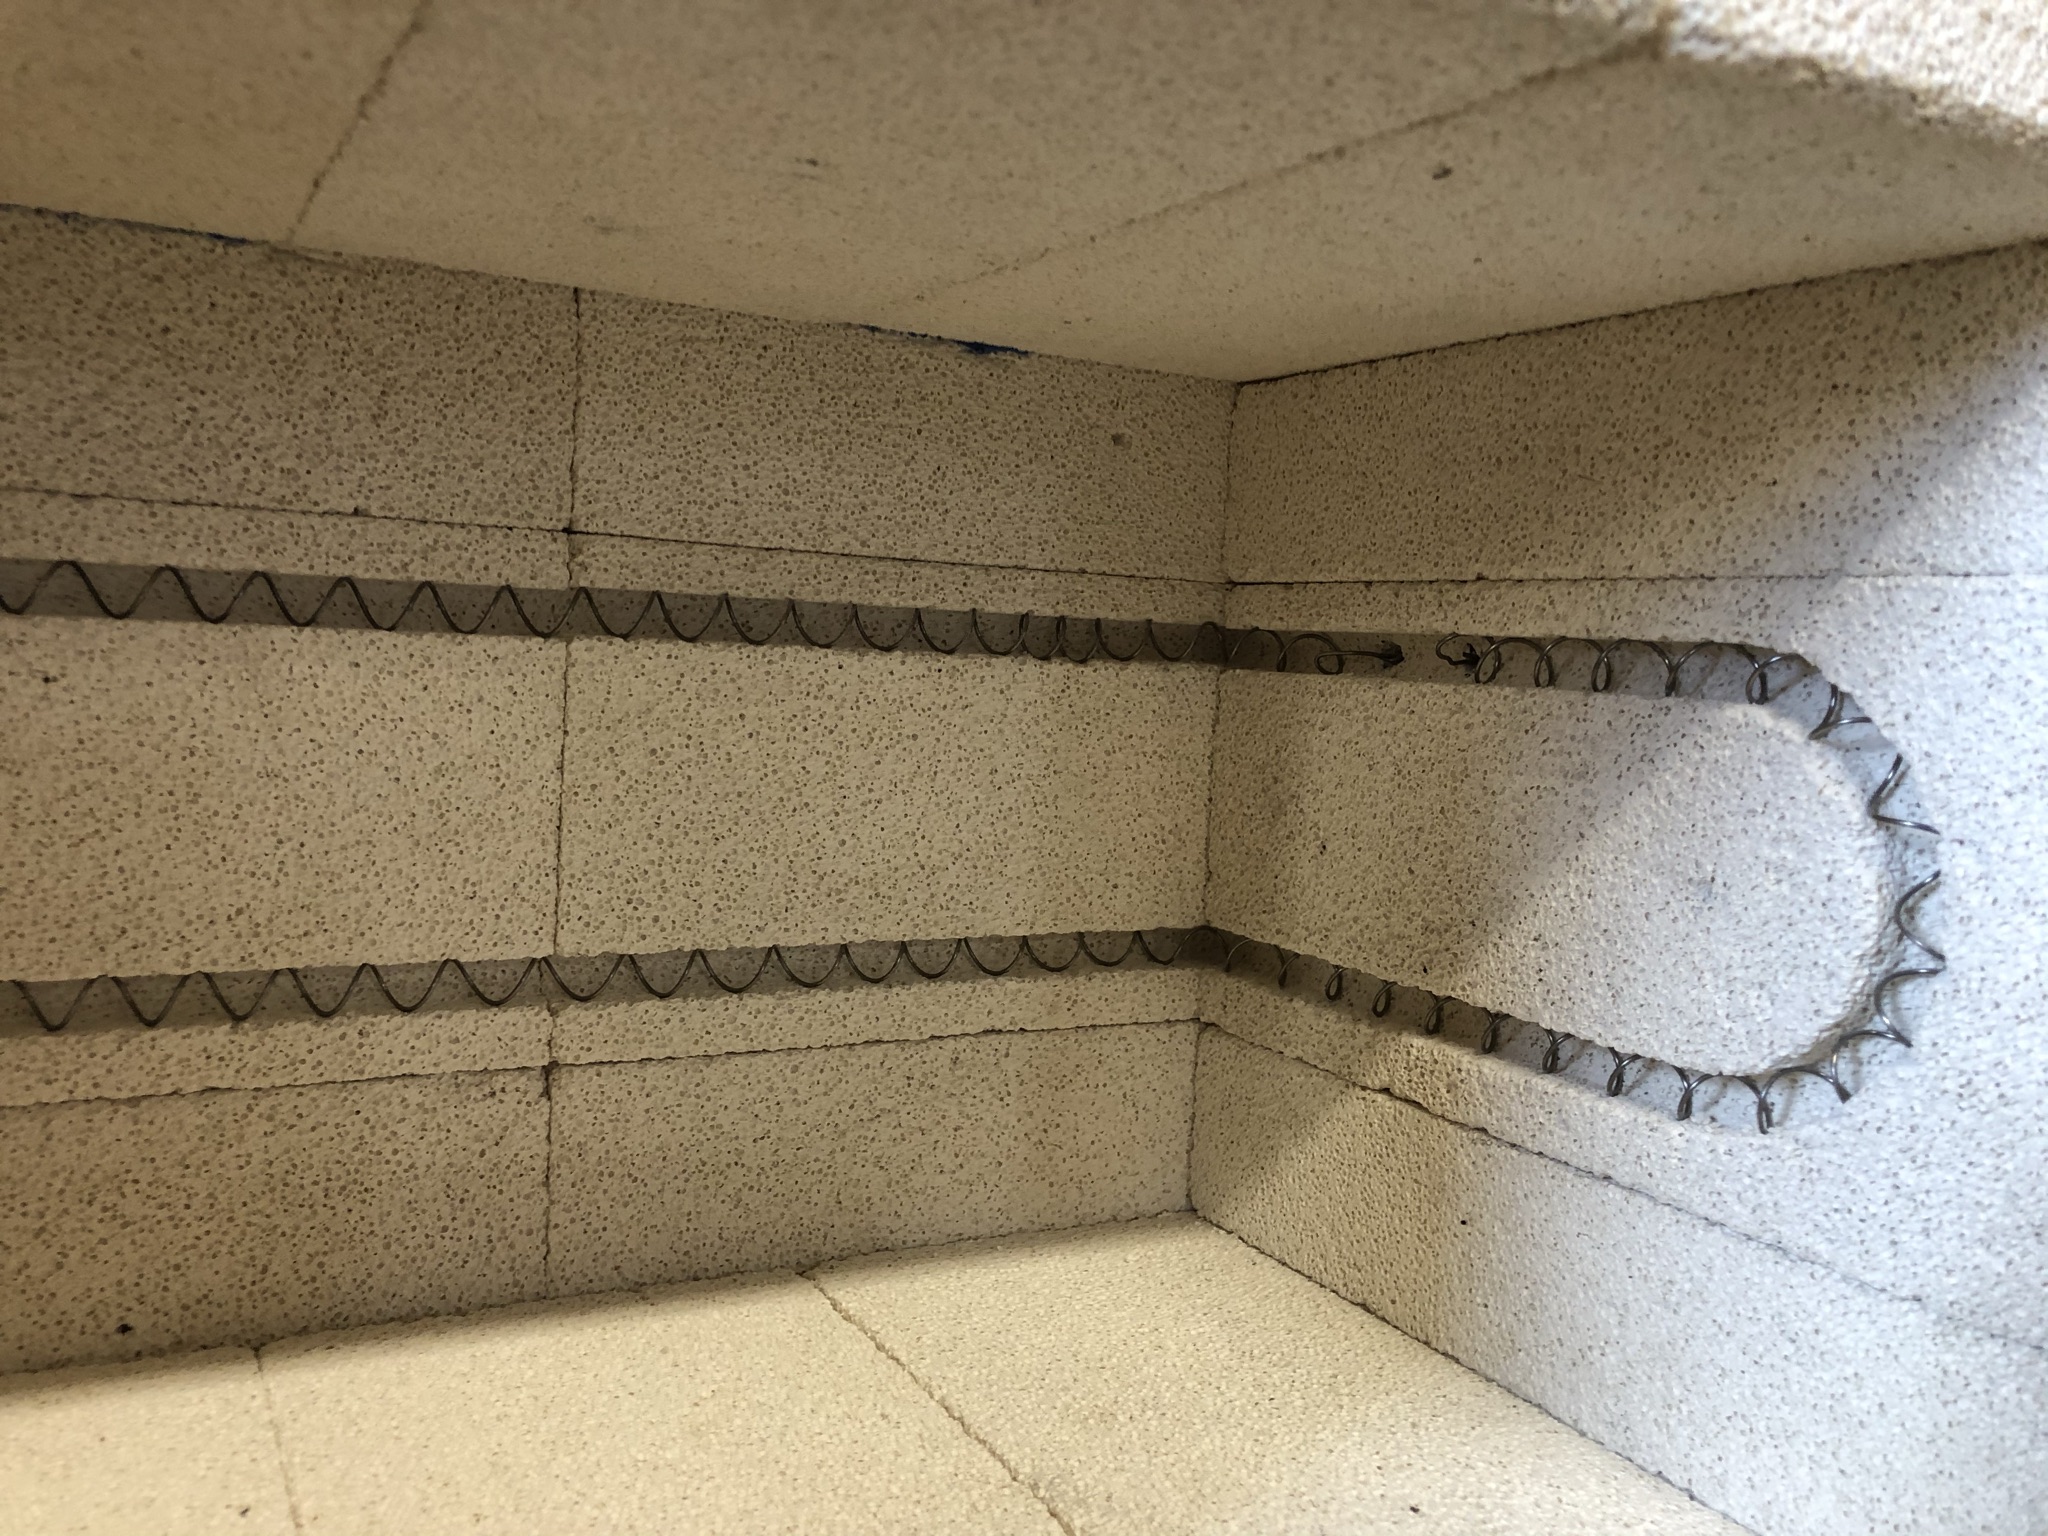
Initially I had problems with the Kanthal wire oxidizing and the double twisting of the wire to the supply didnt work either so I welded the wire to 1/4 bolts to feed to the outside and that cured both problems.Attachment 37234Attachment 37235
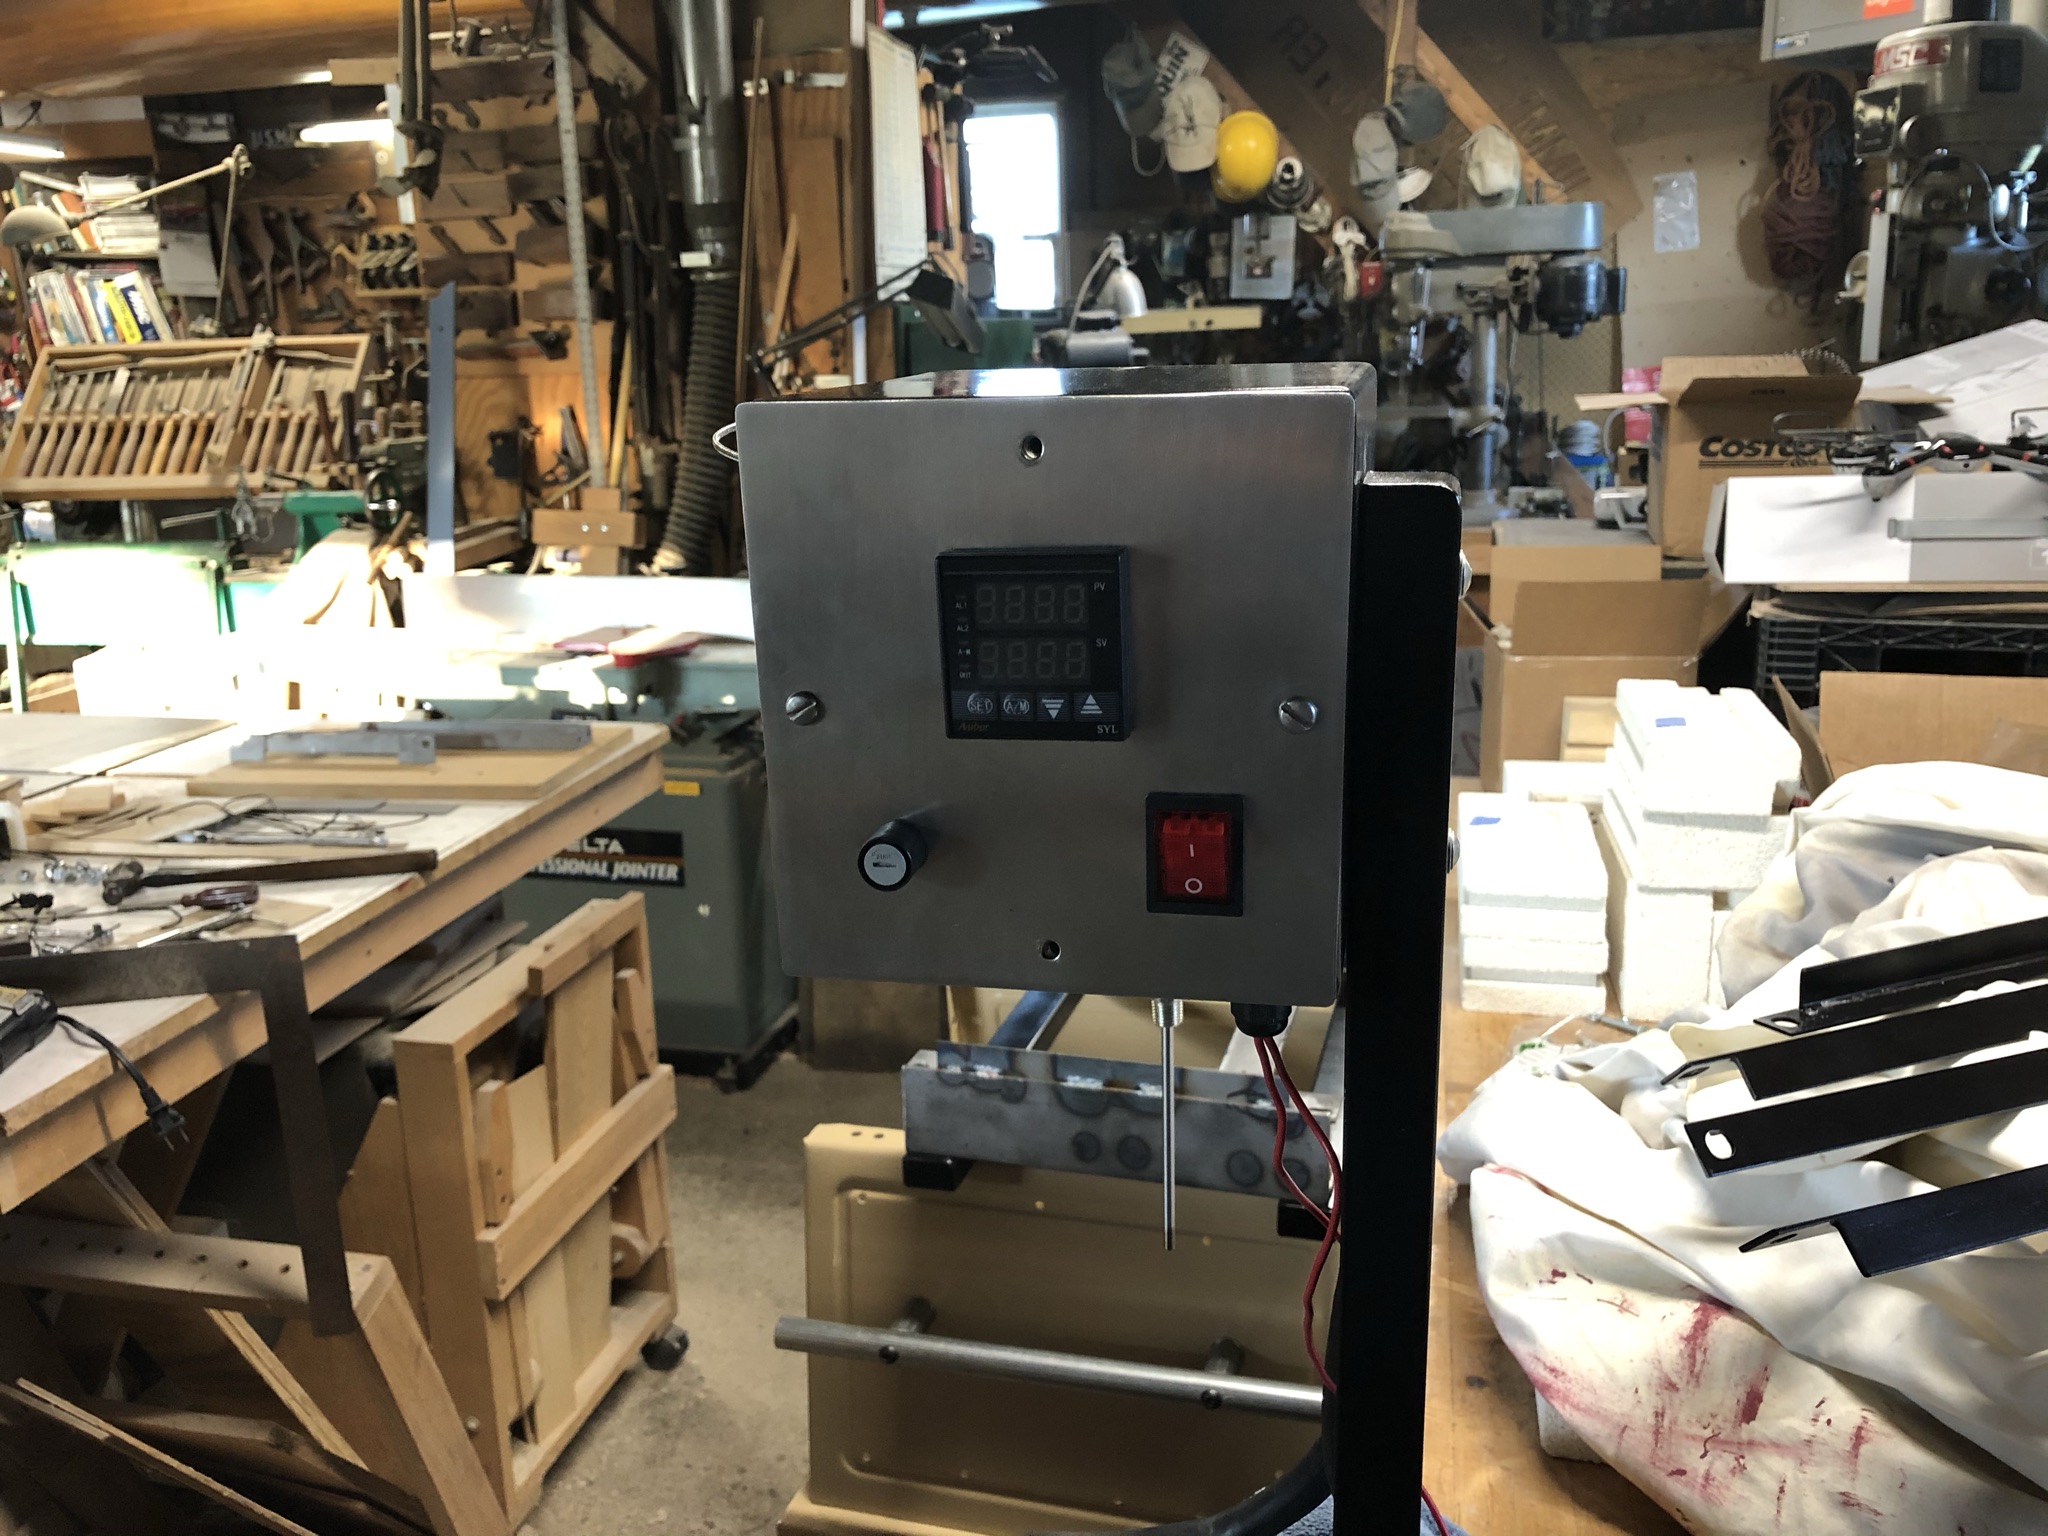
I elected to use a long thermocouple with a collet arrangement to allow me to position the probe as close as possible to the part being treated.Attachment 37236
The controller is a typical PID with SSR and I sized the wire(16 gage) to supply about 2800 watts which seems about right for the size of the chamber (8 1/2x9x13)Attachment 37237
I also kind of attempted to calibrate the oven by melting salt,lead,aluminum and copper and it seems to be accurate. I have more pics if anyone has questions and comments and critiques are welcome. I would appreciate suggestions to make the oven better. I am used to rework😃
-
<!-- BEGIN /var/www/html/homemadetools/protected/modules/zeus/views/tool/postUpdate.php -->
Thanks Eaglewood! We've added your Heat Treatment Oven to our Heating and Cooling category,
as well as to your builder page: Eaglewood's Homemade Tools. Your receipt:
<div id="blocks">
<div class="block b1 pngfix">
<div class="bimg">
<div>
<a href="https://www.homemadetools.net/homemade-heat-treatment-oven-9">
<img src="/uploads/237928/homemade-heat-treatment-oven-9.jpeg"/>
</a>
</div>
</div>
<div class="head pngfix"></div>
<div class="left pngfix"></div>
<div class="right pngfix"></div>
<div class="blockover b1 pngfix">
<div class="title">
<a href="https://www.homemadetools.net/homemade-heat-treatment-oven-9">Heat Treatment Oven</a>
<span> by <a href="https://www.homemadetools.net/builder/Eaglewood">Eaglewood</a></span>
</div>
<div class="tags">tags:
<a href='https://www.homemadetools.net/tag/oven'>oven</a>, <a href='https://www.homemadetools.net/tag/heat-treatment'>heat treatment</a> </div>
</div>
</div>
</div>
<!-- END /var/www/html/homemadetools/protected/modules/zeus/views/tool/postUpdate.php -->
-
Thanks, something like this is on my List.
On your calibration testing were you able to melt copper? I need to look up "Kanthal wire". How much wire did you use?
Are you running 220 volts?
I like it, thanks for posting.
Ralph
-
I used 16awg Kanthal wire from Wireoptim. I was shooting for approximately 5 ohms and ended up with about 5.2 at 16 feet with a 4 inch tail on both ends. This cyfers out at about 2760 watts at 120 v. I also wound the wire on a 3/8 mandrel and with the tension I used ended up with about a .41 dia. and made the grooves in the bricks 3/8. The wire pressed into the grooves nicely with no other need for retention. When heating it is drawing close to 23 amps which puts it in the 2760 watt range.
I used thin pieces of cooper not knowing the actual composition but it started to go liguidius at around 1950 or so. Not a real scientific method but gave me a feeling that the tc/pid were in the neighborhood.
-
What insulating brick did you use and where did you get it?
Thanks,
Ed Taylor
-
There are many sources for "vaping" (the cigarette substitute) supplies on the net. They stock Kanthal A1 wire. It seems that it is for a small heater in the device.
-
I used insulating fire brick, soft and easy to work and a higher insulating factor. I live in northern Vermont so it wasn’t available around here so I had to order it online. A ceramic supply company should have it. I got mine from AARDVARK CLAY AND SUPPLIES. I used 24 bricks @3.85 each. They were VERY well packed and arrived in perfect condition.
-
I do not like the the 23 amps on a 110v line, could I wire up with 220 volts.
Would you just wire each leg to a phase?
Ralph
-
I chose to go 120 because it was more convenient for me to connect to a existing circuit but would have used 220 otherwise. The pid and ssr I bought from Auber Instruments will handle either voltage. I used 10 wag wire and suitable connectors to connect to my main box which is very close to the oven.