https://www.youtube.com/watch?v=uTVBQHMC-oUAttachment 6562Attachment 1390Attachment 1391Attachment 1392Attachment 1393
Printable View
Thanks glens5! I've added your Bandsaw to our Bandsaws category, as well as to your builder page: glens5's Homemade Tools. Your receipt:
<div id="blocks"> <div class="block b1 pngfix"> <div class="bimg"> <div> <a href="/bandsaw"><img src="/uploads/78192/bandsaw.jpeg" alt="Bandsaw" /></a> </div> </div> <div class="head pngfix"></div> <div class="left pngfix"></div> <div class="right pngfix"></div> <div class="blockover b1 pngfix"> <div class="title"> <a href="/bandsaw">Bandsaw</a> <span> by <a href="/builder/glens5">glens5</a></span> </div> <div class="tags"> tags: <a href="/tag/bandsaw">bandsaw</a> </div> </div> </div> </div>
That sure looks like older factory made saw I would have to see some pictures while building it before I would agree on homemade to much machine work and tags painted around to fool me sorry
Attachment 1408
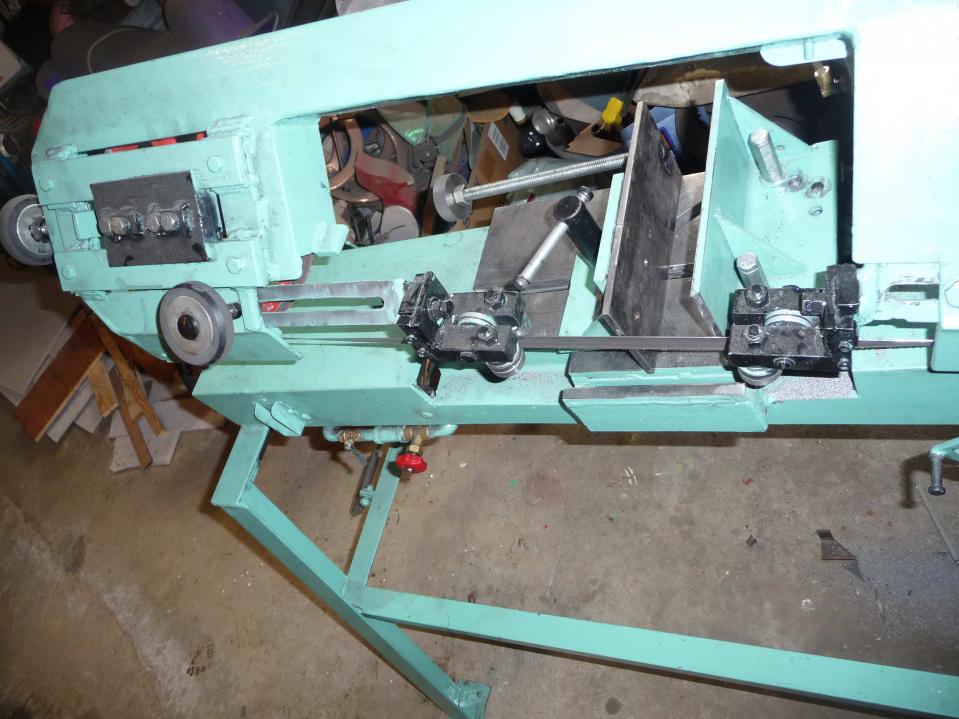
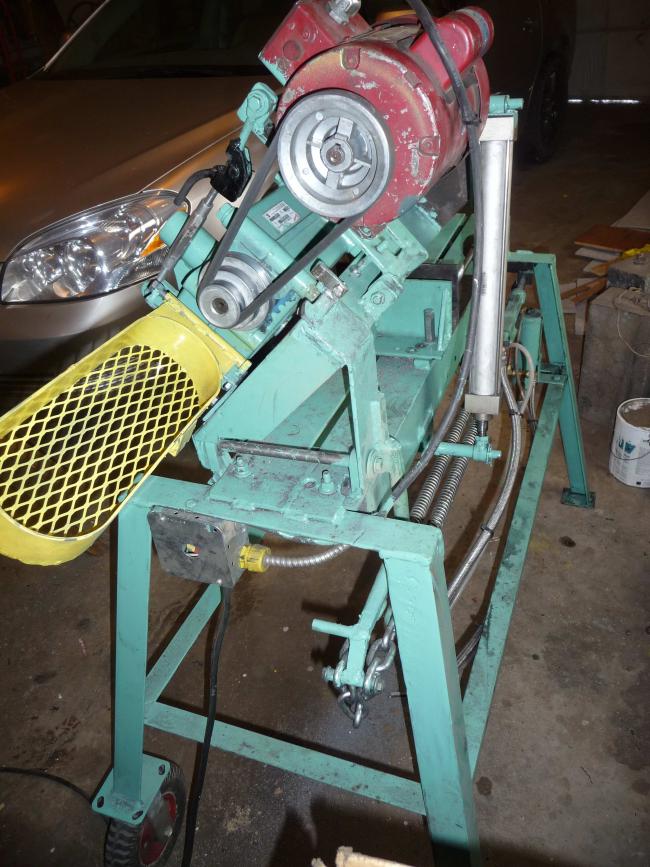
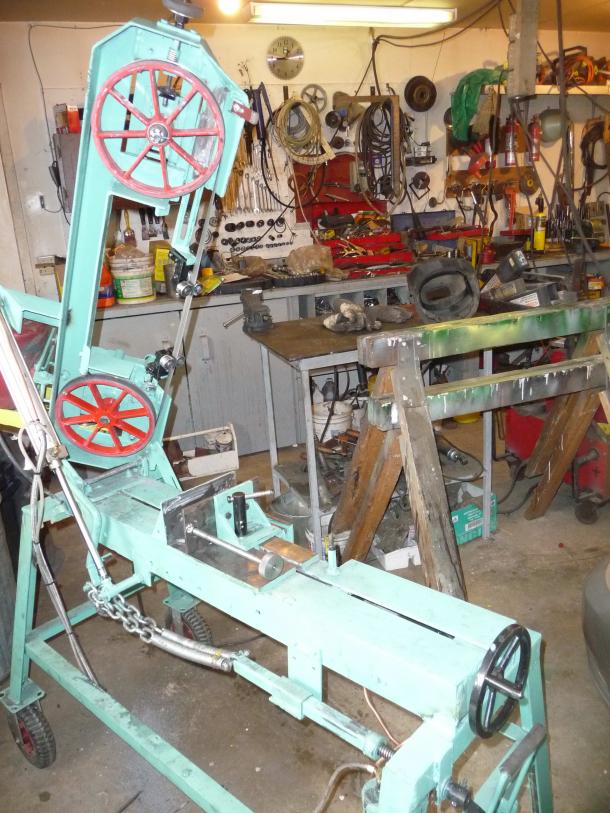
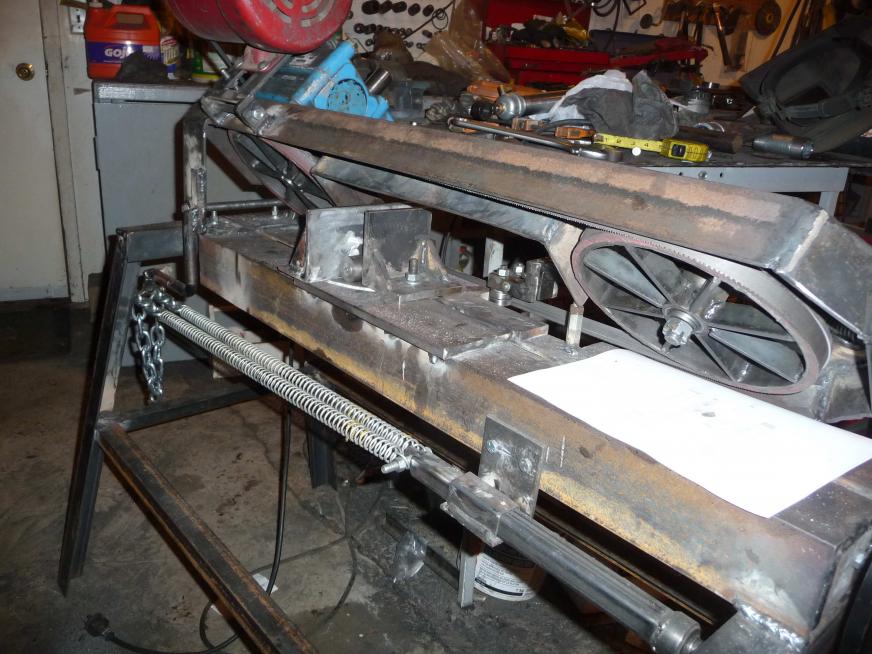
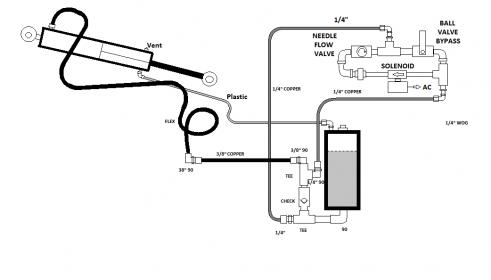
I used 40:1 worm drive gear box from E-bay. It originally had a home made hydraulic cylinder but I opted for a store bought with a longer stroke. And other than the motor the rest is all home made. A close up of some of my welding might convince you.
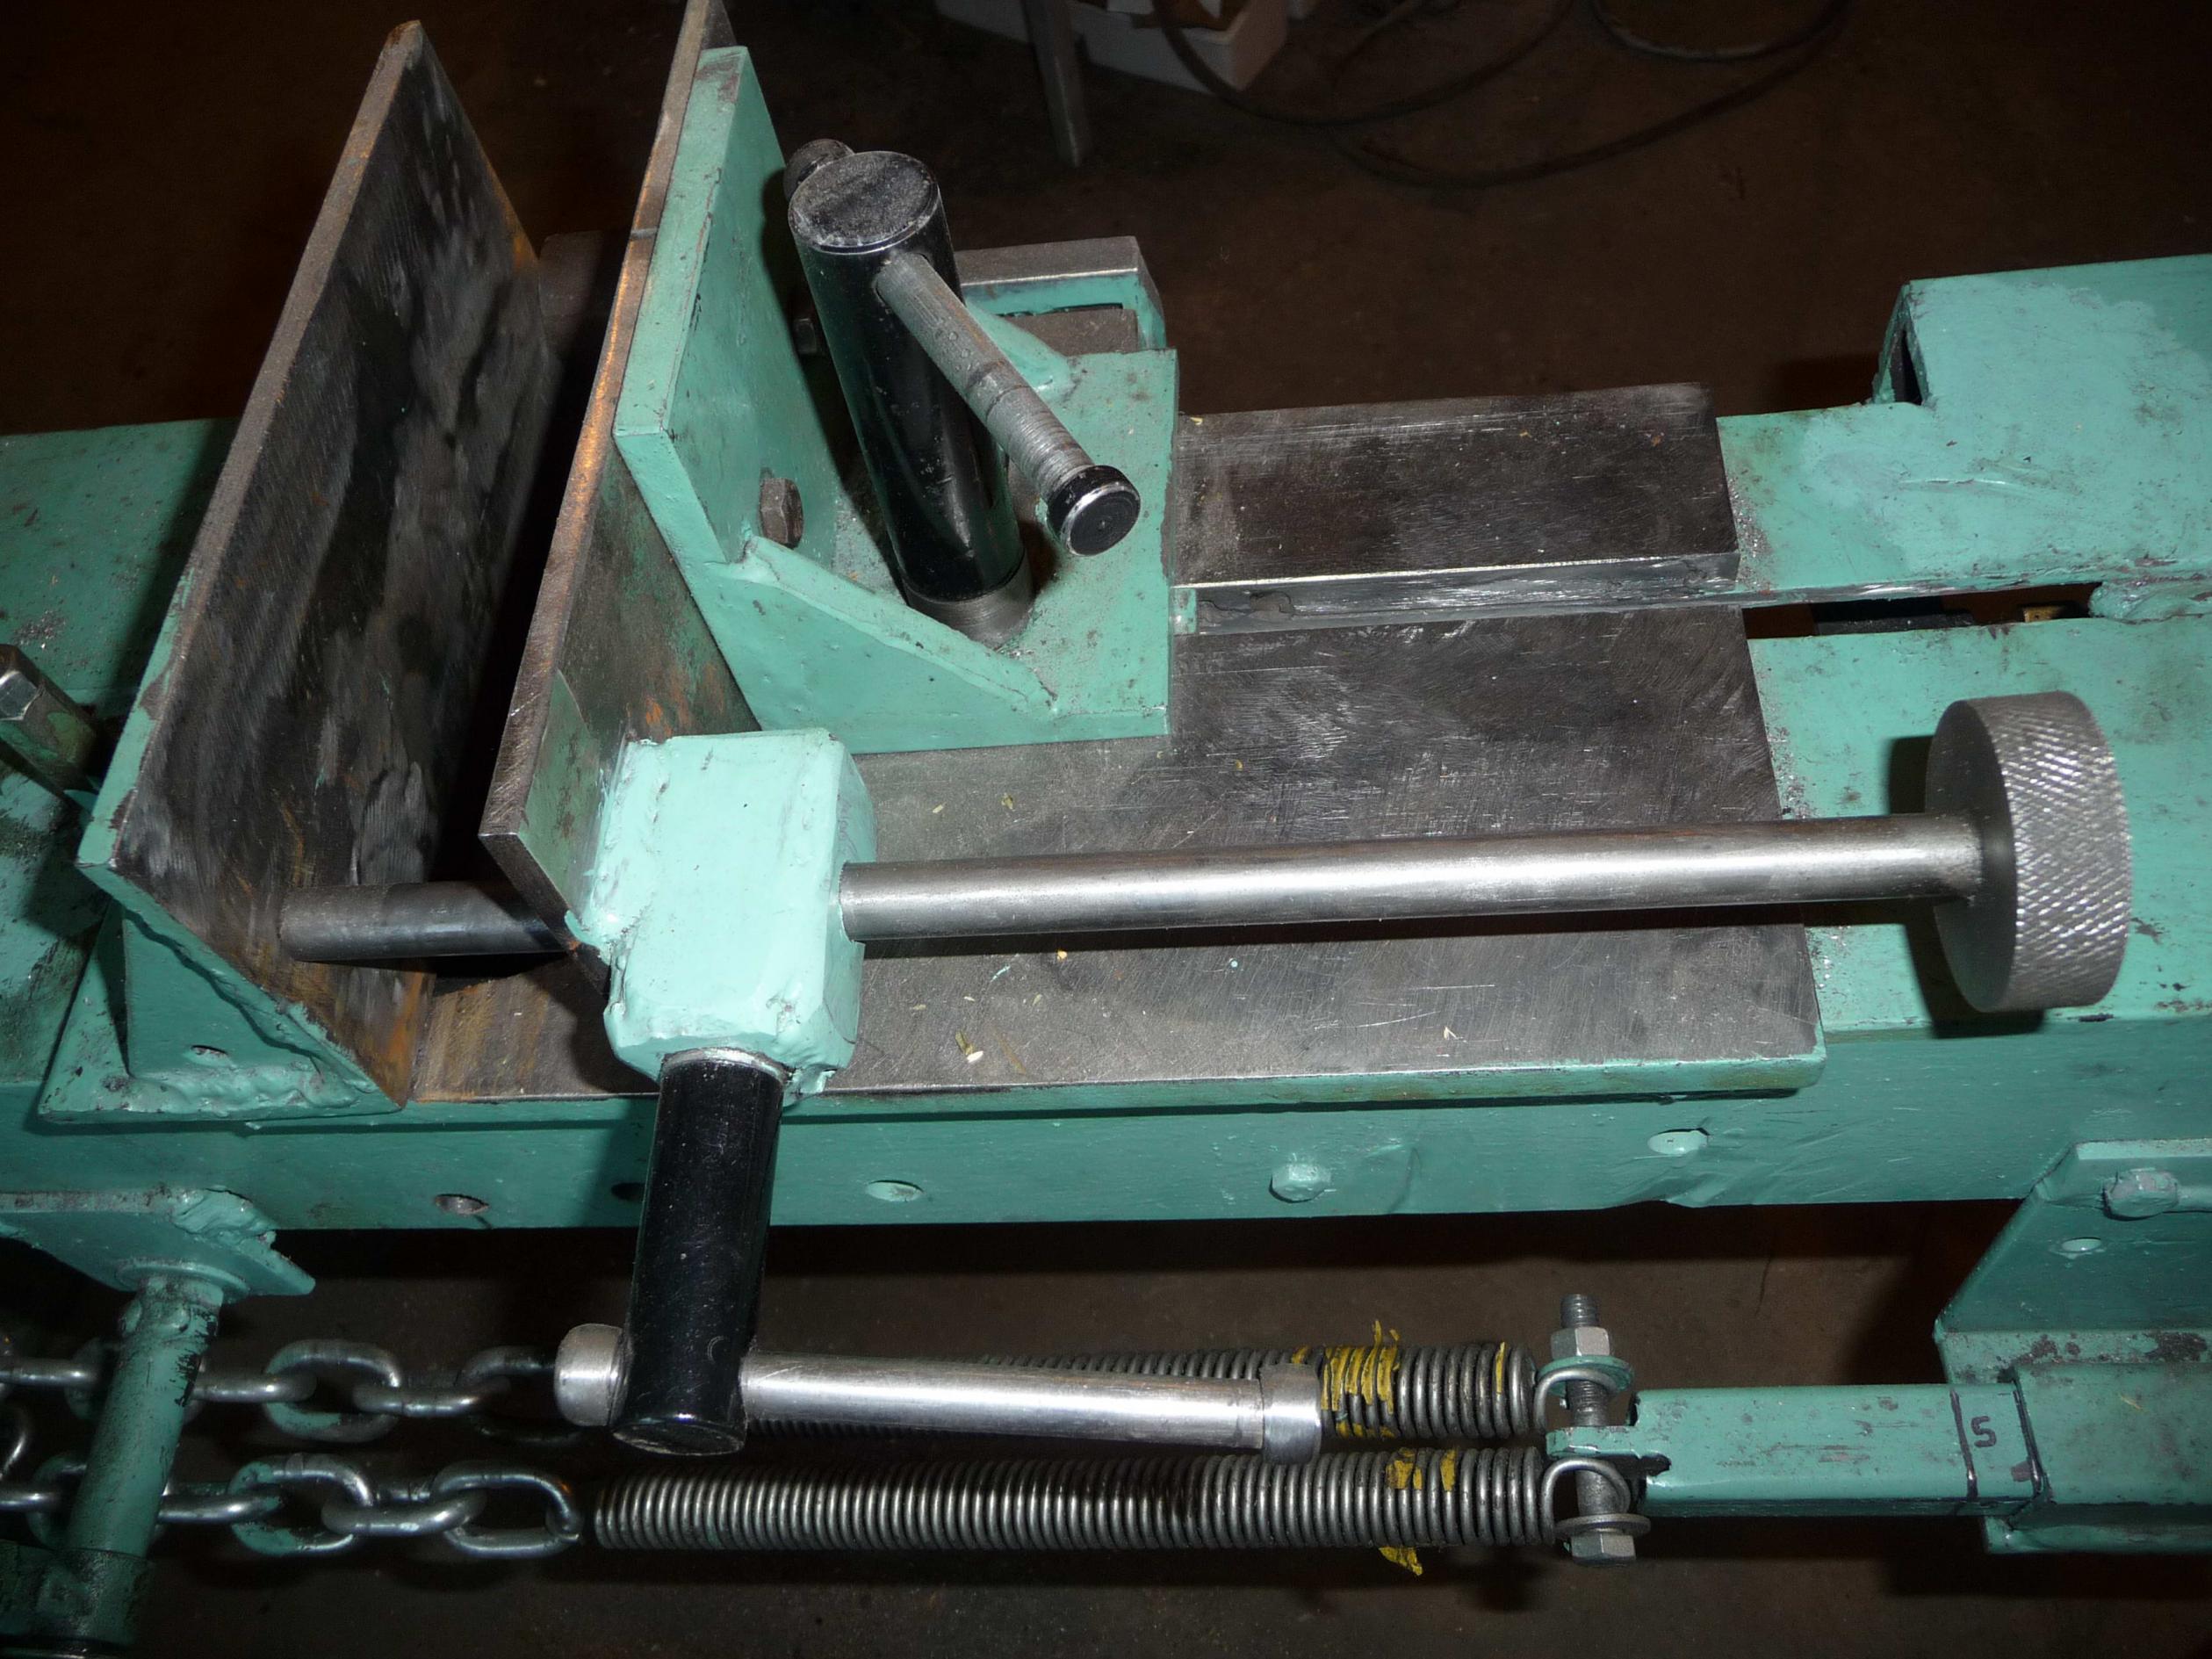
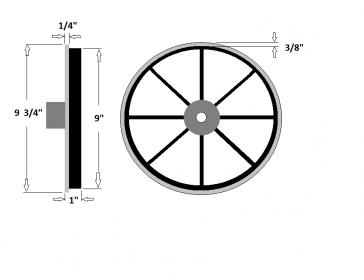
Acme threads for the vice and counter balance as well as the wheels etc. were turned on my old South Bend 9.
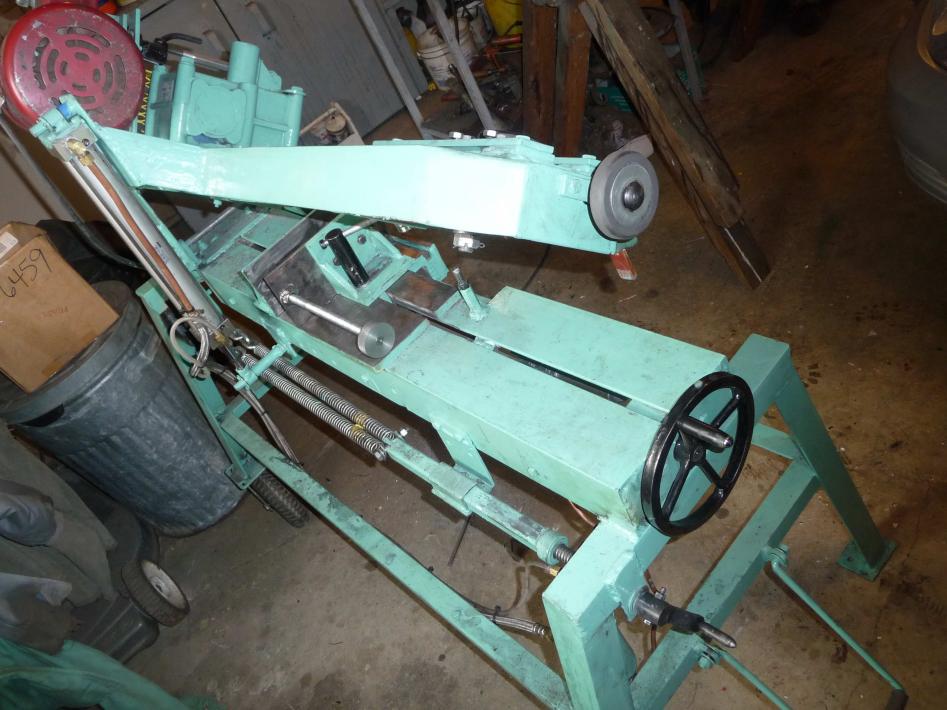
The wheel diameters without the tires were limited to 9" diameters because of the lathe. The rubber tires were made from 1/4" X 3/4" tarp straps glued with vulcanizing rubber and trued with a "Dremel" rotary tool. The finished wheel diameters are 9 1/2".
There were some bends made with a small hydraulic press I have in my little shop.
The hydraulic controls were mounted up front for accessibility with a separate accumulator.
All material except the gearbox and 3/4" Starrett bi-metal blade were purchased locally.
I am pleased with the saw as it very accurate and easy to use. Having said that, in hind sight there are a few details I might have done differently but certainly don't feel are worth changing now that it's done.
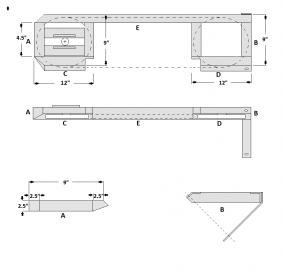
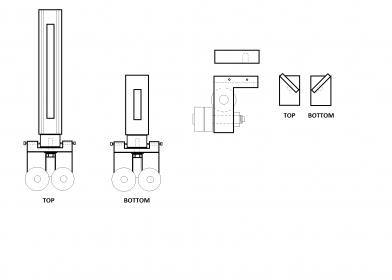
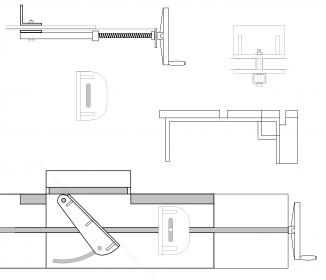
These are a few rough diagrams of what I had done.
There where a few minor changes made.
Attachment 1473
Attachment 1474
Attachment 1475
A couple more.
Attachment 1476
Attachment 1477
Coplaner and tensioner adjuster.
Attachment 1728
Quick counter torque adjustment for the vise rather than the threaded rod.
The clamp doesn't create divots in the rod like a set screw would.
Great build. Been deceived just like Millonmiles. Looks like a vintage factory made unit indeed due to the paint job and construction. Thanks for the clarifying documentation glens5.
I don't know what everyone is having about there are no plans here??