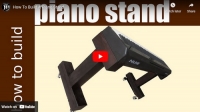
I decided to build my own piano stand from the iron wood. The reason was the original X-type piano stand, that came with the piano, is colliding with the player's knees, and it is very annoying. I needed a piano stand that has plenty of room for my knees.I had 250 years old iron wood posts, which I got from my friend, who reclaimed the shipwreck from the waters next to Borneo Island.I milled the posts to 4x4 inches square profiles, and then cut them to size. The design is very simple, but I had a very sturdy piano stand in mind, a stand that wouldn't wobble or spring or change the geometry. To connect the base to the legs, and the piano support pieces, I used 2x2 inches tennon and mortise joints, that are not going anywhere, ever. A bigger challenge was to create a very stiff frame, with just one stretcher bar, above the knees height, when seated at the piano. For that connection, I used a sliding dovetail with a shoulder recess, to prevent any movement of the stretcher in any direction. I used the epoxy resin for the glue up, because the initial carpenters glue was too elastic, even when dry. Once I applied epoxy resin to all the joints, the frame is as solid as rock, it doesn't move, it doesn't wobble, it doesn't twist.After sanding it to 320 grit, I applied 2 coats of my favourite finish, which is Boiled Linseed Oil, and it made the iron wood posts look really amazing.Then I attached the caster wheels with brakes, so that I can easily move the piano around, when jamming with the guitarists and the drummer.I put a lot of attention to all the measurements, to make sure the piano would fit perfectly into the cavities of the supporting pieces, and the final height with the casters included, would give me the clearance for the knees while playing. Everything turned out on the money, and I was truly satisfied with the results.At the end of the video I played a couple of tunes, even though I'm still a complete beginner piano player. After using the piano on this stand for a few months now, I wouldn't change the design, it functions as intended, my knees don't bang on the stand, and the stand has been holding very well.


 LinkBack URL
 About LinkBacks


 Reply With Quote


Bookmarks