I will show you the rest of my authorship.
Attachment 31685Attachment 31686Attachment 31687Attachment 31688
https://www.youtube.com/watch?v=KHGrtNwNwOk
Printable View
I will show you the rest of my authorship.
Attachment 31685Attachment 31686Attachment 31687Attachment 31688
https://www.youtube.com/watch?v=KHGrtNwNwOk
<!-- BEGIN /var/www/html/homemadetools/protected/modules/zeus/views/tool/postUpdate.php -->
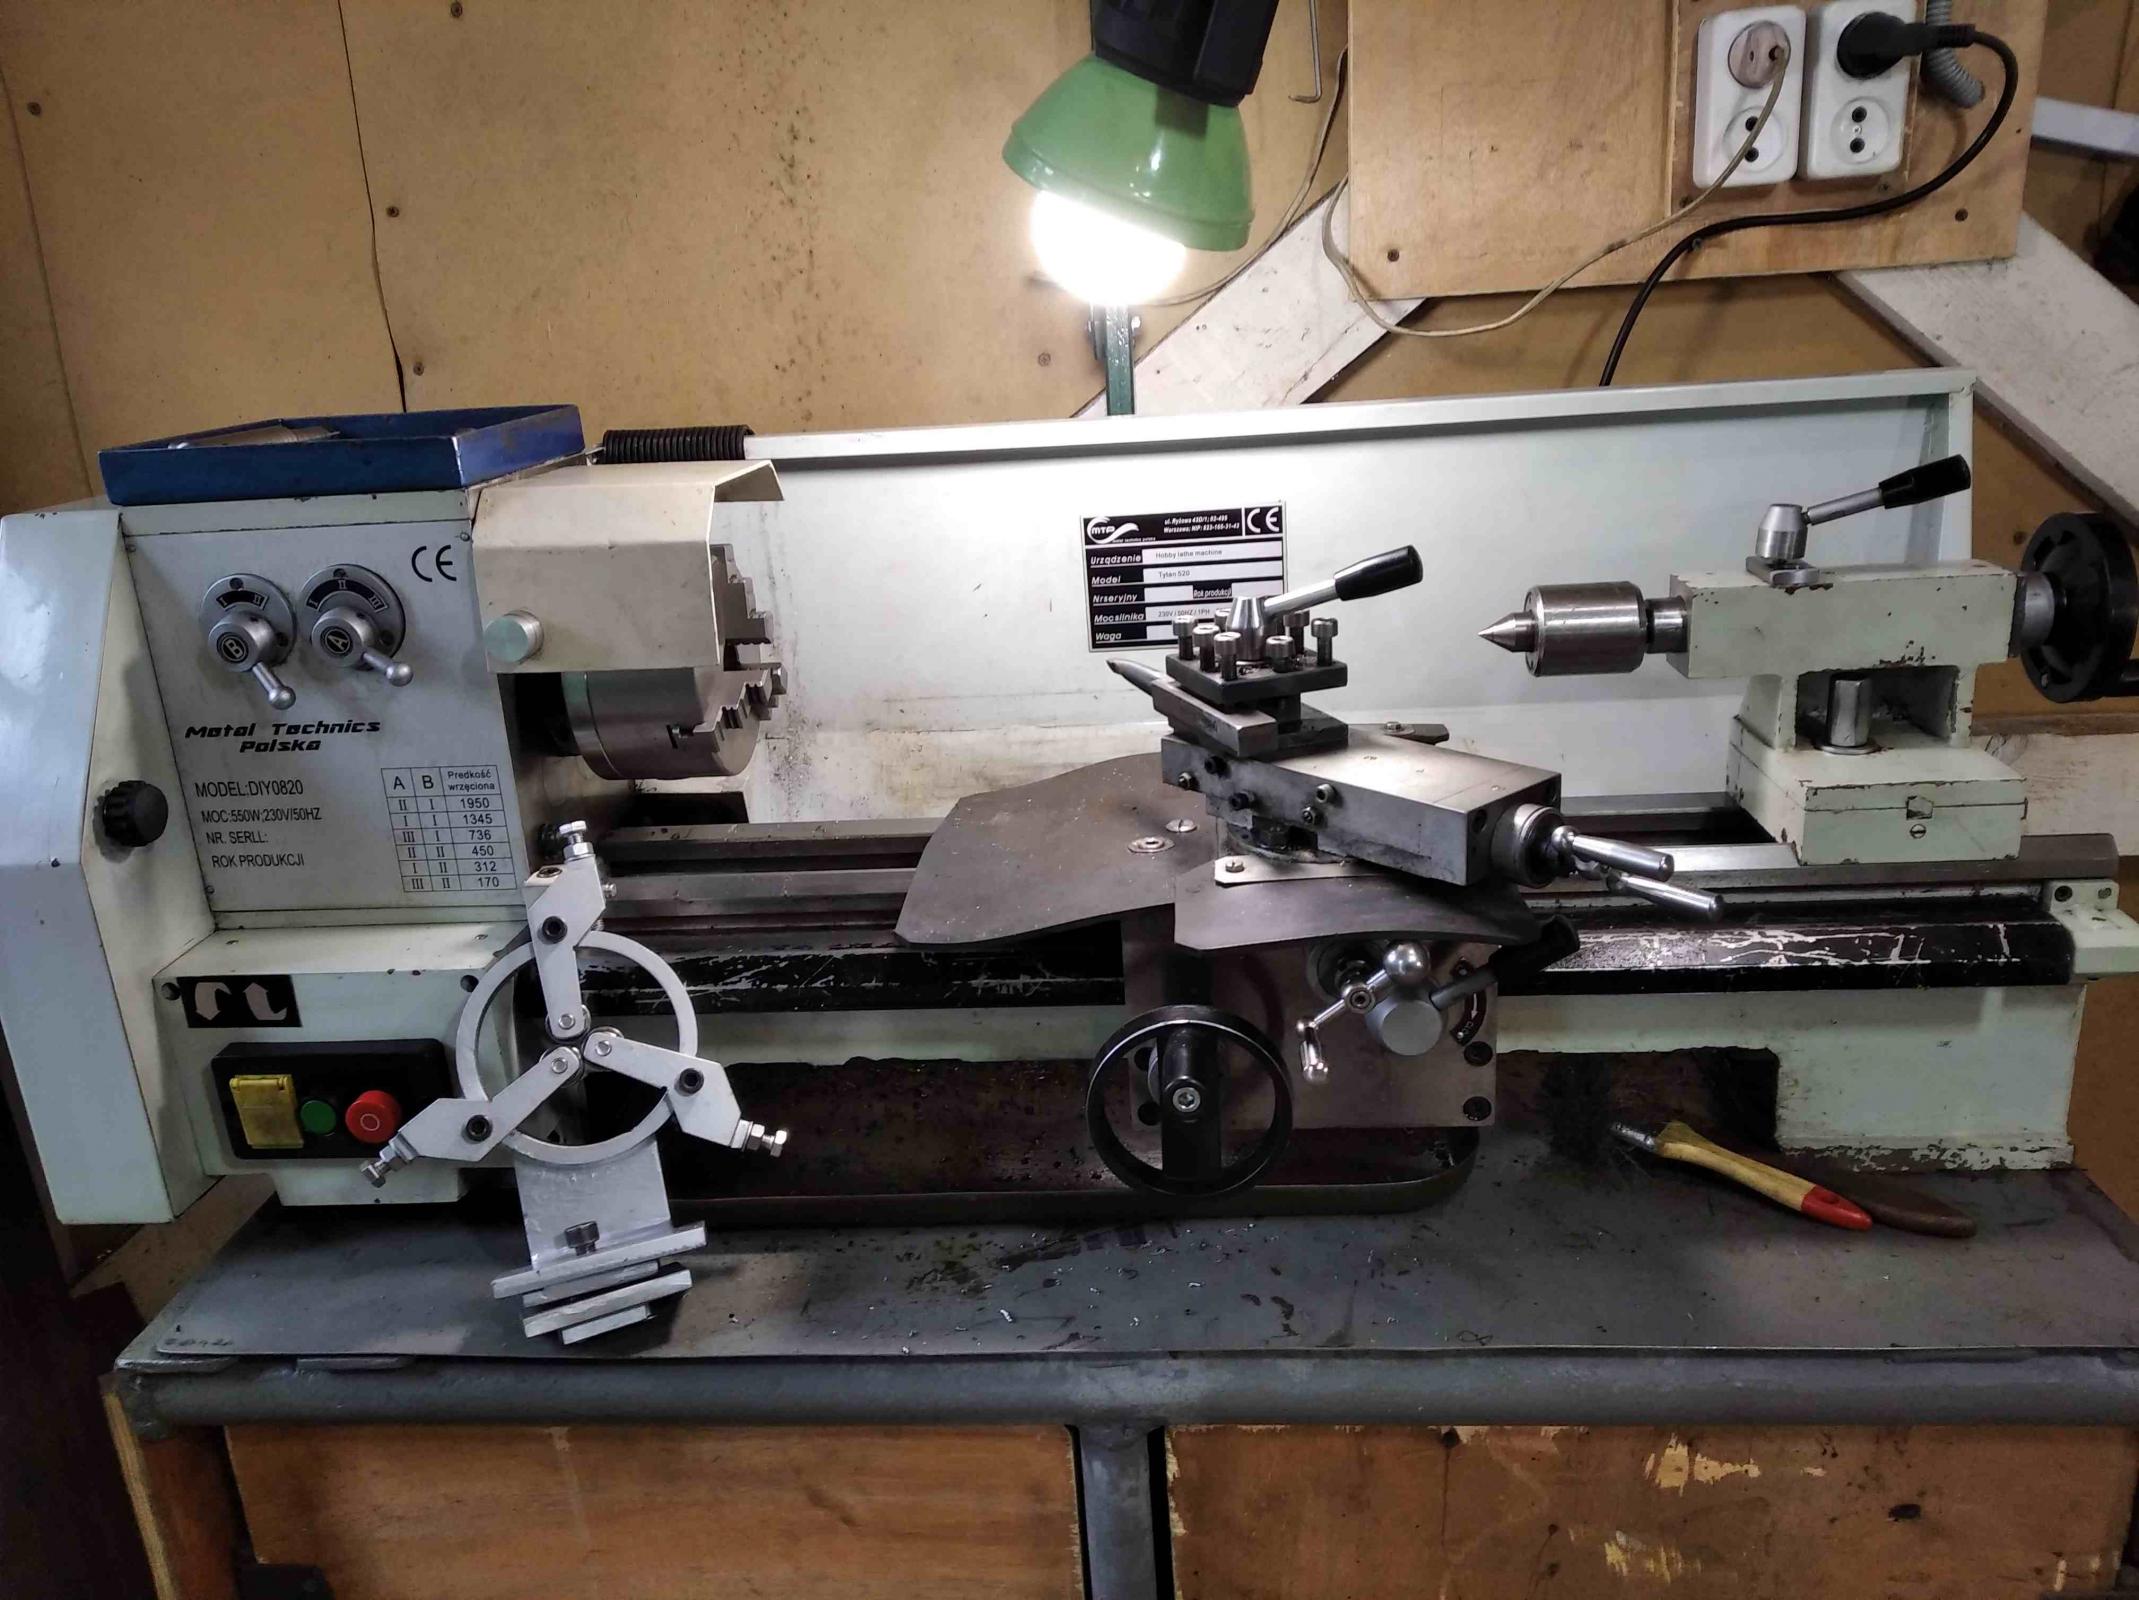
Thanks h7eh7e! We've added your Lathe Steady Rest to our Lathe Accessories category,
as well as to your builder page: h7eh7e's Homemade Tools. Your receipt:
<div id="blocks"> <div class="block b1 pngfix"> <div class="bimg"> <div> <a href="https://www.homemadetools.net/homemade-lathe-steady-rest-7"> <img src="/uploads/227295/homemade-lathe-steady-rest-7.jpeg"/> </a> </div> </div> <div class="head pngfix"></div> <div class="left pngfix"></div> <div class="right pngfix"></div> <div class="blockover b1 pngfix"> <div class="title"> <a href="https://www.homemadetools.net/homemade-lathe-steady-rest-7">Lathe Steady Rest</a> <span> by <a href="https://www.homemadetools.net/builder/h7eh7e">h7eh7e</a></span> </div> <div class="tags">tags: <a href='https://www.homemadetools.net/tag/lathe'>lathe</a>, <a href='https://www.homemadetools.net/tag/steady-rest'>steady rest</a> </div> </div> </div> </div>
<!-- END /var/www/html/homemadetools/protected/modules/zeus/views/tool/postUpdate.php -->
This looks good. I have been wanting to make a fixed steady for goodness knows how long and this gives me an idea for a simple effective build.
That is one nice build. Certainly nice to see a different approach to an age old device.
I really like it; especially by leverage taking place of small diameter fine threads for accurate adjustment! Brilliant, no question. And the frame, a section of heavier wall pipe/ tubing, points out many alternatives to heavy castings.
Again, Terrific concept. In one way, not surprising, you do such good fabrication work on those sanders and grinders.
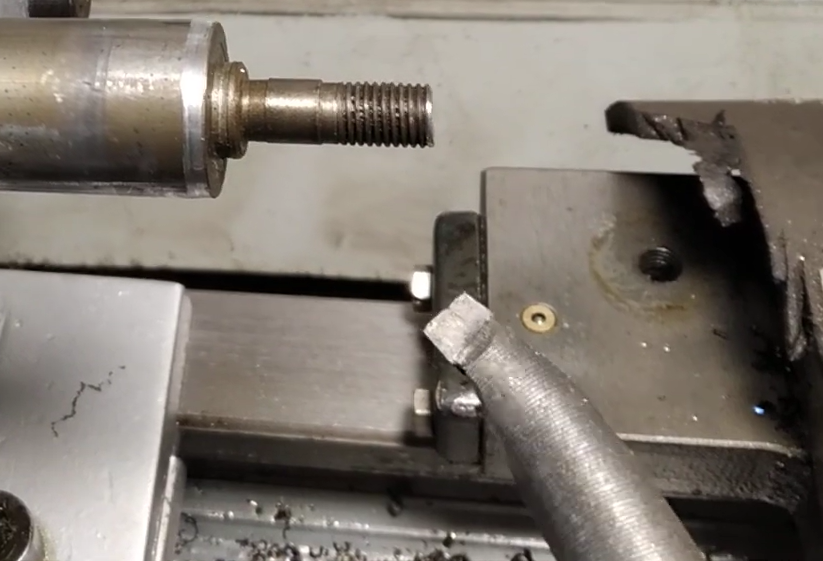
Does anyone know why the lathe tool had that texture from the toolpost to the shaped cutter? While I was watching it in use, I kept wondering what would have made those marks and are they there for some particular reason, or are they just an artifact of the manufacturing process? I thought it was a spring in the video's thumbnail, which begat many more questions. Oh, and the steady rest is very nice, too.
Hard to know what period you refer to, out of 15 minutes of video. Hover cursor at the general frames in question and the time is displayed. Closest thing I see resembling a spring occurs turning OD of the spud outboard of the steady rest; it's cutting through crests of threaded portion. Change in profile and surface finish makes helix of thread root a bit more visible.Quote:
Originally Posted by schuylergrace
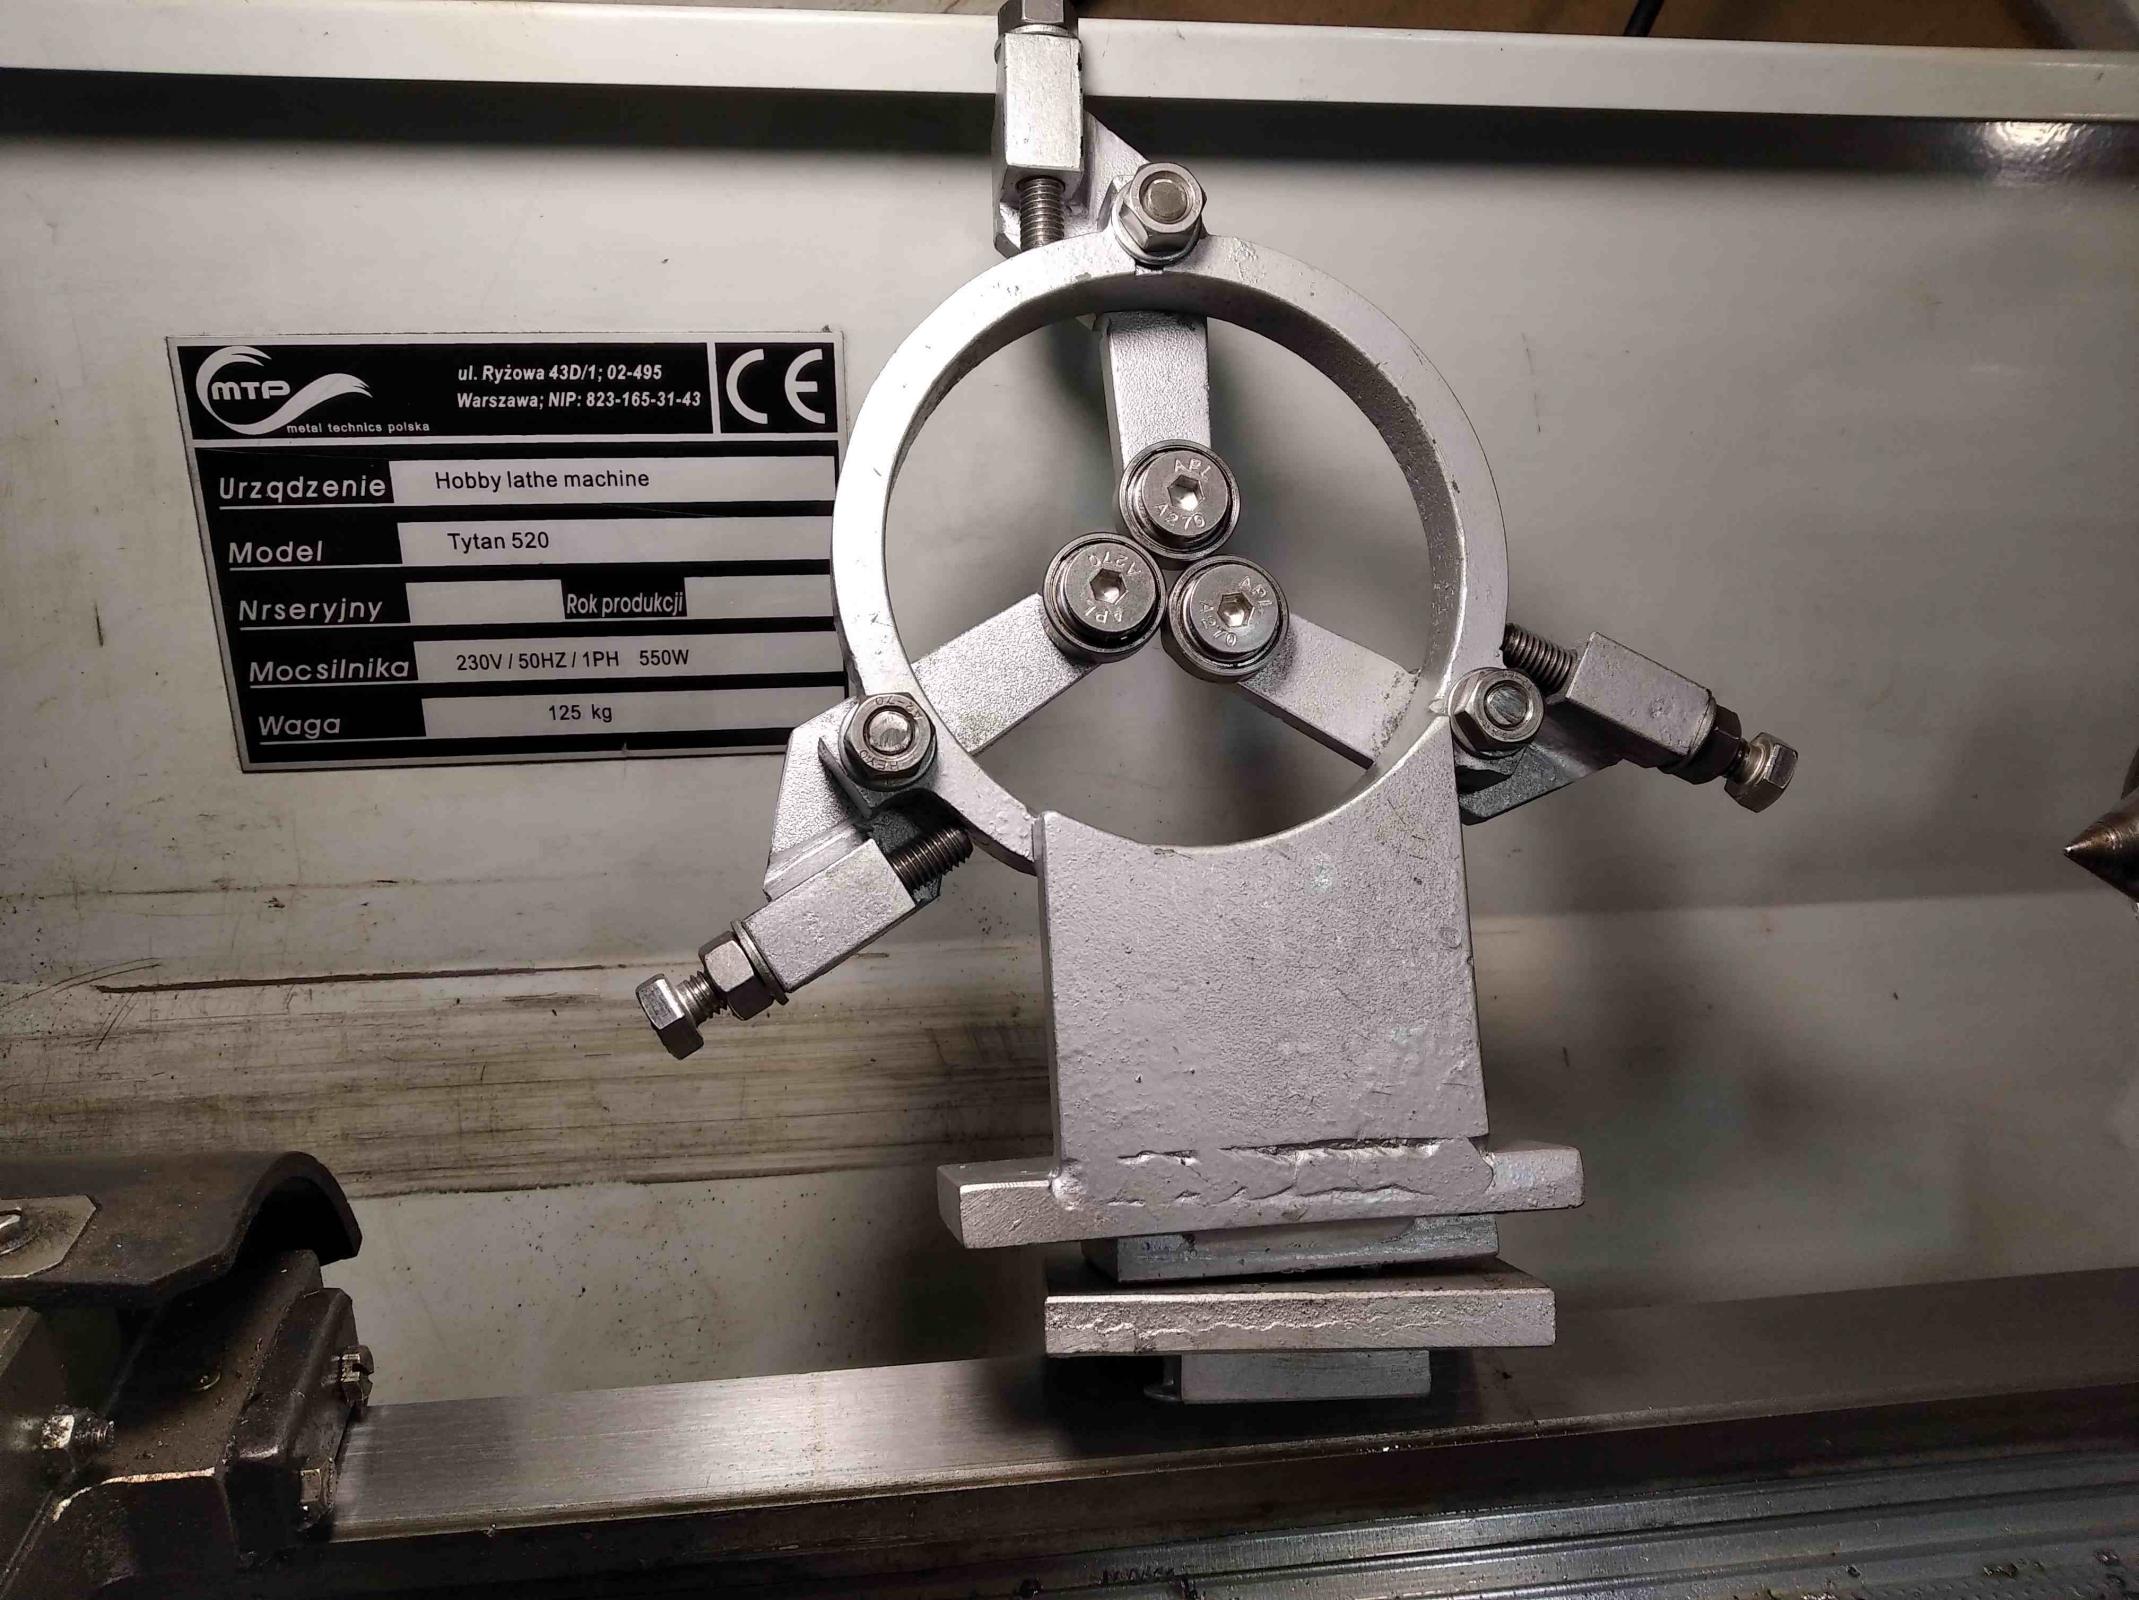
The concept is spot on although the geometry of the pivots are completely wrong, The whole Idea of a steady is to have the supporting points as near opposite the induced stresses created by the turning cutter as possible. This steady does not accomplish this, stop the video atr the 13:40 and you will see what I mean
By changing the clocking of the pivots from the 12-4-8 positions to the 1-5-9 and angling the adjustment bolt on the rear arm to about 30° from the angle it is mounted now this will bring the rollers closer to the true pressure points needed over a wider range of diameters it will still be a compromise as all steadies are to a certain point but will be much closer than what he has now
About half-way through, when he starts machining parts, I noticed the tool he is using, not the part he's making, has what looks like machining marks running around its circumference from the tool post out to where the cutter is ground. The texture is almost like the tool was 3D printed. I'm guessing it may have been cast, and those are marks from where the mold was originally carved out. It doesn't have anything to do with the piece he's making, just something odd I saw and couldn't figure out.Quote:
Originally Posted by Toolmaker51
Isn't it just coarse feed turning marks? Guess he DIYed the tool out of square stock, turned a taper to it,
then torched the tip and bent it before he finally brazed a carbide tip on it?
Attachment 41232