Free 186 More Best Homemade Tools eBook:  
Get 2,000+ tool plans, full site access, and more.

User Tag List

Results 1 to 6 of 6

Thread: Milling arbor storage rack and tooling shelf

  1. #1
    Supporting Member Frank S's Avatar
    Join Date
    Aug 2015
    Location
    Peacock TX
    Posts
    11,212
    Thanks
    1,983
    Thanked 8,787 Times in 4,206 Posts

    Frank S's Tools

    Milling arbor storage rack and tooling shelf

    The perfect place to store my overabundance of horizontal milling arbors seemed to be under a shelf directly below the milling cutter rack.
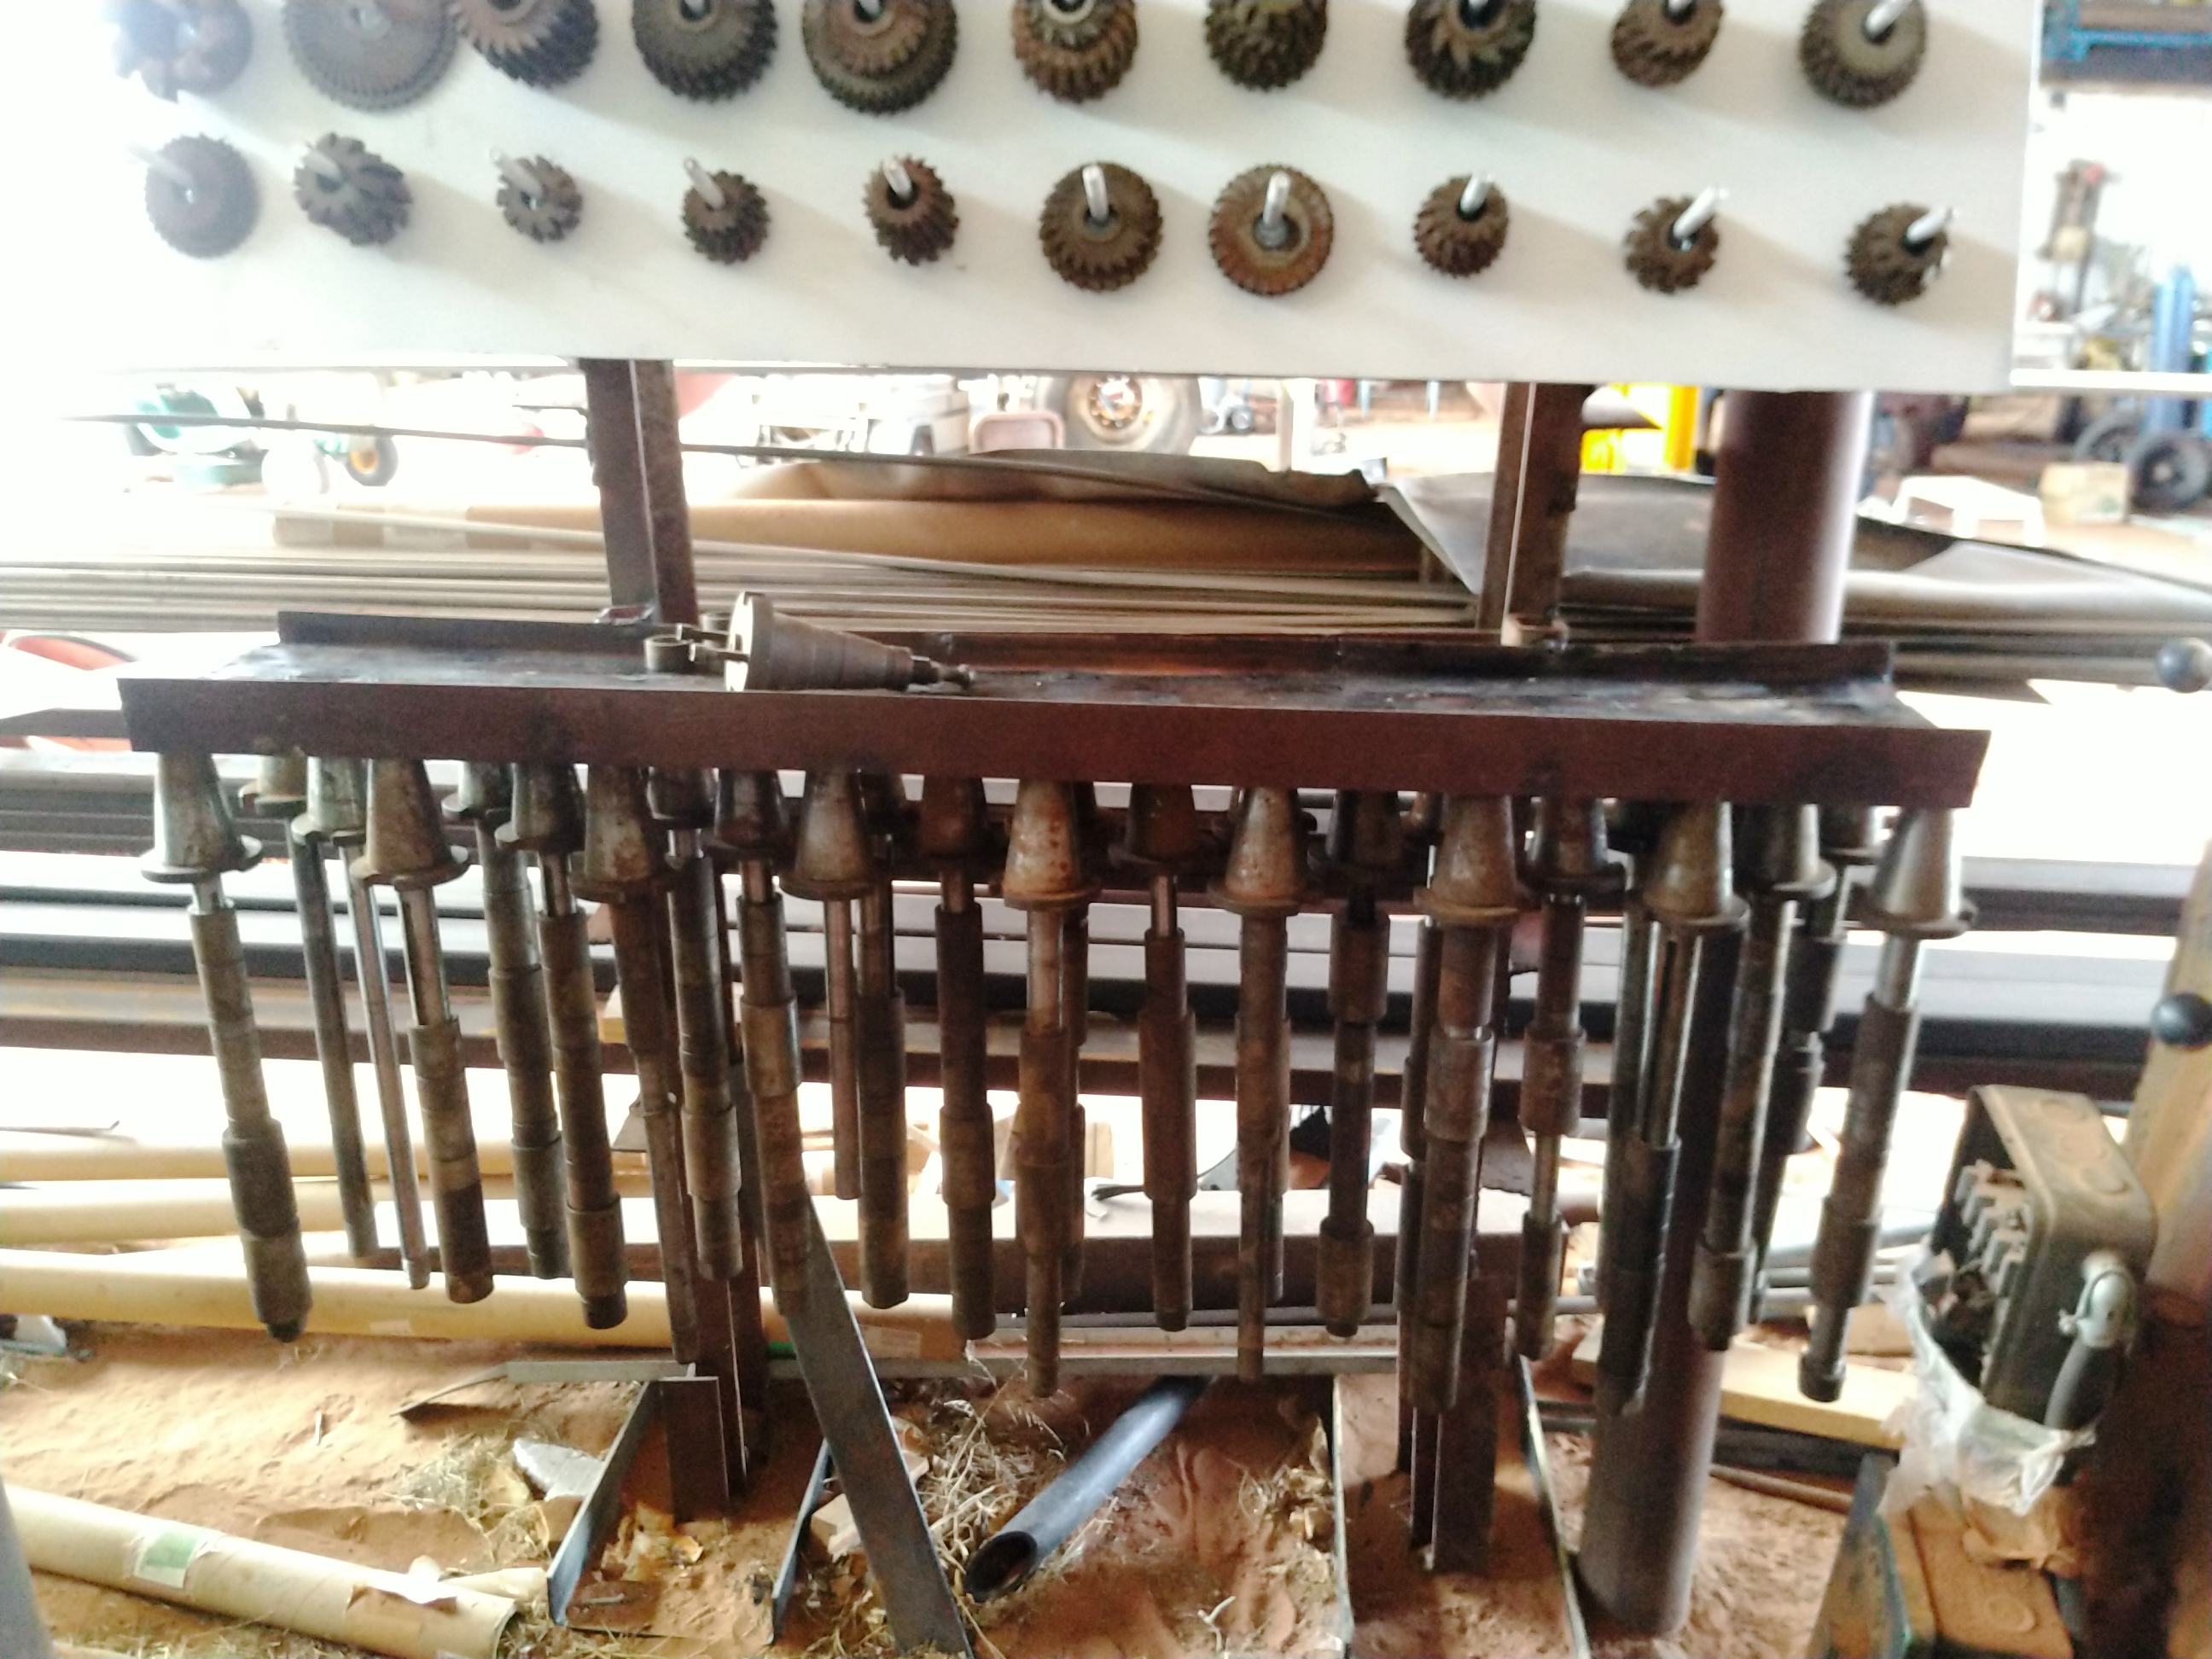
    I haven't brought my Cincinati Horizontal mill online as of yet, but the time is approaching Just like any other machine a Large Horizontal mill requires a lot of tooling to be efficient. The T50 arbors take up a lot of space by themselves and in my opinion, there is only 2 ways they should be stored. Separately in wooden boxes supported in several places along their length is by far the most preferred. it also requires the most space particularly where there are quite a few of them. this would also mean that you could not leave a set of cutters on them when not in use. I like the idea of being able to have multiple arbors pre-assembled with cutters for whatever job run I will be doing, not having to change out several times throughout a job order. So, I think storing them vertically while hanging is the second-best way to protect them.
    I have 26 arbors in 3 maybe 4 different diameters ranging from 1" up.
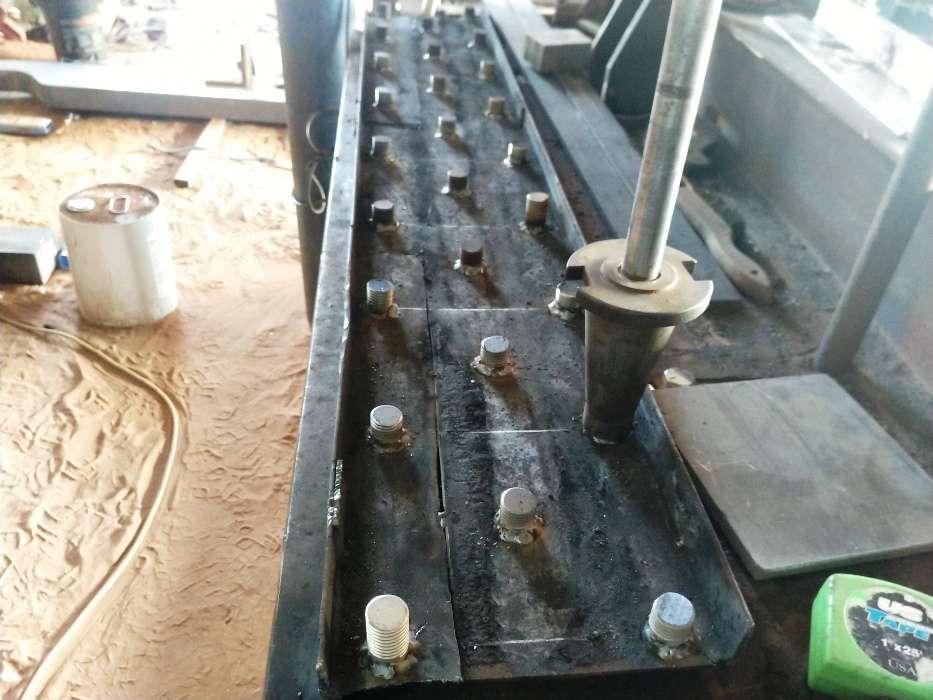
    My solution for quick access was to make a shelf out of 10" mobile home frame with 26 1" diameter threaded stubs welded to the bottom of the shelf in 3 staggered rows allowing enough space between each arbor so as to permit leaving most cutter setup in place should I decide to do so.
    Later on I will build an enclosure over and around the cutter rack and the shelf to protect them even better.
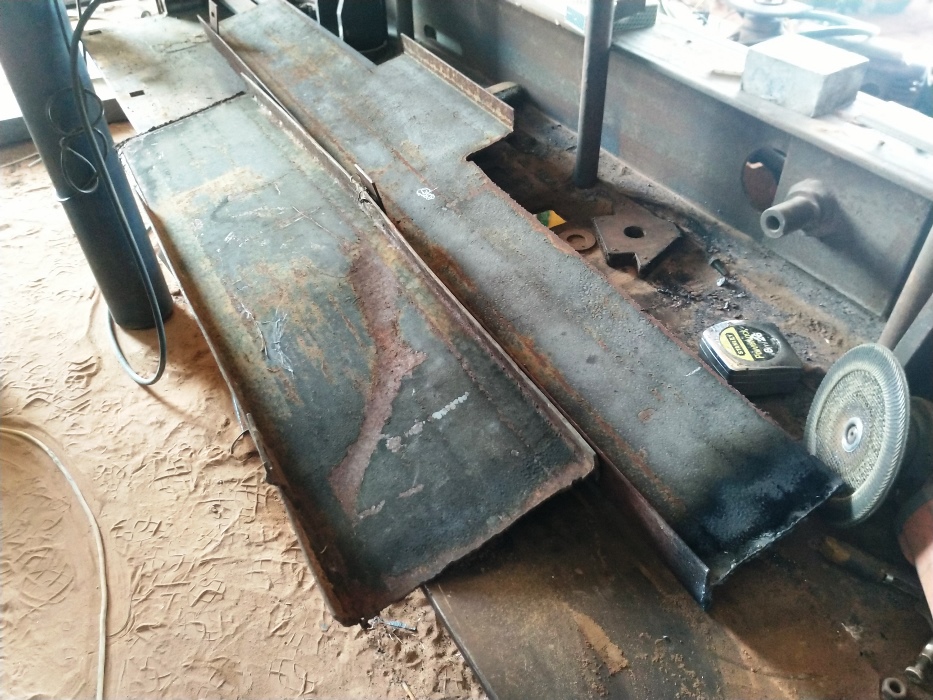
    First I had to section some pieces to the mobile home frame beam together to make a suitable length shelf
    Milling arbor storage rack and tooling shelf-img_20220731_133520acs.jpg
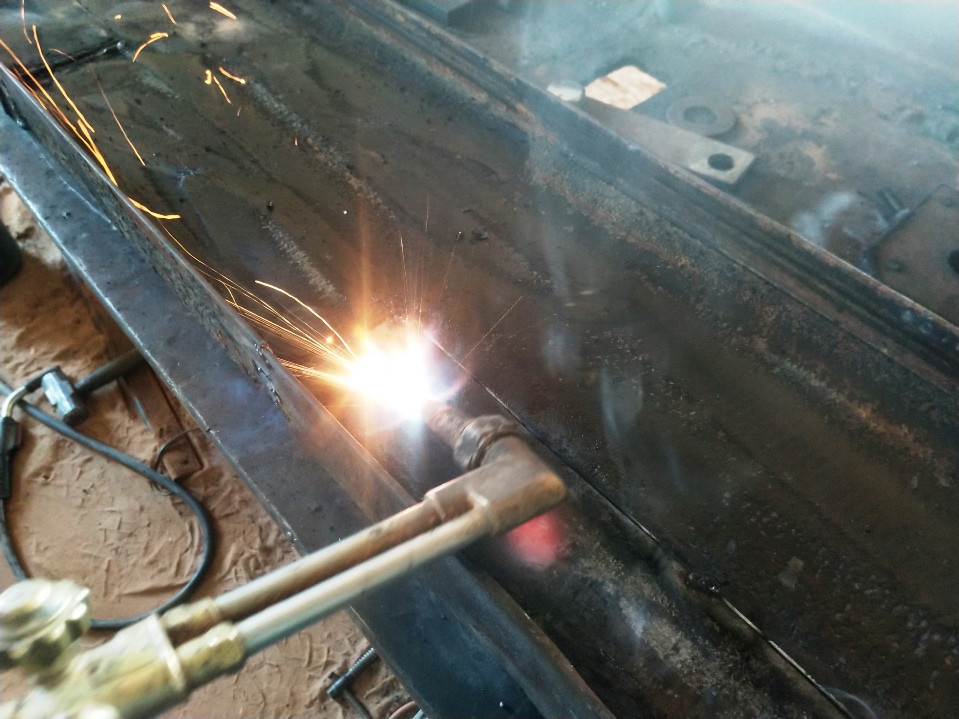
    Next before I could weld the stubs on the bottom, I had to remove the Asphalt based paint along where the stubs were to be placed. The best way I have found to remove the stuff is to burn it off with a torch
    Milling arbor storage rack and tooling shelf-img_20220801_162229acs.jpg
    Milling arbor storage rack and tooling shelf-img_20220801_162857acs.jpg
    Stubs welded in place
    Milling arbor storage rack and tooling shelf-img_20220801_173918acs.jpg
    It's not only the arbors but there are a multitude of spacers on them as well some being only a few thousand's wide ranging up to about 4 inches wide or thick depending on how you want to call them. Leaving them on the arbors may be a minor inconvenience when needing to select the correct width spacer but it keeps them from becoming misplaced and they are out of the way
    Milling arbor storage rack and tooling shelf-img_20220801_184220.jpg

    186 More Best Homemade Tools eBook
    Last edited by Frank S; Aug 1, 2022 at 10:36 PM.
    Never try to tell me it can't be done
    When I have to paint I use KBS products

  2. The Following 4 Users Say Thank You to Frank S For This Useful Post:

    baja (Aug 3, 2022), Inner (Aug 2, 2022), Scotty1 (Aug 3, 2022), Toolmaker51 (Aug 3, 2022)

  3. #2
    Content Editor
    Supporting Member
    DIYer's Avatar
    Join Date
    Aug 2013
    Posts
    3,056
    Thanks
    772
    Thanked 1,852 Times in 1,653 Posts


    Thanks Frank S! We've added your Milling Arbor Storage Rack to our Racks category,
    as well as to your builder page: Frank S's Homemade Tools. Your receipt:


    2000 Tool Plans

  4. #3
    Supporting Member Toolmaker51's Avatar
    Join Date
    Feb 2016
    Location
    Midwest USA
    Posts
    5,331
    Thanks
    7,042
    Thanked 2,981 Times in 1,893 Posts

    Toolmaker51's Tools
    I like the rack, even without owning so many arbors, it stimulates an approach for mine. Instead a rack of welded studs, a handful of short bolts with a slotted rack.
    Seems easier/safer than engaging a stationary - upside down - threaded element, especially if still mounted with cutters. Right now they rest in carpet tubes, whether 40 or 50 taper.

    When dismounting an arbor, keep spacers in order by ID/ length, thinnest in 3" x 5" zipper closure bags, marked with felt pen. 'We' called anything over .100 a spacer, less were shims.
    Sincerely,
    Toolmaker51
    ...we'll learn more by wandering than searching...

  5. #4
    Supporting Member Frank S's Avatar
    Join Date
    Aug 2015
    Location
    Peacock TX
    Posts
    11,212
    Thanks
    1,983
    Thanked 8,787 Times in 4,206 Posts

    Frank S's Tools
    Quote Originally Posted by Toolmaker51 View Post
    I like the rack, even without owning so many arbors, it stimulates an approach for mine. Instead a rack of welded studs, a handful of short bolts with a slotted rack.
    Seems easier/safer than engaging a stationary - upside down - threaded element, especially if still mounted with cutters. Right now they rest in carpet tubes, whether 40 or 50 taper.

    When dismounting an arbor, keep spacers in order by ID/ length, thinnest in 3" x 5" zipper closure bags, marked with felt pen. 'We' called anything over .100 a spacer, less were shims.
    I have a gallon ziplock bag full of shims stashed away in a drawer. I might add a 2x3" angle iron to the front of the shelf cutting a few 1 1/6" wide 2" deep slots along the 3" leg spaced far enough apart to allow for my largest diameter cutters to remain on an arbor. These would be for quicker access when a milling job required the use of multiple cutter sizes or arrangements, otherwise they would be stored on the studs under the shelf.
    The way I look at it, setup time on a project is where money can be made or lost. Back when Jane and I had our machine shop in Ft. Worth a couple of the machine shops geared for production runs only with their CNC machining centers would often send us the things with a too small run count to make it worth their while to set up and make the parts, but they always had allowances included for changeover setups for each different machining operation. We had enough tooling to prearrange all of our changes before starting. An hour spent doing that sometimes could mean saving 20 hours on the contracted project, translated into 19 hours of extra profit which we would split with the shop that sent us the job, giving them the incentive to send us more work. The only way a manual job shop could survive in the world of automatics, was to provide quality, and incentives for repeat business.
    Never try to tell me it can't be done
    When I have to paint I use KBS products

  6. #5
    Supporting Member Toolmaker51's Avatar
    Join Date
    Feb 2016
    Location
    Midwest USA
    Posts
    5,331
    Thanks
    7,042
    Thanked 2,981 Times in 1,893 Posts

    Toolmaker51's Tools
    Set up means lots in a job shop, even more production wise.
    That said, a jobber can tune those as opportunities present themselves; reorganizing full scale production is usually a near cataclysmic event.
    Sincerely,
    Toolmaker51
    ...we'll learn more by wandering than searching...

  7. #6
    Supporting Member Frank S's Avatar
    Join Date
    Aug 2015
    Location
    Peacock TX
    Posts
    11,212
    Thanks
    1,983
    Thanked 8,787 Times in 4,206 Posts

    Frank S's Tools
    Quote Originally Posted by Toolmaker51 View Post
    Set reorganizing full scale production is usually a near cataclysmic event.
    As was all too evident when a shop in South Ft. Worth that made Aviation and aerospace products For Lockheed International found out. It seems the company had been manufacturing the same exact A,B,C,D,E,F,G, products for over 20 years when one day at the stroke of the pen every item they had been making was deemed obsolete product A now needed to be A+h, B had to become B-f so on and so forth. Their production rans ran 6 months at a time when the change came down they were 1 month into production with raw materials for the full production run already in house. This wasn't going to be a simple tooling change either all of their fixtures molds, punches, dies, and jigs would have to be upgraded, modified or scrapped. All this while the company was expected to fulfill the original contract but with the updated parts or face stiff penalties for non-delivery. I think for about a month, just about every small and large job shop in the DFW area who had the capability and were willing to have government watch dogs looking over their shoulders were making something for them. We didn't make anything for them for one reason I didn't feel we had the capabilities with our older machines we only had 1 machinist other than myself and Jane at the time and I knew I wouldn't be able to put up with a shoulder ornament and wasn't about to ask Jane to either so that only left David.


    186 More Best Homemade Tools eBook
    Never try to tell me it can't be done
    When I have to paint I use KBS products

Thread Information

Users Browsing this Thread

There are currently 1 users browsing this thread. (0 members and 1 guests)

Bookmarks

Posting Permissions

  • You may not post new threads
  • You may not post replies
  • You may not post attachments
  • You may not edit your posts
  •