-
2 Attachment(s)
My 72 x 2 Belt Sander
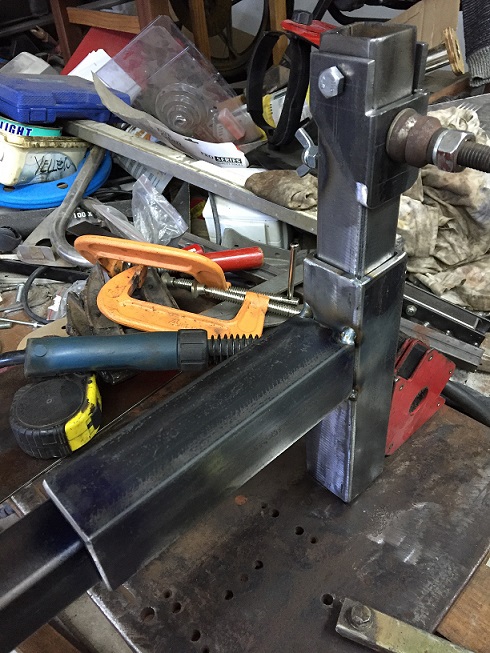
Started my 72 x 2 Belt sander. I am not going to make knives, but I think it can be usefull for all the notching I have to do. The better the fit the easier and stronger the weld. I TIG all my suspension linkages.
Attachment 22935
I did not use square tubing because the fit of one tube into the other is too loose, so I machined down some 50 x 50 x 5 angle iron to give me a nice snug fit for the 38 x 38 x 4 square tubing I use to slide into the other manufactured tube. I inserted some 0.5mm spacers before welding up the angles to form the tube.
A friend of mine suggested I add some hinges so it is easy to flip it 90 Deg so the belt will run horizontally.
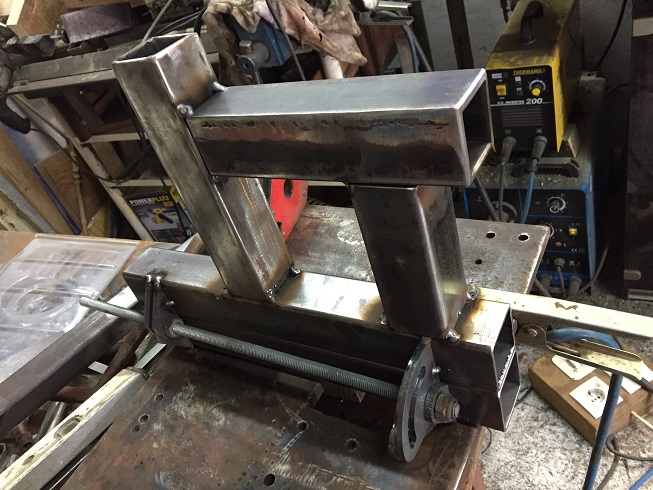
Attachment 22936
-
Garage nut
show us a little bit more, very interesting.
Nelson
-
Unfortunately nothing in the design is my own, Copied basically 100% from a knife making site.
A lot is published on the wheels. I looked at AliExpress as well, sometimes I get stuff there for cheaper than what the material would cost me.
But I ended up with buying some 50Dia x 65 Ali for the rollers and 32 OD x 12 ID x 10 Wide bearings. Not going to bother turning shafts, just going to use capscrews with shanks long enough so the bearings will not sit on thread.
I also opted for an extra roller on the front plate. This will allow me to have both a back supported and unsupported section for immediate use. Remember I am not into knife making, so need to grind off burs and make rebates for welding. sharp edges on a solidly backed belt can rip it to shreds in no time.
-
Drawing
Have you any drawing Im thinking of making one & looking at a few different types. Will build it on my YouTube channel.
Regards Rob
-
Rob
Here is a very nice one and there are drawings and a build thread. Check it out
https://www.hobby-machinist.com/thre...1/#post-536564
Here is another that might fit the bill:
https://www.hobby-machinist.com/thre...2/#post-419497
Good luck and happy building
Nelson
-
1 Attachment(s)
Attachment 22973
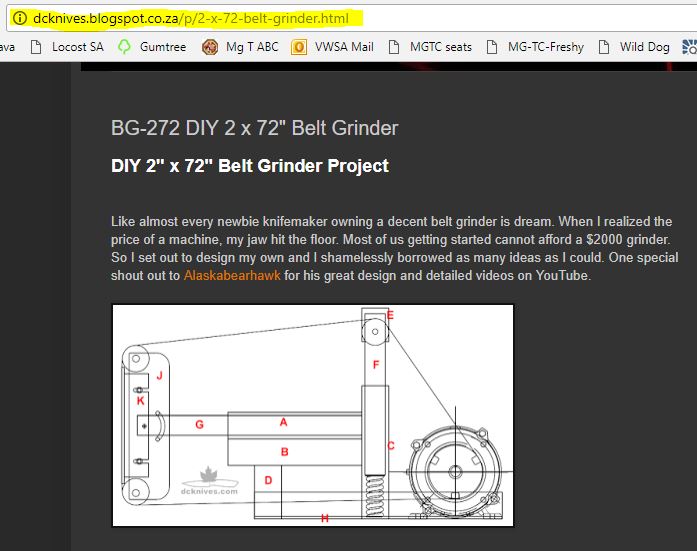
This is where I got my design. Very simple and minimal machining.
-
Check out our comprehensive page on belt sander builds, including multiple links to plans: Homemade Belt Sander
-
1 Attachment(s)
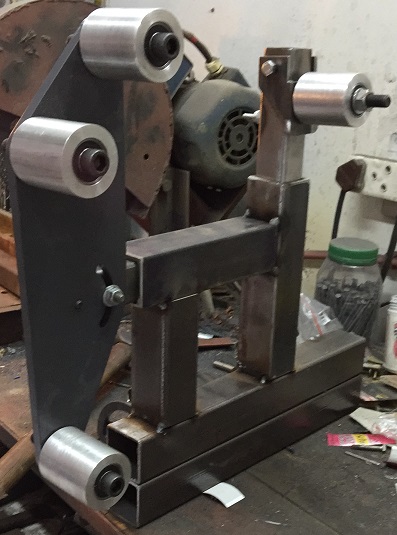
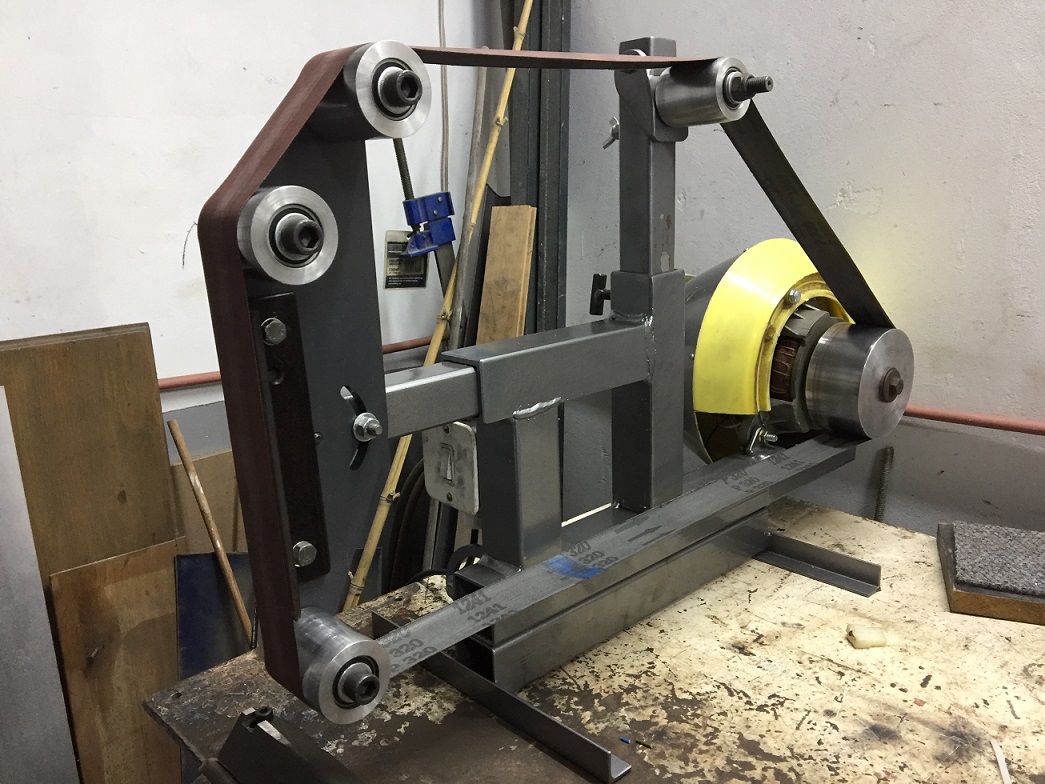
So I finished off the small rollers. You can see by the amount of thread protruding that I used bolts long enough so to ensure the bearings are sitting on the solid shank.
The next was the drive roller. Before I could machine it I had to decide what motor I was going to use. I have an old 1hp motor that has been lying in the shelf for years, but as I connected it to power to see if it is still running...I was reminded why it is on the shelf...It has a power leak from one of its windings...so I got a good old shock...back onto the shelf with a note on a piece of masking tape to have it rewired.
The next was an old central fugal water pump, but the motor was only 0.25Kw so too small. :headscratch:
Then I remembered a post I red where the guy used a lawnmower engine. I has an old (very tired chassis and grass box) electric mower but the motor is still good.
Upon inspection it turned out to be a 2.2Kw motor and it runs at 2880 RPM. A added bonus was that the method to attach the blade(bolt into the center of the axis) would be perfect for my 4' x 60mm wide drive pulley. I had no idea how I was going to tap a M8 through the 4' pulley (the conventional way to attach a pulley with a grub screw to a shaft). I think my tap is about 1.25' long.Attachment 22992
-
1 Attachment(s)
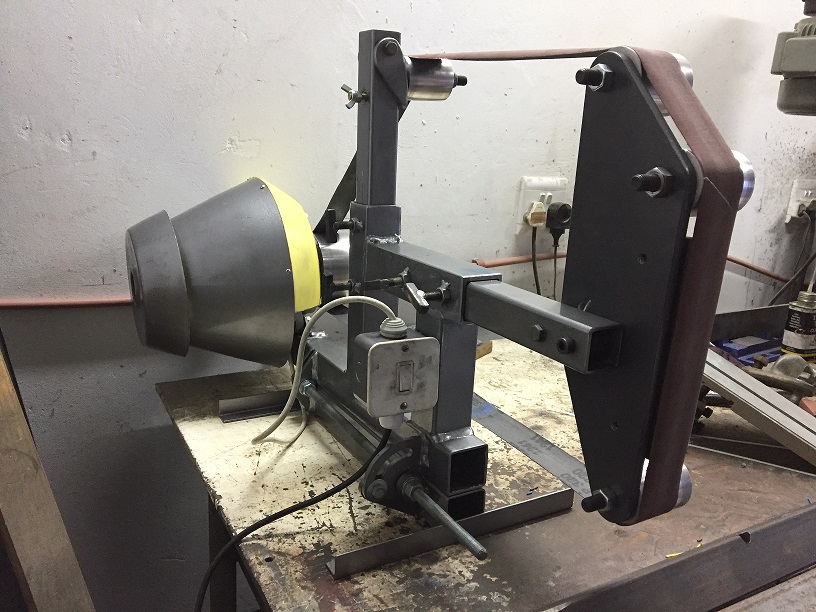
So...just went through the pages and pages of belt sander designs and my design is this based on this one.
Attachment 22993
Just small modification so whole machine can be tilted side ways.
-
Your off to a good start, now I want to see it in action
-
Well that was a steep learning curve.
1) How to take a video and do a little rendering.
2) Creating a YouTube account and then
3) actually loading it onto youtube...All very scary stuff.
But hopefully it was all worth the effort.
https://youtu.be/E1YK0G7OHl0
-
Ps I did have to rotate the footage through 90 Deg that meant 2 eddits as the software only allowed 45Deg at a time.
I took out all the horrible sound.. to make the file a small as possible.
And I added its name :thumbsup:
Noe for some guards, paint and a proper switch
-
2 Attachment(s)
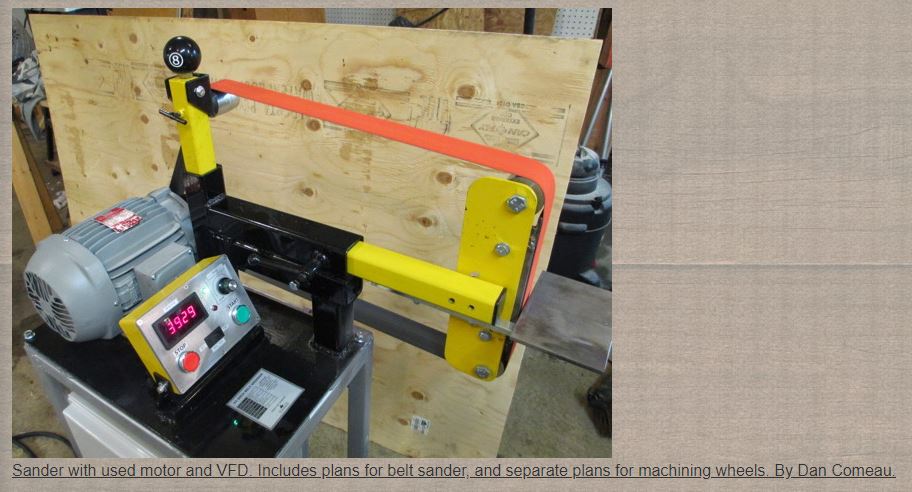
Finished....:clapping:
Attachment 23165
Attachment 23166
Used the lawnmower's motor cover with a coat of paint designed for plastic.
-
Garage nut
Very nice first time video. I like your belt sander and need to make one for myself.
Keep the videos coming
Nelson
-
1 Attachment(s)
Showed it to a friend of mine and he immediately commented that it does not have a "work area/table", fortunately he came up with a solution as well. He scrapped a commercial sanding disc machine, but kept the "working area/table" so....will be fitting this.
Attachment 23173
So NOT FINISHED. :angry:
-
<!-- BEGIN /var/www/html/homemadetools/protected/modules/zeus/views/tool/postUpdate.php -->
Thanks garage nut! We've added your Belt Sander to our Sanding category,
as well as to your builder page: garage nut's Homemade Tools. Your receipt:
<div id="blocks">
<div class="block b1 pngfix">
<div class="bimg">
<div>
<a href="http://www.homemadetools.net/homemade-belt-sander-62">
<img src="/uploads/212651/homemade-belt-sander-62.jpeg"/>
</a>
</div>
</div>
<div class="head pngfix"></div>
<div class="left pngfix"></div>
<div class="right pngfix"></div>
<div class="blockover b1 pngfix">
<div class="title">
<a href="http://www.homemadetools.net/homemade-belt-sander-62">Belt Sander</a>
<span> by <a href="http://www.homemadetools.net/builder/garage+nut">garage nut</a></span>
</div>
<div class="tags">tags:
<a href='http://www.homemadetools.net/tag/motorcycle'>motorcycle</a>, <a href='http://www.homemadetools.net/tag/belt-sander'>belt sander</a> </div>
</div>
</div>
</div>
<!-- END /var/www/html/homemadetools/protected/modules/zeus/views/tool/postUpdate.php -->