Free 186 More Best Homemade Tools eBook:  
New: 300+ fresh build posts/day from 275 forums → BuildThreads.com

User Tag List

Results 1 to 9 of 9

Thread: Rossbotics Universal Vise

Threaded View

  1. #1
    Supporting Member
    Join Date
    Oct 2018
    Posts
    5
    Thanks
    4
    Thanked 10 Times in 2 Posts

    Tek12h's Tools

    Rossbotics Universal Vise

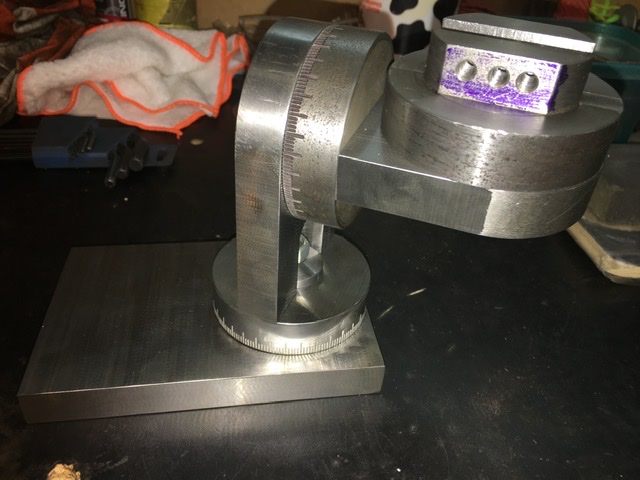
    After finishing the angle dresser a few months back I found Doug’s universal vise and had to have the plans for it.
    It was challenging, as mr bozo always shows up in the shop. Upon completion it has been super handy to have for grinding my 5/8-3/4 lathe tools on the grinder vs hand grinding them.


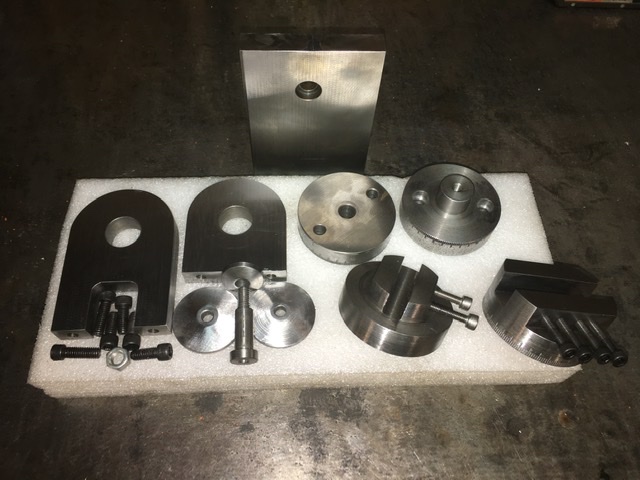
    I used 4140 for all parts except the base, in which case I just some 1018.

    The base was simple milling, squaring it up and drilling a clearance hole with counterbore. I did not get any pictures of that.

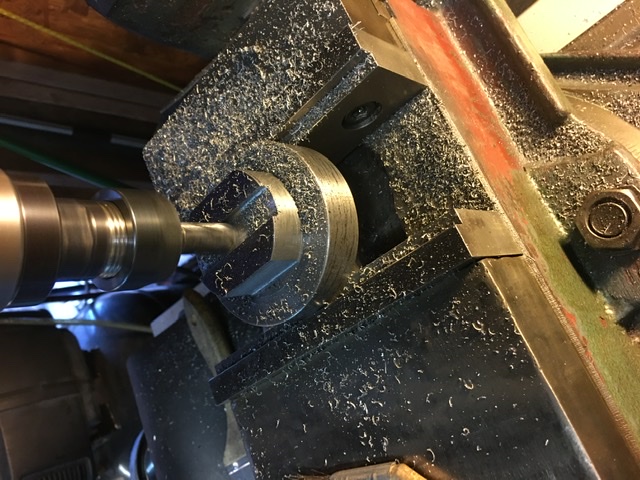
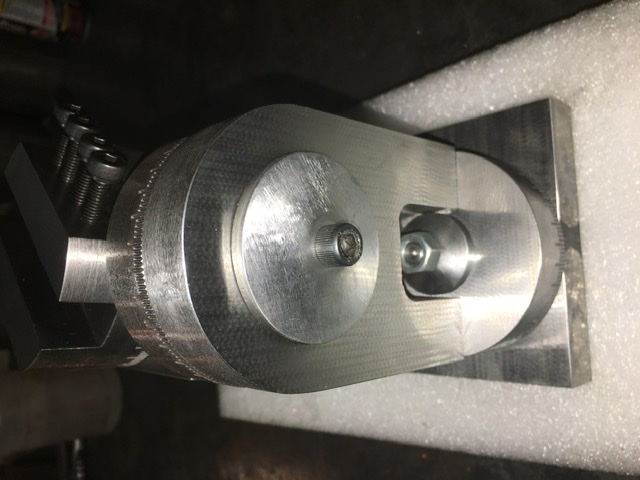
    Starting on the uprights that hold the rounds that swivel. Both pieces needed the same milling done to them. 1” bore through the center and radius at the top.

    Click image for larger version. 

Name:	CB92D82B-FB5F-41AC-9728-EE71C567EFDF.jpeg 
Views:	456 
Size:	146.0 KB 
ID:	33201
    Click image for larger version. 

Name:	CB92D82B-FB5F-41AC-9728-EE71C567EFDF.jpeg 
Views:	456 
Size:	146.0 KB 
ID:	33201
    Click image for larger version. 

Name:	12B2A4CD-6160-4234-94C4-ED88AA29FAF6.jpeg 
Views:	329 
Size:	128.1 KB 
ID:	33202
    Click image for larger version. 

Name:	41F8201A-B2A5-4DCD-8B9F-E4CE07B070D5.jpeg 
Views:	320 
Size:	114.5 KB 
ID:	33203
    Click image for larger version. 

Name:	7639CE8B-1269-4AFD-97F2-F47117919CF4.jpeg 
Views:	318 
Size:	102.1 KB 
ID:	33204


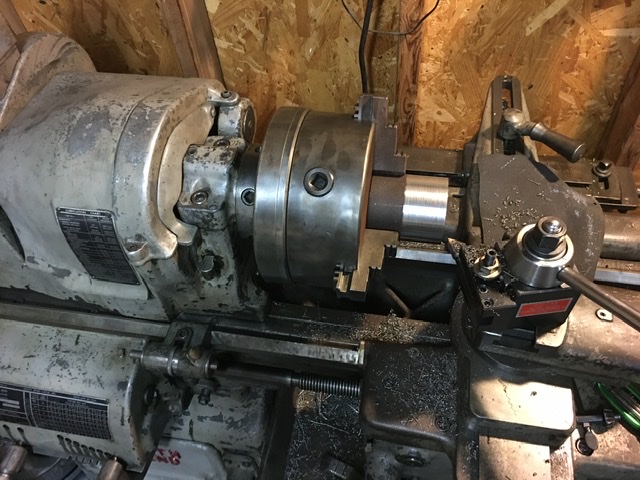
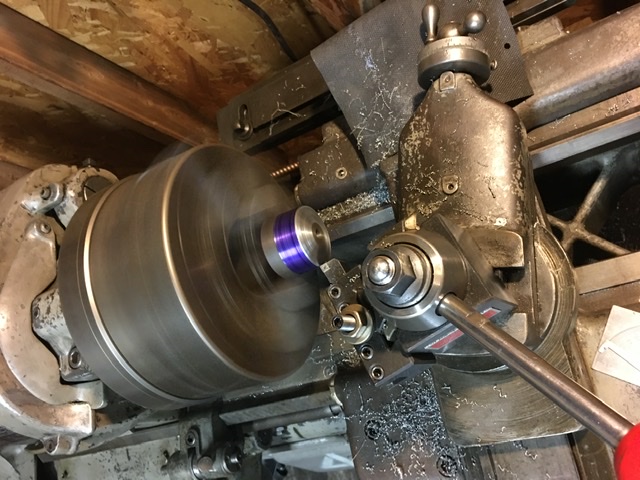
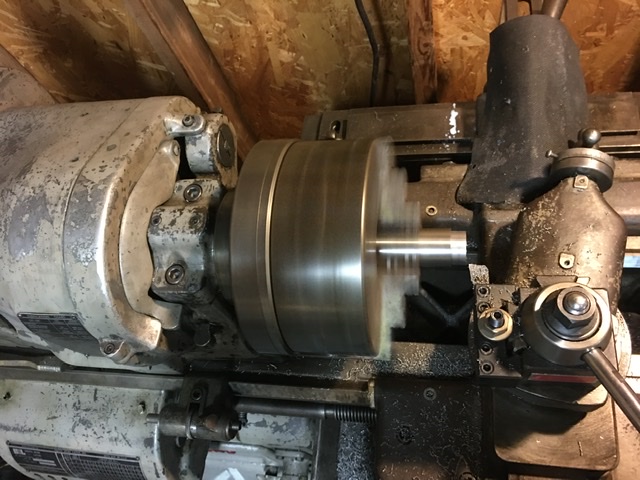
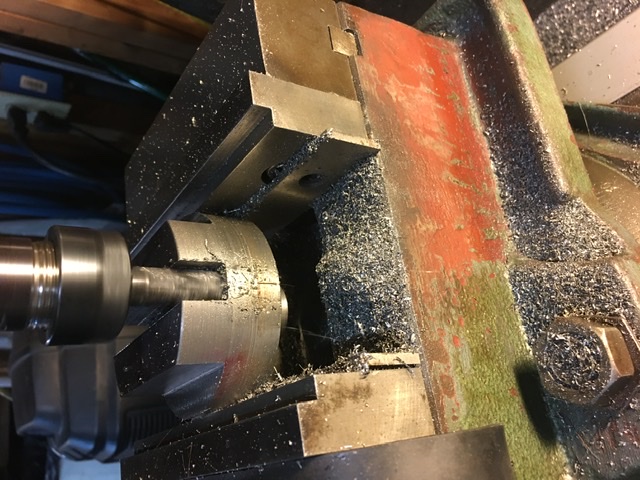
    After finishing the base, and the uprights I moved onto the lathe as there was a lot of work to do. Had to turn down the boss for mounting onto uprights, and make sure it was a good tight fit that still allowed swivel.

    Click image for larger version. 

Name:	50CE59BA-3972-47A3-8202-35C5CC48D673.jpeg 
Views:	322 
Size:	125.1 KB 
ID:	33205
    Click image for larger version. 

Name:	9A38100C-1181-40B5-A4CA-ACB7895E2283.jpeg 
Views:	332 
Size:	123.2 KB 
ID:	33206
    Click image for larger version. 

Name:	1BFBC48B-0EFA-47F0-A03A-DDFDA028BAC6.jpeg 
Views:	319 
Size:	114.9 KB 
ID:	33207

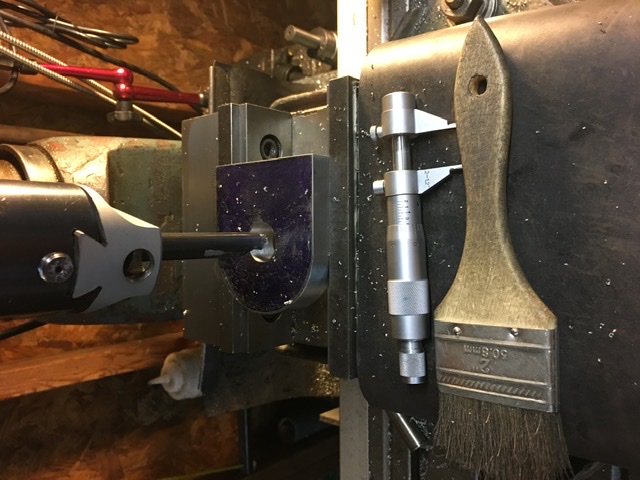
    While at the lathe I knocked out a shoulder bolt to bolt the vise to the base as well. Ross includes prints for the bolt too.
    Click image for larger version. 

Name:	EAC10B55-819A-4AE7-BD40-284EB1D7A5CA.jpeg 
Views:	304 
Size:	133.7 KB 
ID:	33208

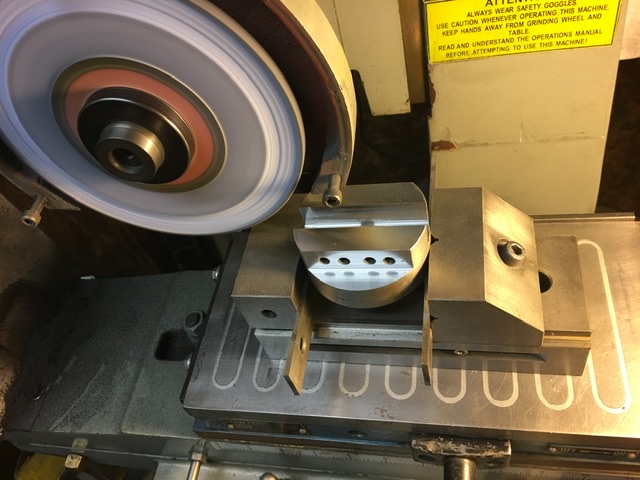
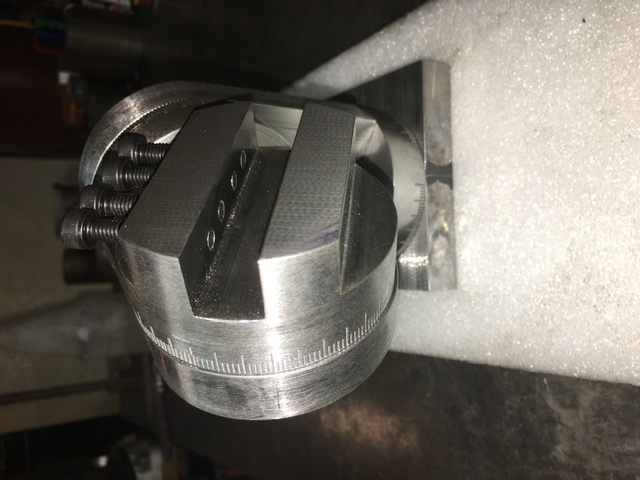
    I made 2 different tool holders for the vise, one is smaller that allows me to hold 5/16-3/8 tools for grinding, the other is for 5/8-3/4 tools.
    Click image for larger version. 

Name:	11C05EC0-A89B-41F1-B023-B584B38FCC80.jpeg 
Views:	378 
Size:	130.0 KB 
ID:	33209
    Click image for larger version. 

Name:	11C05EC0-A89B-41F1-B023-B584B38FCC80.jpeg 
Views:	378 
Size:	130.0 KB 
ID:	33209


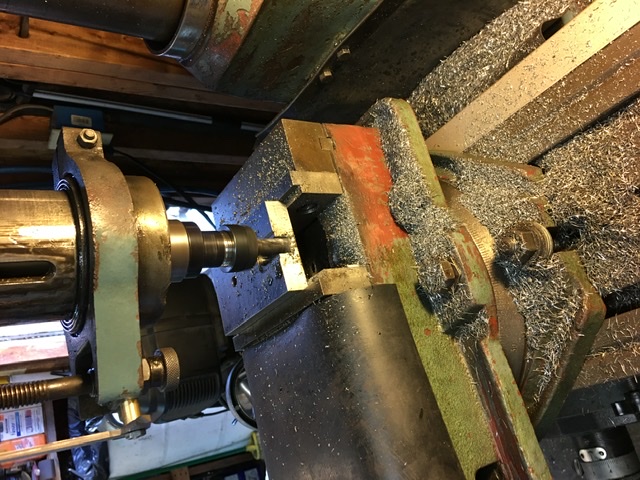
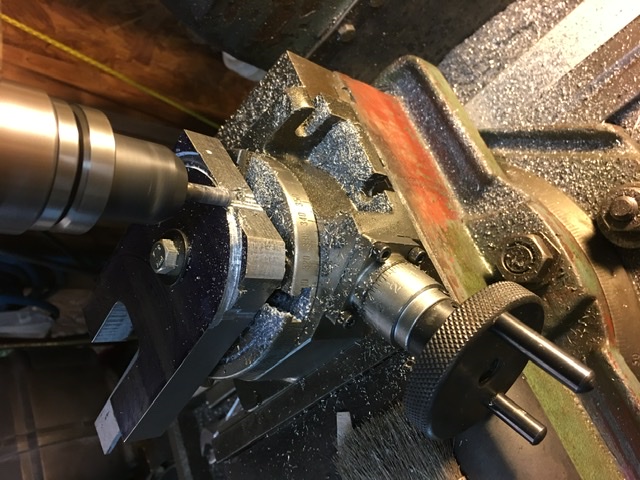
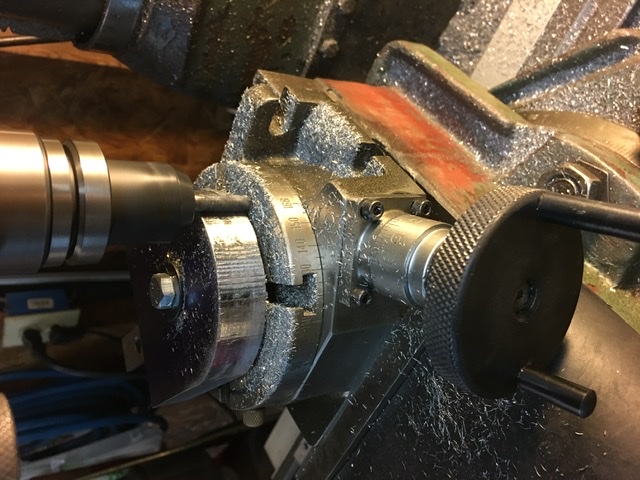
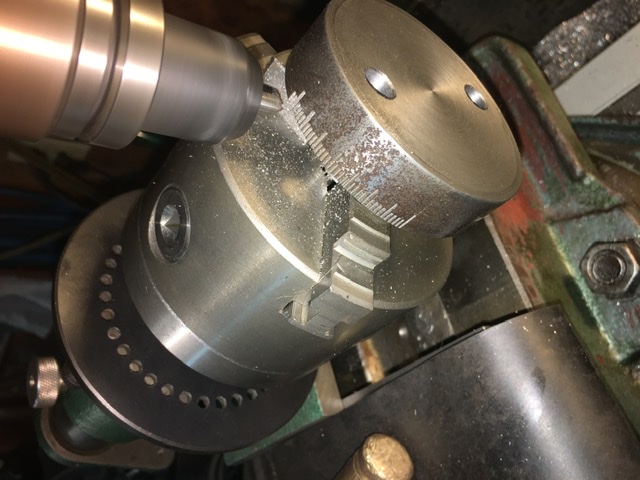
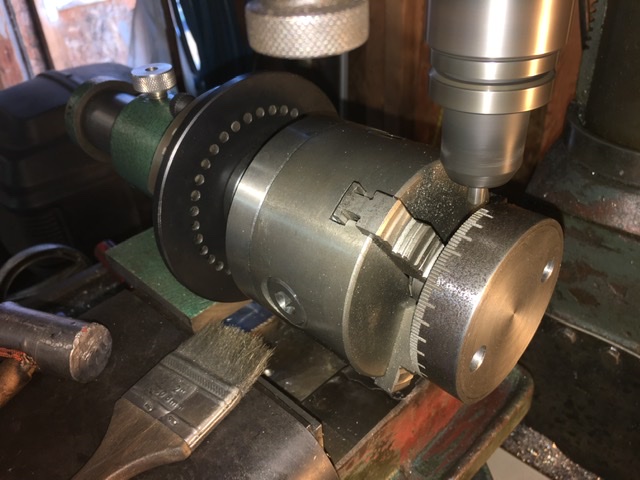
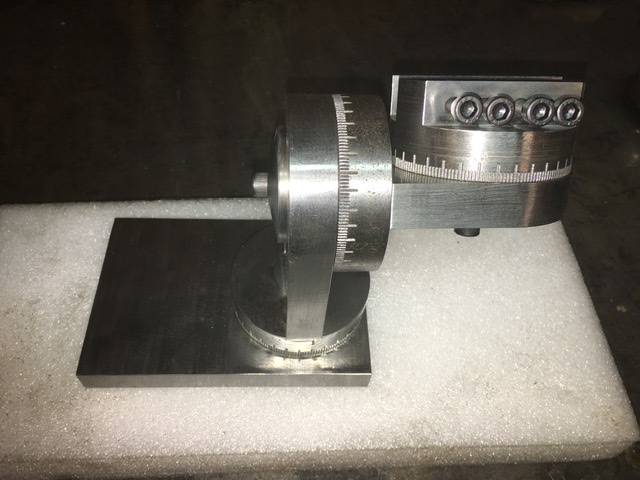
    Once I finished with the turning and milling of the rounds, it was time to make the graduation marks around them. This vise will swivel, so you use graduation marks to set your desired angle. In the prints that were included Ross uses his homemade dividing head/numeral stamping machine to setup for that operation. I pondered on the situation and realized I had a 5C spindex, and it worked out perfect! I got all the graduations done, however I still don’t have any good way to mark the numerals.

    Click image for larger version. 

Name:	EF03846A-0F8A-4182-B992-68D833970C61.jpeg 
Views:	327 
Size:	92.5 KB 
ID:	33210
    Click image for larger version. 

Name:	C17755B7-D248-486A-8EA2-BD642FA0291E.jpeg 
Views:	321 
Size:	91.6 KB 
ID:	33211

    Now it’s time for assembly, and test fitting all the pieces before grinding.

    Click image for larger version. 

Name:	2C0B4CD3-C0FF-4161-8C9C-B67B04A66071.jpeg 
Views:	330 
Size:	81.9 KB 
ID:	33212

    I got a couple of shots of grinding the tool holder, I had more but they’ve disappeared from my card.
    Click image for larger version. 

Name:	74F94498-9668-4499-A381-A54F872744B5.jpeg 
Views:	344 
Size:	97.3 KB 
ID:	33213

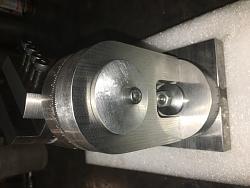
    After a long few days, some mishaps, and yelling later....it’s completed and ready to be used
    Overall I’m happy with the outcome, although I wish I would’ve took my time a bit more on the washers and getting them to a nice polish. The tool was a blast to build and it’s already been put to use along with the angle dresser!

    Thanks for checking it out! And thanks to Doug for allowing the homemadetools community access to his plans!

    Click image for larger version. 

Name:	5566798E-57AC-4BD7-9625-BC9900F6FFAB.jpeg 
Views:	349 
Size:	91.6 KB 
ID:	33214
    Click image for larger version. 

Name:	89185AC2-878F-42B0-A9A2-A073CB9AB5DB.jpeg 
Views:	338 
Size:	84.2 KB 
ID:	33215
    Click image for larger version. 

Name:	ED802514-B8CC-4759-A605-2AA02A5A20DF.jpeg 
Views:	325 
Size:	79.3 KB 
ID:	33216
    Click image for larger version. 

Name:	642E7093-388C-4257-8B6B-0B36CB5AE43E.jpeg 
Views:	324 
Size:	75.0 KB 
ID:	33217

  2. The Following 9 Users Say Thank You to Tek12h For This Useful Post:

    Carnel (Jan 27, 2020), emu roo (Dec 11, 2024), Jon (Jan 23, 2020), nova_robotics (Nov 6, 2023), Paul Jones (Jan 24, 2020), rendoman (Jan 23, 2020), reysl1949 (Jan 27, 2020), rossbotics (Jan 25, 2020), Scotsman Hosie (Jan 26, 2020)

Thread Information

Users Browsing this Thread

There are currently 1 users browsing this thread. (0 members and 1 guests)

Bookmarks

Posting Permissions

  • You may not post new threads
  • You may not post replies
  • You may not post attachments
  • You may not edit your posts
  •