
 LinkBack URL
 About LinkBacks


I am looking for input from those of you who have more experience in what I am planning to try.
I have been wanting a heat treating oven for a while now. Inspired by the recent postings here, specifically in regard to PID controllers, and the need to anneal, machine, then heat treat, some large hardened steel heavy equipment pins, I need to get moving on this project.
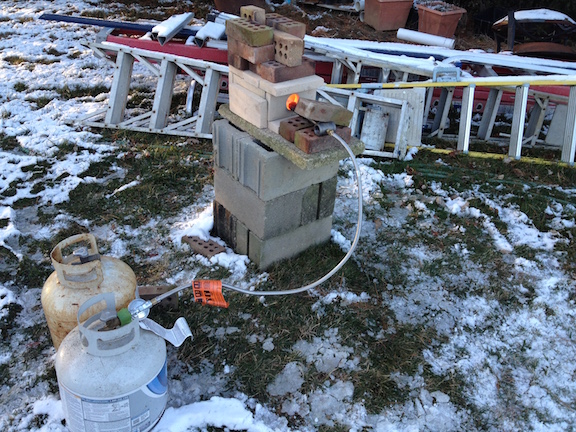
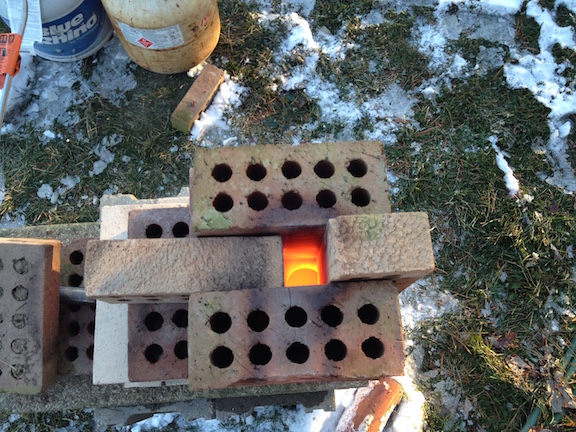
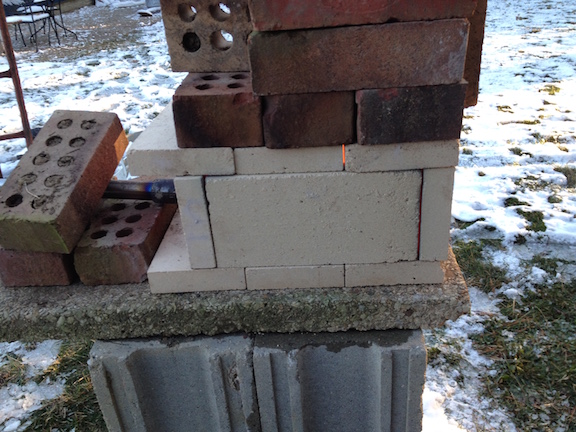
Last week, in search of a quick solution to anneal the pins, with input from ideas on this forum, I put together an atmospheric propane forge burner. Then built a chamber out of hard fire brick held in place by random clay brick I had on hand. It worked great to heat the steel. I measured the temp at over 1700˚f. But it is nearly impossible to control the cooling as required for proper annealing. So, now I have a forge, but still need a good, reliable way to heat treat, specifically anneal hardened steel.
I have a section of ceramic kiln from a school where I used to teach. It was a nice Skutt kiln https://skutt.com/ceramic-kilns/ . These kilns are basically round, 10 sides, and built in sections so you can add or remove sections to make the kiln larger or smaller. Each section consists of 2 rows of 10 bricks 4 1/2 high so each section is 9 tall and about 24" inside. I have one of these sections, with the elements, along with the stand and the top and bottom from the original kiln.

I am thinking I can cut the bricks, to make a smaller oven. I have a plan to cut the bricks so I can get two from each so I will end up with 4 rows of 10.
This would allow me to make two sections about 9 in diameter and 9 tall. I would be able to use just one section, or if necessary, put them together and have a 9 by 18 if necessary for longer parts. The bricks are held together by large stainless steel bands, much like big hose clamps I should be able to reuse these bands also.
Originally I was thinking of laying the oven on the side. Now I am leaning toward standing it up, like the kiln was originally built. It already have the original kiln stand I can just make smaller.
I will also need a PID that has ramping and soaking capability. Currently I am considering one used on a build here about a week ago. Auber SYL 23X2P Ramp and Soak. They have 3 models where X = 4, 5, or 7. I am not certain which s best for my situation. I have eliminated #7. So the choice is between 4 and 5.
https://www.auberins.com/index.php?m...&products_id=4
#4 would work with the many 24vac and a few 208-240 vac contactors that I have on hand, removed from various equipment over the years.
#5 requires Solid State Relays, I have no experience with SSR. I am not afraid to learn, but wonder if it is worth the money since I already have old school contactors I can use.
All opinions are welcome.
Thanks,
John


 Reply With Quote


Bookmarks