
 LinkBack URL
 About LinkBacks


Hi All
I am getting very close to powering my homemade bead roller, ring roller and slip rollers.
I have been collecting the items over a period of time as I didn't want to spend too much money and was in no rush to get it finished as it has been one of those projects you can just drop on, as and when there were bits to do.
I then needed to use the bead roller for one of my steam engines and it was very difficult to guide the work piece and wind the handle. So the decision was made to bump this up to the top of the jobs to do list.
I had most of the consumable items stock material for shafts etc, nuts and bolts but a lot of items came from Ebay when ever it was possible to get at good price and of course the good old skip diving finds.
The skip finds make up most of the project. The main metal base was originally a coil winder which I was given, as it was destined for a skip. I took it apart and kept the bits I thought would be useful and scrapped the rest.
The metal base,motor mounting brackets, metal sockets and the bearing block have all been used in this project.
The power wire was also a skip salvage of off cuts.
The bench top was going to be thrown out at work and I just happened to be in the right place at the right time.
Most of the taper lock pulleys were given to me from a friend who over ordered and couldn't return them.
The main drive is a clutched industrial sewing machine motor. I bought 5 off ebay for £50 (BARGAIN as they all worked)
One of the more expensive items was the foot pedal and linkage which was £15 which I think is very reasonable due to the amount of work I would have had to put in to make one plus material costs.
The metal switch box was purchased from Maplins, when they were closing down for £2 and the toggle switch and rocker switch was bought in a bundle of items from the same supply for pence.
Another expense was the additional taper lock bushes to suit the shaft sizes i intend to use and a couple of pulleys £60-ish.
The pulley block had 2 new bearings £6
Vee belts £20
So about £120 in total to build the motorised table.
The idea is to have a interchangeable system so I can simply bolt the tool required tool to the table slip a vee-belt on the pulley and use it under controlled speed (rpm) hands free to guide the workpiece.
So the photos below show the table build to table top where the tools will be bolted in place. I have ordered the vee-belts so will wait to drill the top until I am happy all works and lines up as expected.
There are a couple of extra thing I need to think about 1st a skid so it can be moved around the workshop as I also intend to bolt the homemade box folder to the same work surface. 2nd is a automatic belt tensioner as the ring roller drive is on the moving part of the machine so each adjustment will loosen the tension on the vee belt. Also the other two machines might need slight tension although the pulley block can be adjusted as the centre is of set by 10mm giving 20mm total adjustment. The motor also can be easily adjusted to take up any tension.

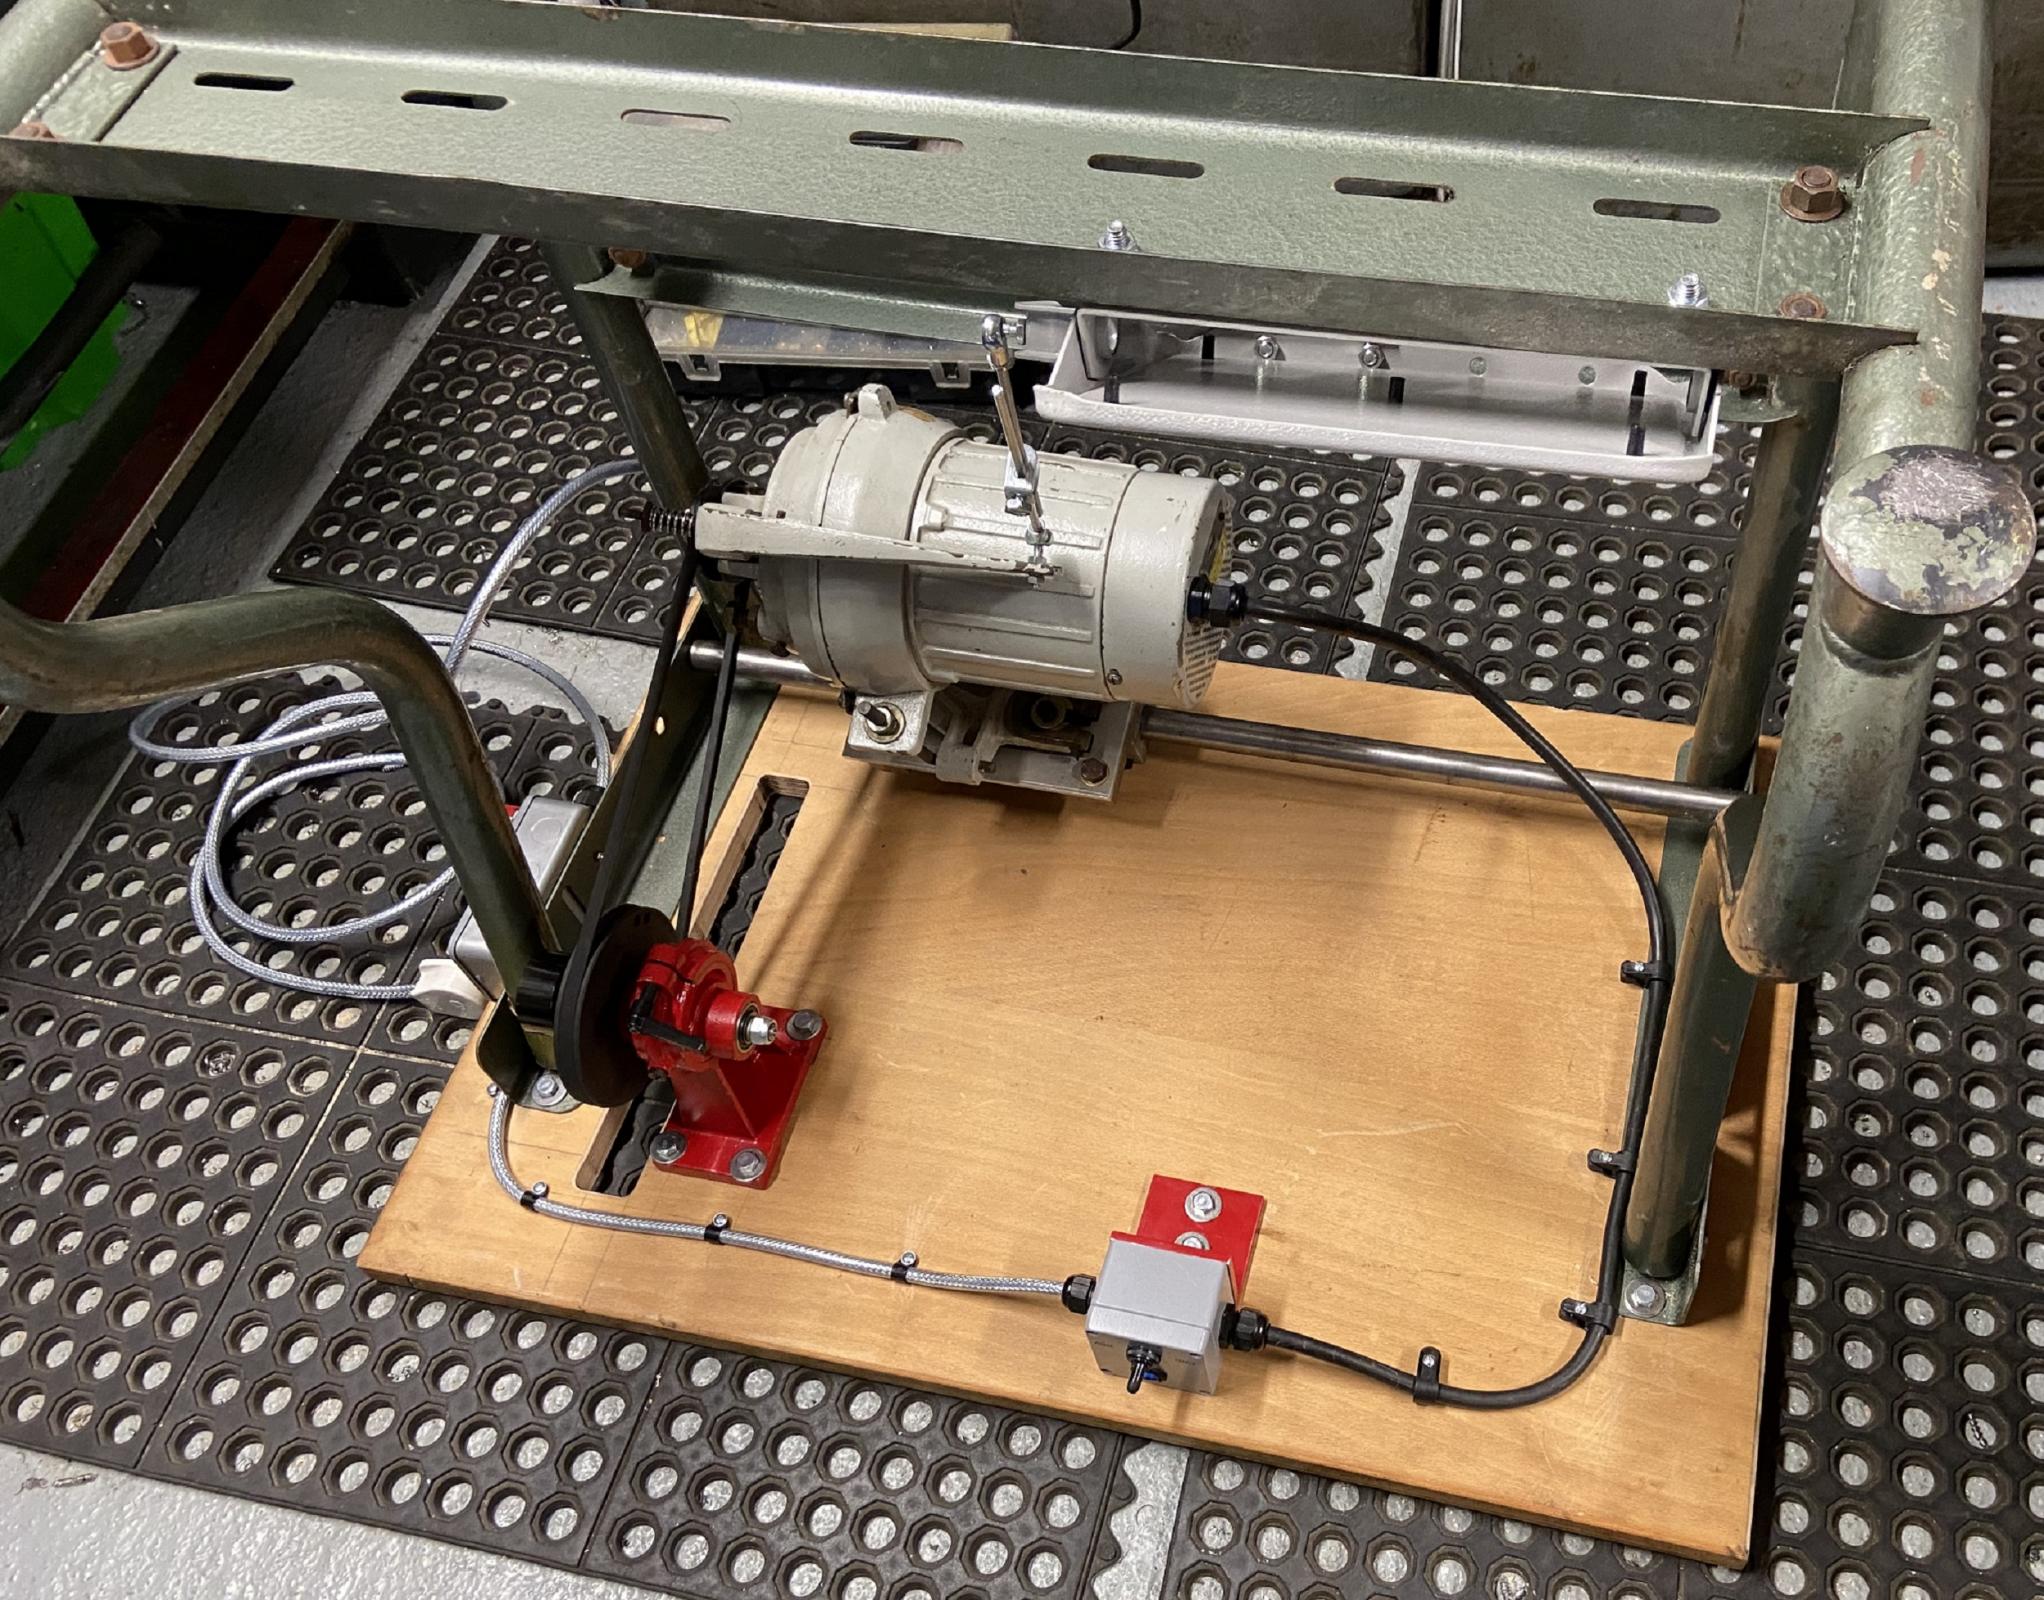
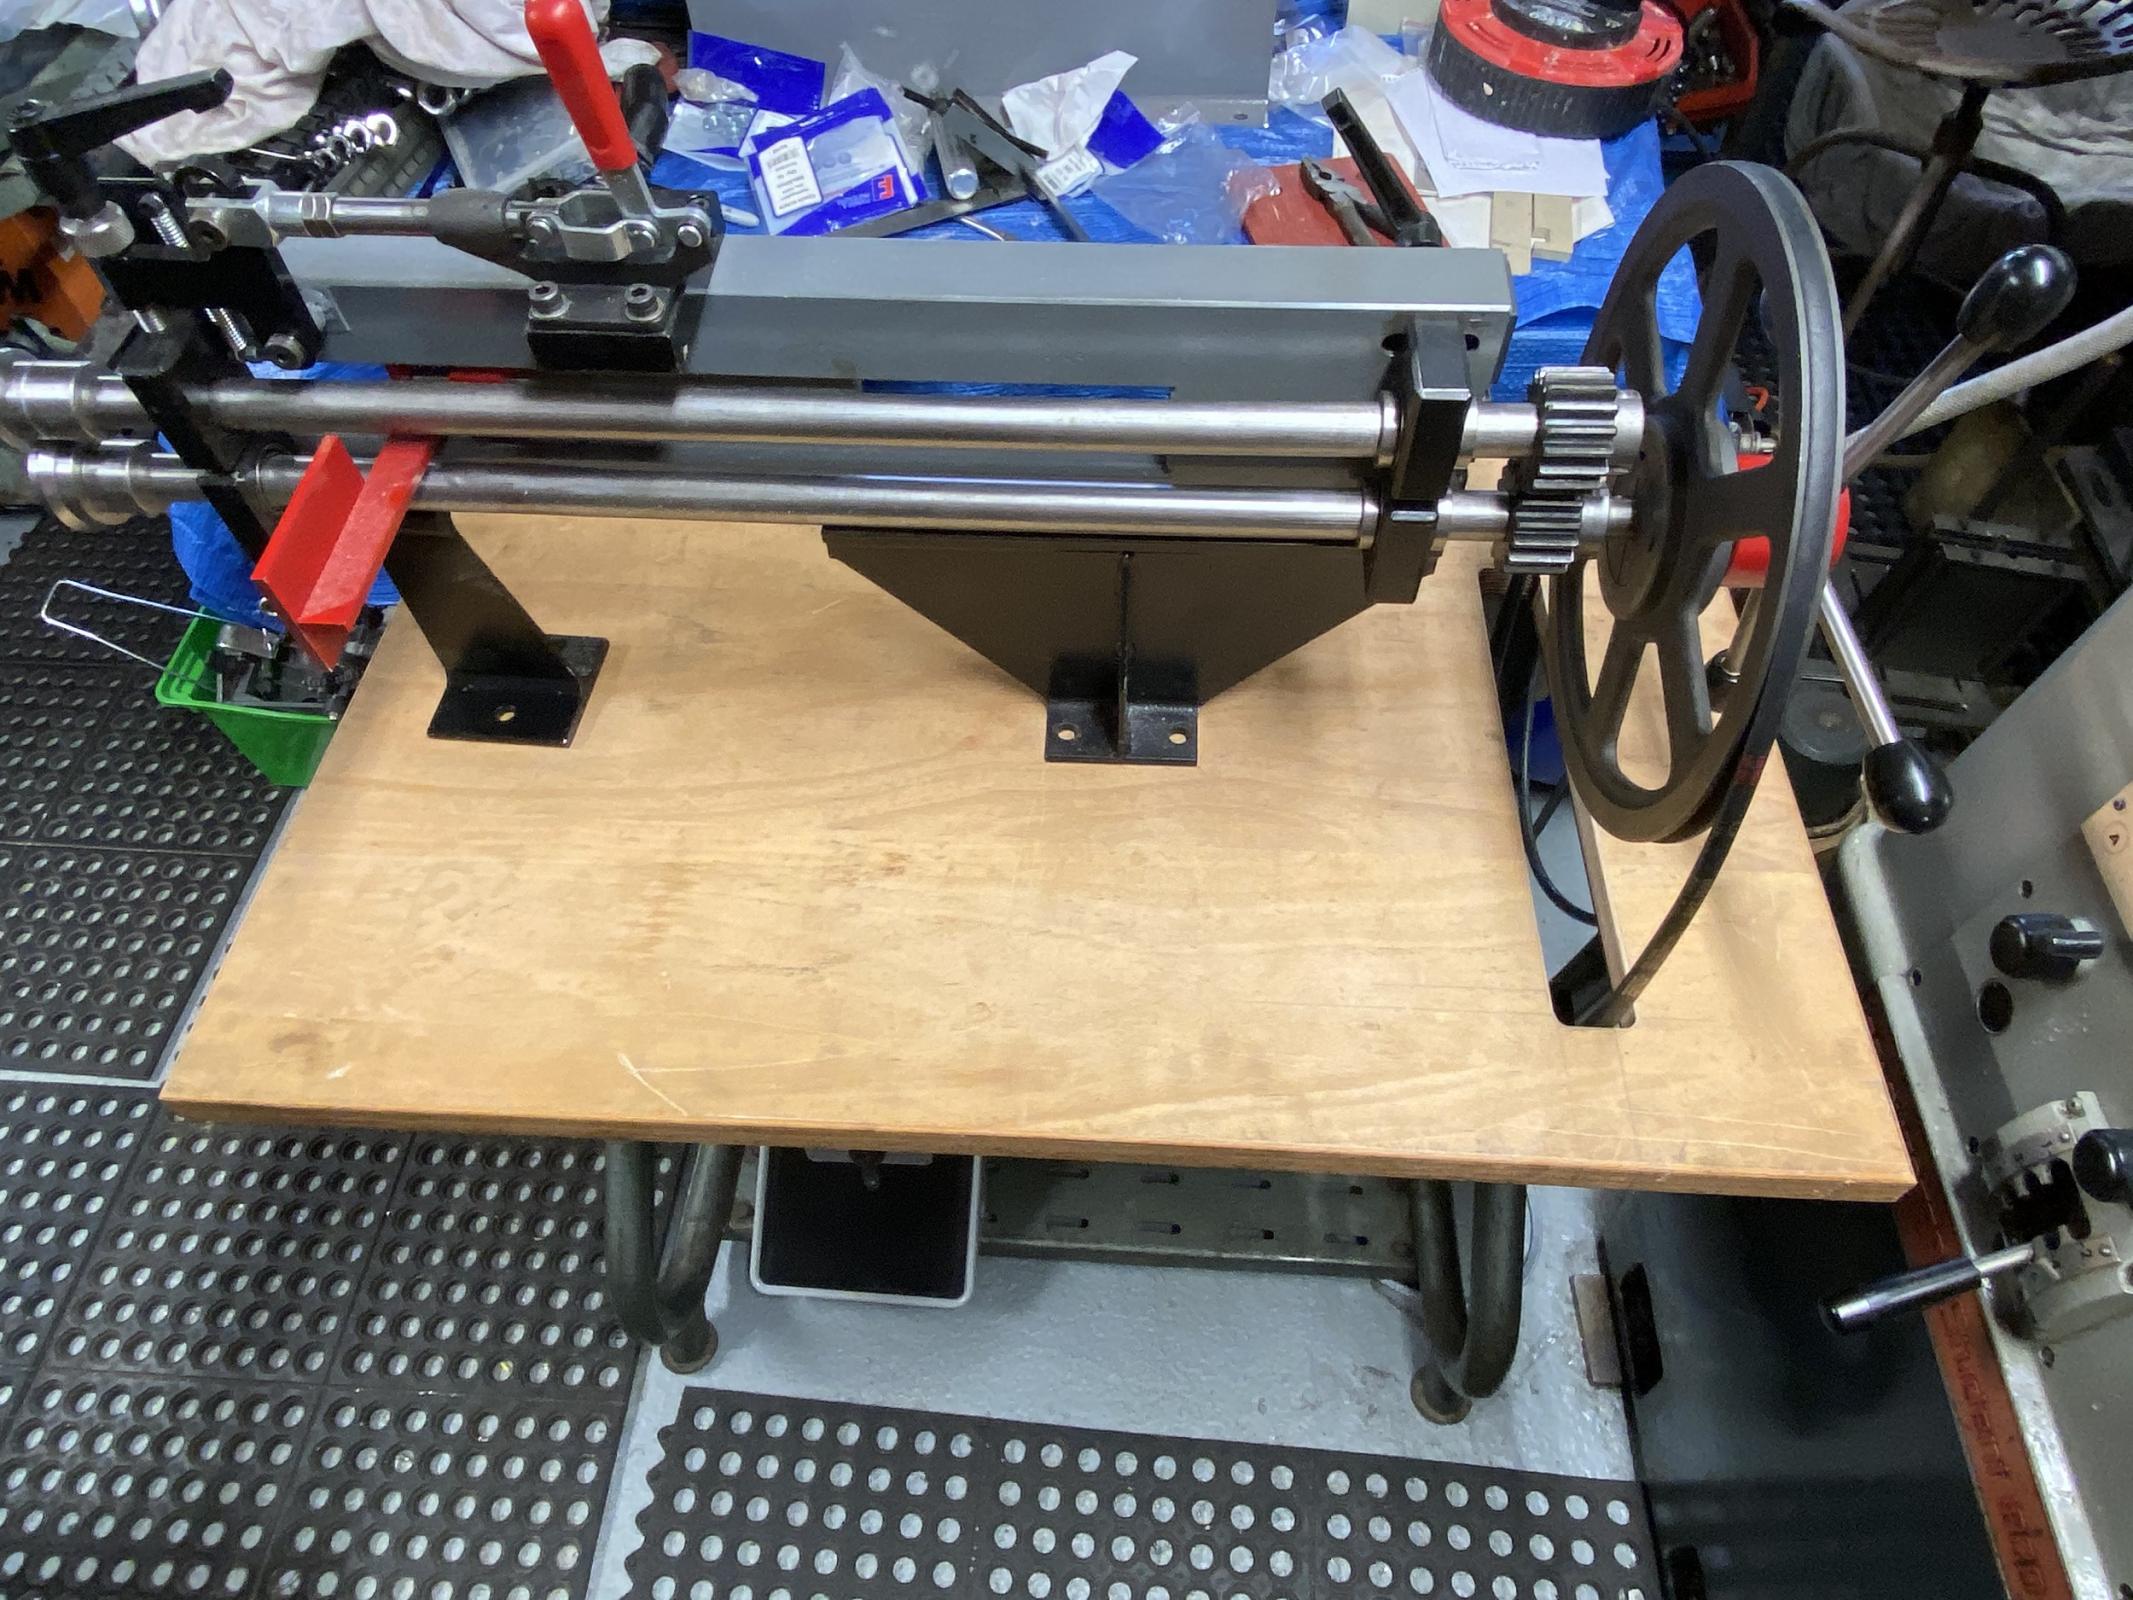
Table ready for tooling to be bolted to work top. The slot allows the vee belt to drive the machine from the bottom drive
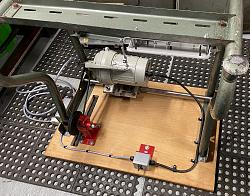
Underside of the table showing motor, switch, pulley block and main metal frame.
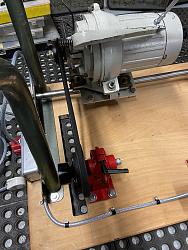
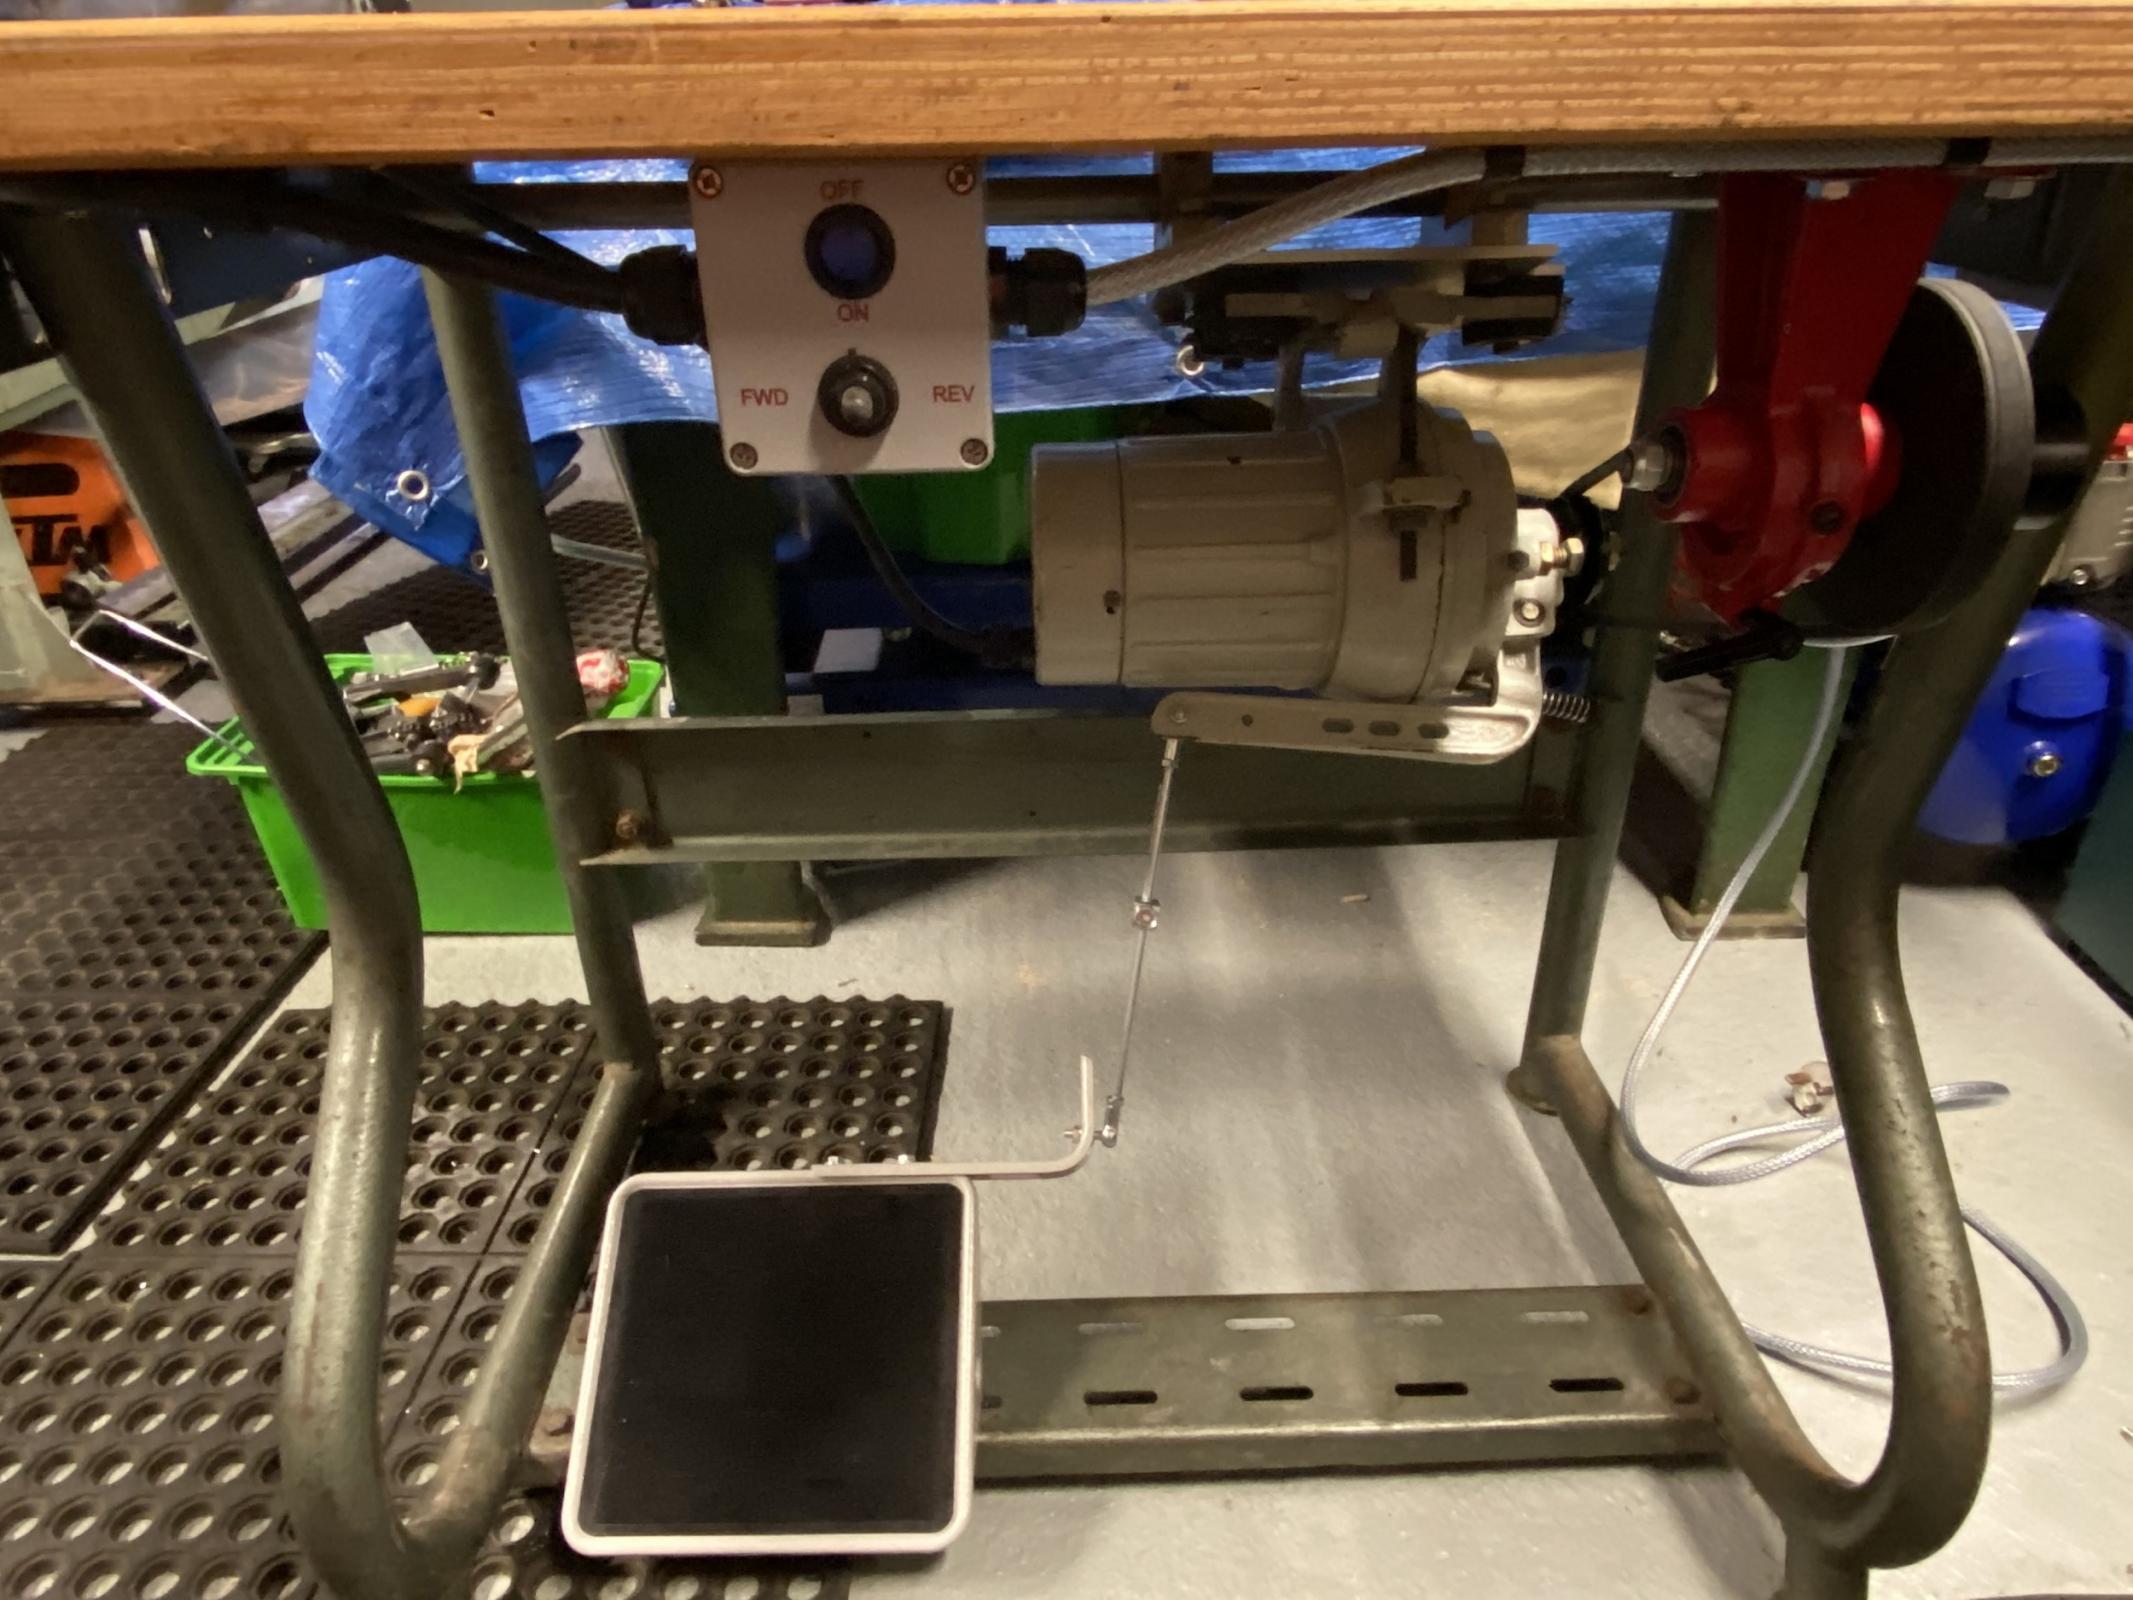
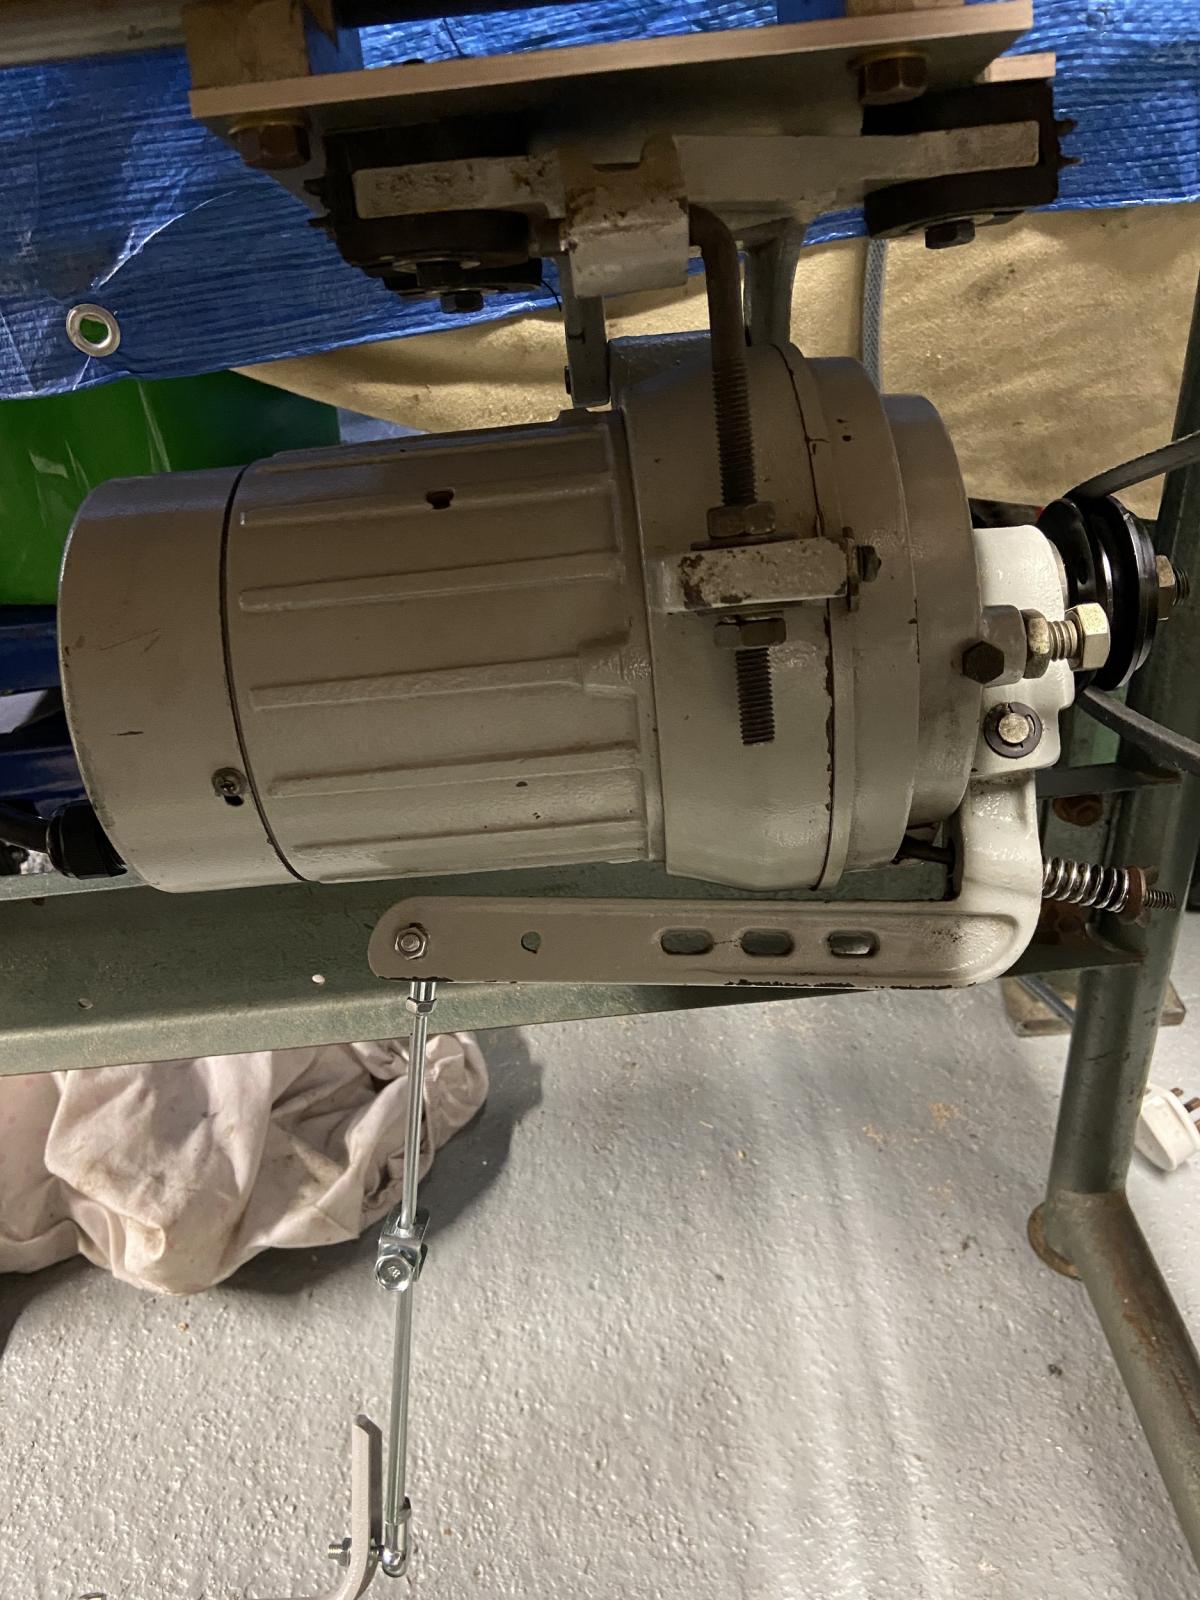
Clutched motor. The belt is off set for a reason, when the clutch is operated it moves the drive pulley towards the motor so the two pulleys are in line when fully engaged.
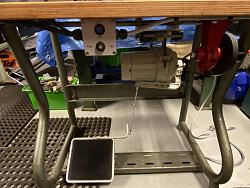
Foot pedal linkage to clutched motor. The linkage is called a Pitman Rod.
Foot pedal.

Industrial clutched sewing machine motor

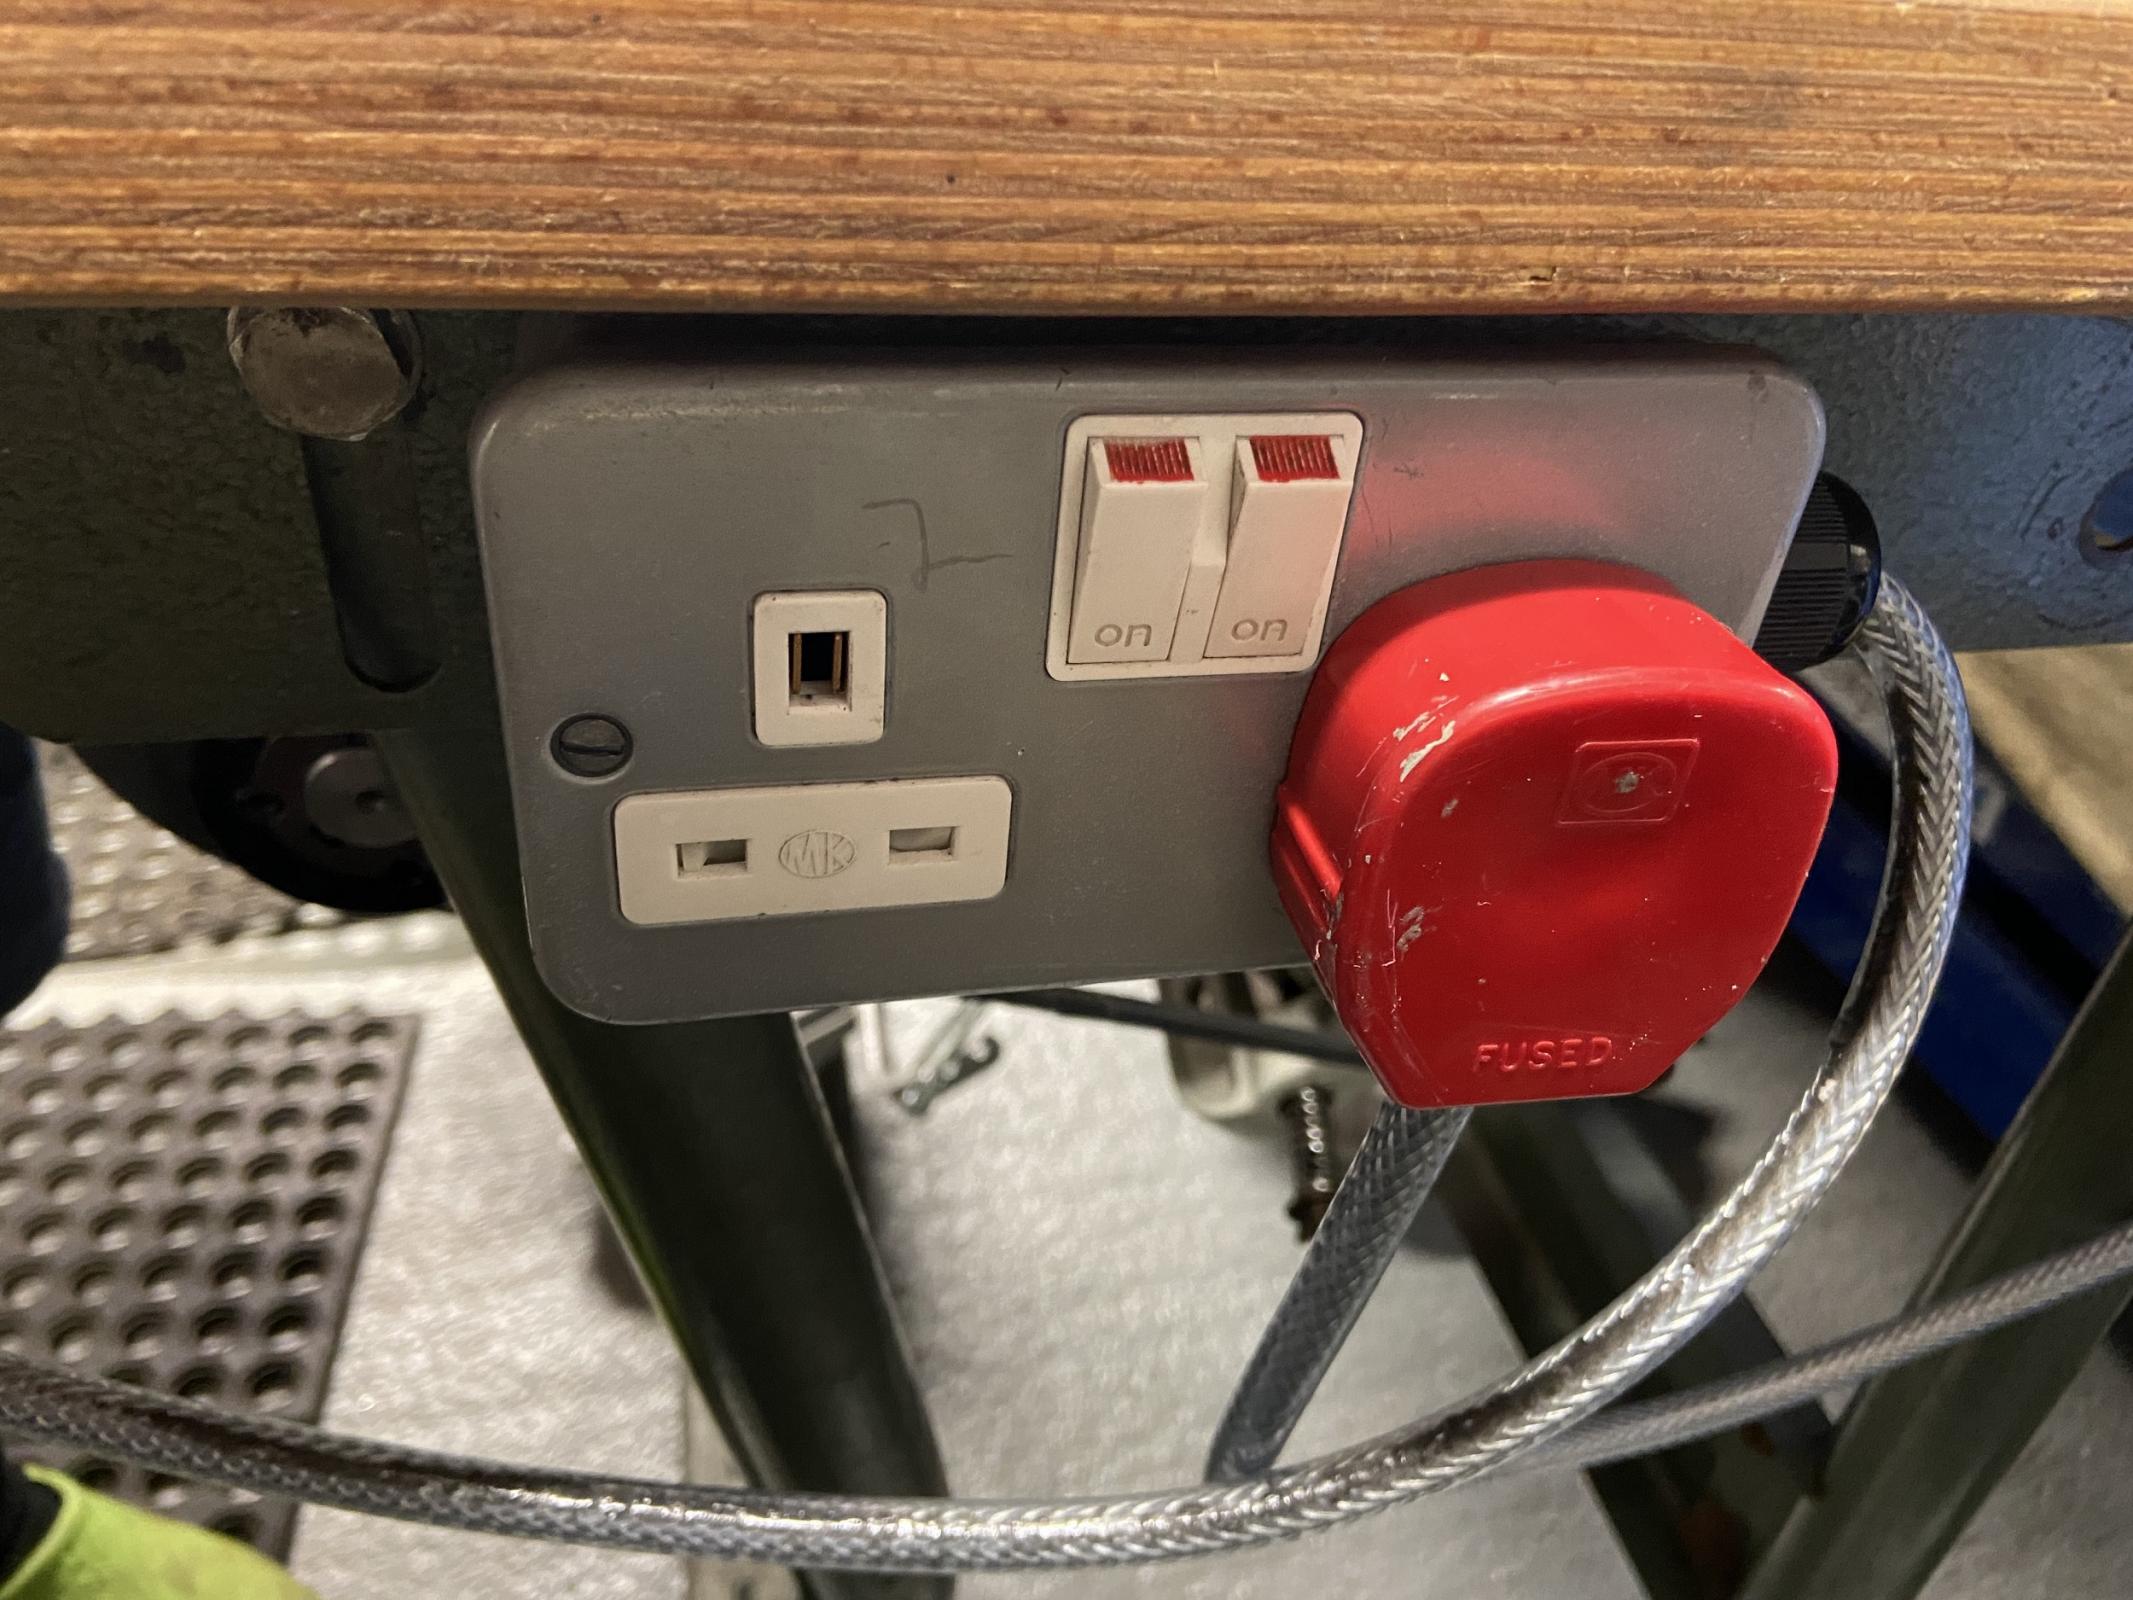
I have added a double socket so a light can be used from the second outlet.
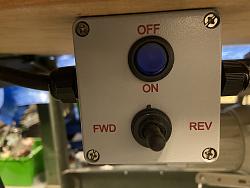
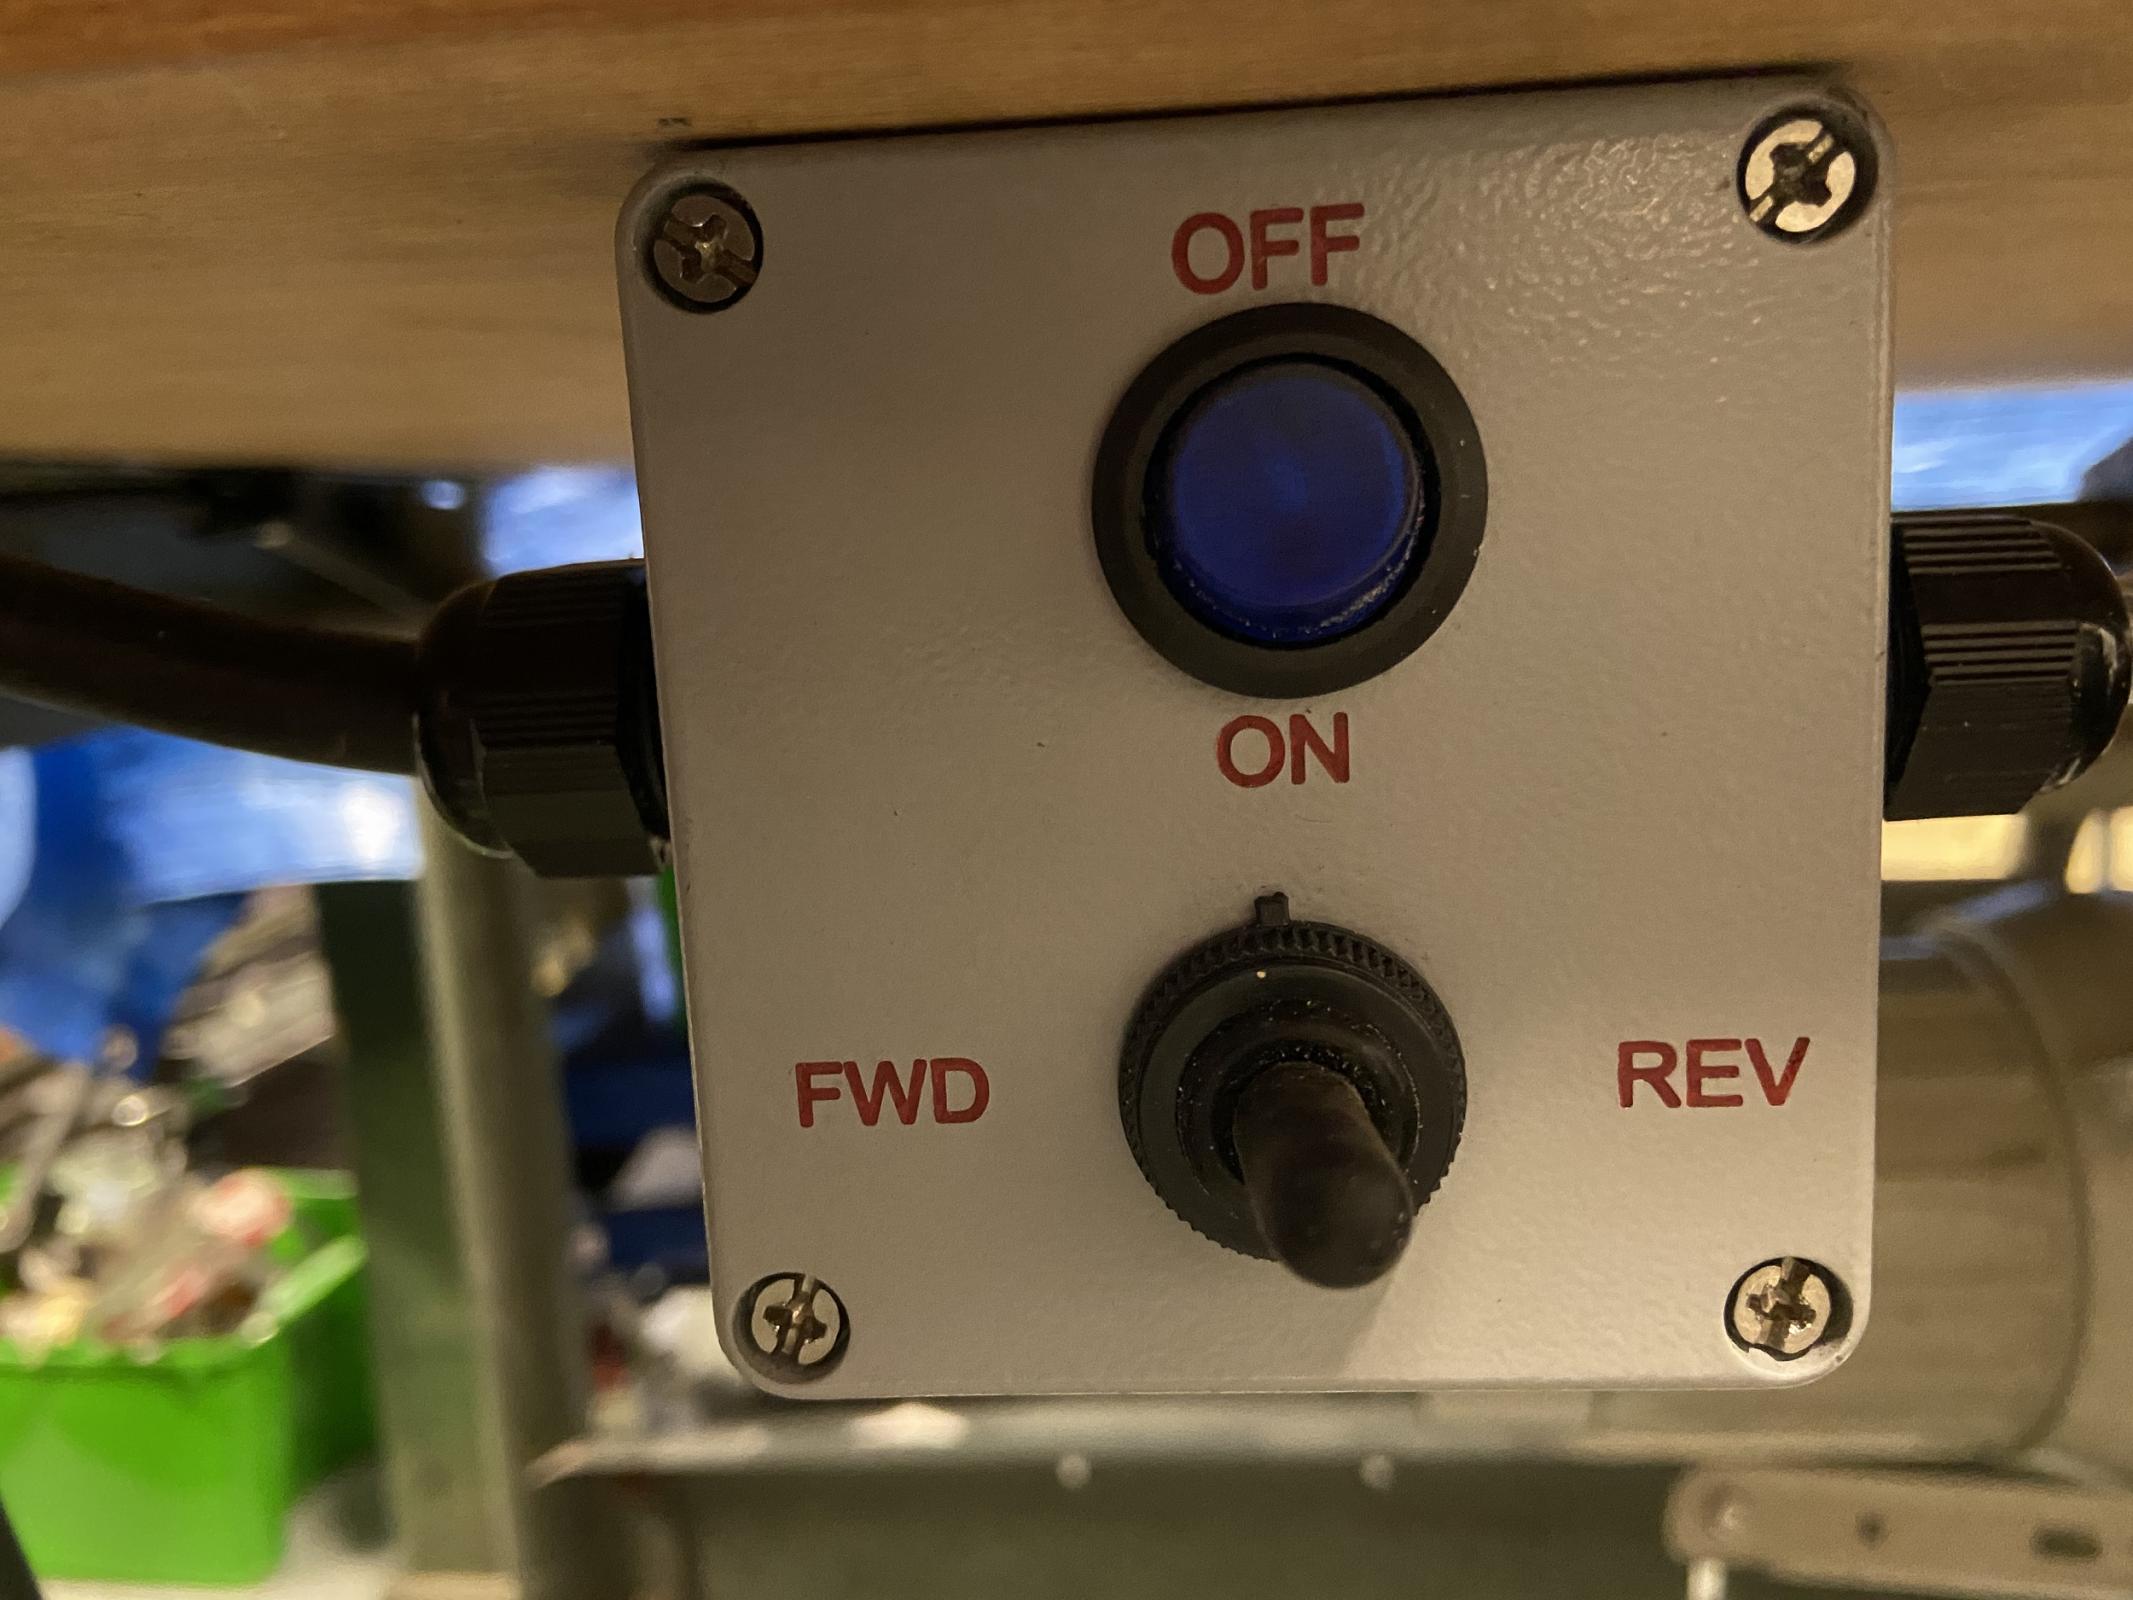
Switch engraved rocker switch ON/OFF and toggle switch for direction
Bead roller just placed in position to show vee belt coming up from bottom drive. (on going) The tooling will be bolted to the table top via 8mm Prong tee-nuts.
I thank you for taking the time to view
The Home Engineer.


 Reply With Quote

Bookmarks