
Originally Posted by
Paul Alciatore

Hi Rick,
You may remember me, Paul Alciatore; we corresponded about an earlier version edge finder you were developing. I do like and support your effort in this arena. Edge finding is an area that definitely can be improved. I am surprised that none of your versions has been picked up by a manufacturer.
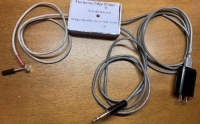
I am looking at your web document in the above link and am a bit confused. The schematic, which is shown multiple times in that document, perhaps to make reading it easier, shows four wires that are connected to the spindle, the body of the machine, and perhaps to the part itself. But it is not clear which wire is connected where.
I am guessing that the two connections labeled "to machine body" are connected at the vicinity of the part (on the table or in a vise). But how? Are they just connected together at that connection point and then that connection is made to the part or the table/vise. Or perhaps one goes to the part and the other to the table/vise so Rpart is seen between them. This is not clear.
Then the spindle connection is equally unclear. Again there are two wires. But no clarification as to how they are connected to the spindle, to the body of the machine near the spindle or to the probe itself.
Perhaps the analysis makes this clear, but I haven't gone through it yet.

 LinkBack URL
 About LinkBacks


 Reply With Quote


Bookmarks