
 LinkBack URL
 About LinkBacks


Hey this is not a flash tool but will get you out of trouble if you are having problems dismantling a glass slider in order to replace a broken door glass pane with a second hand one. I was helping out for a 90.y.o. mowing her lawn when i heard a distinctive crackling noise through my ear muffs when slowed the honda to empty the catcher. B. Looking online and UTUBE I could find nothing to help. The closest was a guy, Mexican I think, who taped some perspex to the outer perimeter rim of broken pieces of glass: all the rest were simply about removing the door no matter what search description I typed. The new price for the glass fitted ranged up from AU$600 where I could buy a second hand one from $20 to $120. I found one the correct size,an old imperial one, and travelled 20 kilometres to purchase it. By the way the cheapest new one was 45 kilometres travel and I had to deliver it or a call out fee was applicable. (I knew I could replace the glass as I had previously replaced (about 20 years ago) a new door glass by using a block of wood with a hardwood dowel inserted.) There is a myriad of sizes out there so "beware the purchaser"!
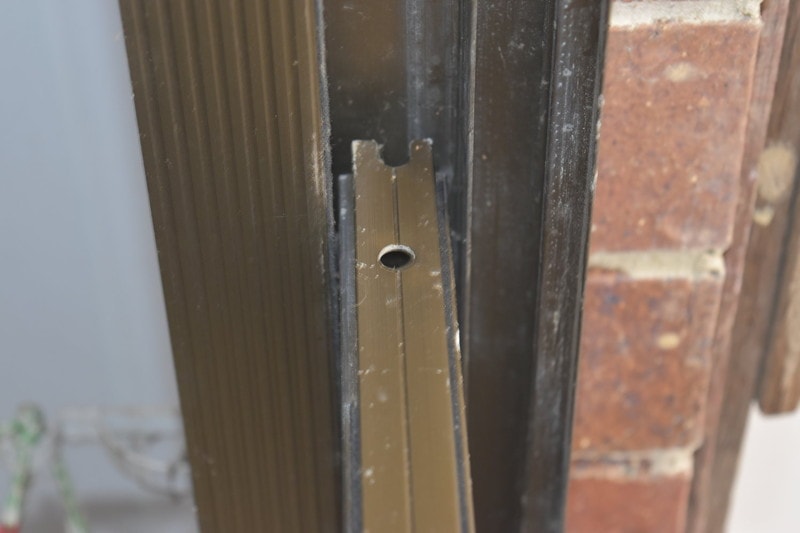
The sliders have screws on the inside aluminium extrusion: one top & one bottom.These are easily accessed, but this simply removes just one edge and it is not possible to replace glass at that point. (There was another problem with the door in question and that was the door was way too tight in the frame but we wont go there here). The exposed side of the slider has a coverstrip that is not accessable to burglers etc. The door has to be removed from its track to enable the cover strip to be moved enough to access one screw then go to other end and do the same for that screw. It is best to lay down a cheap tarp or painters cloth to catch the crystals if it is a pre-laminated door.
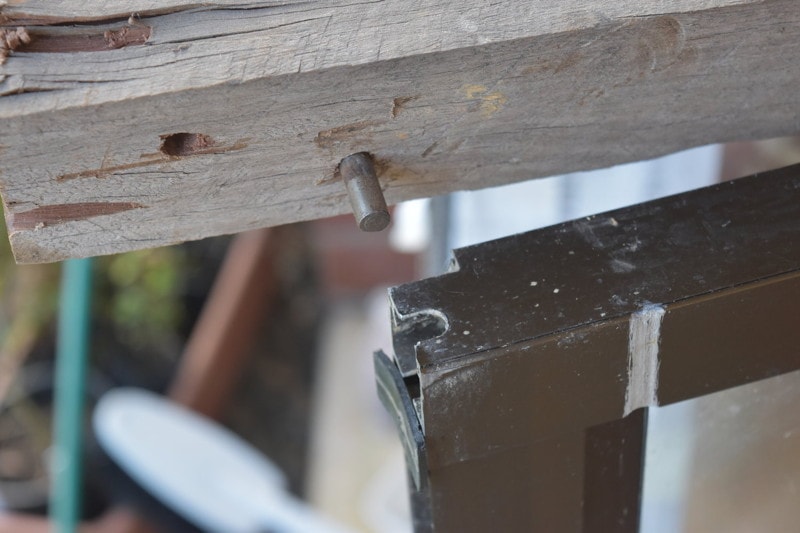
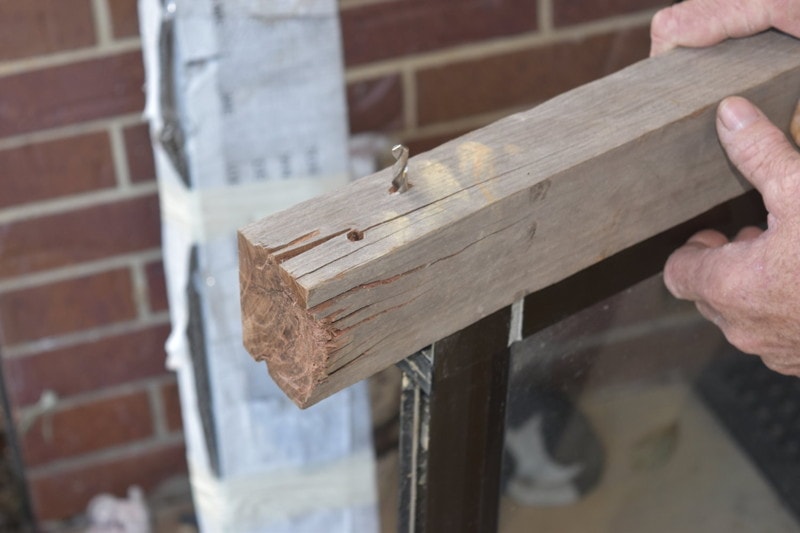
There is a rounded slot, similar to routing a stopped groove or trench in wood,that enables pressure to be applied to gain screw access. I then tapped on one end with a claw hammer & then the other (you can leave one corner in tact if the glass is exactly the same size). This time the door was over 30 years old with spider webs, dust, and mud wasp deposits and other gross rubbish glueing the security section to the main frame (extrusion). The dowel disintegrated. I tried then a Phillips head screwdriver with the cross cut off and rounded at the tip. It was not going to budge the cover strip and I risked totally ruining the frame. I came up with this tool, for one use only as you can see.The drill bit is a good fit to the slot : in this cade 8mm & the 3 by 2 is well seasoned hardwood.
The seal is removed along with all the crystals and cleaned accordingly. Remove the glass from the second hand door in the same fashion.Place the seal of the old door (for my one it was shorter than the original too tight one-I cut off some of the frame styles) on it and use a light smear of Vaseline to assist in reinsertion. Then reassemble & reinstall.
The owner was most pleased and also she now had laminated glass to boot.
My first post & I don't seem to be able to ad pics so any suggestions/advice would be appreciated.


 Reply With Quote

Bookmarks