Free 186 More Best Homemade Tools eBook:  
Get 2,000+ tool plans, full site access, and more.

User Tag List

Results 1 to 3 of 3

Thread: Specialized Angle Blocks

  1. #1
    Supporting Member Karl_H's Avatar
    Join Date
    Sep 2013
    Posts
    800
    Thanks
    609
    Thanked 436 Times in 236 Posts

    Karl_H's Tools

    Specialized Angle Blocks

    I needed to make some specialized angle blocks for another project – specifically, I needed to take a 4 inch bar and make one side 7.5 degrees to the opposite side. Since the piece was so long, I needed to support it at both ends, so using my standard issue angle blocks was not going to work.

    Joe ∏ addressed this 3 or 4 years ago, and I would like to present it again.

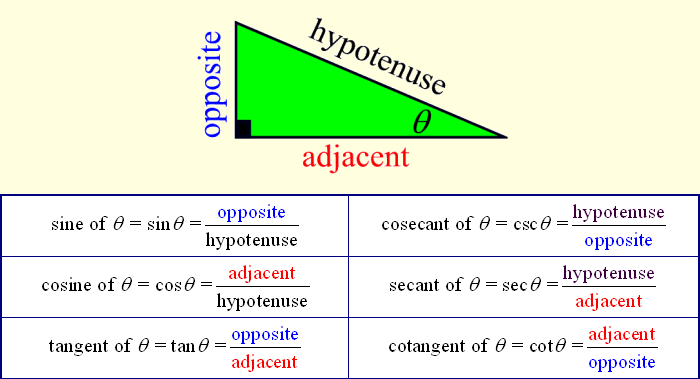
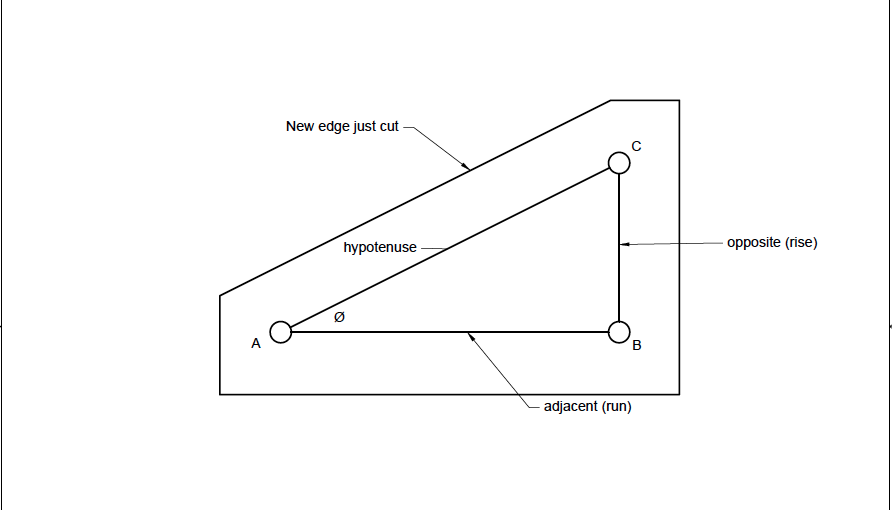
    First of all, this graphic summarizes most of what we need to know about trigonometry:

    Specialized Angle Blocks-trig-functions.png

    (I printed this picture and I keep it handy for reference.)

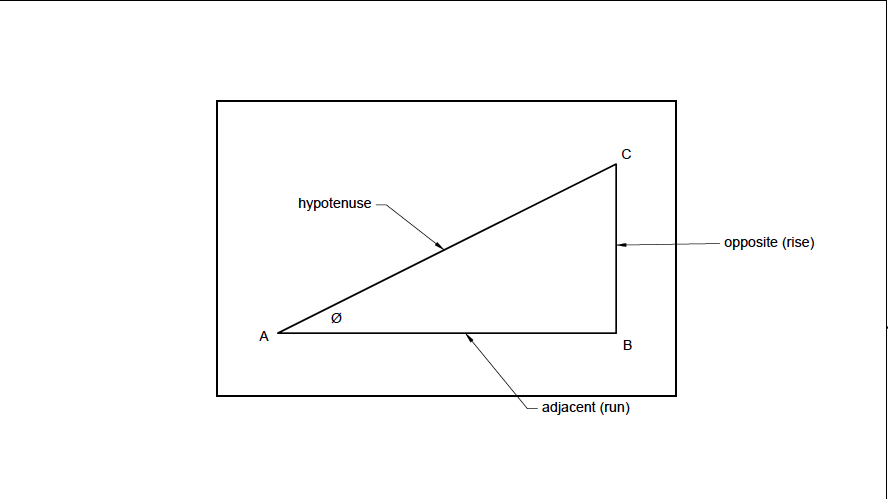
    For my project, I started with two identical squared pieces of aluminum, and I needed to find points A, B and C so that the angle Ø was 7.5 degrees. By squaring the blanks first, I was confidant I could use any of the edges to indicate my angle plate later.

    Specialized Angle Blocks-1.png

    The length A to B doesn’t matter much, so I chose 1.5 inches. (As you will see later, it is important that the distance between A and C is less than the width of your vise jaws.)

    Using the definition tan Ø = opposite/adjacent, and multiplying both sides by adjacent, you get the formula tanØ x adjacent = opposite.

    Plugging this in my calculator: 7.5 [tan key] x 1.5 = 0.1975

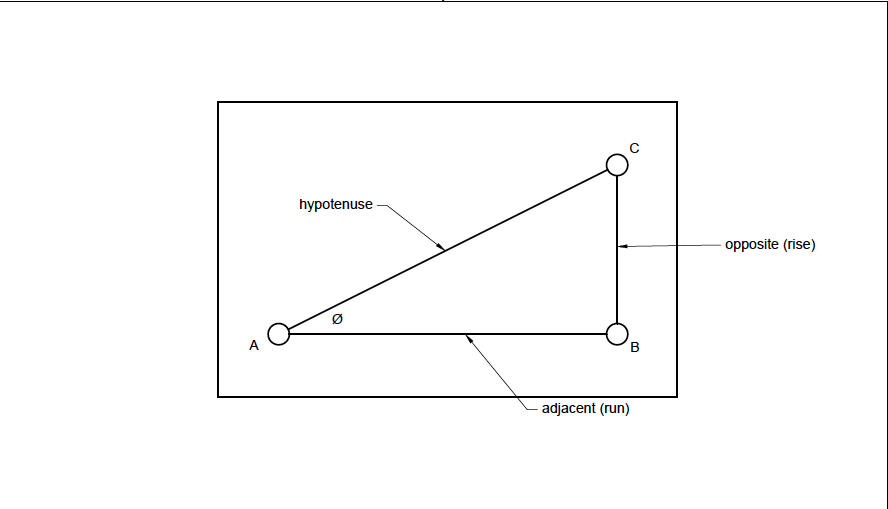
    So I drilled and reamed the hole at A, ran the x-axis 1.5, then ran the y-axis 0.1975 and drilled and reamed hole C.

    For this case, there is no need to put a hole at B. In other instances it might be beneficial so you could put pins in either A & B or in B & C to register your soon to be cut angle off the edge a part or off the slots in your table.

    Specialized Angle Blocks-2.png

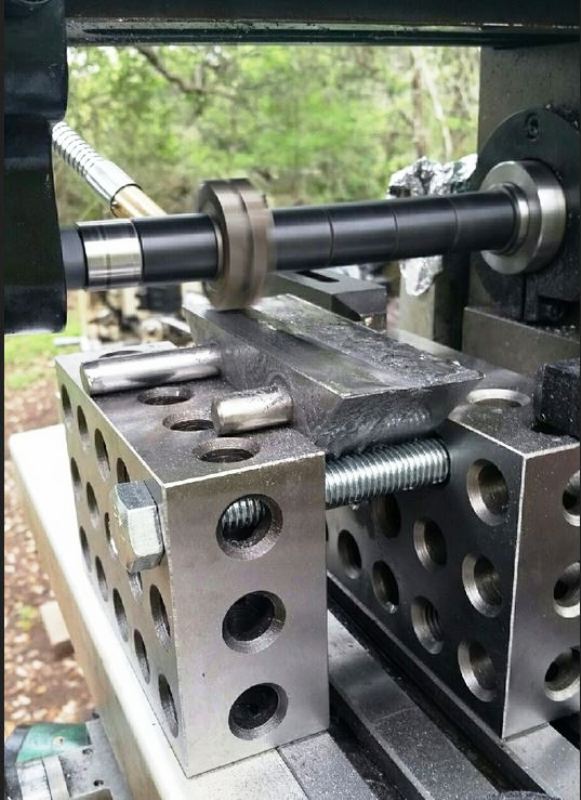
    I then put pins in both holes. In my case, I was making 2 identical parts so I put the pins through both blanks.

    Specialized Angle Blocks-1-pins-blanks.jpeg

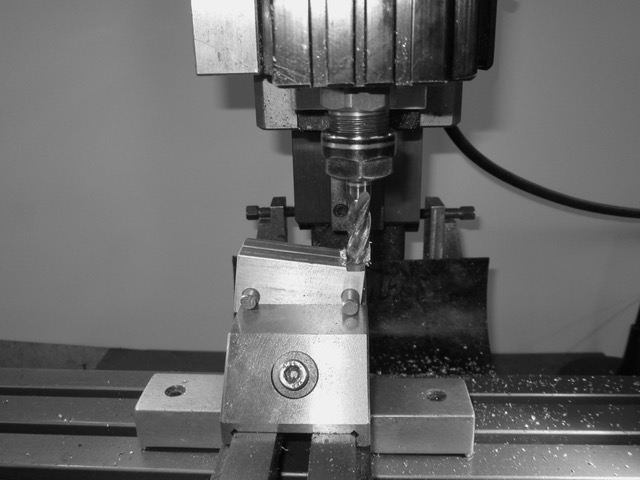
    The pieces are then placed in the vise with the pins firmly against the top of the jaws. (You could add parallels on top of vice if the pins are too far apart to fit on your vise, but that decreases the amount of material you have to hold them.)

    Specialized Angle Blocks-2-blanks-vise.jpeg

    Then I simply cut the pieces to give me a precise 7.5 degree angle block.

    Specialized Angle Blocks-3.png

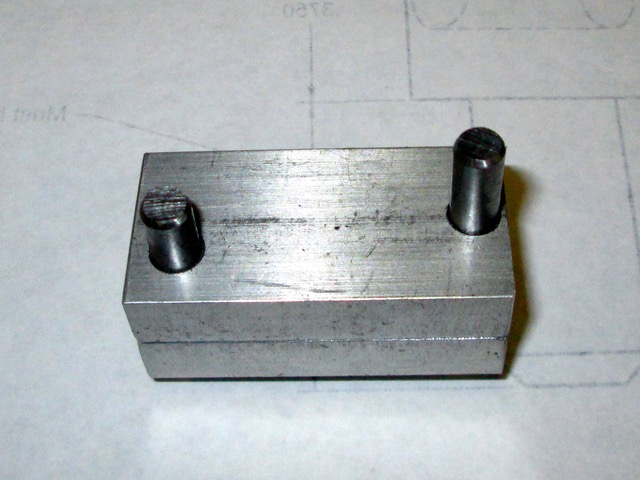
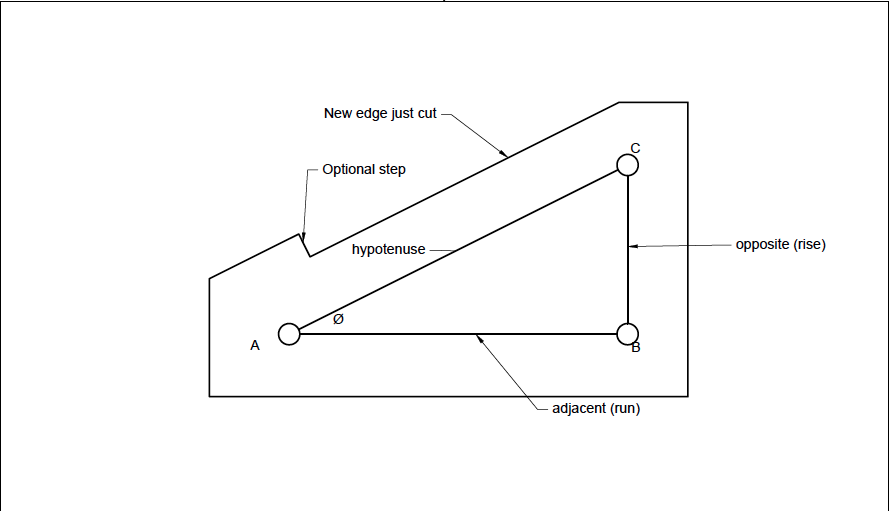
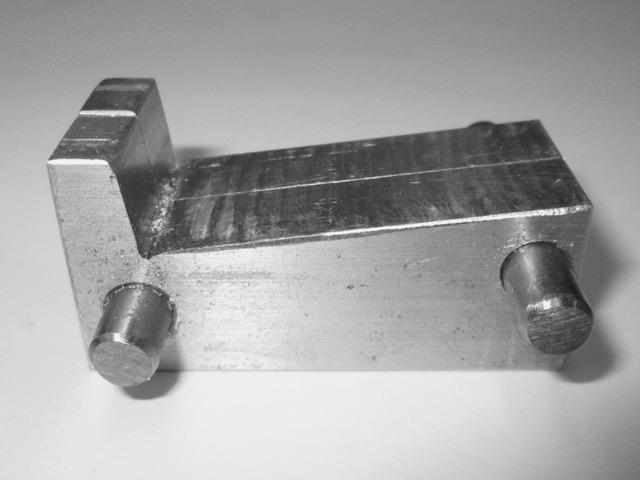
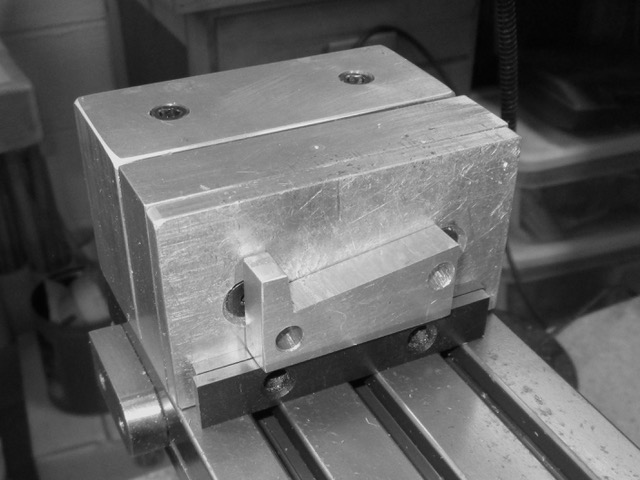
    I wanted to be able to register both blocks on my table, so I added an optional step in them.

    Specialized Angle Blocks-4.png

    Specialized Angle Blocks-3-finished-blocks.jpeg

    And here is one of the blocks in place.

    Specialized Angle Blocks-4-block-place-use.jpeg

    I hope this was interesting and that it helps you tackle another project.

    186 More Best Homemade Tools eBook

  2. The Following 6 Users Say Thank You to Karl_H For This Useful Post:

    Carnel (May 12, 2020), JoeH (May 12, 2020), Jon (May 14, 2020), mwmkravchenko (May 11, 2020), Saltfever (May 13, 2020), Toolmaker51 (May 11, 2020)

  3. #2
    Content Editor
    Supporting Member
    DIYer's Avatar
    Join Date
    Aug 2013
    Posts
    3,056
    Thanks
    772
    Thanked 1,852 Times in 1,653 Posts


    Thanks Karl_H! We've added your Specialized Angle Blocks to our Measuring and Marking category,
    as well as to your builder page: Karl_H's Homemade Tools. Your receipt:


    2000 Tool Plans

  4. #3
    Supporting Member Crusty's Avatar
    Join Date
    May 2019
    Location
    Dry Gulch, Tx
    Posts
    749
    Thanks
    220
    Thanked 846 Times in 324 Posts

    Crusty's Tools
    I made mine with removable dowel pins in the long face for work stops because it could give me another option for use. Mine are general purpose 45º blocks but I made them essentially the same as you made yours. The trig and dowel pins method can make angles so close to the desired angle that the error can't be measured with the usually available tools. I used a couple of 2-4-6 blocks bolted together and clamped to the table as a vise since mine were too big for my milling vise.


    Specialized Angle Blocks-finished.jpg Specialized Angle Blocks-planing-long-face.jpg

    I keep thinking of comments to add. If I do it again I'll fill all three holes with dowels as long as the stack is thick and just drive 2 out far enough to set that angle on the vise so that the stack is always pinned together until all 3 faces are planed.


    186 More Best Homemade Tools eBook
    Last edited by Crusty; May 9, 2020 at 05:51 PM.
    If you can't make it precise make it adjustable.

  5. The Following 2 Users Say Thank You to Crusty For This Useful Post:

    Karl_H (May 9, 2020), Toolmaker51 (May 11, 2020)

Thread Information

Users Browsing this Thread

There are currently 1 users browsing this thread. (0 members and 1 guests)

Tags for this Thread

Bookmarks

Posting Permissions

  • You may not post new threads
  • You may not post replies
  • You may not post attachments
  • You may not edit your posts
  •