-
5 Attachment(s)
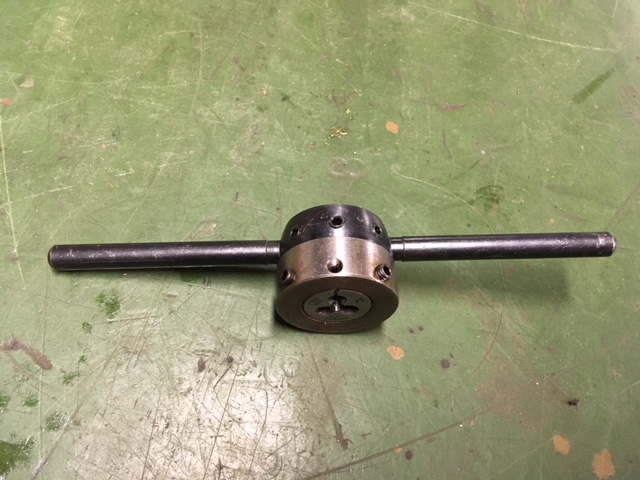
Split die setup
Hi All
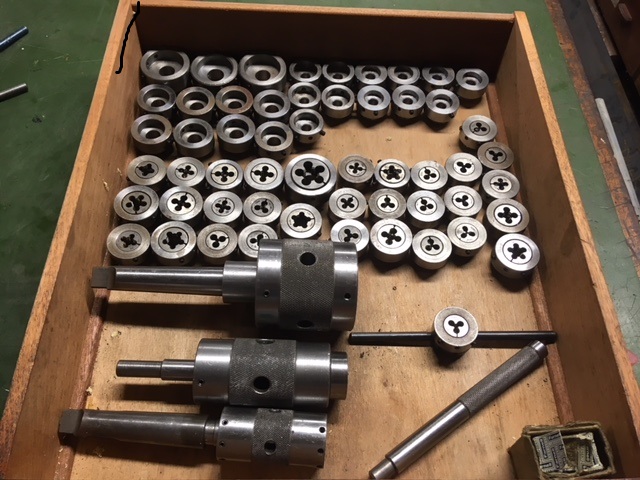
This is the setup I use when using split dies.
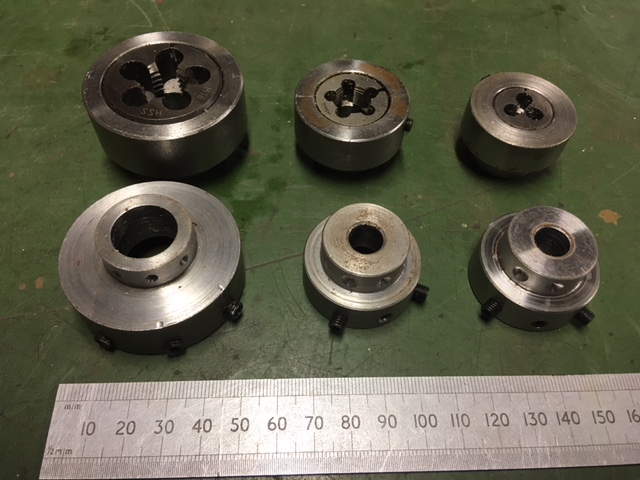
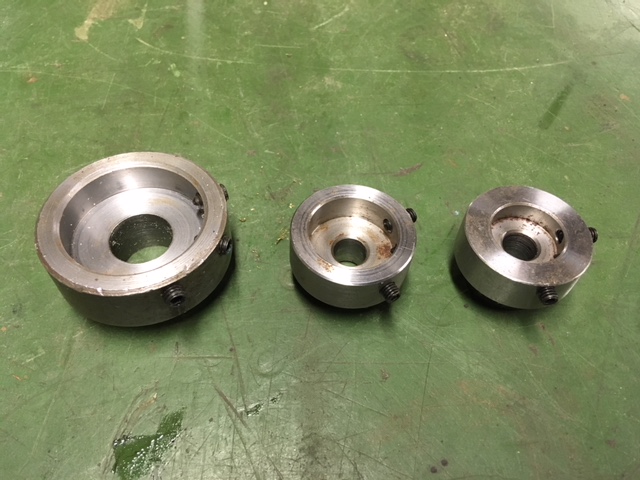
About 20 years ago I spent a couple of days machining a couple of tailstock die holders and different size split die holders.
The idea is once the split die is set and cutting the correct desired size/fit, it remains in its own die stock holder until such time it becomes damaged or blunt.
If I haven’t got the correct size die set I simply grab another die stock holder and set it up. After it has been set and used it is stored in the draw for the next time it is required. The obvious advantage is once set, you know it will cut the same again and again. These can also be used in a standard hand held die stocks but the biggest advantage is the time and effort they save.
Attachment 21535Attachment 21536Attachment 21537Attachment 21538Attachment 21539
The Home Engineer
-
I guess I'm having a hard time understanding the advantage here.... Are you controlling the depth of the thread cut? Is it faster to change the outer die holder to the main die holder?
I rarely do an external threads, so hence my lack of understanding.....
I have a large tapping jig that I have set up with various tap sizes.....
-
Hi bimmer1980
Thank you for your interest.
Split dies can be adjusted to give different types of fit. You can either spread the die open which makes the cut thread a tighter fit in the female mating part or compress the die to make the die cut more material hence making the thread slacker/looser fit. So, they need to be set each time they are removed from the stock. To overcome this, I made the die holders. This makes life a lot easier especially if you are constantly needing to change thread sizes. Set once and leave once set.
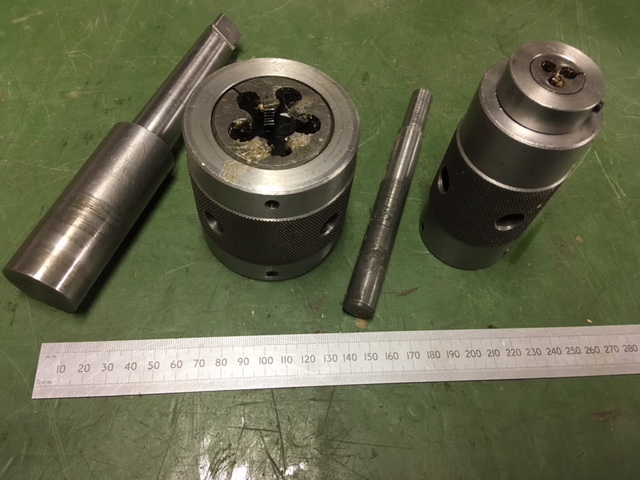
There are three grub screws set around the outer diameter of the stock. The two outer plain cup screws compress the die and are set at 90 degrees apart and the middle cone grub screw fits in to the split in the die so when screw in spreads the die. This screw is set between the other two screws is set centrally to the plain cup screws (45 degrees either side)
So as a time saver once I have set the die to the desired fit I leave it set and it then cuts the same fit/size that I require every time.
I hope this helps your understanding if not please get back in touch
link to an adjustable diehttps://www.regalcuttingtools.com/pr...djustable-dies
Many thanks again
The Home Engineer
-
Excellent explanation! I just learned something new. Makes perfect sense now. Thanks!!
-
All of my split dies have a screw made in which is there to set the die's depth of cut.Generally speaking about the only time one of these would ever have to be adjusted would be as the die gets older and worn.or if there is a blind hole in a casting which has become worn to oversize. then I will slightly expand the die a few thou STD. afterwards. About the only time I Can see where the individual die holders would be useful for me would be to use a 2" die in a 2,1/2" die stock.or a 1,1/2" in a 2" stock.I do have several 1" dies but doubt if I would ever want to use one of them in a 1,1/2" die stock.
The only time I ever needed to under size a male thread was if I were going to sent them for hot dip galvanizing. I rarely encounter the need to go up or down in thread class
I can see where if someone had to do a lot of threading across the 3 classes where these adapters would come in handy as they could be marked as such.
-
As a model maker I am constantly making individual components with different thread sizes. Some components have more than one size. So, having a system that I can quickly change sizes between without having to set every time works great for me. Also, less chance of cutting a thread to slack or too tight. Split dies can vary so once I am happy that the correct fit is made on a test piece I just leave alone knowing when I use it, they will cut the way I want them to. Most of the sizes are the small end so I don’t bother screw cutting. The larger dies I tend to be used as chasers, once I have screw cut I use them to finish the form of the thread.
Thank you again for your comments
The Home Engineer
-
I fully understand your application. I rarely ever use dies for threading except for possibly just enough to get a full nut of a rod or to extend existing threads which is even less frequent. I mostly just use dies for clean up or as a finishing cut when single pointing, or as I said when I need to undercut for galvanizing
-
WOW.......That set is to die for.... nice job.
-
The Home Engineer
I must say that is a very nice set up. The greatest advantage I see in it is The die never comes in contact with anything but the part to be threaded and no chance of dulling or chipping you dies. Very nice set up and very easy to make ones own set.
Thank you for sharing
Nelson
-
<!-- BEGIN /var/www/html/homemadetools/protected/modules/zeus/views/tool/postUpdate.php -->
Thanks thehomeengineer! We've added your Split Die Setup to our Tapping and Threading category,
as well as to your builder page: thehomeengineer's Homemade Tools. Your receipt:
<div id="blocks">
<div class="block b1 pngfix">
<div class="bimg">
<div>
<a href="http://www.homemadetools.net/homemade-split-die-setup">
<img src="/uploads/209229/homemade-split-die-setup.jpeg"/>
</a>
</div>
</div>
<div class="head pngfix"></div>
<div class="left pngfix"></div>
<div class="right pngfix"></div>
<div class="blockover b1 pngfix">
<div class="title">
<a href="http://www.homemadetools.net/homemade-split-die-setup">Split Die Setup</a>
<span> by <a href="http://www.homemadetools.net/builder/thehomeengineer">thehomeengineer</a></span>
</div>
<div class="tags">tags:
<a href='http://www.homemadetools.net/tag/die'>die</a> </div>
</div>
</div>
</div>
<!-- END /var/www/html/homemadetools/protected/modules/zeus/views/tool/postUpdate.php -->