Free 186 More Best Homemade Tools eBook:  
Get 2,000+ tool plans, full site access, and more.

User Tag List

Results 1 to 6 of 6

Thread: Torsional beam mini lathe stand

  1. #1
    Supporting Member DIYSwede's Avatar
    Join Date
    May 2019
    Location
    Stockholm, Sweden...
    Posts
    634
    Thanks
    415
    Thanked 799 Times in 319 Posts

    DIYSwede's Tools

    Torsional beam mini lathe stand

    Finding a way of making my lathe unconditionally steady, constantly aligned and positively unwarped on any table just about anywhere, I stumbled upon HMT member "Xynudu", Rob's page:
    My home made metal lathe bench

    There he cleverly adapts the method used in the workshops of naval ships :
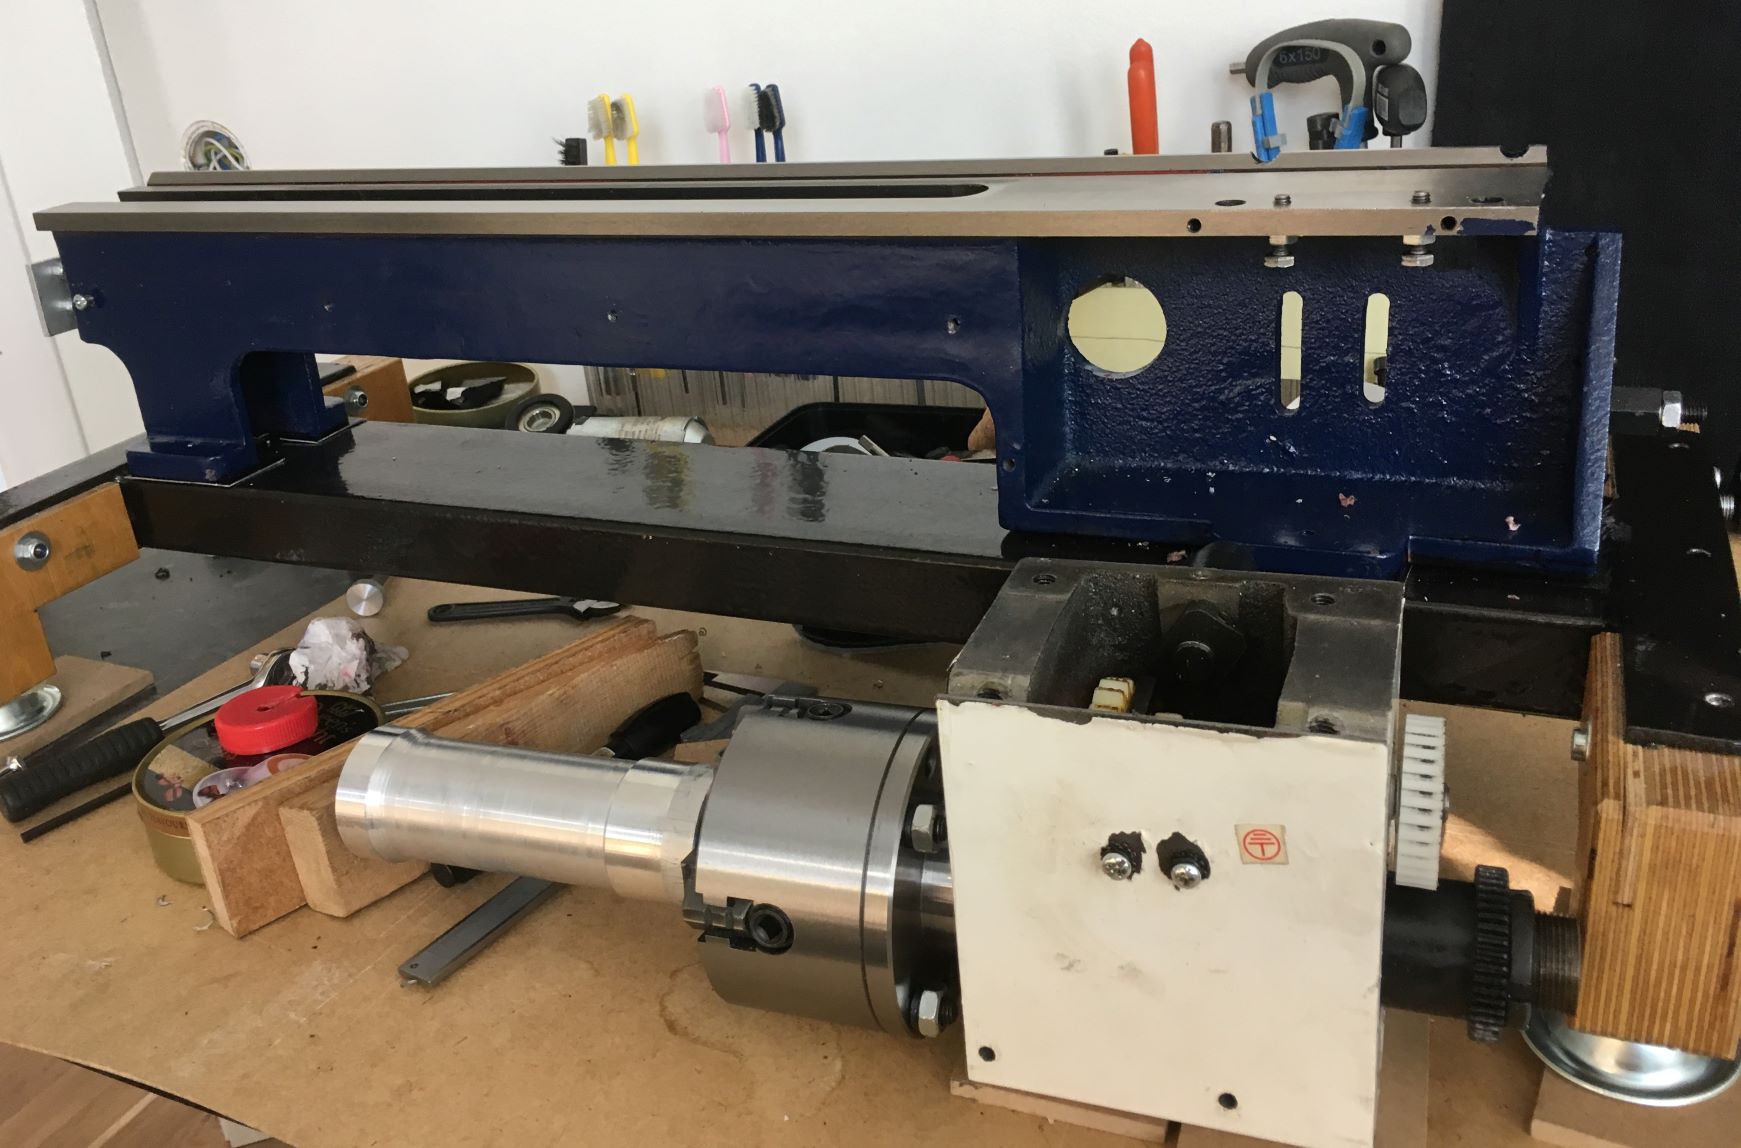
    The Spanning Beam or (more appropriately) Torsional Beam Lathe stand,
    whereby the lathe is bolted atop a rectangular box girder (wider and longer than the lathe's footprint) to avoid all bending and twist,
    adding two rigidly fixed legs at the headstock, and at least 1 leg at the tailstock end that can "float" on top of a heaving,
    yawing, pitching deck without transmitting those motions up into the lathe's bed.
    (Guess this puts the common "Lathe Leveling" discussion to rest? -Level isn't necessary, "Twist-free lathe bed" is crucial)

    "Simple, quick and cheap to make" sounded just fine to me, and as Providence would have it:
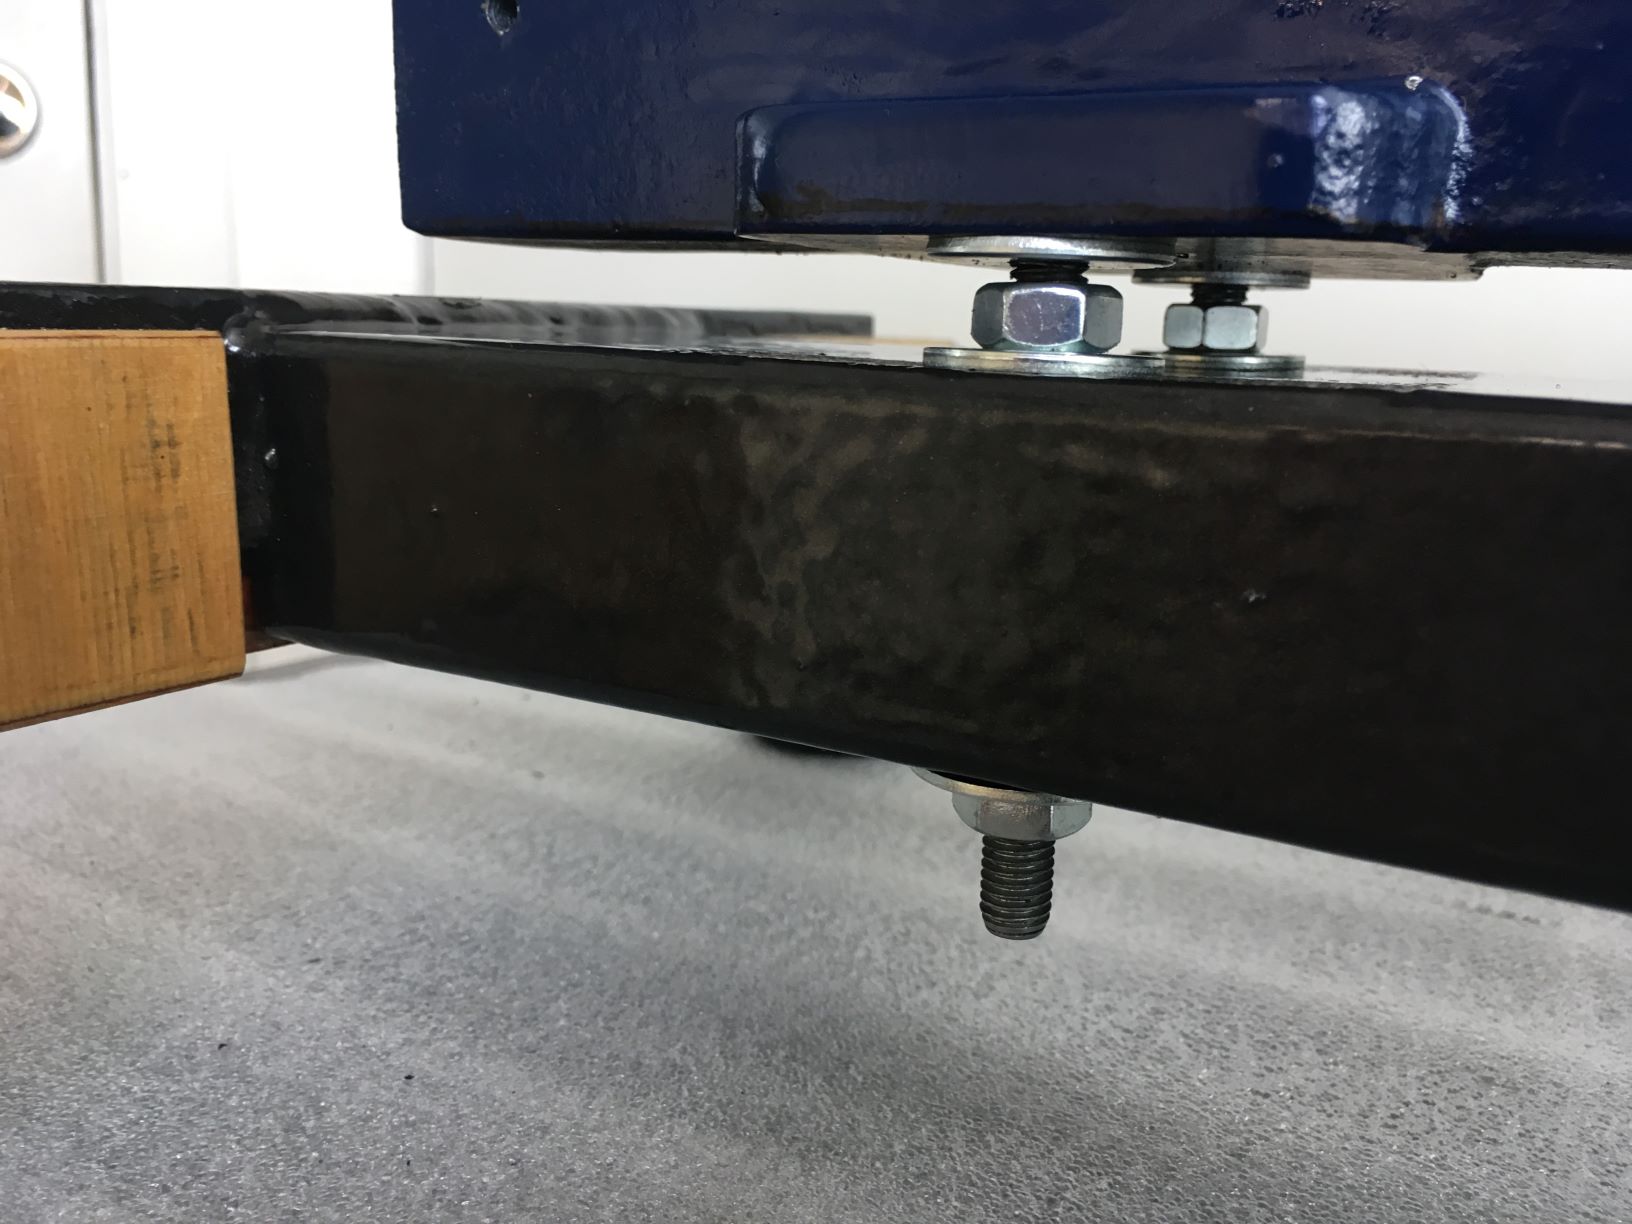
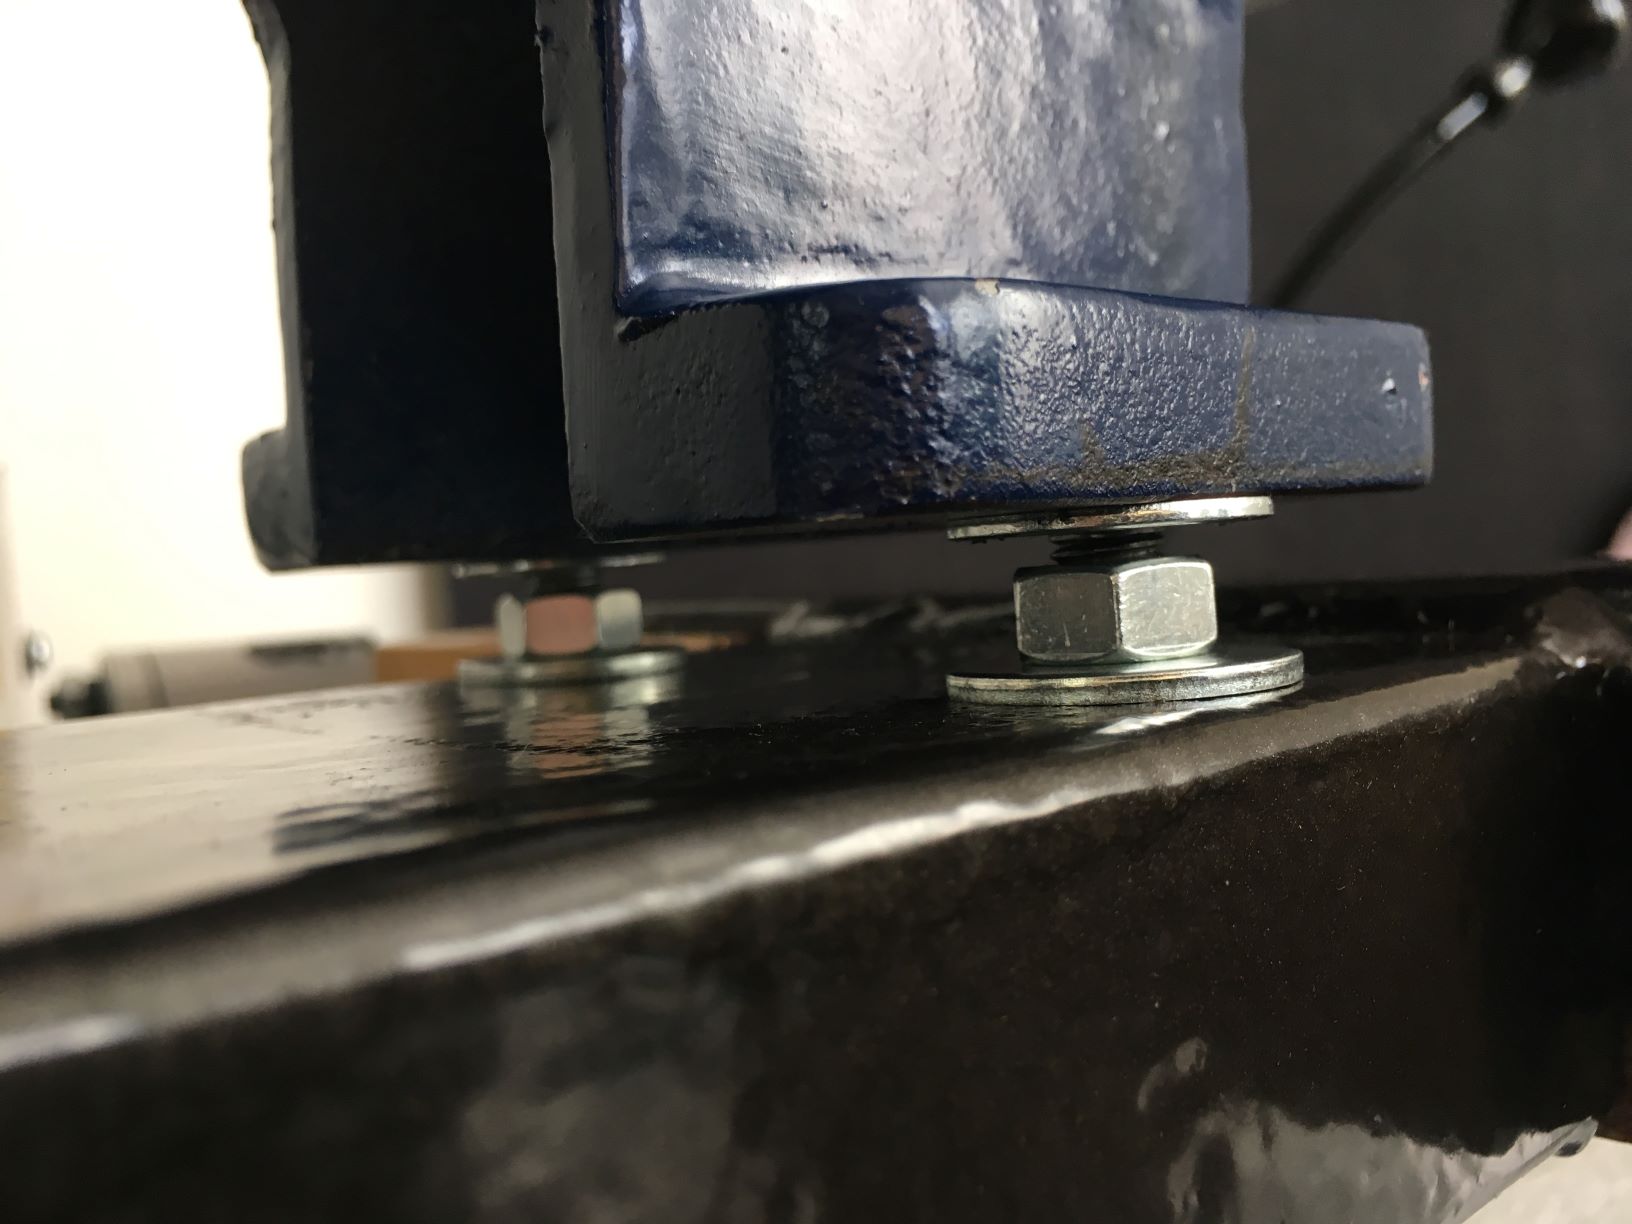
    I had a scrap piece of cold-rolled RHS stashed at work, so I simply chopped away a 673 mm length from a 100 x 40 x 4 mm,
    and welded two 10" pieces of hot-rolled 35 x 35 x 5 mm angle iron to the ends,
    making the stand just a bit longer and wider than my lathe bed.

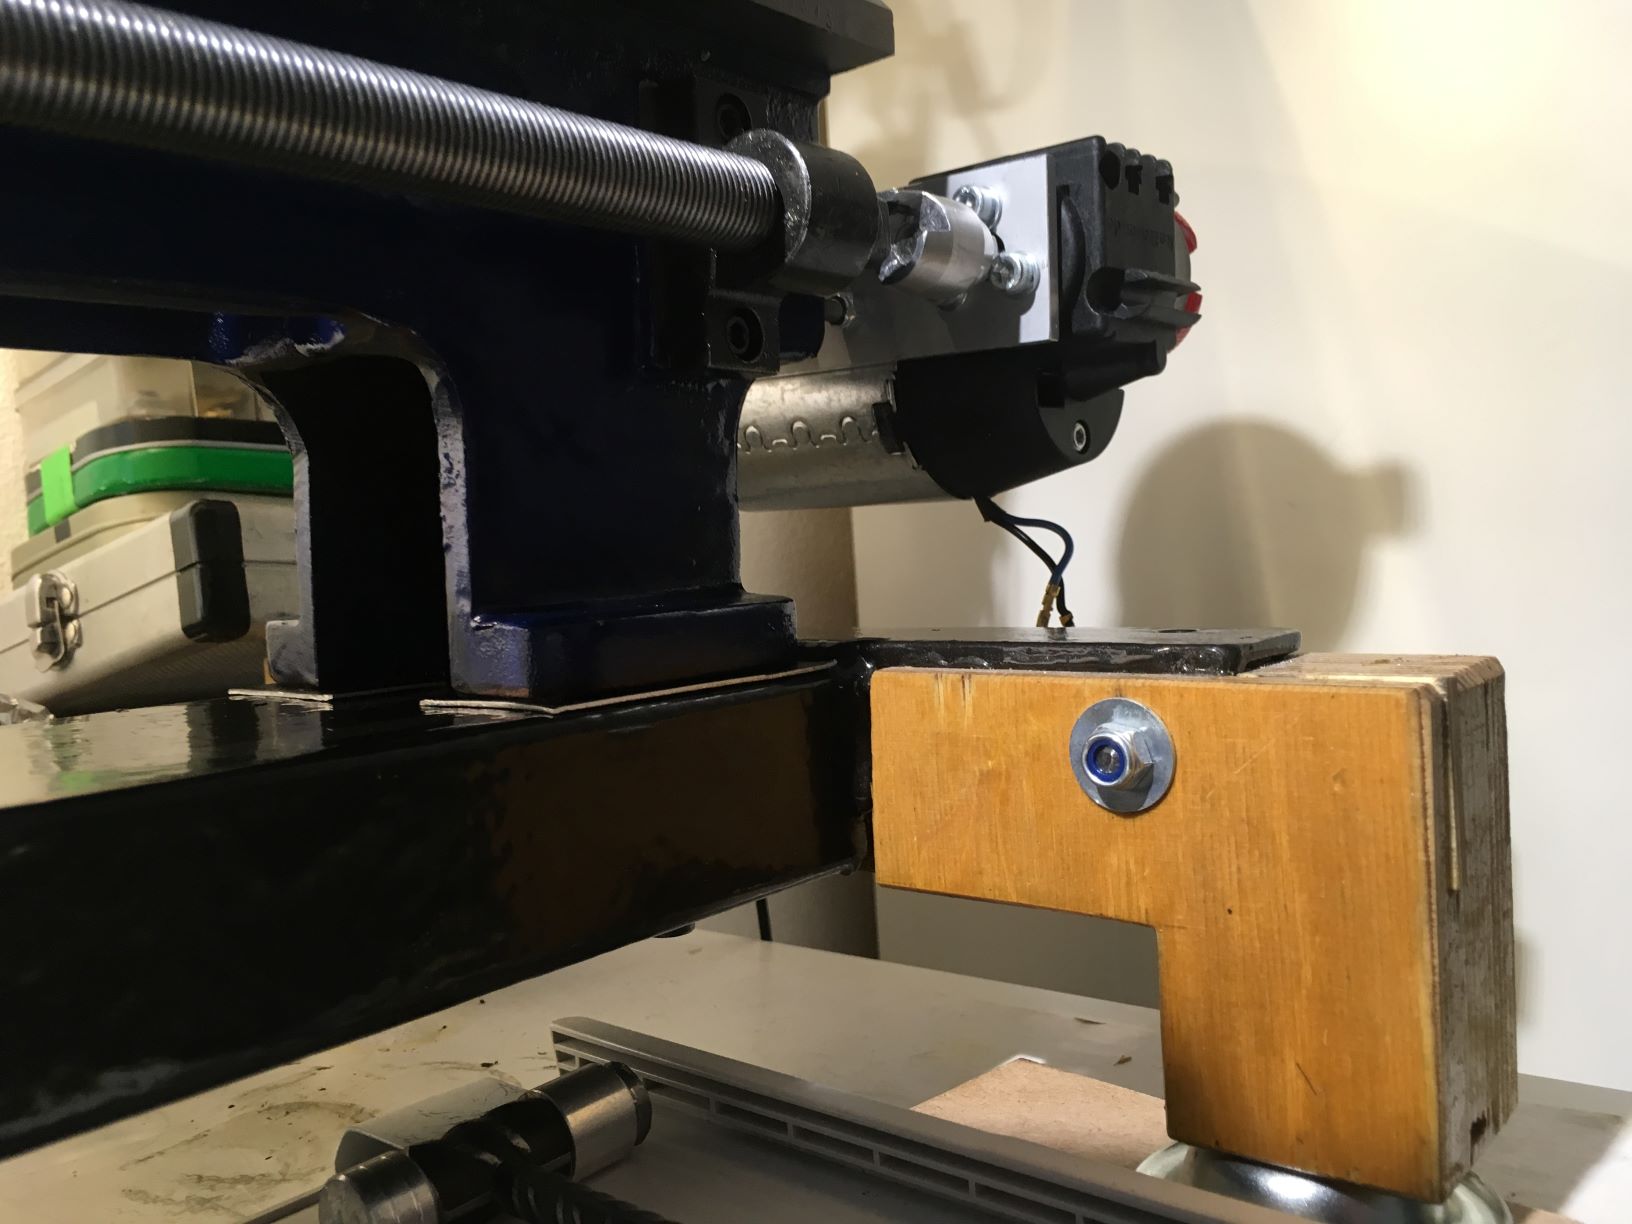
    Rob also mentions that it's a pretty clever idea to lower the beam a bit below the end supports,
    for cutting oil to follow the beam into the chip tray, rather than out and down the legs - so I adopted that.
    Drilled the bolt holes thru the RHS, added 1 mm soft Al shim and bolted the lathe on - simple as that.
    Check for headstock parallellism and bed twist will now hopefully be an uncommon practice...
    (Edit: The line above is one of those "Famous Last Words"-lines you've heard about. See my reply below)

    Torsional beam mini lathe stand-torsional-beam-lathe-stand.jpg

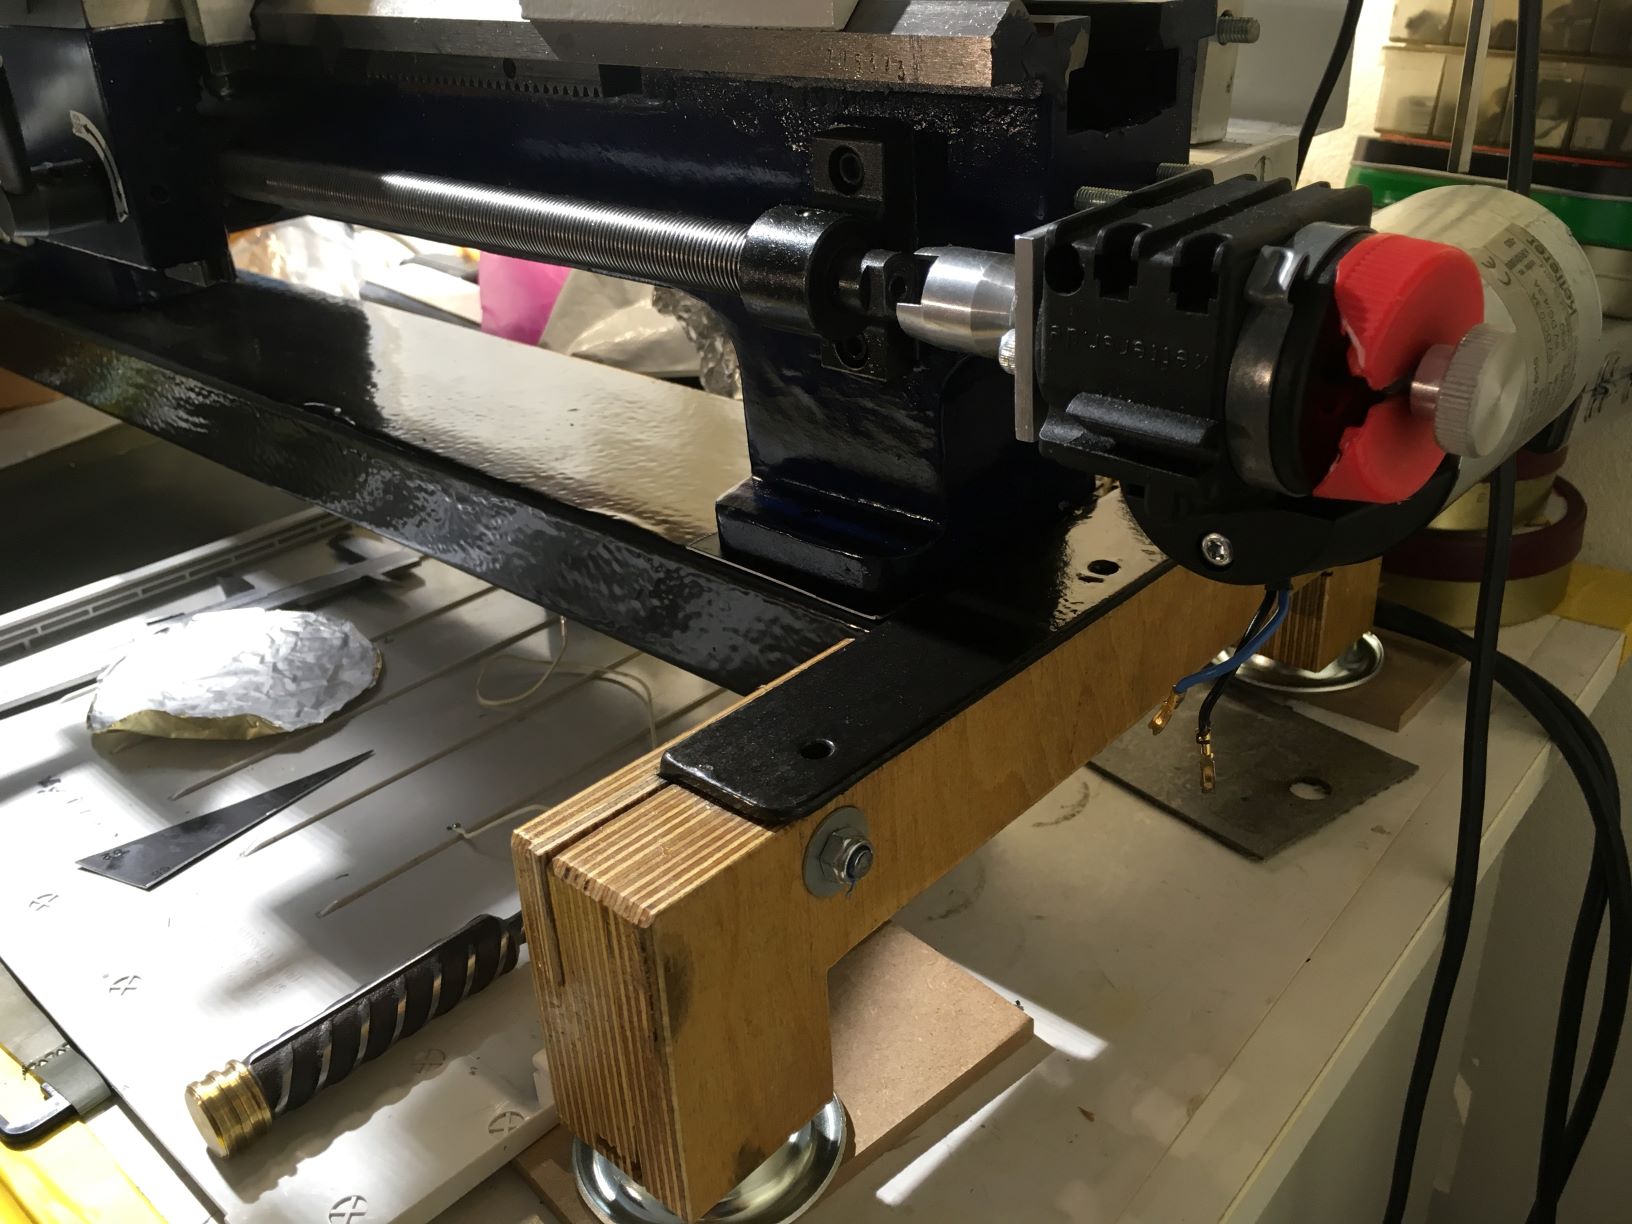
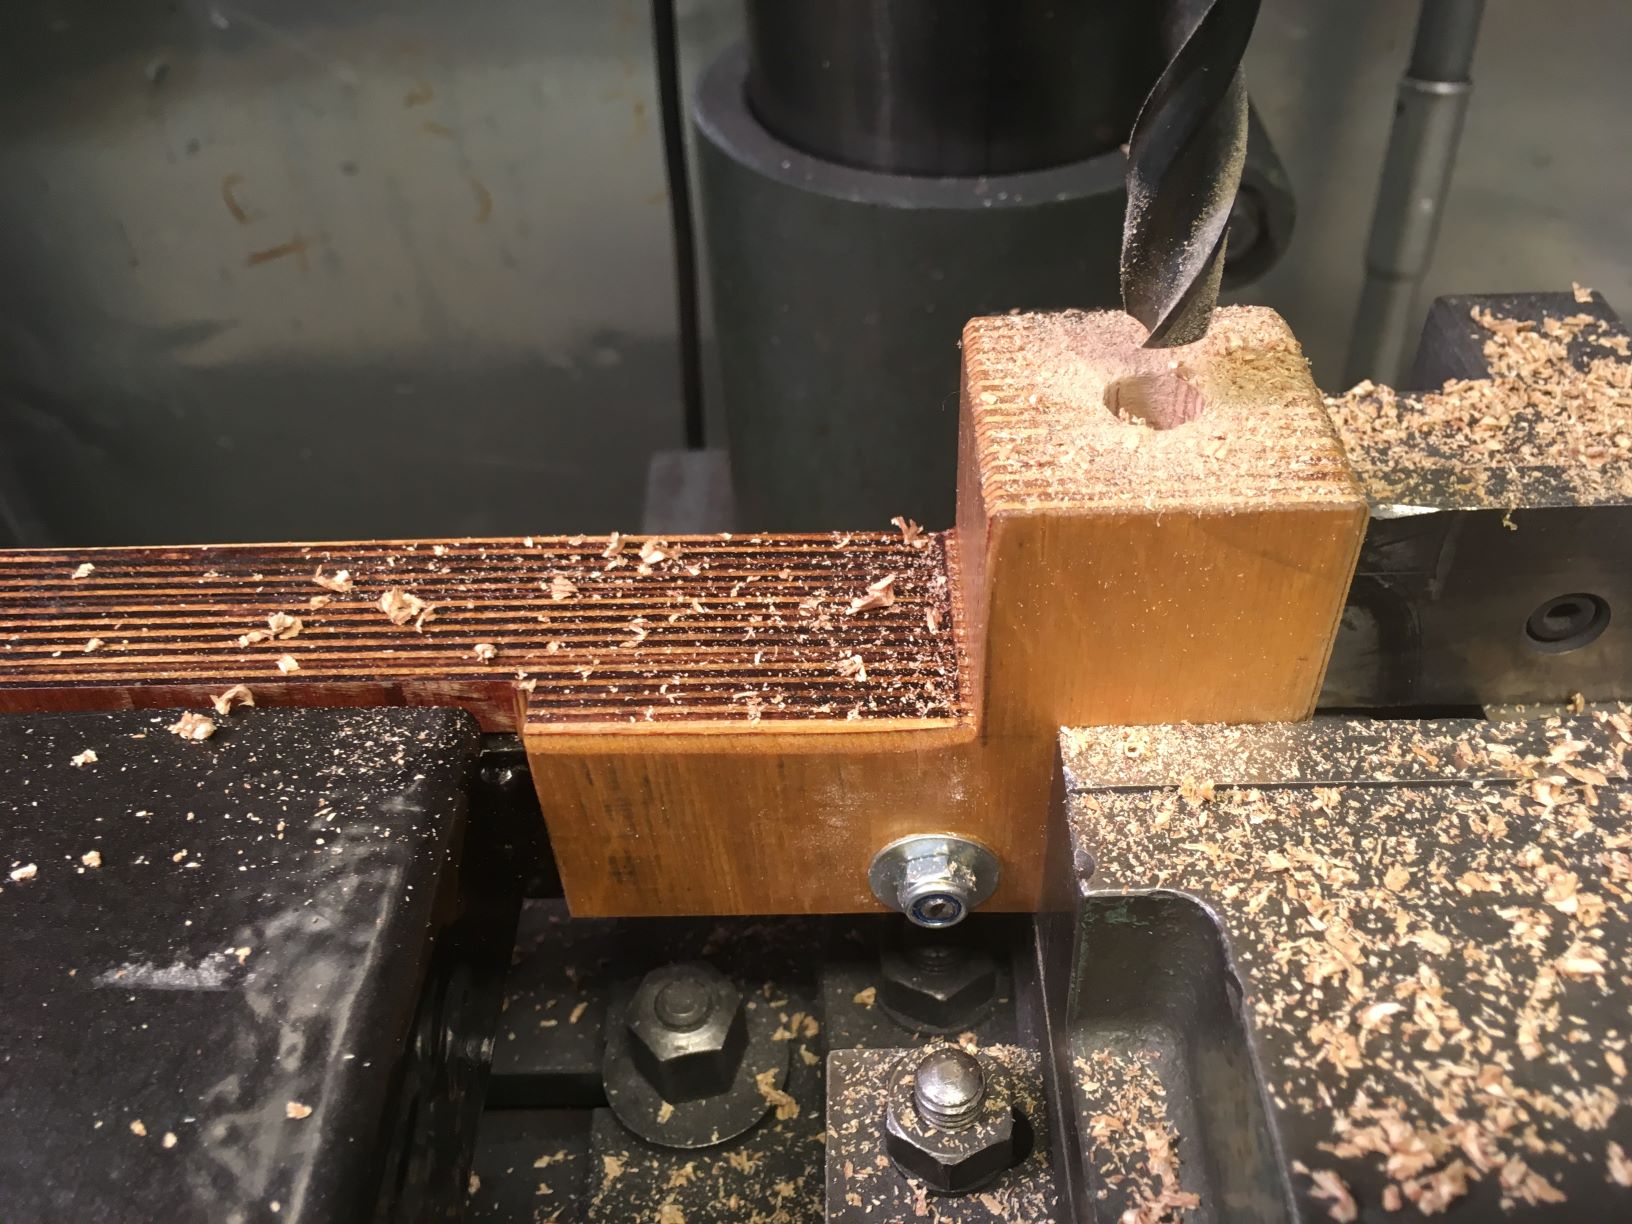
    Sorry for the black Hammerite finish, and the barely completed 45 mm square plywood feet.
    Reason for the wide footprint plywood stand is to provide for a wide, long and roomy chip tray,
    that can be removed to any side, front or back.
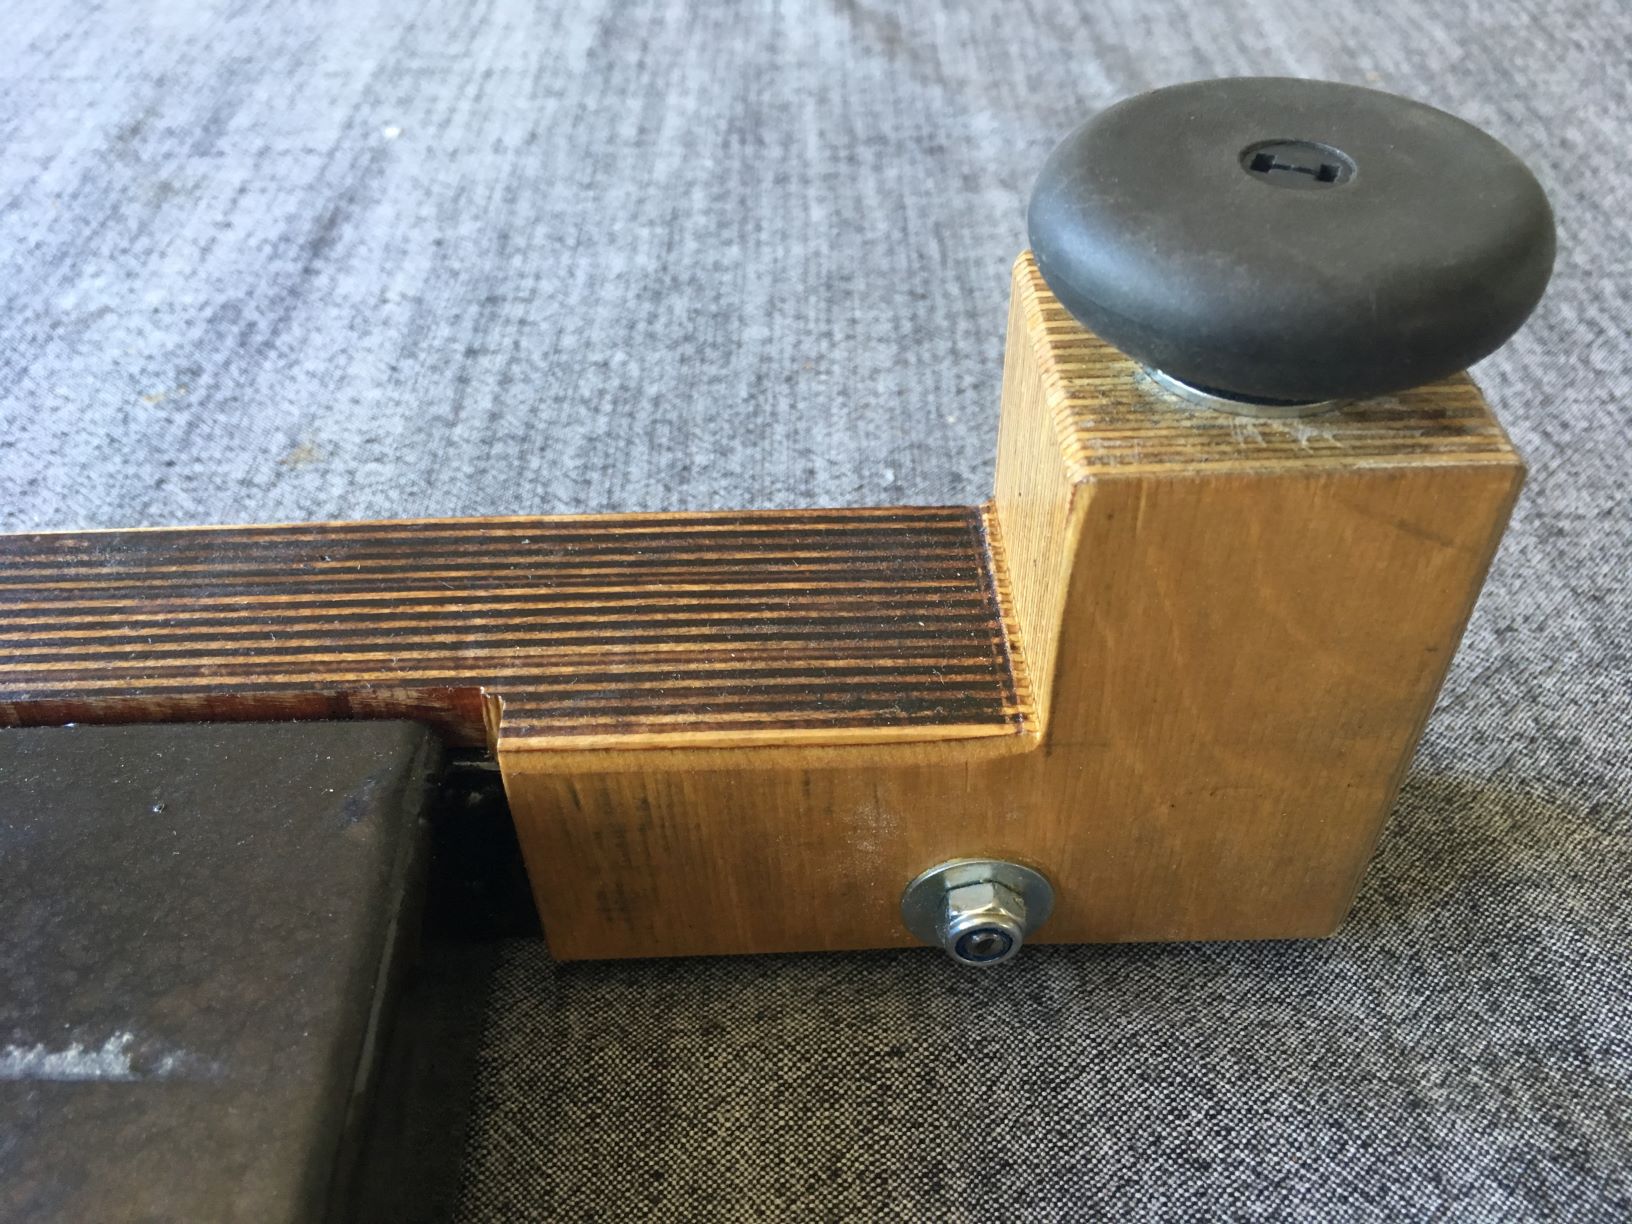
    I also chose to have two feet (rather than a monopost) at the tailstock,
    as my "domestic workshop" is a wheeled workbench, and I don't particularly need the lathe to topple off it.

    Torsional beam mini lathe stand-worm-drive-lead-screw-2.jpg

    Here you also can glimpse my worm drive lead screw motor add-on:
    http://www.homemadetools.net/forum/y...ive-love-73211
    Also my "Idiot safe" red yoghurt lid for preventing the machinist ( i. e. me) from accidentally engaging the dog clutch,
    and the black grinding angle 20 & 8 deg for the hob cutter tool.

    186 More Best Homemade Tools eBook
    Last edited by DIYSwede; Jun 8, 2019 at 10:39 AM. Reason: added link

  2. The Following 3 Users Say Thank You to DIYSwede For This Useful Post:

    Inner (May 31, 2019), Jon (Jun 1, 2019), Paul Jones (May 31, 2019)

  3. #2
    Content Editor
    Supporting Member
    DIYer's Avatar
    Join Date
    Aug 2013
    Posts
    3,056
    Thanks
    772
    Thanked 1,852 Times in 1,653 Posts


    Thanks DIYSwede! We've added your Torsion Beam Lathe Stand to our Machining category,
    as well as to your builder page: DIYSwede's Homemade Tools. Your receipt:


    2000 Tool Plans

  4. #3
    Supporting Member bruce.desertrat's Avatar
    Join Date
    Nov 2017
    Posts
    787
    Thanks
    559
    Thanked 668 Times in 357 Posts

    bruce.desertrat's Tools
    Looks really neat, but the link didn't work for me, error: "This site can’t be reached users.tpg.com.au’s server IP address could not be found." and my google-fu is just not cutting it today...

  5. The Following User Says Thank You to bruce.desertrat For This Useful Post:

    DIYSwede (Jun 1, 2019)

  6. #4
    Supporting Member DIYSwede's Avatar
    Join Date
    May 2019
    Location
    Stockholm, Sweden...
    Posts
    634
    Thanks
    415
    Thanked 799 Times in 319 Posts

    DIYSwede's Tools
    Link worked for me, as I just tried it.
    You might try Xynudu's YT channel:


    Regards
    Johan, DIYSwede
    "Not affiliated..."

  7. #5
    Supporting Member DIYSwede's Avatar
    Join Date
    May 2019
    Location
    Stockholm, Sweden...
    Posts
    634
    Thanks
    415
    Thanked 799 Times in 319 Posts

    DIYSwede's Tools
    Guess these pics better show than those previously posted:

    Torsional beam mini lathe stand-teardown-1.jpg

    Torsional beam mini lathe stand-teardown-2.jpg

    Yup - I'm amidst a complete teardown and upcoming headstock alignment, as I found it's out 0,147 mm in 113 mm run.
    (I.e. close to 6 thou in less than 4.5"!)
    Not just "cutting a taper" - a veritable cone manufacturing machine!

    "-As I was just checking the bed alignment on the RHS mount, I realized that..."
    Headstock bolts were loose, apart of a bad initial fitting and the spindle bearings aren't coaxial with the headstock centre line.

    The only thing I didn't check after my initial "delivery teardown & overhaul" 2 years ago.
    Didn't want to disturb the motor at the time, and as all the other milled & ground surfaces was tight, flat, nice and perpendicular...
    I just assumed... No more of that - Measuring is Knowing.

    Wow - really. The fun never ends. At least nothing is broken. Being a cheap guy - my time for this is free! -Whoopee!
    Last edited by DIYSwede; Jun 8, 2019 at 10:48 AM. Reason: correction, clarification

  8. #6
    Supporting Member DIYSwede's Avatar
    Join Date
    May 2019
    Location
    Stockholm, Sweden...
    Posts
    634
    Thanks
    415
    Thanked 799 Times in 319 Posts

    DIYSwede's Tools
    Whilst rebuilding/ aligning the lathe, now's the time for fitting the adjustable feet for the entire stand.
    4 pieces of 48 mm dia, former office chair rubber knobs, 4 reused M8 threaded inserts and a 12 mm drill:

    Torsional beam mini lathe stand-12-mm-drill.jpg Torsional beam mini lathe stand-knob-foot.jpg

    These will admit adjusting the 4 legs of the entire lathe/stand on just about any surface,
    without disturbing the bed's flatness - as the RHS beam provides (almost) total rigidity.

    Thus the lathe's bed must be rigidly fastened to the beam, but also allow for relative and easy adjustments:
    4 pieces of M8 all-thread were cut, and 15 mm of one end of each were turned down and threaded M6,
    put into the bed, now resting upside down diagonally on my surface plate.
    Fitted the all-threads pointing upwards, adding washers and nuts, placing pieces of 10 mm HSS blanks as temporal spacers.
    Then the beam/ foot was lowered, the final washers and nuts put on, and adjustments started.

    My point in having it upside down would hopefully provide bed flatness & stress-free initial mounting,
    as the 6 kg beam "just floats" on the HSS pieces whilst I tighten the nuts equally, just releasing the spacers.
    If done the ordinary way, perhaps warp could be introduced by the lathe's own weight affecting the beam unevenly.

    Headstock (left) and tailstock (right)

    Torsional beam mini lathe stand-hs-m8-all-thread.jpg Torsional beam mini lathe stand-ts-adjust.jpg

    When turned over, bed now measures straight and unwarped to 0.05 deg (I'm waiting for a machinist's level in transit).
    The bed top is also parallel (i.e. equidistant) to the beam, both length- and crosswise.
    I'm considering helping the headstock bolts with a 4 x 4" 10 mm aluminum plate for weight distribution - undecided yet.

    Now alignments, measurements and tweaks will commence for the headstock, saddle, crosslide and tailstock in rotation.

    To be continued...

    Thoughts, comments and suggestions on the above welcome!


    186 More Best Homemade Tools eBook

  9. The Following User Says Thank You to DIYSwede For This Useful Post:

    Scotsman Hosie (Jun 20, 2019)

Thread Information

Users Browsing this Thread

There are currently 1 users browsing this thread. (0 members and 1 guests)

Bookmarks

Posting Permissions

  • You may not post new threads
  • You may not post replies
  • You may not post attachments
  • You may not edit your posts
  •