Free 186 More Best Homemade Tools eBook:  
Get 2,000+ tool plans, full site access, and more.

User Tag List

Page 1 of 2 1 2 LastLast
Results 1 to 10 of 11

Thread: Upgrading my HF Bead Roller

  1. #1
    Supporting Member astroracer's Avatar
    Join Date
    May 2012
    Location
    Byron, Michigan
    Posts
    311
    Thanks
    20
    Thanked 570 Times in 174 Posts

    astroracer's Tools

    Upgrading my HF Bead Roller

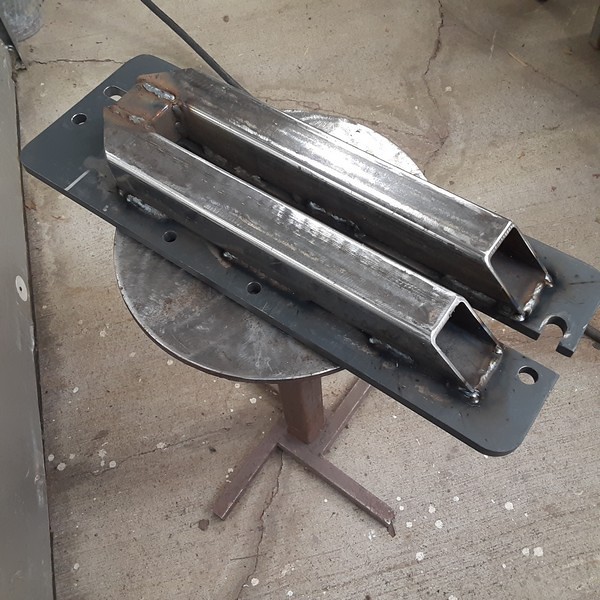
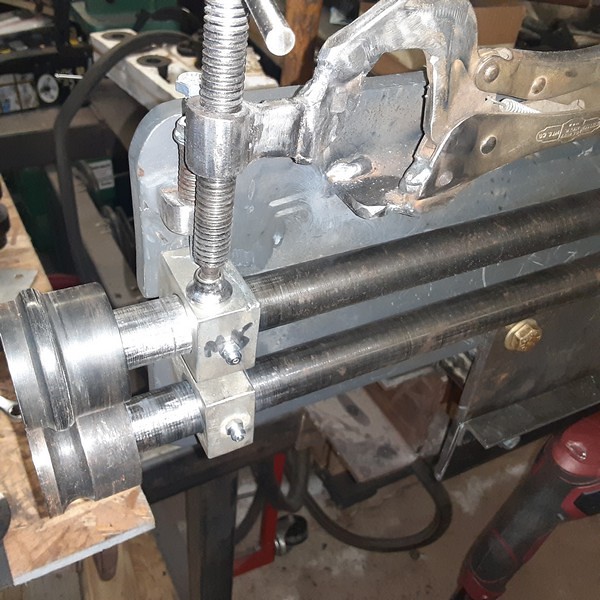
    I've had a Harbor Freight bead roller for quite a while. It has been a workhorse in my shop for panel fab and now I think it is time to give it some love.
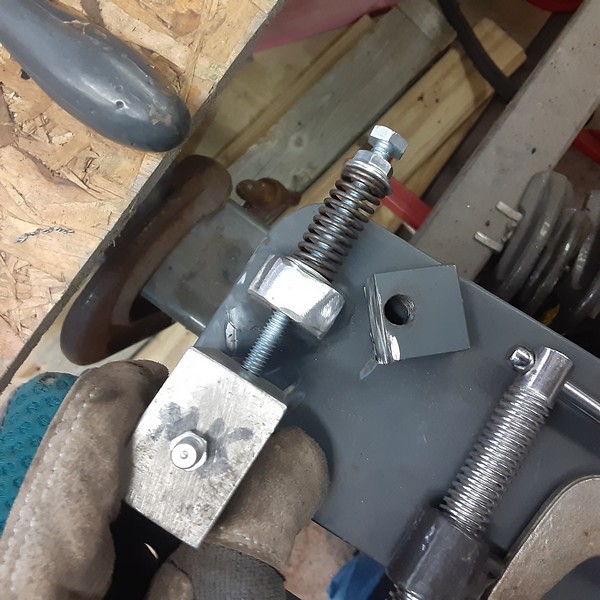
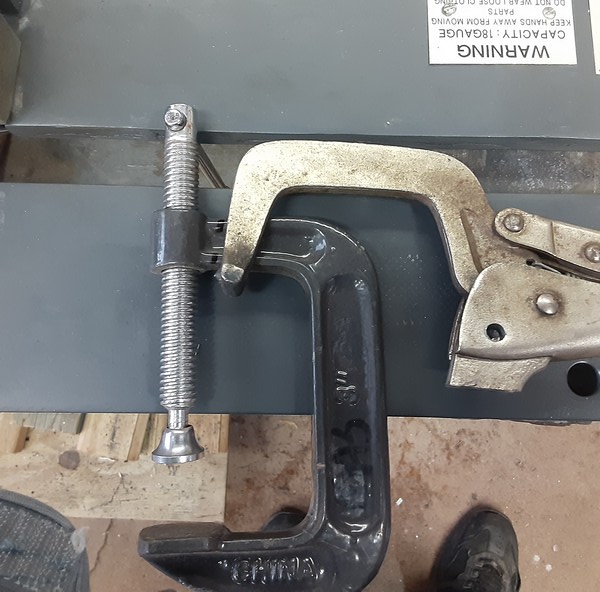
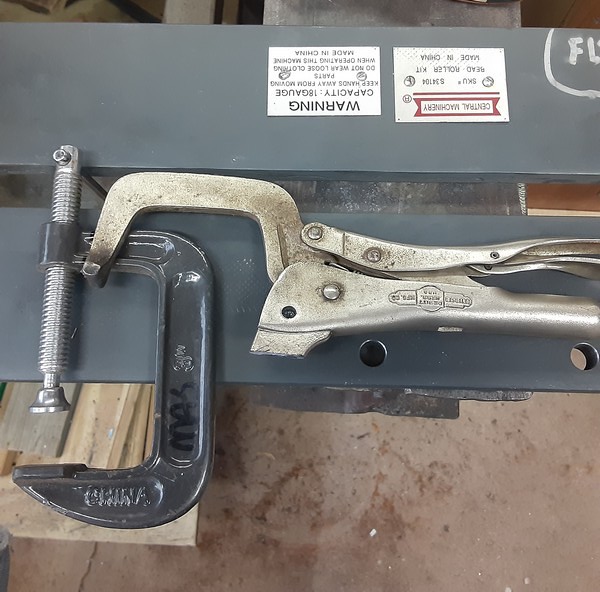
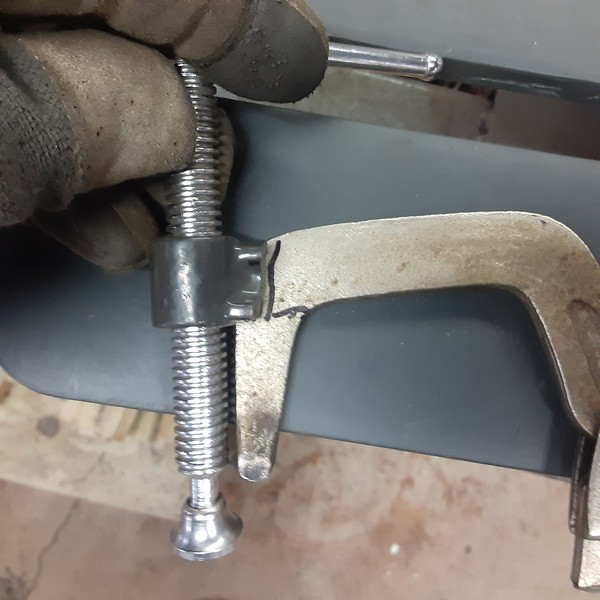
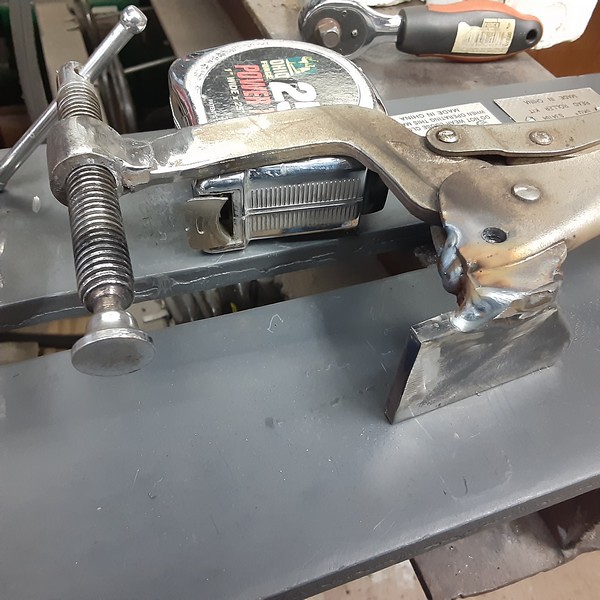
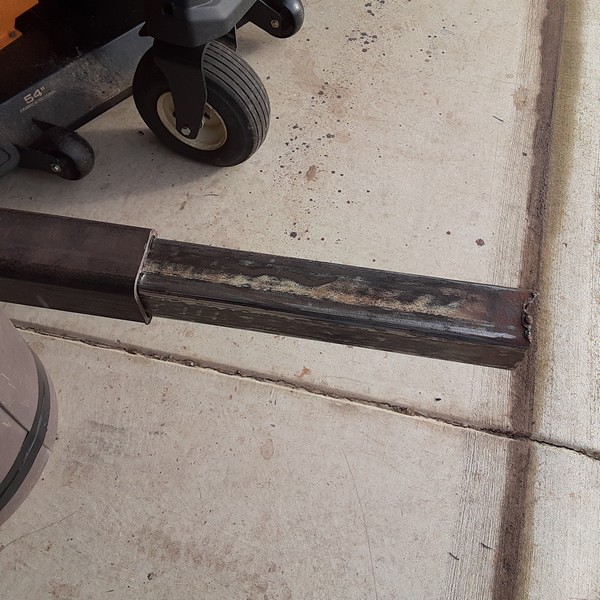
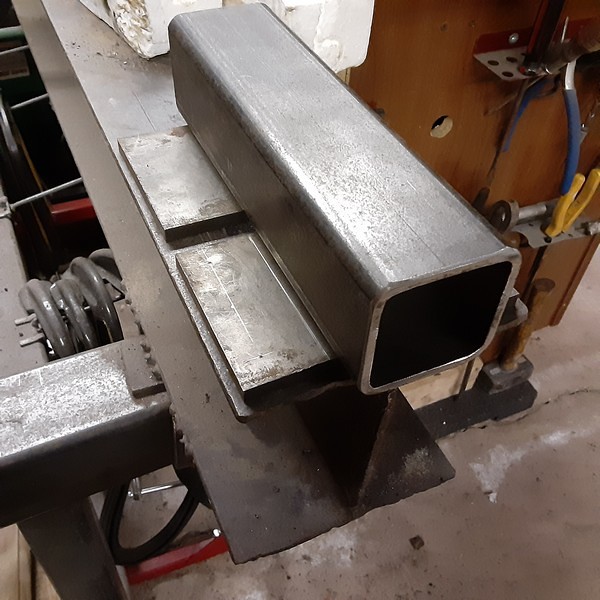
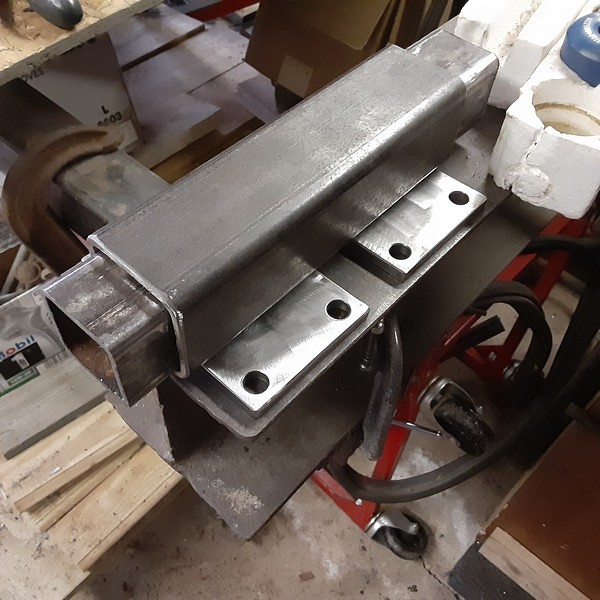
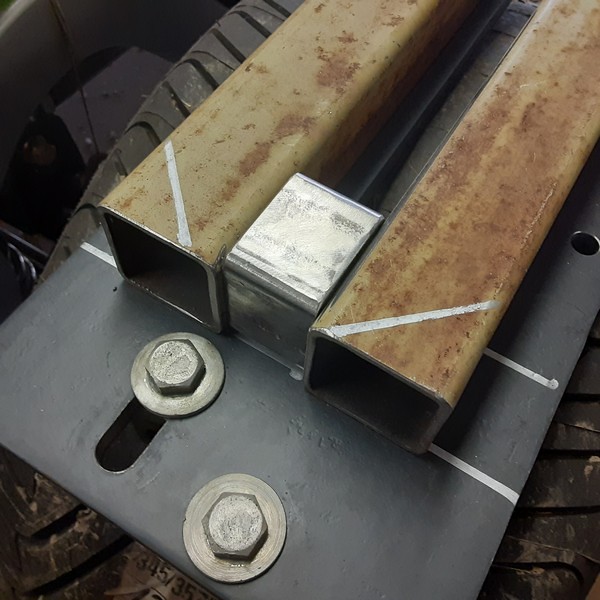
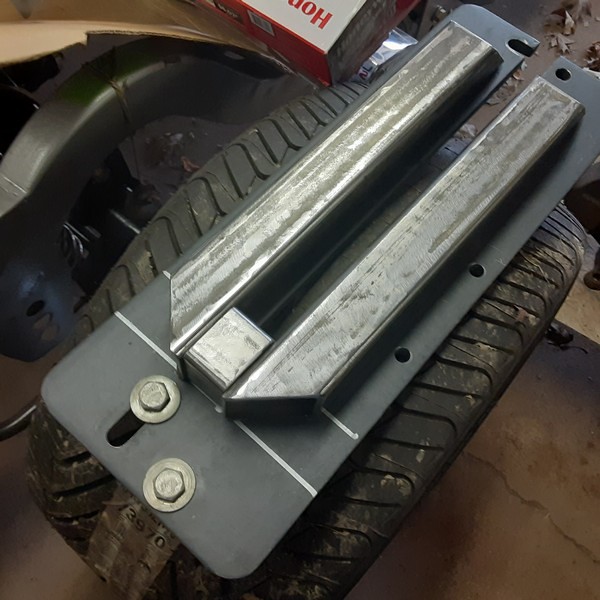
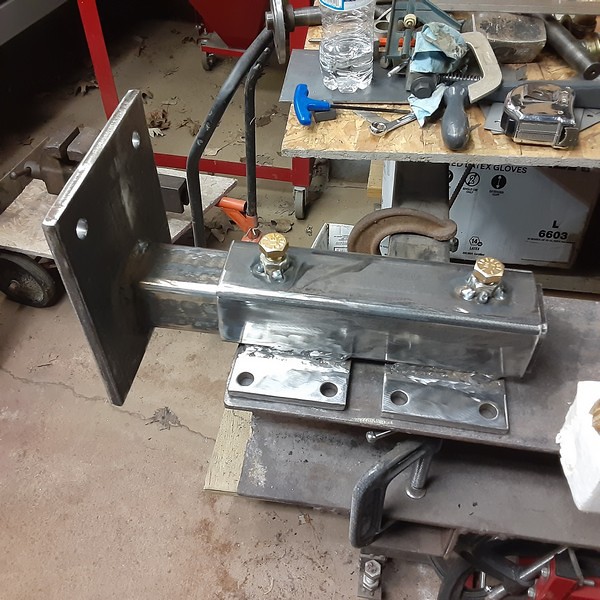
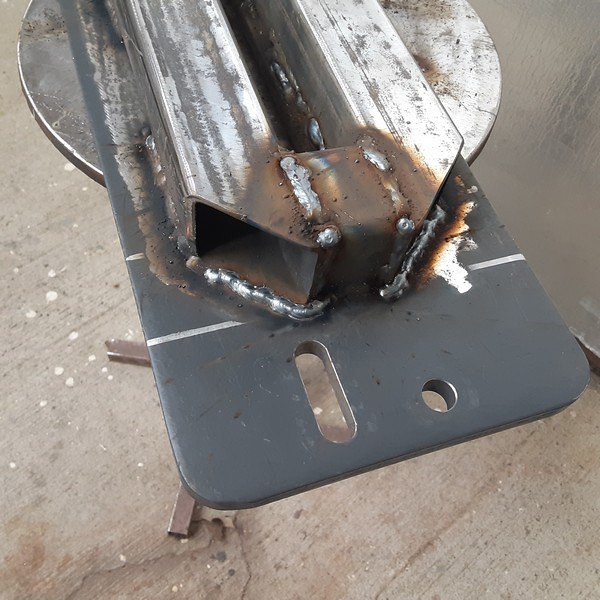
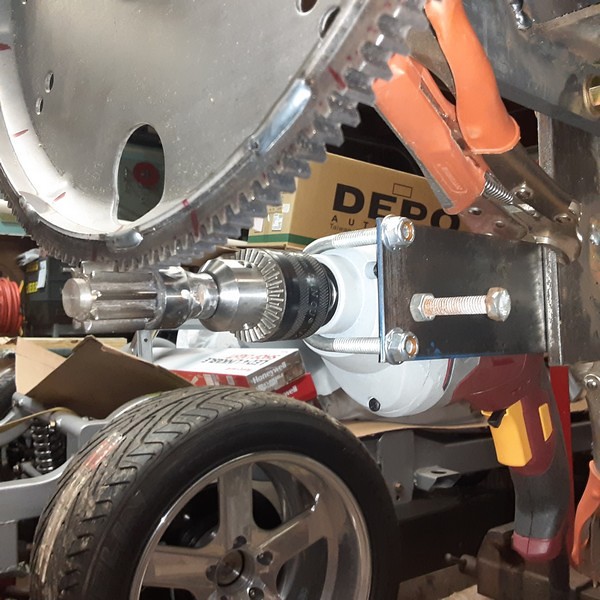
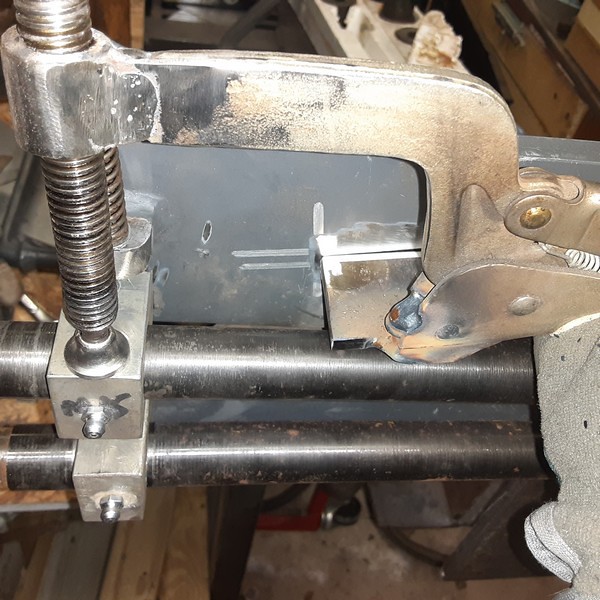
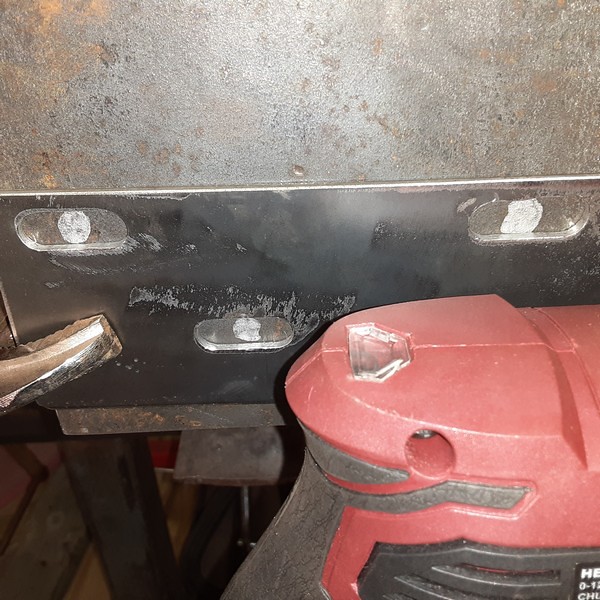
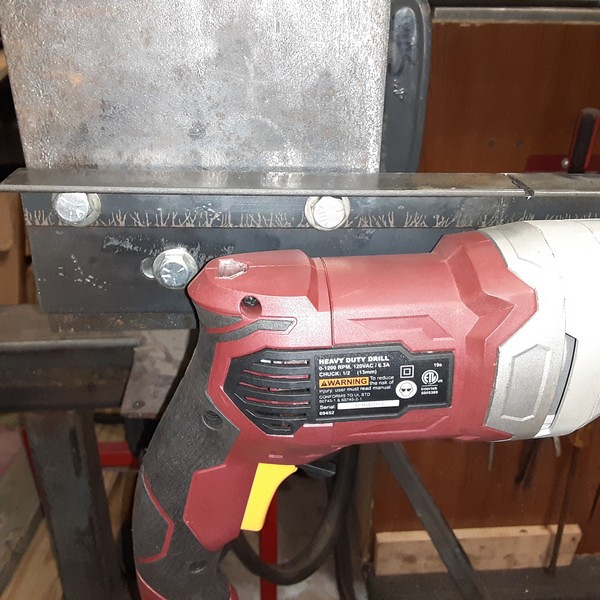
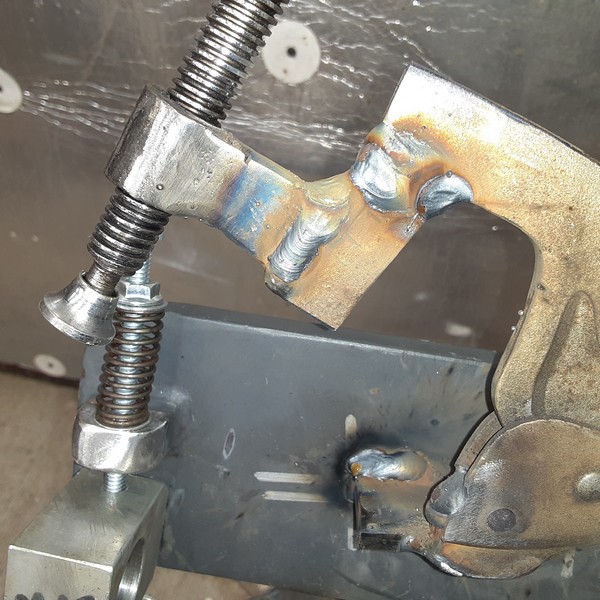
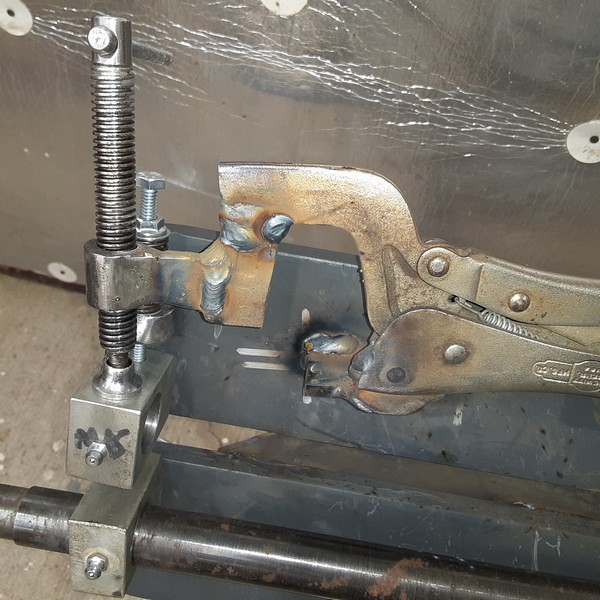
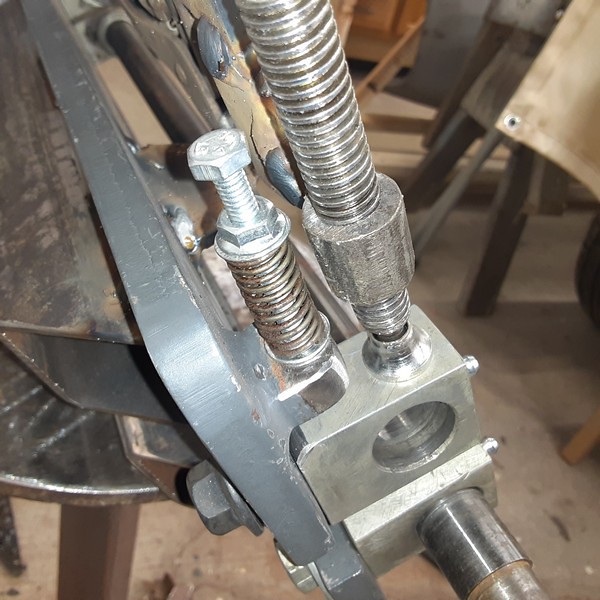
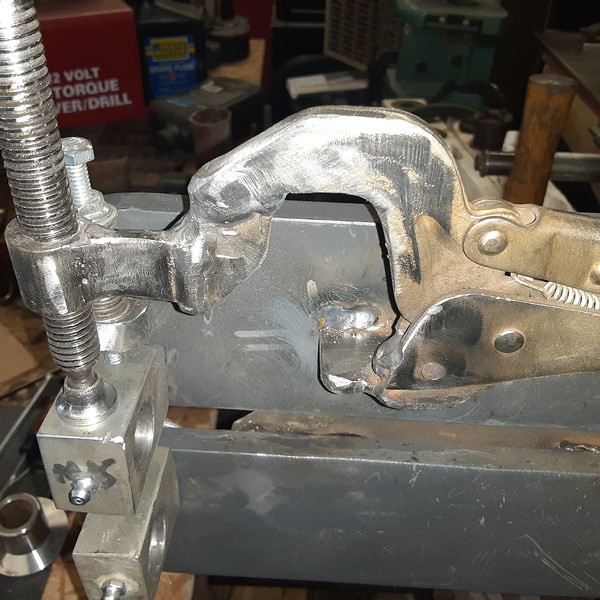
    I am doing the tubing reinforcement to the base plate, adding a return spring for the upper die and reworking a Vise-Grip clamp to replace the tightening screw. I am also building a receiver tube so it can be plugged into my chassis jig or the tool stand.
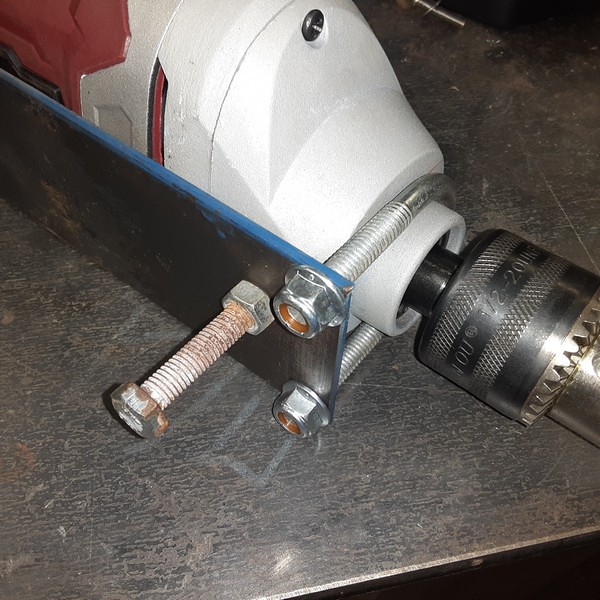
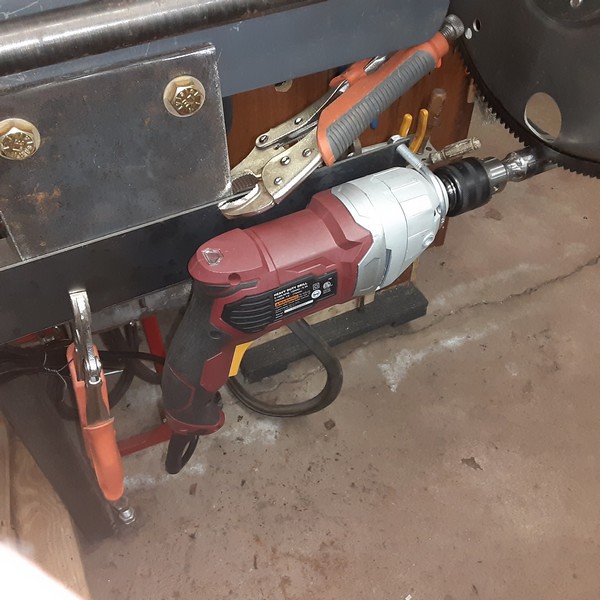
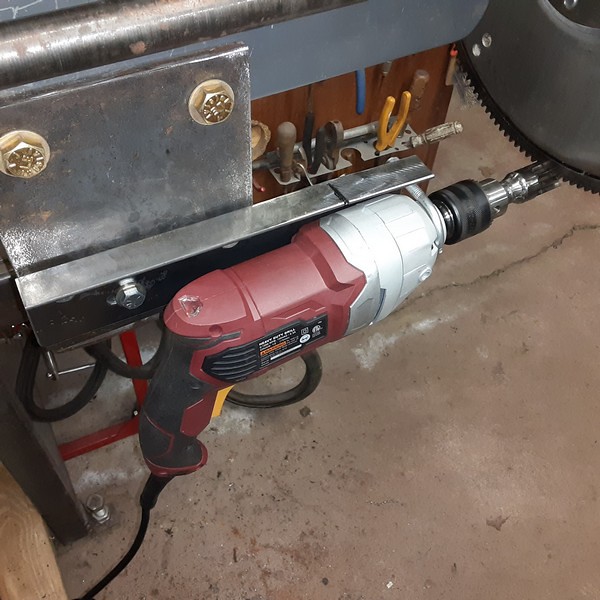
    I will also be adding a HF 1/2" drive drill motor to drive it thru an automotive flexplate and pinion gear. I have had a pretty good time getting this off the ground this week. Still have a bit to do but I got most of the welding done today to get the roller mounted so I can put it back together to work out the drill driver mounting.
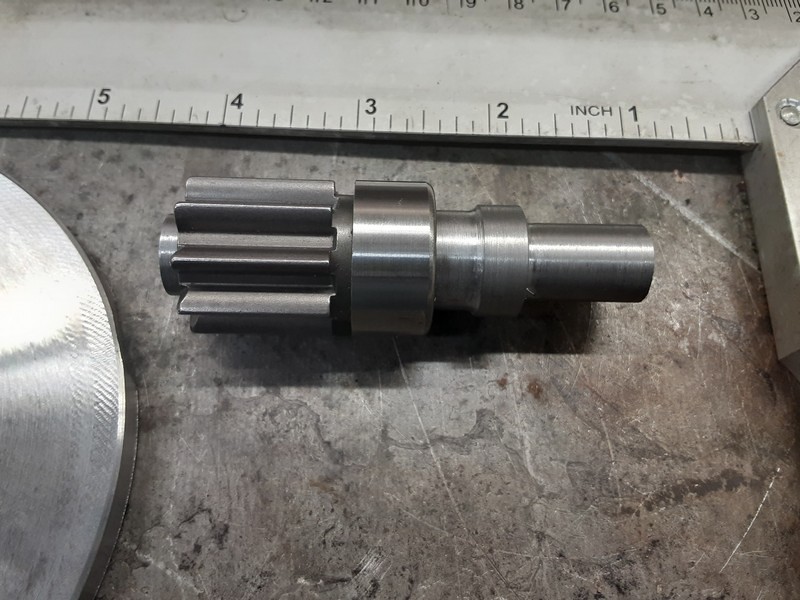
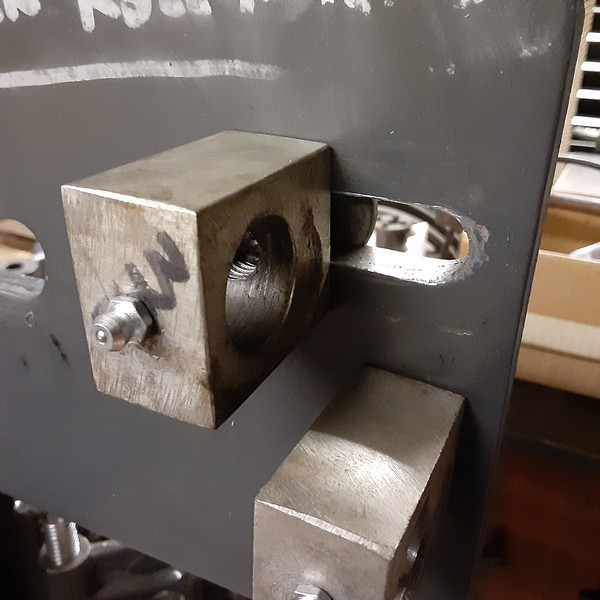
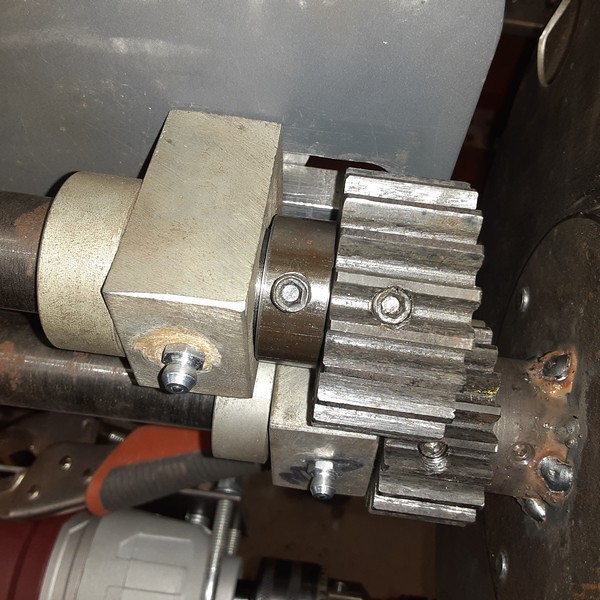
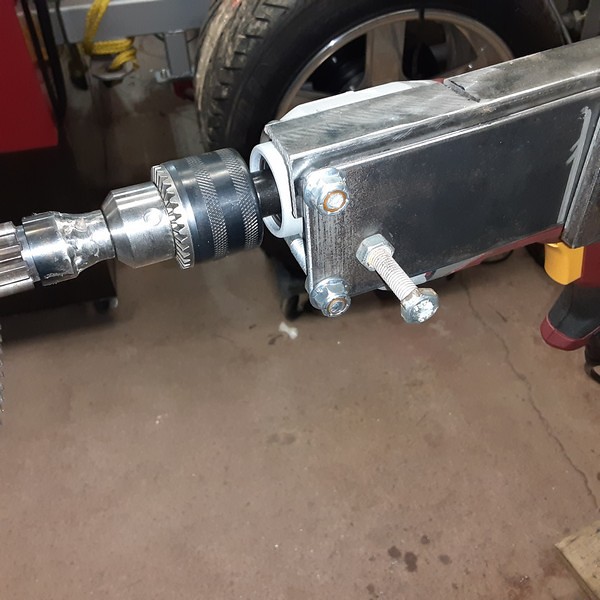
    These first few pics are of the adapters I had to make for the flexplate and pinion gear.

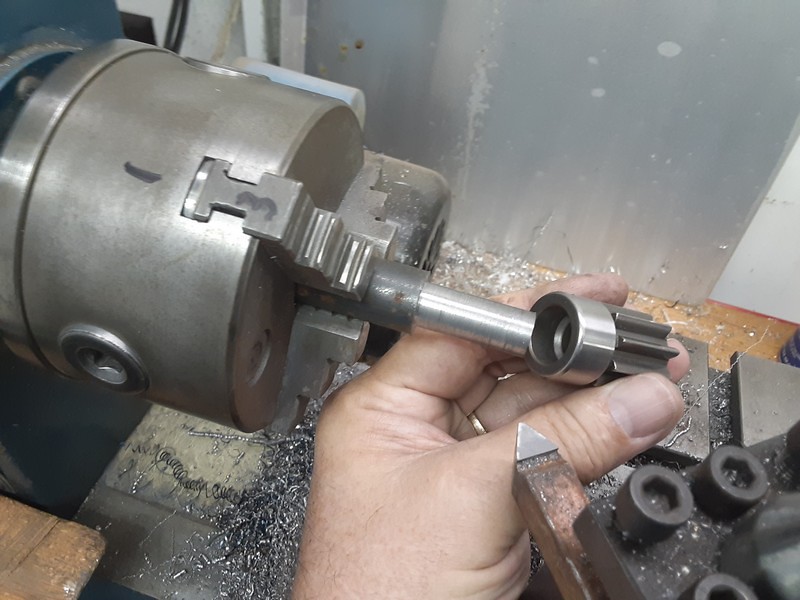
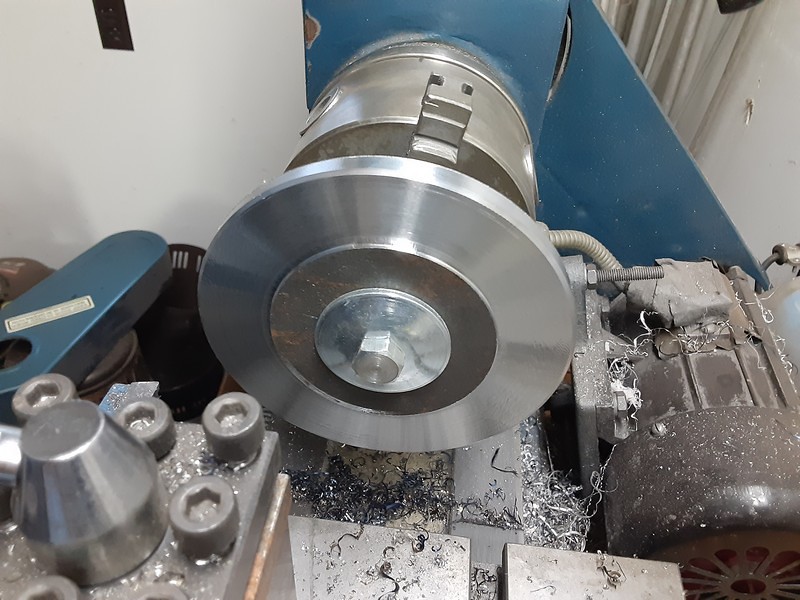
    Starting the pinion gear adapter. You can see the ID's of the gear in this pic. I am turning the smaller one here. I will turn a shoulder to pilot down into the bigger ID then turn the adapter around in the chuck to spin it down to about a 1/2" to fit the drill chuck.

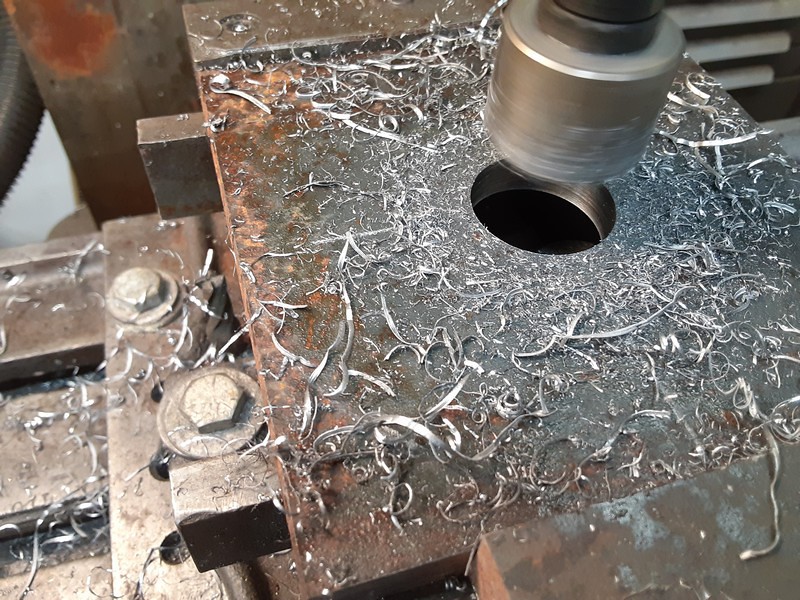
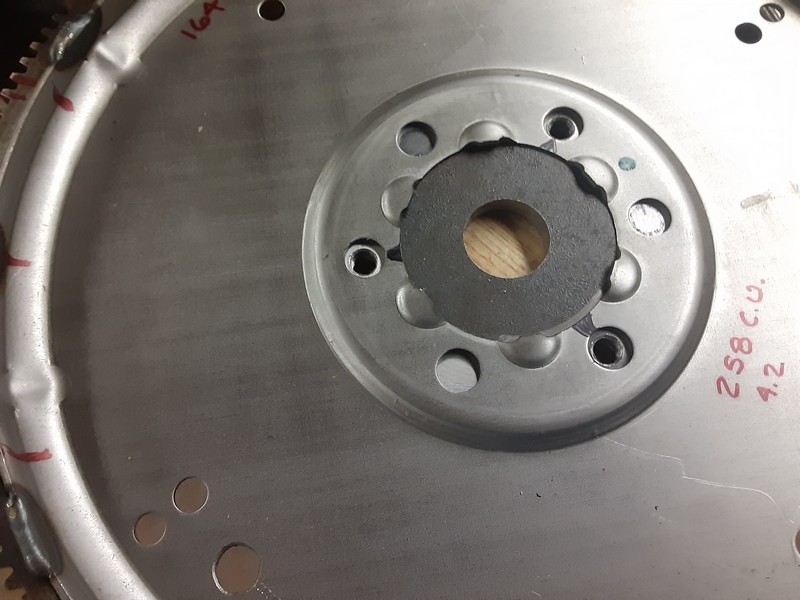
    I made the flexplate adapter out of a piece of 3/8"s inch plate and a keyed bushing. The bushing will have to be bored out to fit the roller shaft and then welded to a plate. That I chunked out with the bandsaw and a cutoff disc then mounted it in the mill and cut the center hole with an 1 1/4" Rota-Broach. perfectly round hole and it fit the step on the bushing like a glove.

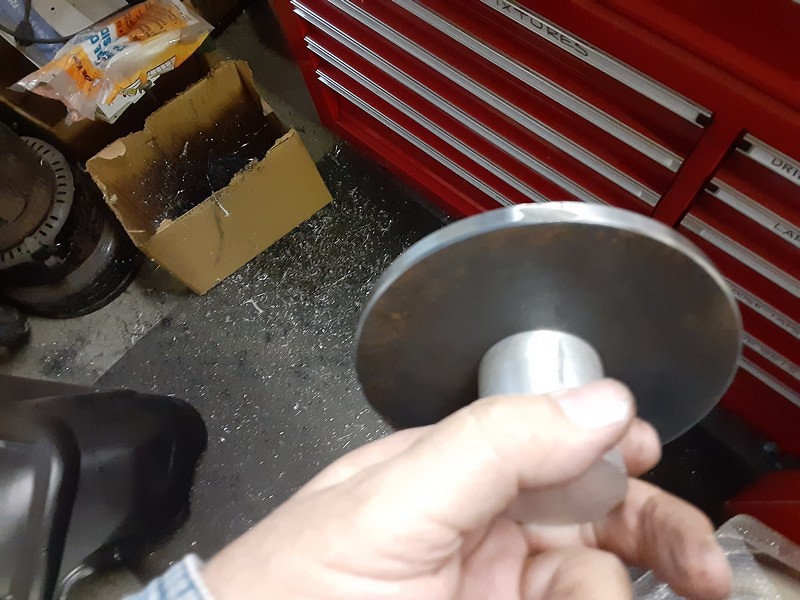
    That hole was then used to bolt on a mandrel so I could chuck the plate up into the Lathe.

    I faced the plate about a 1/16th on an inch and brought that diameter down to a snug fit in the pilot hole in the flexplate.

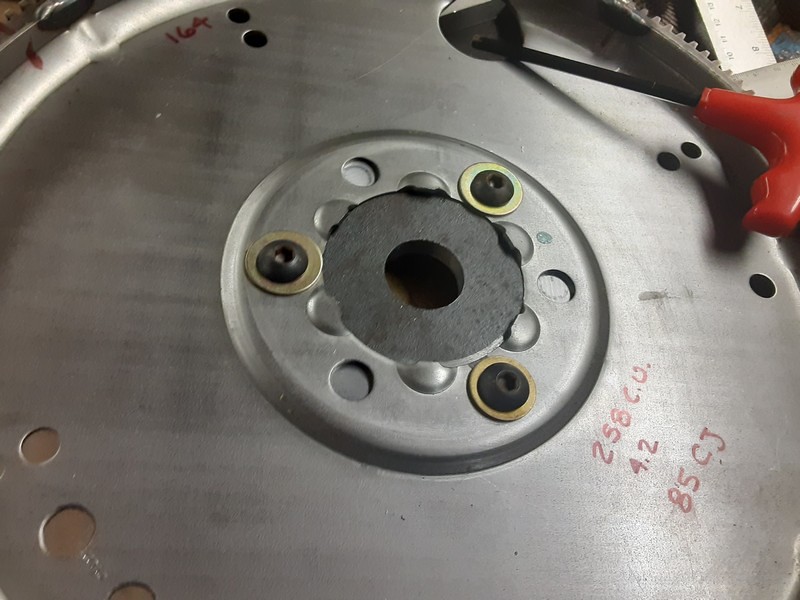
    This locates the flexplate nicely so it should run fairly true to the shaft after it all put together. After drilling and tapping a few holes gets this bolted up.

    I'll add more pics later, it's getting late and I am ready for bed...
    Mark

    186 More Best Homemade Tools eBook
    Last edited by astroracer; Dec 25, 2020 at 08:32 PM.

  2. The Following 3 Users Say Thank You to astroracer For This Useful Post:

    EnginePaul (Dec 28, 2020), Jon (Dec 28, 2020), Sleykin (Dec 28, 2020)

  3. #2
    Supporting Member astroracer's Avatar
    Join Date
    May 2012
    Location
    Byron, Michigan
    Posts
    311
    Thanks
    20
    Thanked 570 Times in 174 Posts

    astroracer's Tools
    I was asked on another forum where I got the pinion gear. A buddy gave me the flexplate, it fits an '85CJ straight six so I ordered a Bendix for it and cut it apart.

    Here are more pics as I modified the backing plate. I slotted the top rear bolt hole to allow the shaft to move for upper die adjustment,


    drilled a clearance hole for the 1/4" die return bolt and trimmed off that block to make room for the modified vice grip for die clamping.

    Two holes were also drilled for 1/2" bolts that will attach the bead roller to my receiver adapter.


    I cut up two perfectly good clamps to make the upper die clamp...

    This will make setting the die so much easier and faster it will be worth it. I did some eyeball engineering, cutting the lower jaw off, leaving some material to weld on a spacer block.

    I trimmed off the upper jaw, removing the drop leg so the clamp lug can weld straight on.

    I should have left about an inch of the drop in place. That would have spaced the clamp up a bit more in relation to the die shaft.
    THIS would have been a good spot...

    Hind sight, I guess. This will work but I will need to tip the clamp a bit to get room above the shaft.
    New clamp, ready to weld to the backing plate.

    Thanks for watching, I'll post more later.
    If you have any questions holler!
    Mark

    2000 Tool Plans

  4. The Following 2 Users Say Thank You to astroracer For This Useful Post:

    Jon (Jan 2, 2021), Sleykin (Dec 28, 2020)

  5. #3
    Supporting Member astroracer's Avatar
    Join Date
    May 2012
    Location
    Byron, Michigan
    Posts
    311
    Thanks
    20
    Thanked 570 Times in 174 Posts

    astroracer's Tools
    I have a bunch of 2" sq. x 1/8" wall tubing I bought years ago that was reclaimed from pallet racks. I will use this to make the mount for the bead roller and it will slip into a piece of 2 1/2 x 3/16's wall tube that will act as the receiver. I drilled some holes in a couple of plates and welded those to the 2 1/2" tube. I can then bolt or clamp this to my jig tables or tool stand.


    I used some of that reclaimed tube to reinforce the back plate as well. This will be plenty stout and will change the whole way this roller feels when doing a bead.


  6. The Following User Says Thank You to astroracer For This Useful Post:

    Sleykin (Dec 28, 2020)

  7. #4
    Supporting Member astroracer's Avatar
    Join Date
    May 2012
    Location
    Byron, Michigan
    Posts
    311
    Thanks
    20
    Thanked 570 Times in 174 Posts

    astroracer's Tools
    I worked out the mounts for the drill motor as well. Just a piece of 1/8 plate drilled for a 1 3/4" U-bolt that will trap the front of the drill and I added a hole that will bolt to the T-Handle mount on the side. This should hold the drill pretty steady with no worries of it moving during operation.

    This plate will bolt to the mount for the bead roller. Here it is clamped in place so I can do a trial run with the motor to see how it works.

    The drill motor will work just fine. Getting the mounting plate drilled with a few slots and drilling and tapping the receiver mount will be next on the to do list. The drill plate is going to need to be slotted a bit so the pinion gear can be adjusted for quiet running.

    I also started doing some set-up work with the gears, the adjustable upper rear block and getting the quick clamp positioned. I needed another spacer to set the top gear to the rear block. I pulled a chunk of 1 1/4" x 5/16 wall tube out of the scrap bin, cut off a short piece and bored it out to fit the shafts and cut it down to 1/2" long. Drilling and tapping for an M8 x 1.25 set screw (same as all the other Chinezeum set screws... )

    Setting up the quick clamp I ended up trimming a bit off the spacer block to center it to the upper shaft better. I will get this welded on later after I get the drill motor mounts finalized.

    This is getting close.
    Mark
    Last edited by Jon; Dec 28, 2020 at 02:40 PM. Reason: adjusting image bracket

  8. The Following 3 Users Say Thank You to astroracer For This Useful Post:

    clydeman (Dec 28, 2020), Keithm (Dec 28, 2020), Sleykin (Dec 28, 2020)

  9. #5
    Supporting Member astroracer's Avatar
    Join Date
    May 2012
    Location
    Byron, Michigan
    Posts
    311
    Thanks
    20
    Thanked 570 Times in 174 Posts

    astroracer's Tools
    I slotted the drill motor plate today,

    transferred hole locations to the mounting plate and drilled and tapped those for 3/8-16 bolts.

    There is "just" enough slop in the mounting holes to allow me to set the pinion depth to the flexplate for a very quiet gear mesh.

    I also added a piece of angle to the motor plate to control any "rollback" the drill was seeing during startup.

    It wasn't much but it was still there so this piece stiffened it up nicely so now there is no movement of the drill when I hit the gas.
    This is almost ready to use! A little bit of welding (attaching the quick clamp) and some cleanup grinding and I should be running beads tomorrow.
    Thanks for watching!
    Mark

  10. #6
    Supporting Member
    Join Date
    Aug 2016
    Posts
    635
    Thanks
    1
    Thanked 187 Times in 166 Posts

    wizard69's Tools
    Mark, that is some nice photography! All those nice closeups that are in focus really pop. I'm hoping we will soon see pics of the finished project as this looks like one nice bead roller upgrade.

  11. The Following User Says Thank You to wizard69 For This Useful Post:

    astroracer (Dec 29, 2020)

  12. #7
    Supporting Member astroracer's Avatar
    Join Date
    May 2012
    Location
    Byron, Michigan
    Posts
    311
    Thanks
    20
    Thanked 570 Times in 174 Posts

    astroracer's Tools
    Thank you Sir! I am using my phone... It takes HUGE pics so I download them to my computer then run them thru a downsizing program before I upload them to my share site.
    I didn't get out to the shop today, went grocery shopping with the better half which is a chore as we are buying for us as well as her and my mothers so it takes two.
    I did pick up some better M8 set screws at ACE to replace all of the pig-iron screws that came in the bead roller. Trying to tighten them and they immediately round out so the key just spins... I got to use my birthday gift card so that made them "almost" free.
    Mark

  13. #8
    Supporting Member astroracer's Avatar
    Join Date
    May 2012
    Location
    Byron, Michigan
    Posts
    311
    Thanks
    20
    Thanked 570 Times in 174 Posts

    astroracer's Tools
    Haven't had much time to get out to the shop. I got the drive brackets all wrapped the other day and, after looking at my 1st attempt for the quick clamp decided to redo that a bit to shorten up the reach. I used the lower jaw I cut off to drop the clamp head closer to the bearing block. A little cutting, a little welding and this is done and will work nicely. I will clean it up a bit with the grinder and round off some of those straight corners.
    Clamp open.

    Closed up

    Adding the "C-Clamp" to the Vice Grip will let me sneak up on the depth setting when rolling heavier material or tipping a flange PLUS it will leave that setting alone when I open the vice grips to release the material. That will be handy.

    I haven't had a chance to use it yet but I am expecting good things.
    Mark

  14. #9
    Supporting Member astroracer's Avatar
    Join Date
    May 2012
    Location
    Byron, Michigan
    Posts
    311
    Thanks
    20
    Thanked 570 Times in 174 Posts

    astroracer's Tools
    I got the upgraded BEAD roller cleaned up and operational today. Did some clean up work on the quick clamp and touched up the welds for the braces on the back side. After I get some use out of it I will probably pull this all apart and take to a powder coating shop for blasting and coating. We'll see how well it works before I pull the trigger on that.


    I am locking the trigger on the drill right now and running it with a variable speed foot pedal.

    It works right now for proof of concept but I have a reversing foot pedal coming from Amazon and I will be rewiring the drill to use that pedal. I will also be adding a router speed controller to the mix so I can just stomp on the pedal to make it go and rely on the speed controller to keep the RPM's constant.
    I ran a few beads on a small piece of scrap 20ga. The bead roller works great. No more twist when clamping the metal in place, the drill has no problem running the bead and the new quick clamp works very well.

    I am happy with the way this turned out, now to get the drill motor set up to work better with a new pedal and remote speed control.
    Mark

  15. #10
    Supporting Member Isambard's Avatar
    Join Date
    Aug 2019
    Location
    Hawke's Bay, New Zealand
    Posts
    156
    Thanks
    0
    Thanked 55 Times in 35 Posts
    I see the drill chuck is a 1/2" 20tpi mount. To reduce the over hang of the pinion, threading the pinion and direct mounting it to the drill would reduce stress and a tendency to walk the pinion out of the drill chuck...Tom

Thread Information

Users Browsing this Thread

There are currently 1 users browsing this thread. (0 members and 1 guests)

Bookmarks

Posting Permissions

  • You may not post new threads
  • You may not post replies
  • You may not post attachments
  • You may not edit your posts
  •