 LinkBack URL
 About LinkBacks
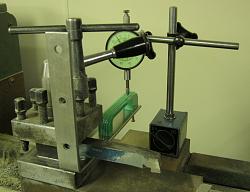
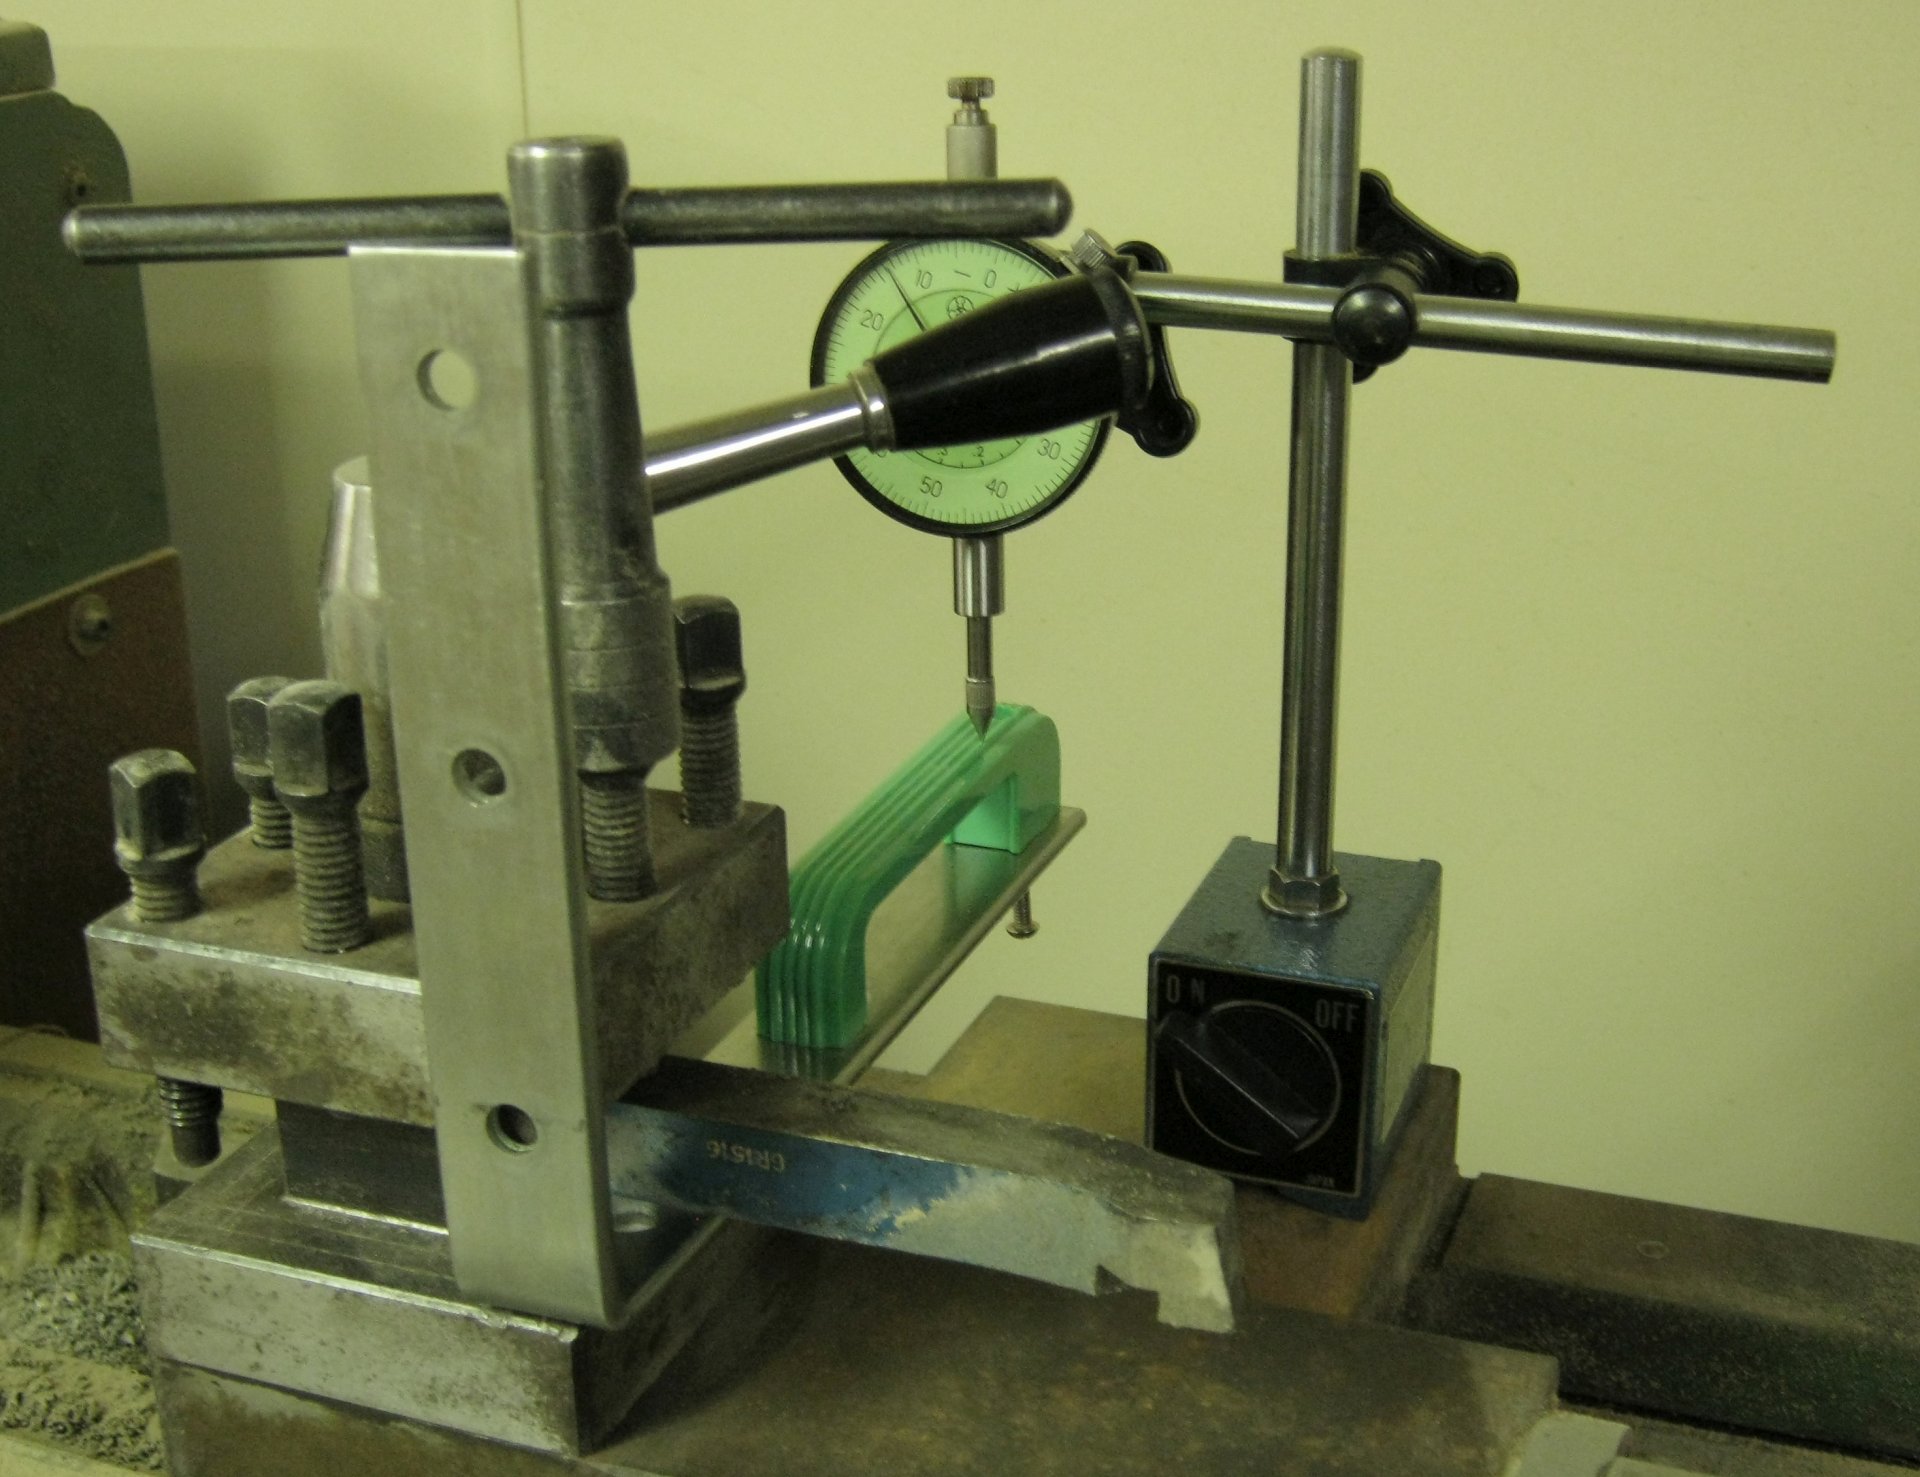
I needed a way to measure the shape of a cupboard handle and managed to do it with a dial indicator and lathe topslide. It take a while but gives great results.
Grant Trebbin: Using A Dial Gauge To Measure The Shape Of A Surface


I needed a way to measure the shape of a cupboard handle and managed to do it with a dial indicator and lathe topslide. It take a while but gives great results.
Grant Trebbin: Using A Dial Gauge To Measure The Shape Of A Surface

Jon (Jul 30, 2016), Paul Jones (Jul 30, 2016), PJs (Aug 3, 2016), Toolmaker51 (Jul 30, 2016)

Grant,
Looks like very precise way to measure the profile. What was the distance between each measurement as you measured the various heights of the profile?
Thank you for the photos of your setup,
Paul

PJs (Aug 3, 2016)


Ah the memories; shrink rules, big rolls of wide drafting paper, slide rules or finally the Texas Instrument calculators, red LED's in case you wanted to work in the dark? Cue Mr. Walsh; at the Troubadour, no less. Hello LA! Analog mebbe; but WB6ACU too.
Way back before digitized RS232 probes recording right into a controller, Moldmakers did this very thing. Imagine taking readings around a large oval tray, then removing it to TIG weld damaged areas. Of course, replacing it at least once more to machine, unless porosity reared it's fugly mug. Normally that was in the shut-off, but often had to work the feature profiles as well. Female side cut into the solid, male relieved or bolted on separately. Until CNC, those were all ro-tabbed (rotary table). Round trays were cut and blended on a lathe faceplate. As an aside, a 28" restaurant tray used around a 36" lathe, vertical or horizontal. That compression mold would be 4 or 5 inches thick with both halves. Locate the centers, bored for large dowels to run an indicator. A horizontal needed two sets of clamps...one for screws to jack it around sideways, other for holddowns.
Old ARMY reserve commercial was all like "...we do more before 8 in the morning then some people do all day!" Ooh my, a whole weekend, once a month.
Yeah, we did that much all day, every day. I still marvel at the capital investment of those various companies, by a single proprietor. Owned the building. Machines anchored and bedded. Bigazz forklifts with railcar mast. The big busboy box you've all seen, that injection mold is 12 ton. Unloaded the blocks, ran and shipped it. Well over 6 months work. The old foreman he'd hired ages ago and a few machinists. No hint of 'investors', LLC's, and certainly little interest of corporate situations. Each man had a machine or two, to run and maintain. Some jobs were run by different men doing successive operations, others you did all the steps.
Fat resumes, little scars, in the command of live cast iron. Life's been good.
Uber impressed with your site. Sorry, can't help you out of Woolworth's situation. I'll direct our Italian Stallion ''rendoman" there, he will eat it up too, post haste.
Last edited by Toolmaker51; Jul 31, 2016 at 09:16 AM. Reason: Update.
Sincerely,
Toolmaker51
...we'll learn more by wandering than searching...
0.1 mm between measurements. I could have gone smaller, but 0.1 mm was fine for the level of detail I wanted.
PJs (Aug 3, 2016)


Thanks Grant Trebbin! We've added your Shape Measuring Method to our Measuring and Marking category,
as well as to your builder page: Grant Trebbin's Homemade Tools. Your receipt:
There are currently 1 users browsing this thread. (0 members and 1 guests)
 Posting Permissions


 Reply With Quote

Bookmarks