
 LinkBack URL
 About LinkBacks


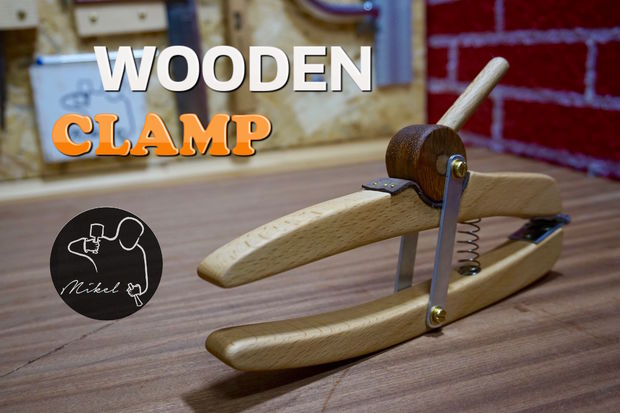
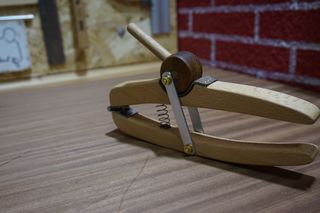
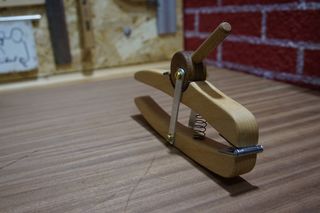
I want to show you how to make a cheap and effective wooden clamp. I have used wood chips and other materials that I already had in my workshop. As at first sight it may seem weak, this clamp has plenty of clamping pressure. It has a Norwegian style, as these type of clamping tool was traditionally used for Norwegian boat construction
I would also apologise for my English as a non-native English speaker some terms are very difficult for me.
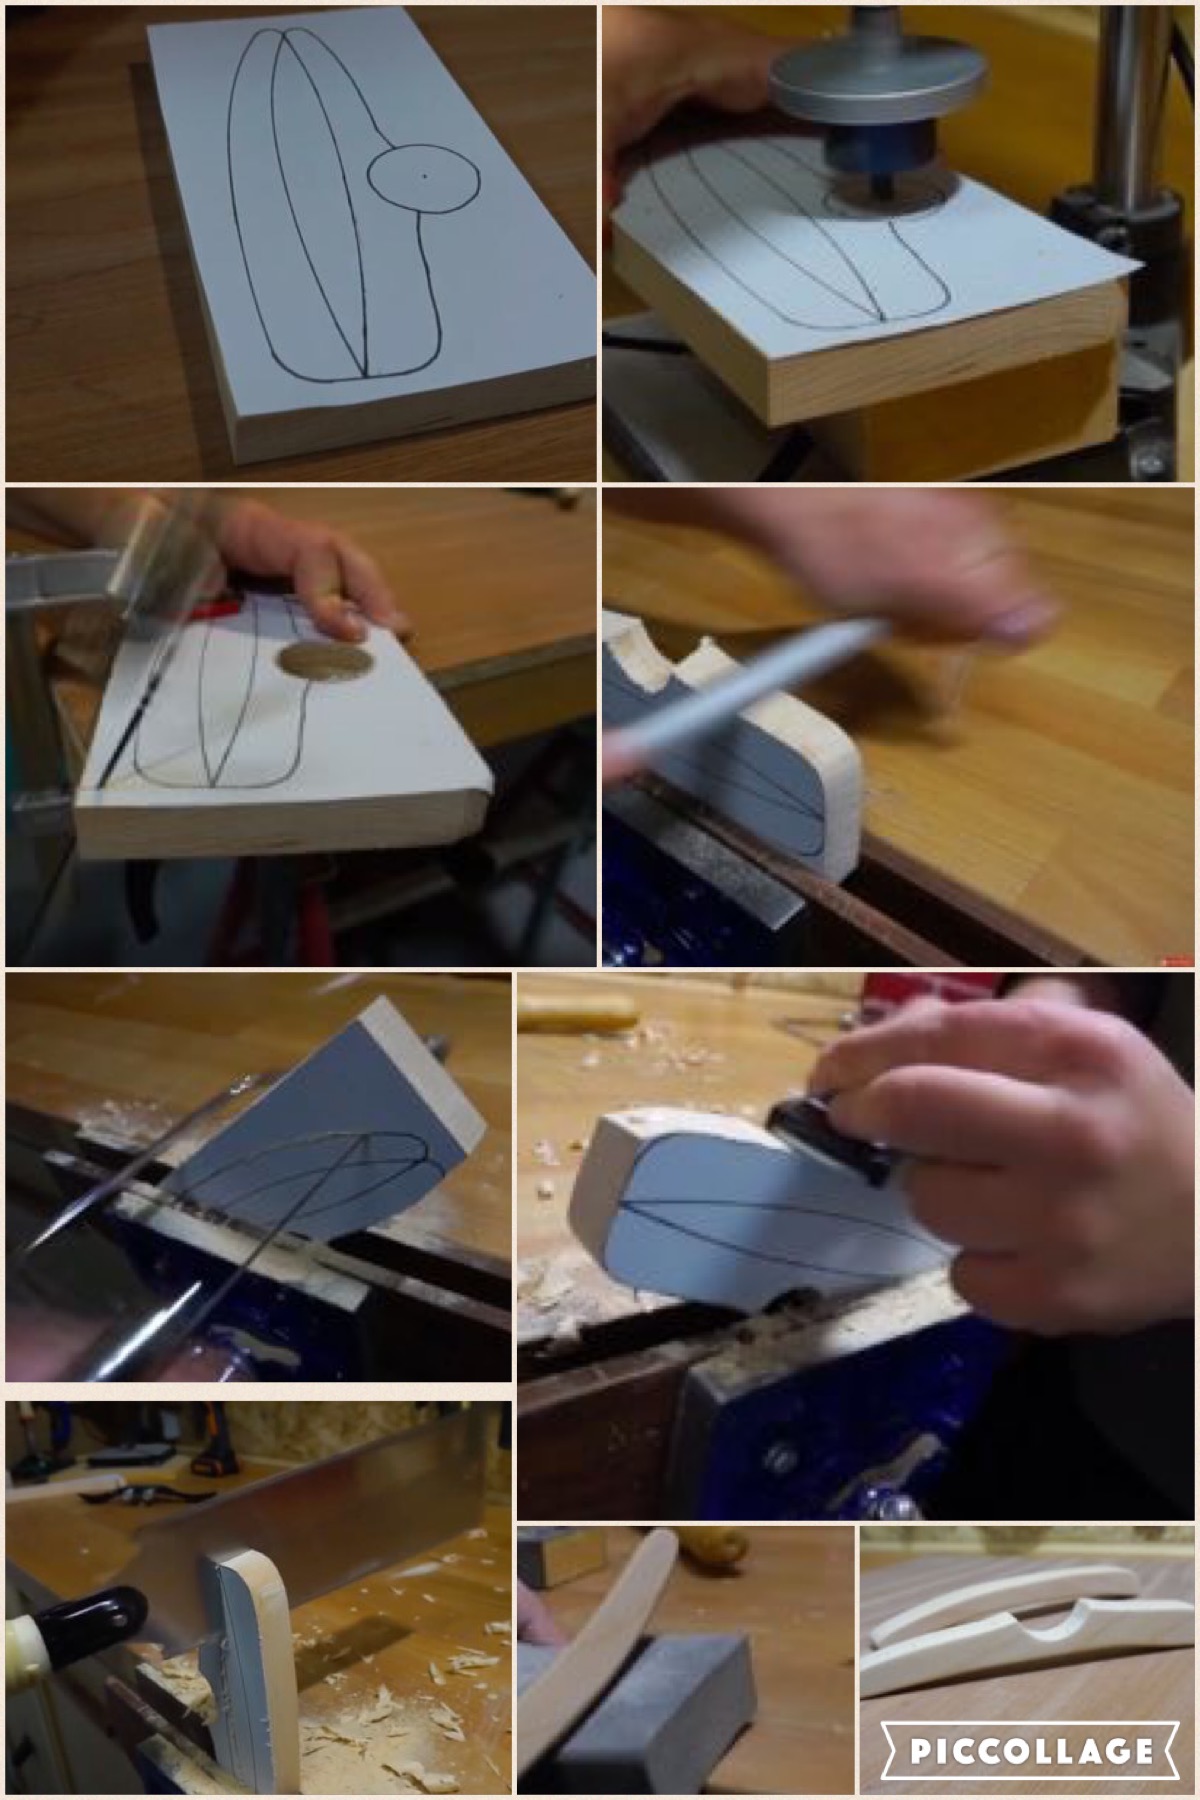
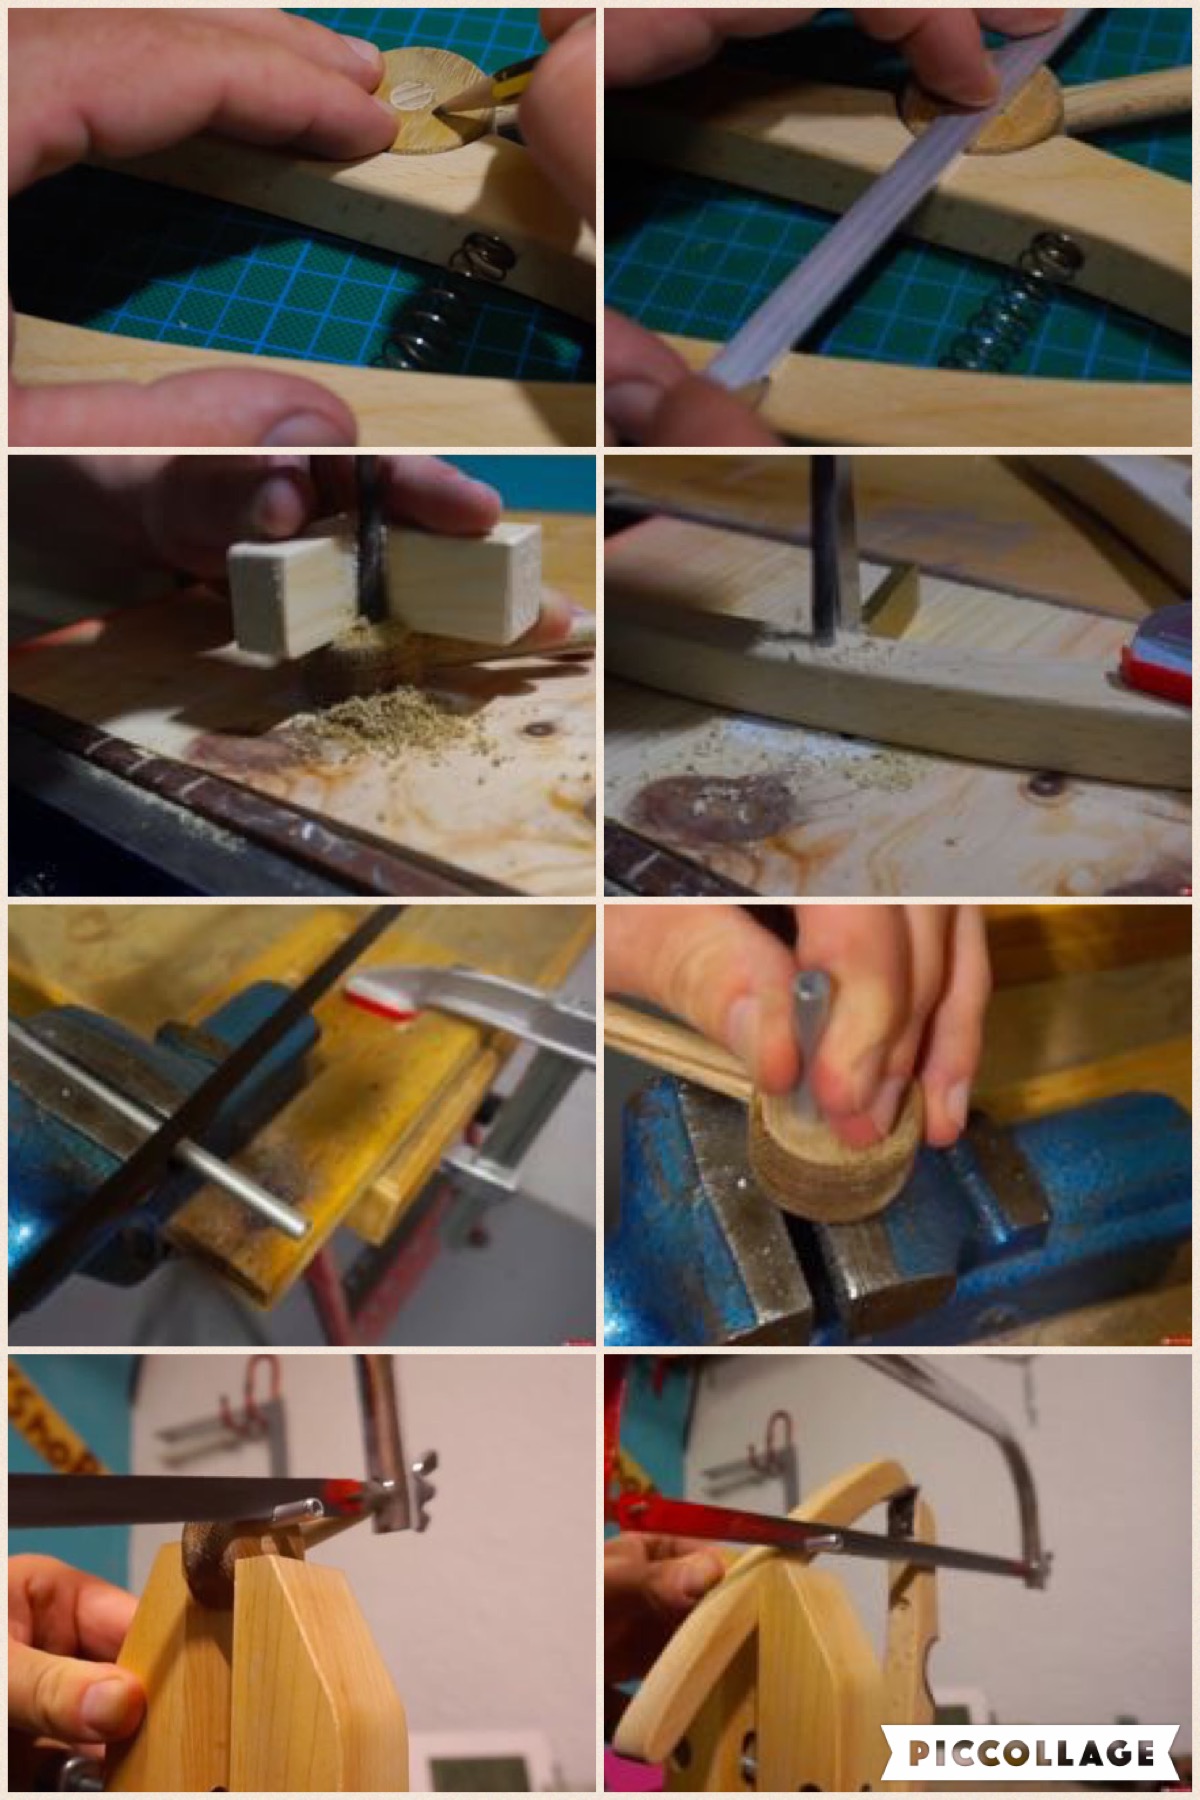
I start cutting the pieces that I previously drew by hand and later I glue it on the wood. For cutting I use a fret sawl and for the rounded zone I use a hole saw.
I use a rasp half round and a block plane to flatten the irregular surfaces and for the final touch a sanding paper grit 250.
Here is the drawing of the figure.
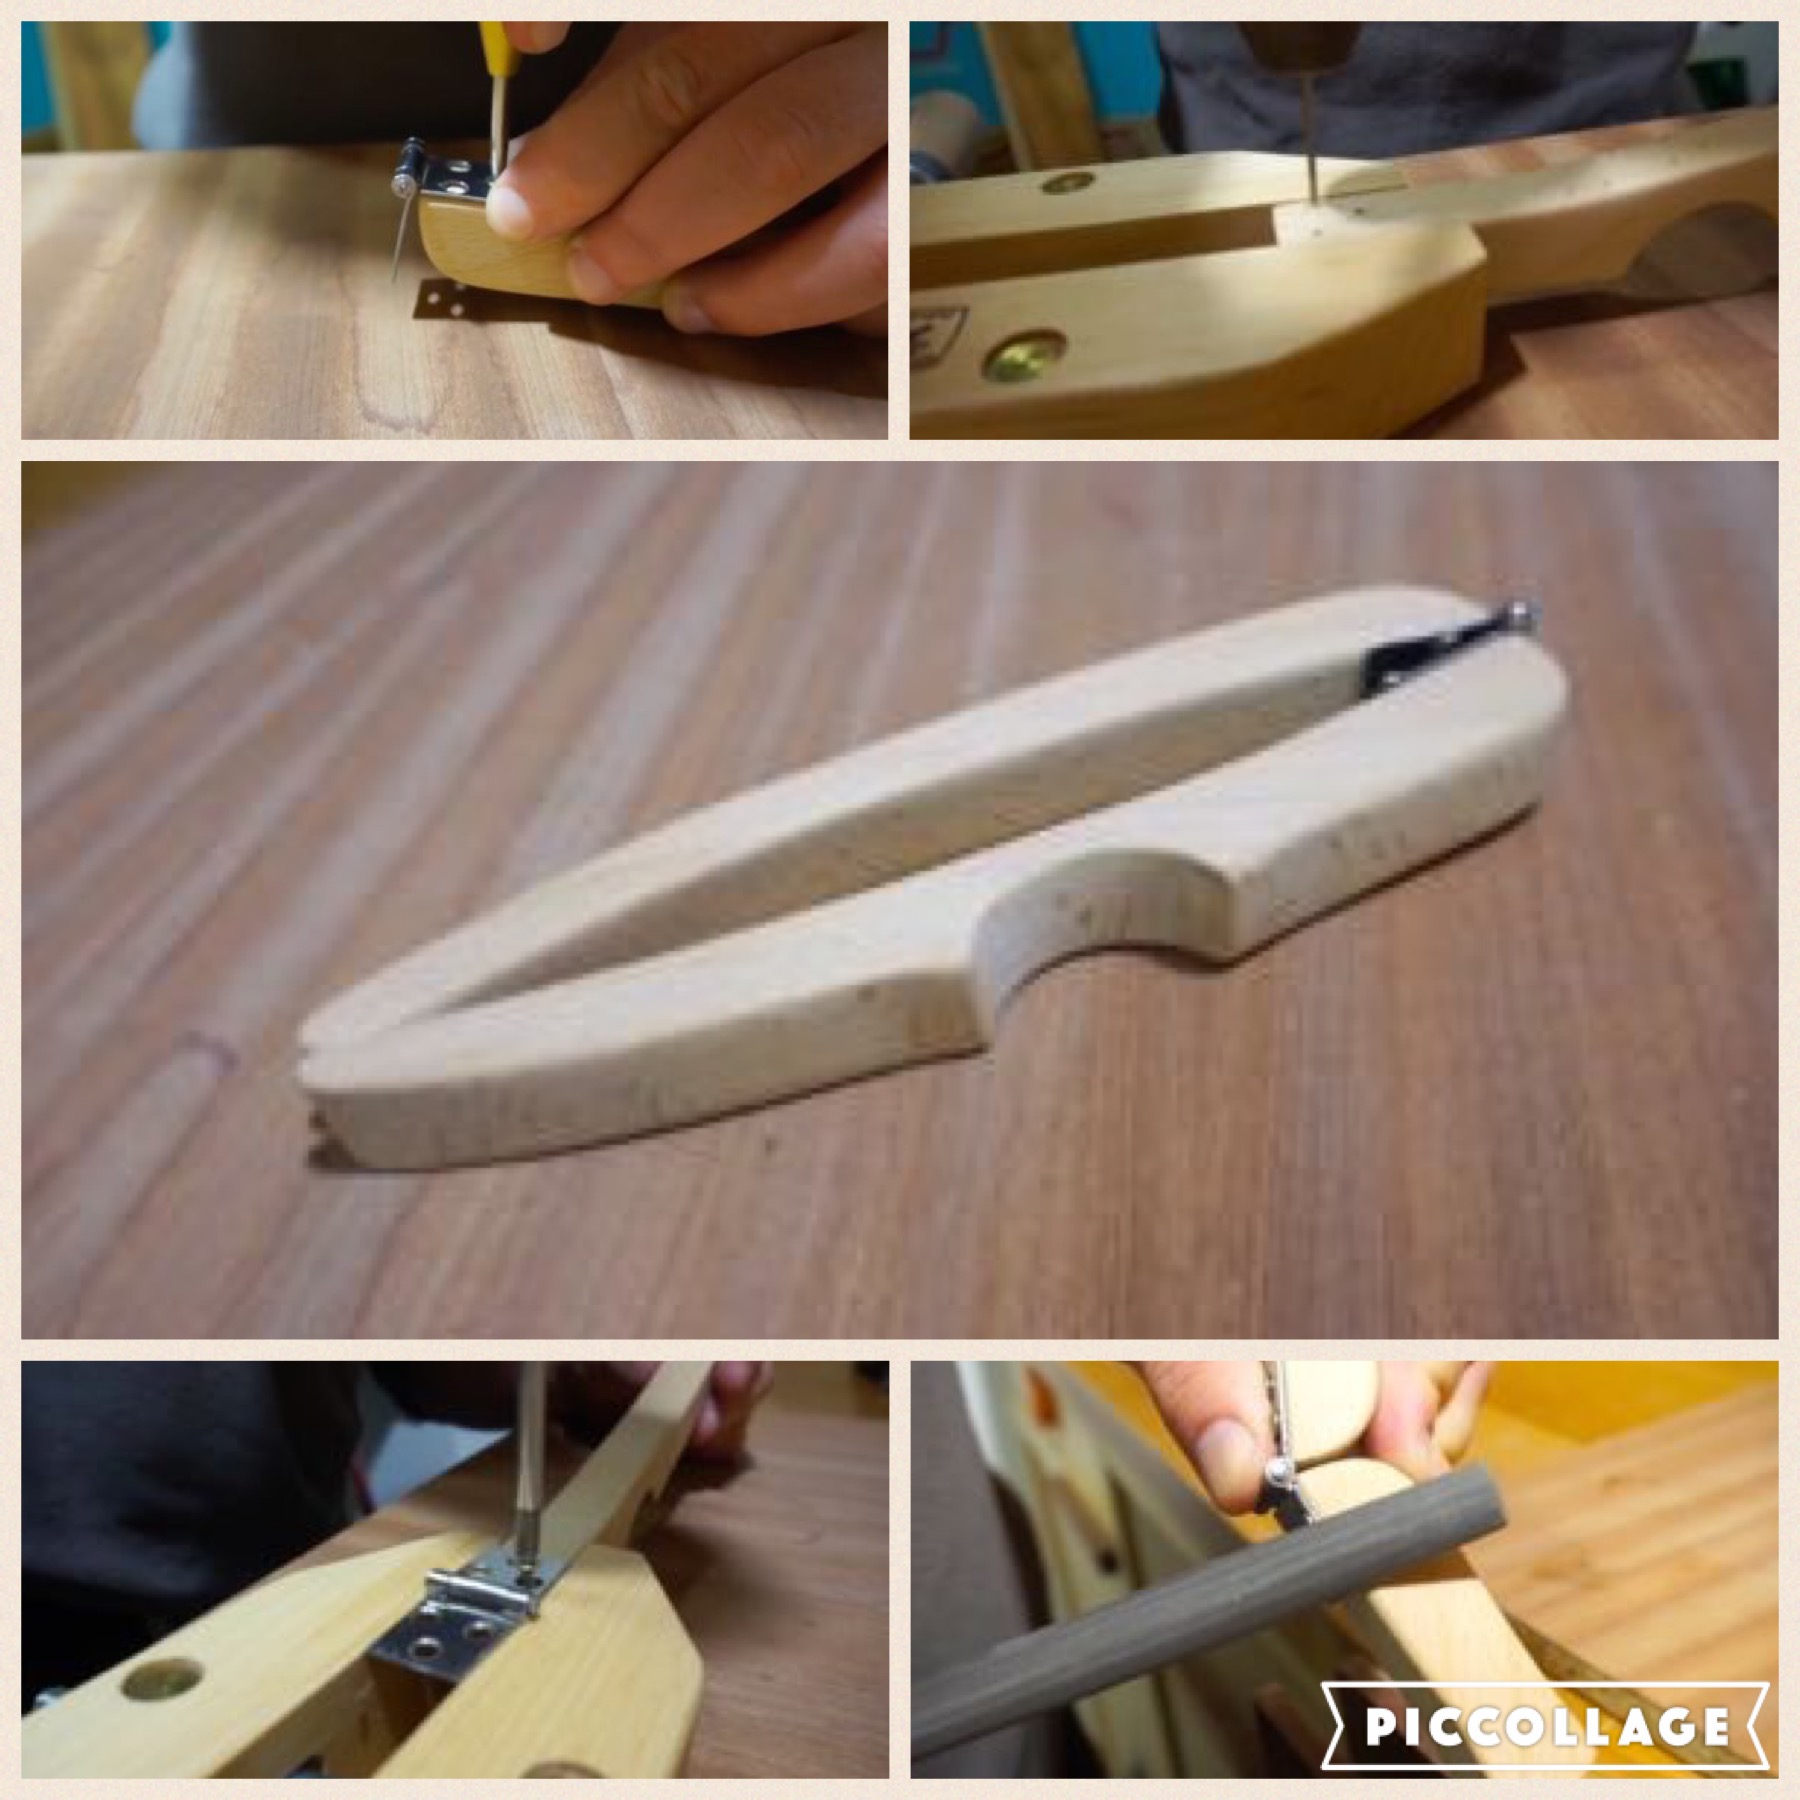
For the join of the both pieces I use a hinge the most similar to the thickness of the wood and before screwing I drill the holes with a hand drill that afterwards I tightly screw.
As the hinge I used is wider I polish the sides to adjust it to the maximum.
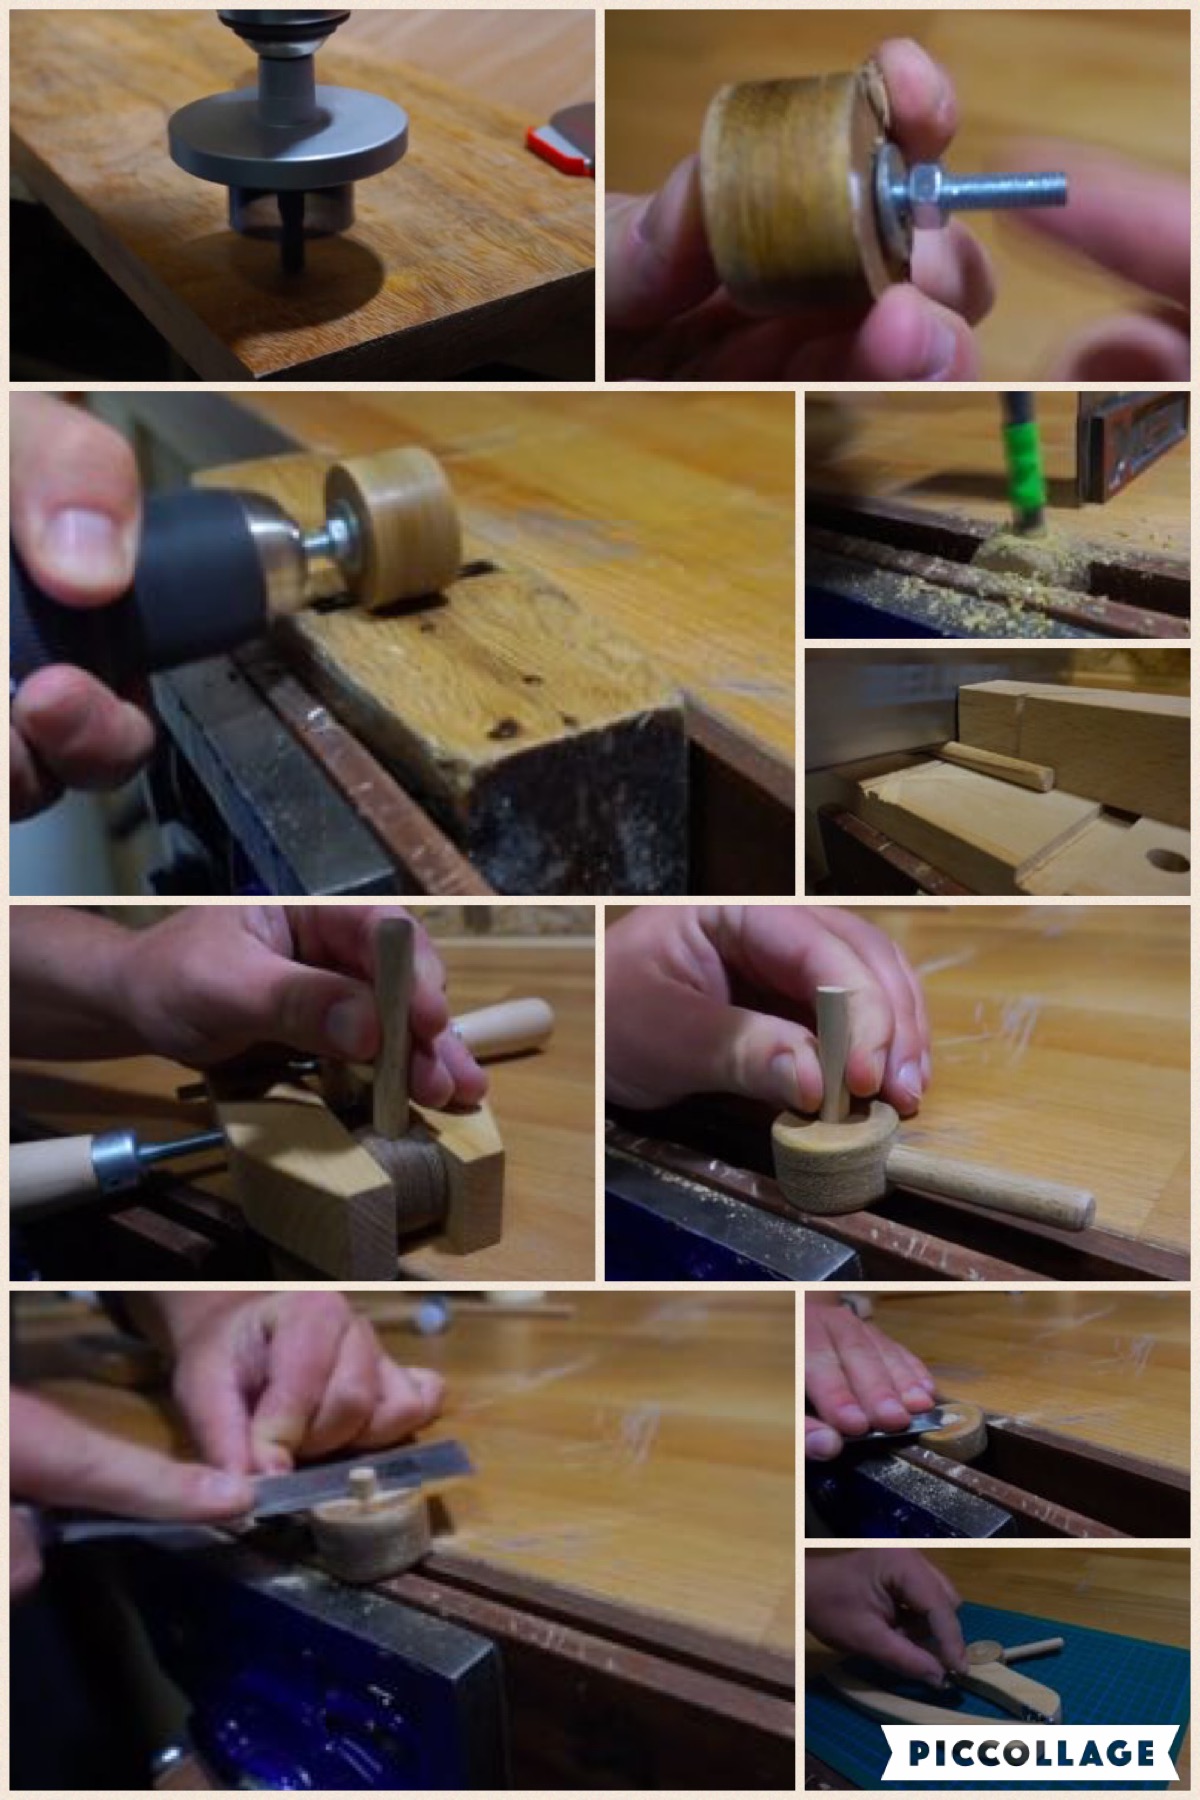
I use other type of wood for making a color-contrasting for the clamping system.
With the same hole saw I used previously I make a circle and after I use a homemade but very effective technique to polish it: it is about using a plane wood as a lathe with the help of a drill as you can see in the photos.
Then we drill the wood in order to insert the wooden stick that we will use to tight the clamp. For this I use a bit drill of the same size of the wooden stick and finally we cover with another little stick the hole that remains in the center of the circle.
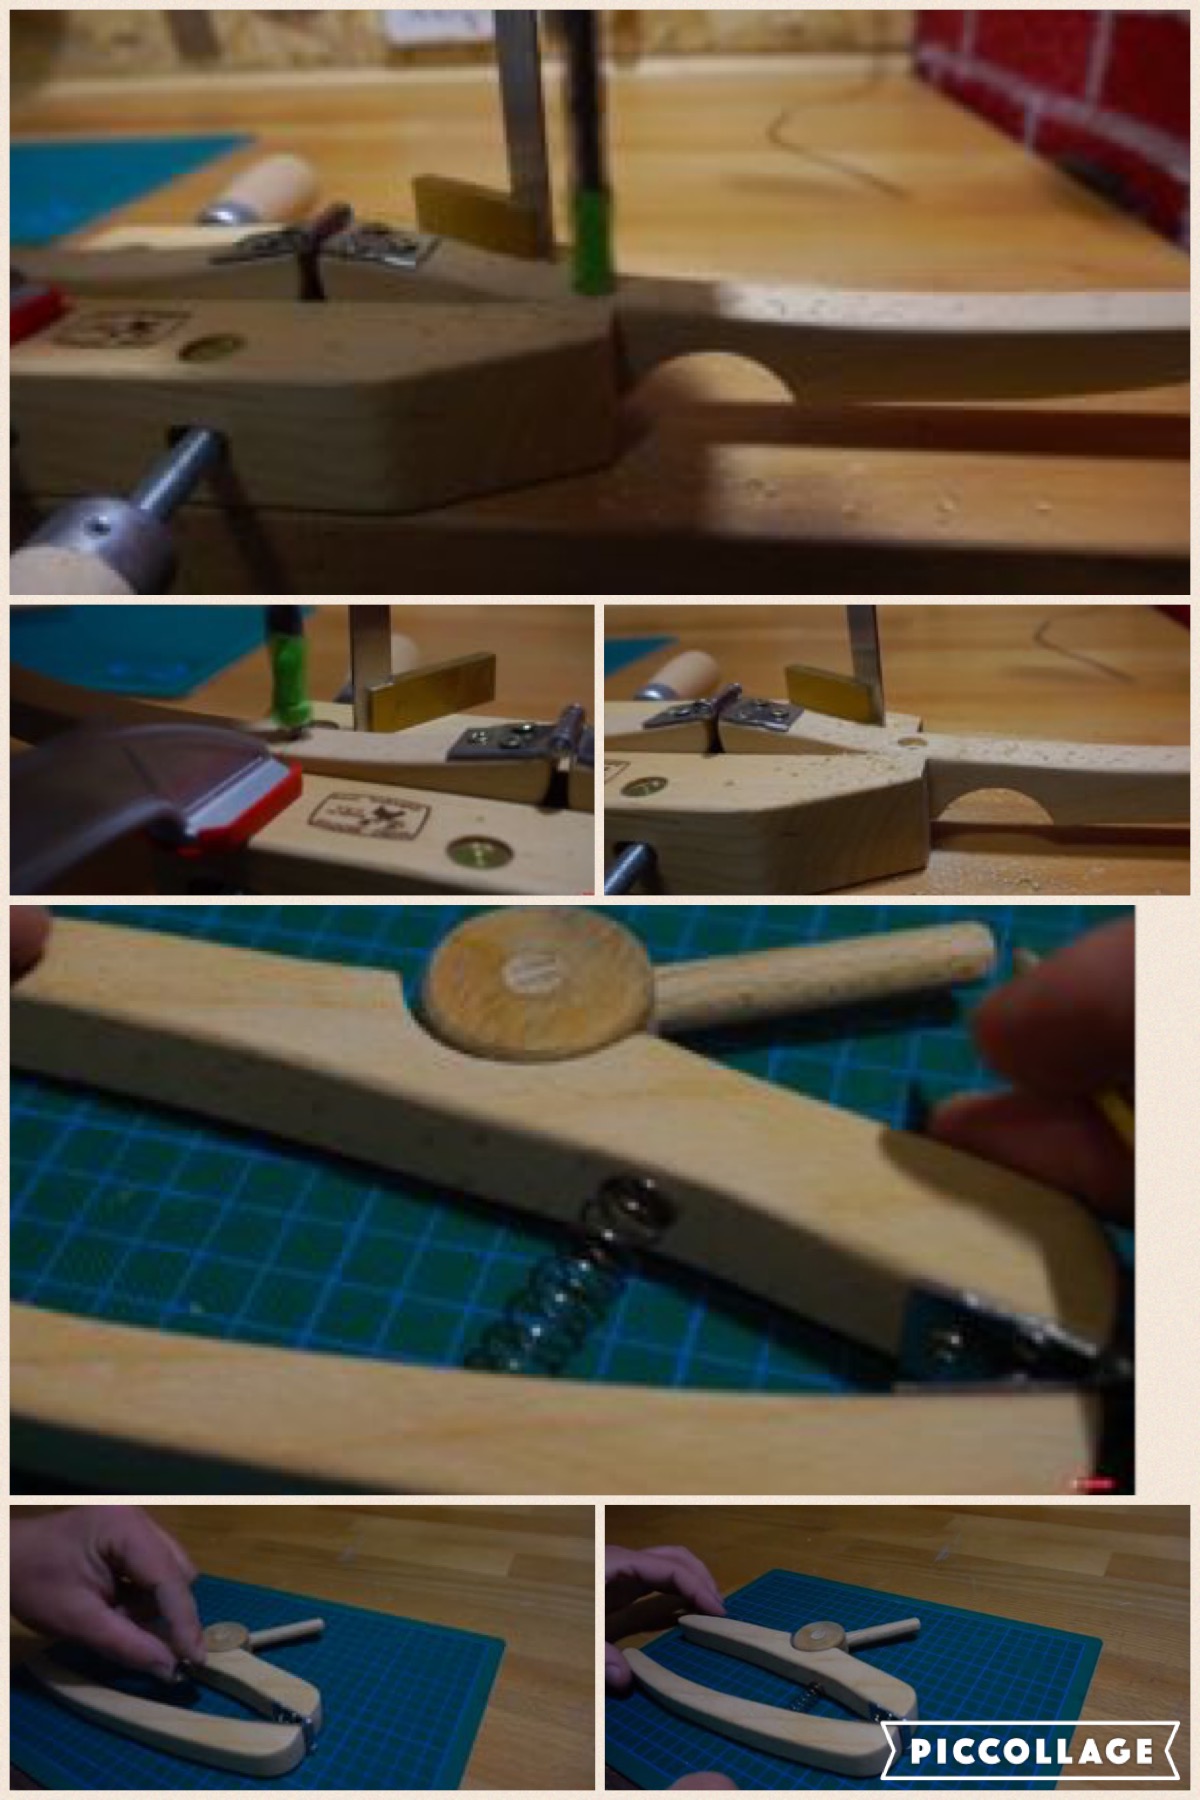
For making the clamp return to the open position I settle one spring making 2 holes where this is accommodate without the need of any supporting system.
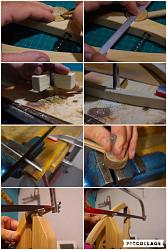
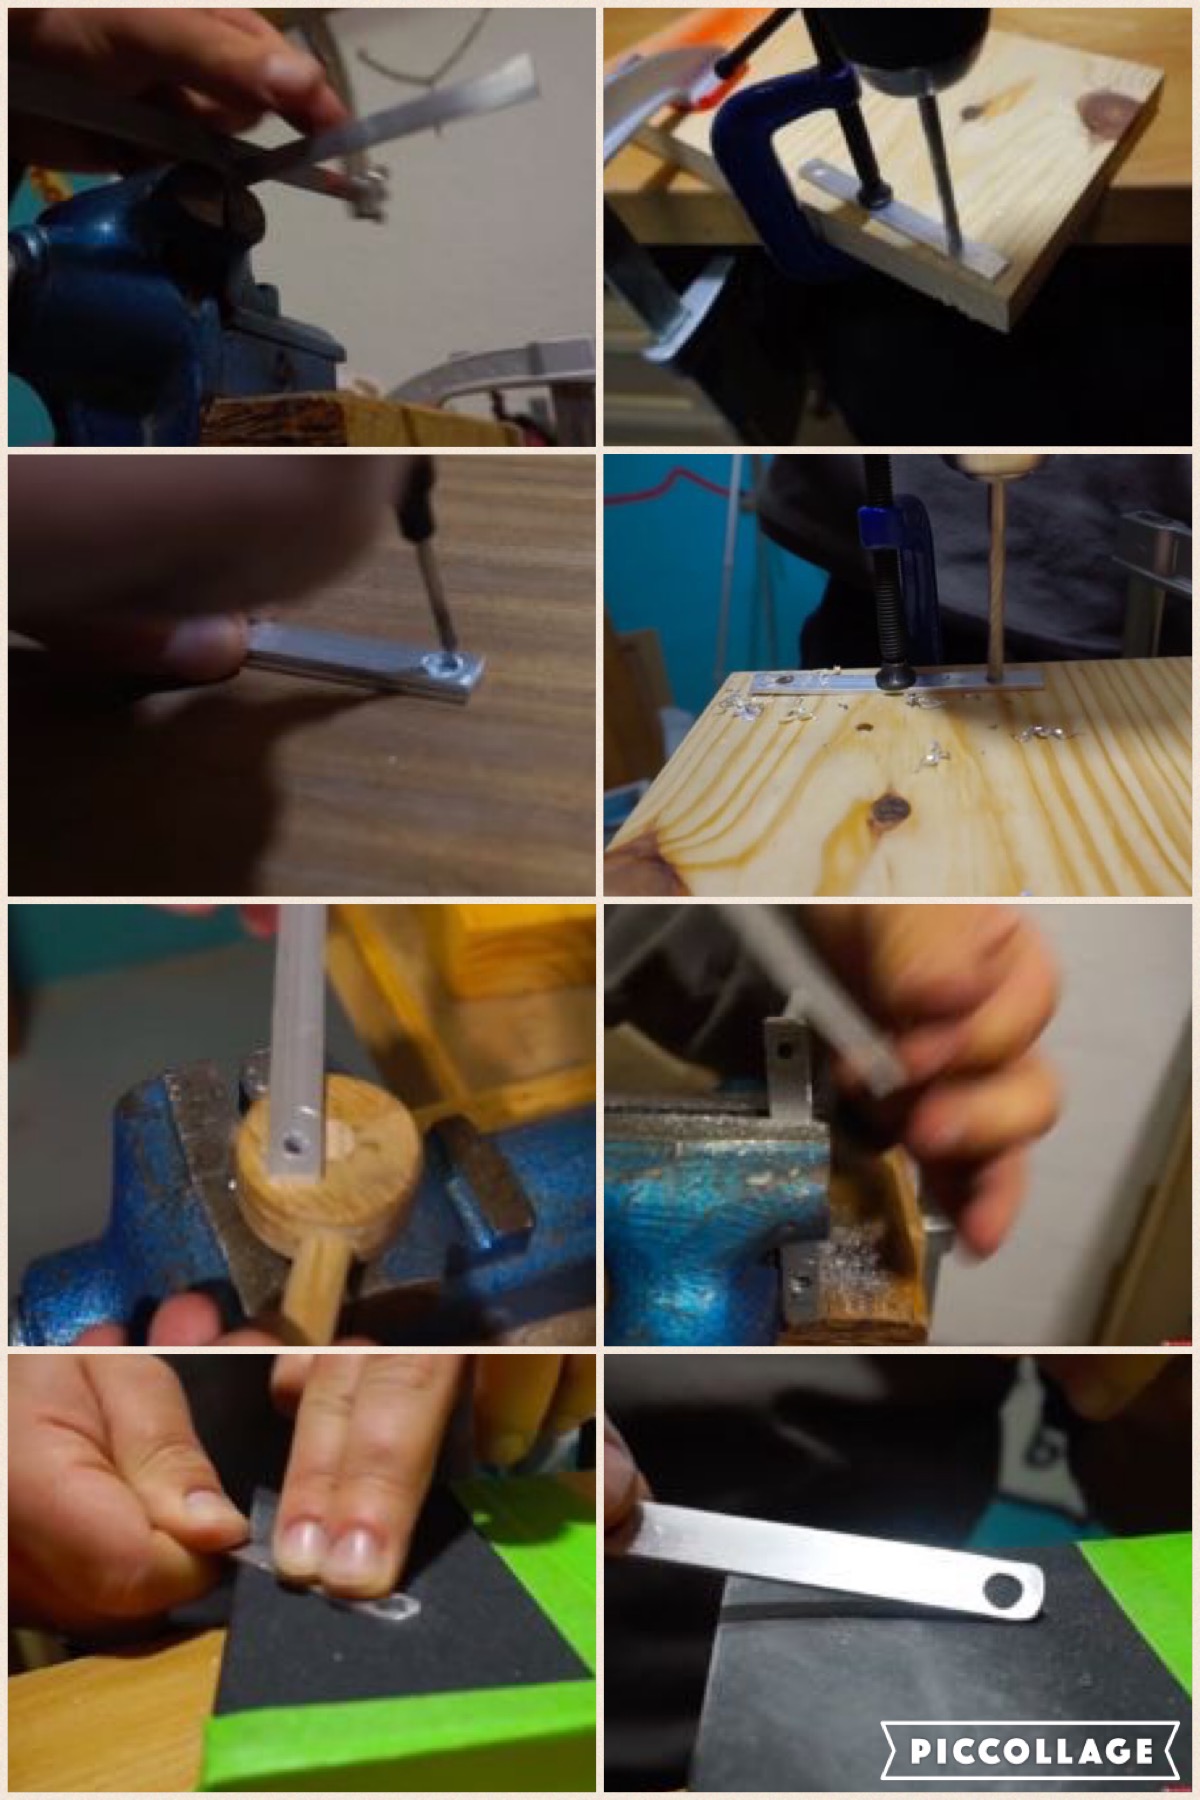
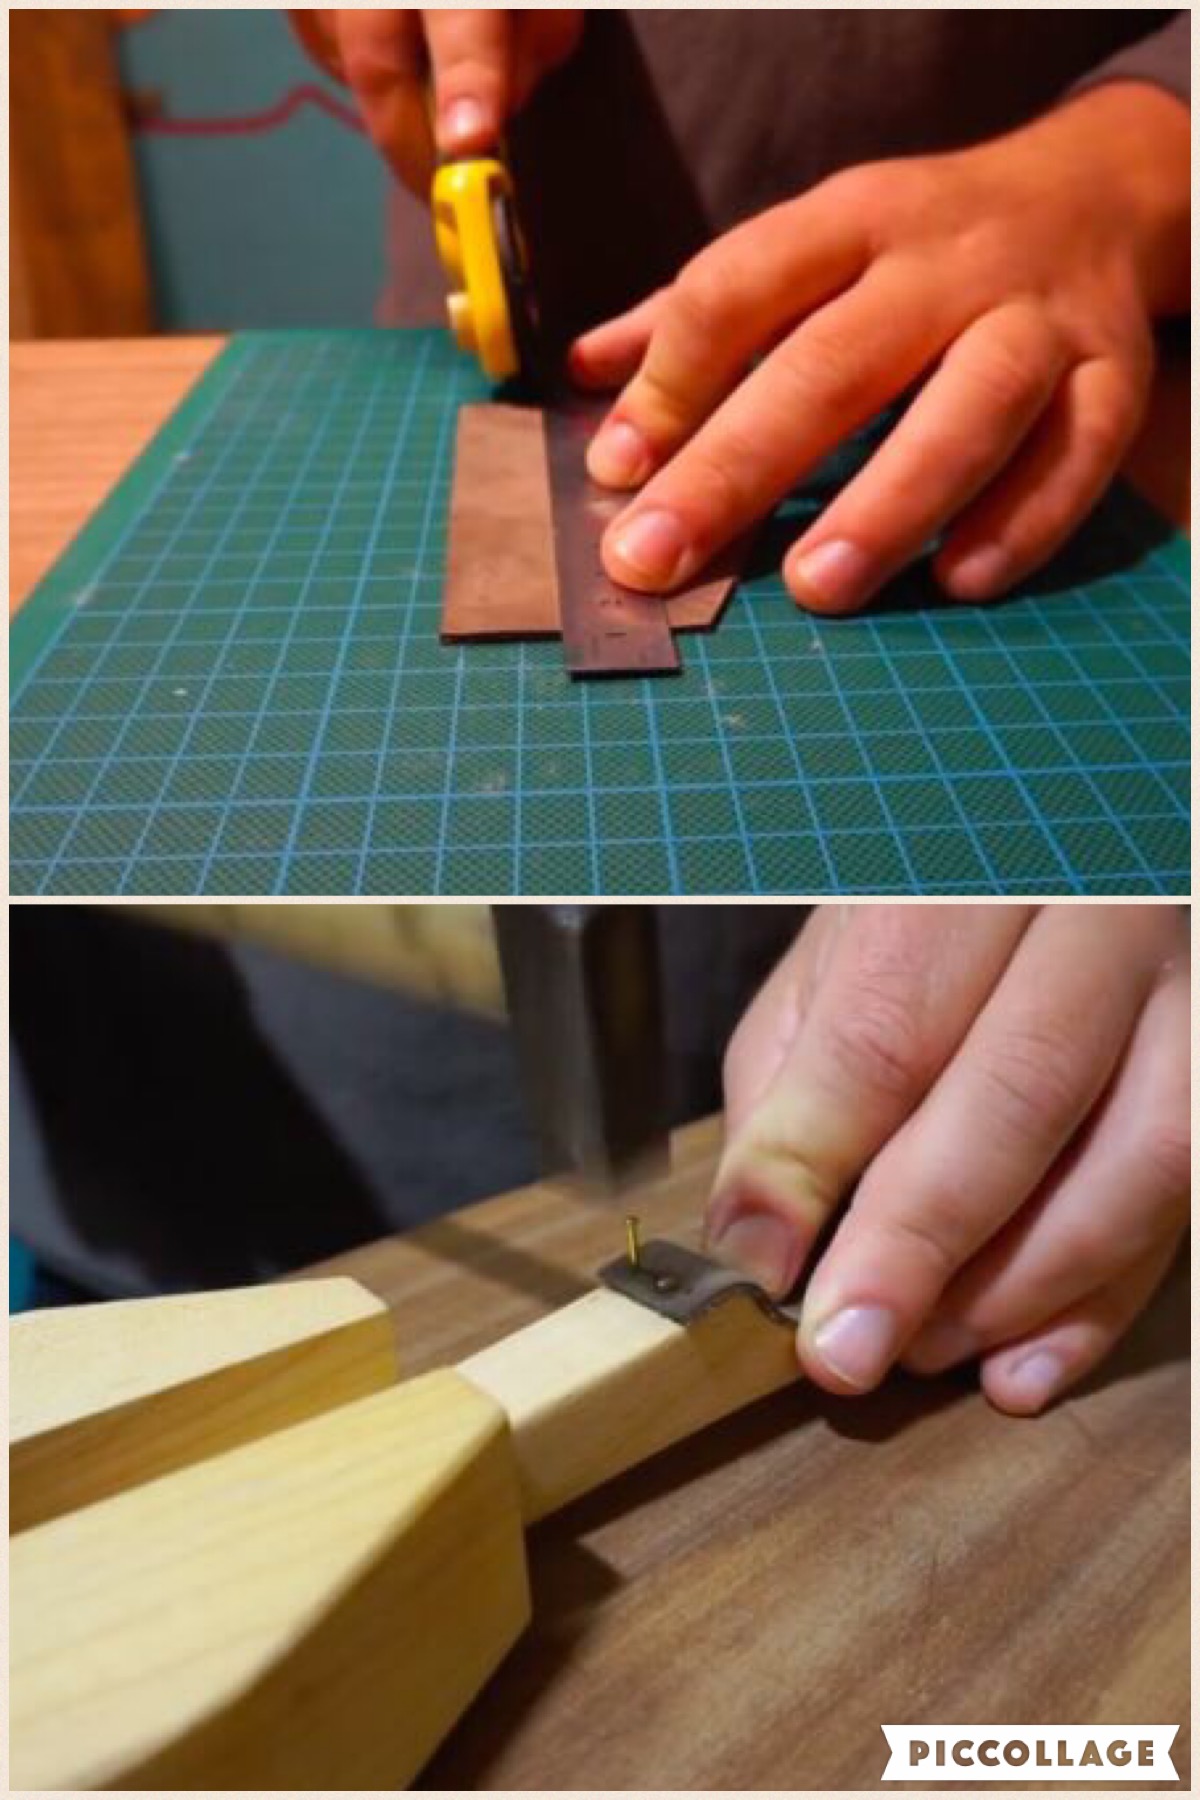
Now we have to mark the points for the 2 aluminum tubes and we drill it with a bit drill of the same size (6mm) and then we introduce them in the holes. Afterward, we cut 2 metal sheets (8x1x0,2cm) and we drill one hole in each end with the same size of the tube diameter (6mm).
I use a steal rasp file and sanding paper for a better shape and softness of the metal sheets.
I screw a piece of leather on the curve area for making strong friction against the wood as braking mode.
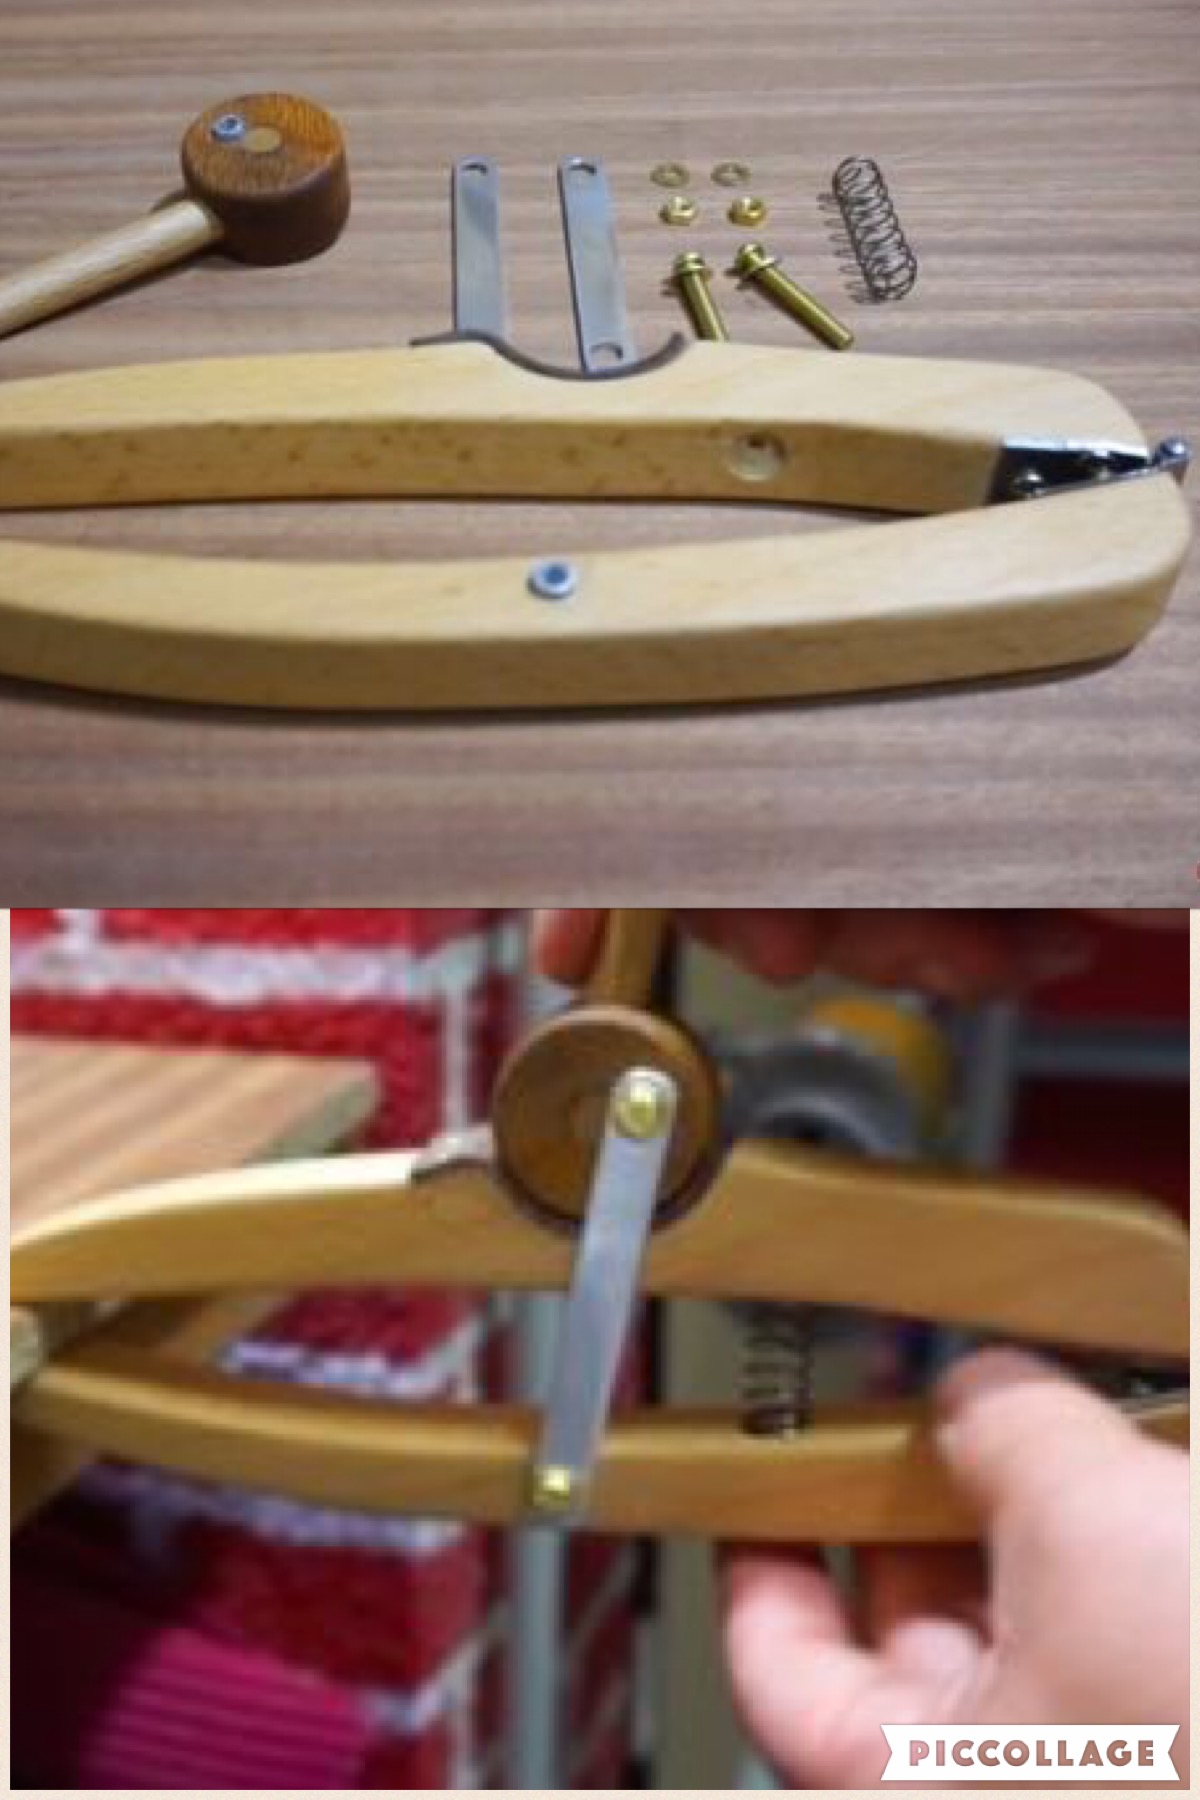
After a coat of oil onto all the pieces we start with the final assembling!
For this the images almost speak for themselves!
My Channel


 Reply With Quote

Bookmarks