Free 186 More Best Homemade Tools eBook:  
Get 2,000+ tool plans, full site access, and more.

User Tag List

Page 2 of 2 FirstFirst 1 2
Results 11 to 19 of 19

Thread: 35 buck Chinese Machinist's Level overhaul and cralibation (!)

  1. #11
    Supporting Member Toolmaker51's Avatar
    Join Date
    Feb 2016
    Location
    Midwest USA
    Posts
    5,331
    Thanks
    7,042
    Thanked 2,981 Times in 1,893 Posts

    Toolmaker51's Tools
    re:filling the vial. My choice would be 90% medicinal alcohol. It will take food coloring as a dye, freezing will be non-issue, easily found and handled. Dye somewhat larger quantity than needed with a pinhead to 'spoon' it.
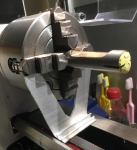
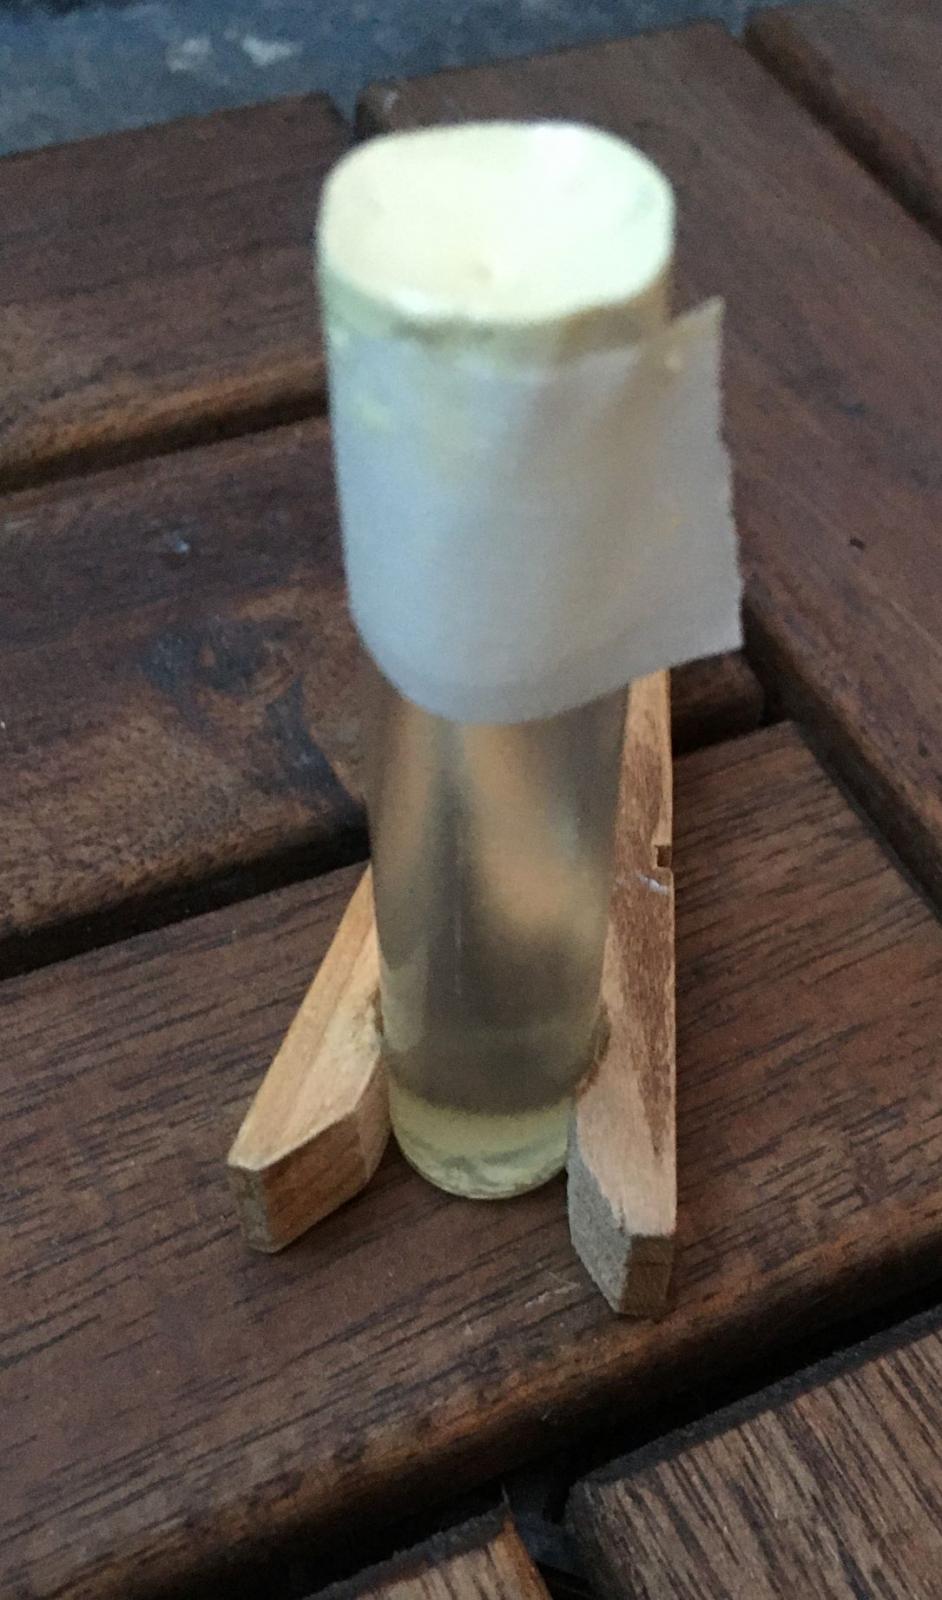
    The real trick will be determining what volume is needed for a proper size bubble. Maybe fill it experimentally, hold end shut and horizontal. Once found, up-end and felt-tip mark a graduation on side for later. In regards to filling the tube, my first test would be to submerge it; otherwise a plastic eyedropper.
    We have a popular epoxy here called J-B Weld, find an equivalent to seal nib.

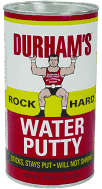
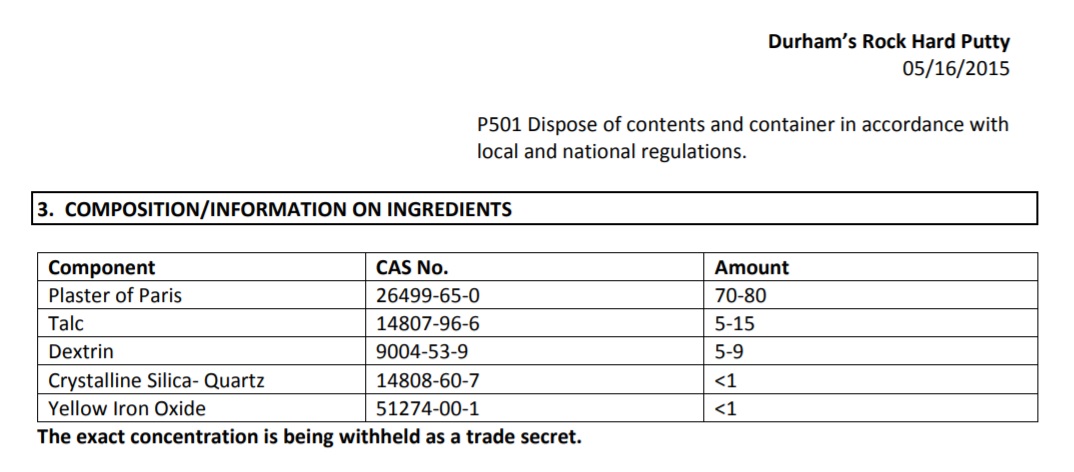
    Sulfur is low melting point but not getting quick even distribution could crack vial. I guess warming it in hot water is possible. I used plaster of paris for my Starrett level.

    186 More Best Homemade Tools eBook
    Last edited by Toolmaker51; May 10, 2020 at 12:16 PM.
    Sincerely,
    Toolmaker51
    ...we'll learn more by wandering than searching...

  2. #12
    Supporting Member DIYSwede's Avatar
    Join Date
    May 2019
    Location
    Stockholm, Sweden...
    Posts
    634
    Thanks
    415
    Thanked 799 Times in 319 Posts

    DIYSwede's Tools
    Thanks for chiming in, TM51, much appreciated!
    Easiest and cheapest for me would undoubtedly be using an ordinary MEK-denaturated ethanol from the gas station,
    already having a pink hue (the booze - not the gas station), ready to serve.

    I've tried to figure out why ether has been the "go to" liquid for precision levels over the years (beside its freezing point).
    Given that machinist's levels with 4 arcsecs/ div take a looong time for the bubble to set, I think the dynamic viscosity might be a clue.
    Link for viscosities of different liquids:
    https://www.engineeringtoolbox.com/a...ds-d_1259.html

    So, Ethanol - it's viscosity is rated at 1.074 (cP at 300K), whereas ether clocks in at 0.223 (and pentane at 0.219, acetone at 0.316).
    Thus the bubble with alcohol should be much slower to set and perhaps also less precise?
    This was my hypothesis for trying that motor starter fluid, by just adding some red food dye (thanks for that tip!).

    Our equivalent to JB Weld was my initial sealant thought too, after dropping the "droplet of water glass" idea.
    Start with everything at room temp, apply epoxy generously - put in fridge for 72 hrs (thus lowering vapor pressure).
    I've scratched the nib's surroundings with a diamond file to get a good bite, and the epoxy can stand solvents, ketones etc.

    Thanks also for your tips in how to fill up - I guess I'll fill it entirely as stated earlier, turn upside down
    then let the warm fingers squeeze out some - turn horizontal while pinching the hole, test for bubble size, and repeat.

    My report will come in due time, as well as some more of my shortcomings - after all:
    I broke the darned vial, so I might as well figure out how it (cheaply) can be fixed, and learn something new under way.

    Cheers and take care!
    Corrections and suggestions welcome, as always.

    Johan

    2000 Tool Plans

  3. #13
    Content Editor
    Supporting Member
    DIYer's Avatar
    Join Date
    Aug 2013
    Posts
    3,056
    Thanks
    772
    Thanked 1,852 Times in 1,653 Posts


    Thanks DIYSwede! We've added your Center Drilling Fixture to our Drilling and Drill Presses category,
    as well as to your builder page: DIYSwede's Homemade Tools. Your receipt:


  4. #14
    Unkle Fuzzy's Avatar
    Join Date
    Mar 2017
    Location
    Near Monkeytown, USA
    Posts
    149
    Thanks
    1
    Thanked 88 Times in 51 Posts
    To mount the vial in it's tube...Rock Hard Water Putty. Looks exactly like what is in there.

    I've used it for years to bond new brass necks onto glass oil lamp bodies.

    It's literally, as the name states, hard as a rock, and sets with out any shrinkage.Name:  Water Putty.png
Views: 187
Size:  8.8 KB

  5. #15
    Supporting Member DIYSwede's Avatar
    Join Date
    May 2019
    Location
    Stockholm, Sweden...
    Posts
    634
    Thanks
    415
    Thanked 799 Times in 319 Posts

    DIYSwede's Tools
    Thanks for the tip, Uncle Fuzzy - I'll check out whether that or some equivalent is available over here!
    Your suggestion is right up my alley.

    OTOH...
    The Swedish Cheapskate's 1st Commandment:
    -Thou shalt not BUY, what you can wing together thyself, by reading the MSDS!


    35 buck Chinese Machinist's Level overhaul and cralibation (!)-rhp-msds.jpg

    AFAIK: The dextrin (sugar), quartz and iron oxide content is probably for it to keep its powdery property and ease of mixing.
    Seems to be of too low percentage as to have any bearing on final hardness - that's what the talcum's for.
    Snag is: Plaster's pretty hygroscopic, and could deteriorate in hi humidity environments...

    My first thought on fixing with Plaster of Paris was to add talcum and/ or bentonite clay up to, say 25%, add some water.
    "pour" and let that set, then finally and forever fix that putty with 50/50 water glass/water mix (for optimal penetration).
    Nope- you can't mix plaster (nor any other cement) with water glass directly - it'll become "Insta-set" in the bucket.

    (My home-brewed El Cheapo refractory mix was 7% bentonite (ball) clay, 93% (of weight) silica sand, add water glass to taste.
    30-40% Perlite could be added to that mix for better insulation. Held up just fine up to app 730 deg C in my old aluminum foundry.)

    Cheers
    Johan
    Last edited by DIYSwede; May 12, 2020 at 02:06 PM. Reason: omitted foul language

  6. #16
    Supporting Member jdurand's Avatar
    Join Date
    May 2019
    Location
    Krasnodar Krai, Russian Federation
    Posts
    1,458
    Thanks
    127
    Thanked 749 Times in 417 Posts

    jdurand's Tools
    Another DIY cement for cracks and gaps in smaller items is to pack the crack with corn starch and then drip liquid Super(ish) Glue on it (any brand). The glue soaks in and hardens the whole mass.

  7. #17
    Supporting Member DIYSwede's Avatar
    Join Date
    May 2019
    Location
    Stockholm, Sweden...
    Posts
    634
    Thanks
    415
    Thanked 799 Times in 319 Posts

    DIYSwede's Tools
    Thanks, jdurand!
    Q: -Being into pyrotechnics yourself, you surely must've used bentonite clay for tube ends and nozzles?
    If you press it in firmly, it's almost as cast - then seal off/ fixate with a droplet of waterglass.

    Cheapest glue there is, also good for fire protection of just about anything fibrous (but it gets stiff and glossy, tho).
    I use it by the gallons all the time at work - fireproofed a complete stage set entirely made from cardboard (sic!).
    Painted/ waterproofed a concrete base for a textile dyeing machine by adding 2-3 teaspoons of atomized aluminum per litre,
    completely filling all the pores, looking great and easy to clean. Ain't no dye stains no more!

    Cheers
    Johan

  8. #18
    Supporting Member jdurand's Avatar
    Join Date
    May 2019
    Location
    Krasnodar Krai, Russian Federation
    Posts
    1,458
    Thanks
    127
    Thanked 749 Times in 417 Posts

    jdurand's Tools
    Quote Originally Posted by DIYSwede View Post
    Thanks, jdurand!
    Q: -Being into pyrotechnics yourself, you surely must've used bentonite clay for tube ends and nozzles?
    If you press it in firmly, it's almost as cast - then seal off/ fixate with a droplet of waterglass.

    Cheapest glue there is, also good for fire protection of just about anything fibrous (but it gets stiff and glossy, tho).
    I use it by the gallons all the time at work - fireproofed a complete stage set entirely made from cardboard (sic!).
    Painted/ waterproofed a concrete base for a textile dyeing machine by adding 2-3 teaspoons of atomized aluminum per litre,
    completely filling all the pores, looking great and easy to clean. Ain't no dye stains no more!

    Cheers
    Johan
    Didn't use waterglass, just a mixture of bentonite, grog (ground up pottery that didn't make it), and I a bit of wax. Press hard and you have a nozzle.

  9. #19
    Supporting Member DIYSwede's Avatar
    Join Date
    May 2019
    Location
    Stockholm, Sweden...
    Posts
    634
    Thanks
    415
    Thanked 799 Times in 319 Posts

    DIYSwede's Tools
    -Well, at least I tried...

    35 buck Chinese Machinist's Level overhaul and cralibation (!)-vial-filling.jpg

    Starter fluid in test tube - came out way below freezing, so I had to wait for the drive gas to boil off,
    then dropped the vial in and let it fill up - a mere walk in the park - no thermo-cycling even needed.

    When filled, let some ether mix out by hand warming the vial for a proper-sized bubble,
    then thoroughly cleaning the roughened neck (as there was some oily residue from the fluid),
    tape off a ridge for the epoxy to sit within, mix it and fill - let cure (-Ahem):

    35 buck Chinese Machinist's Level overhaul and cralibation (!)-vial-curing.jpg

    This morning I figured out that only one of infinitely possible outcomes had actually happened:
    The ether in fact stopped the epoxy from hardening at all, it was just a gooey mess,
    and the previously "perfect bubble" inside hade become bigger, and thus totally useless for its purpose.
    Tore the mess off, emptied the vial by warming it, and cleaned it for Round #2 ... Off to work.

    Conclusion to y'a all: Epoxy IS resistant to all sorta liquids, but only when properly cured!
    My hypothesis: Ether is very volatile with a pretty high vapor pressure at room temperatures,
    that prevented the epoxy from hardening.

    So: "Rinse and repeat" for yours truly - next time sealing with a droplet of waterglass, instantly set by a shot from a CO2 extinguisher.
    Then, with vial properly sealed off - some quick setting "steel epoxy" for ruggedness.

    Given the levels of my knowledge and wiseness (humbleness aside) today - I thought I've already done all mistakes possible!

    The fun never ends for a cheap walk-in closet machinist.


    186 More Best Homemade Tools eBook

  10. The Following User Says Thank You to DIYSwede For This Useful Post:

    Toolmaker51 (May 15, 2020)

Thread Information

Users Browsing this Thread

There are currently 1 users browsing this thread. (0 members and 1 guests)

Tags for this Thread

Bookmarks

Posting Permissions

  • You may not post new threads
  • You may not post replies
  • You may not post attachments
  • You may not edit your posts
  •