-
3 Attachment(s)
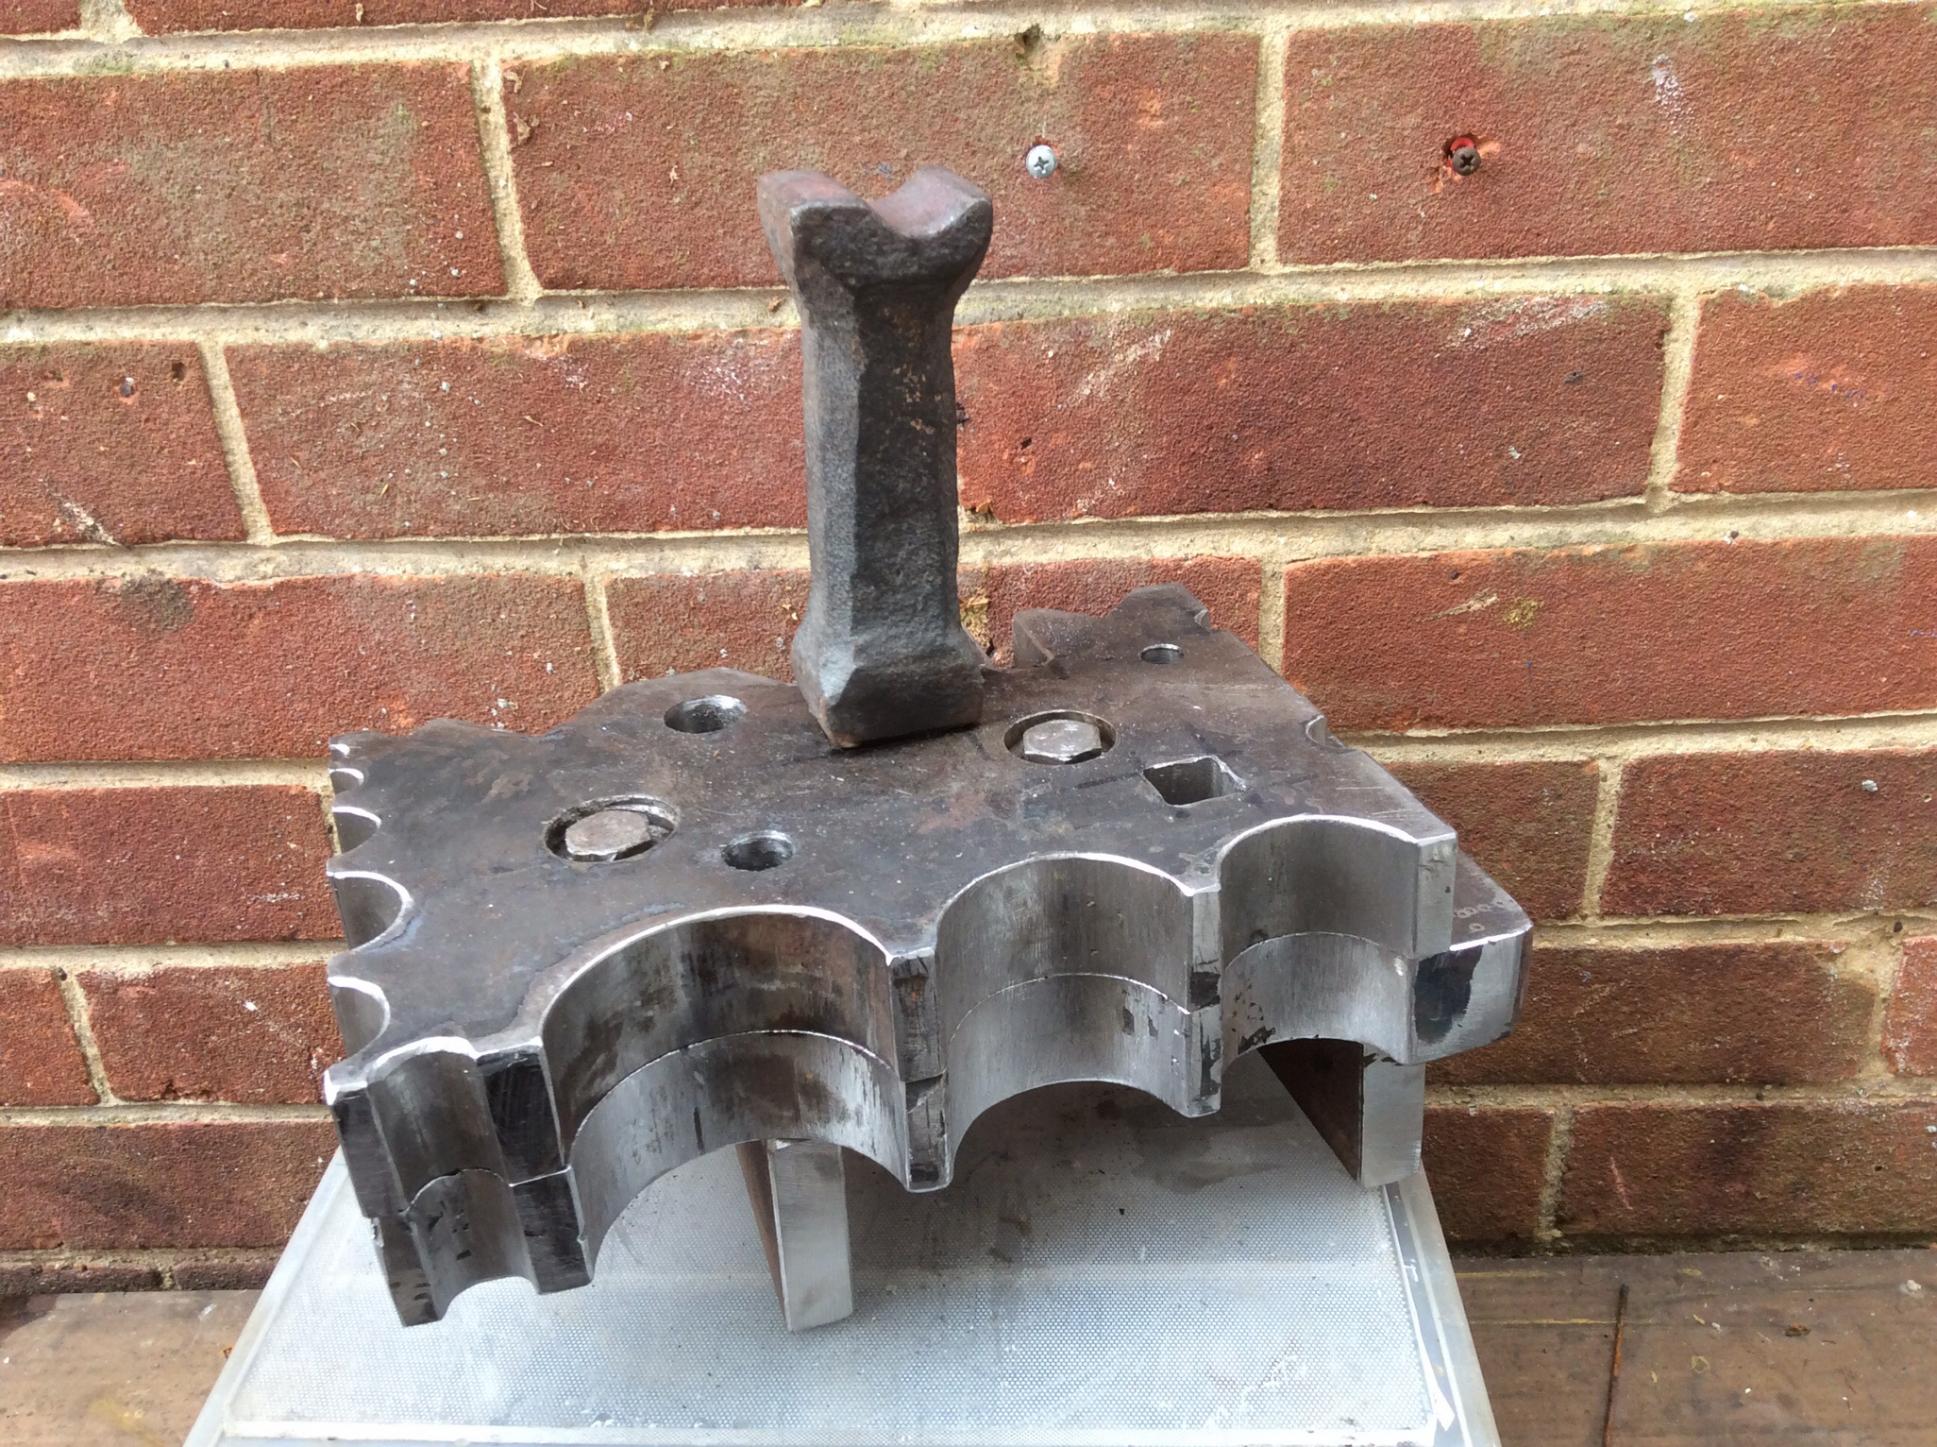
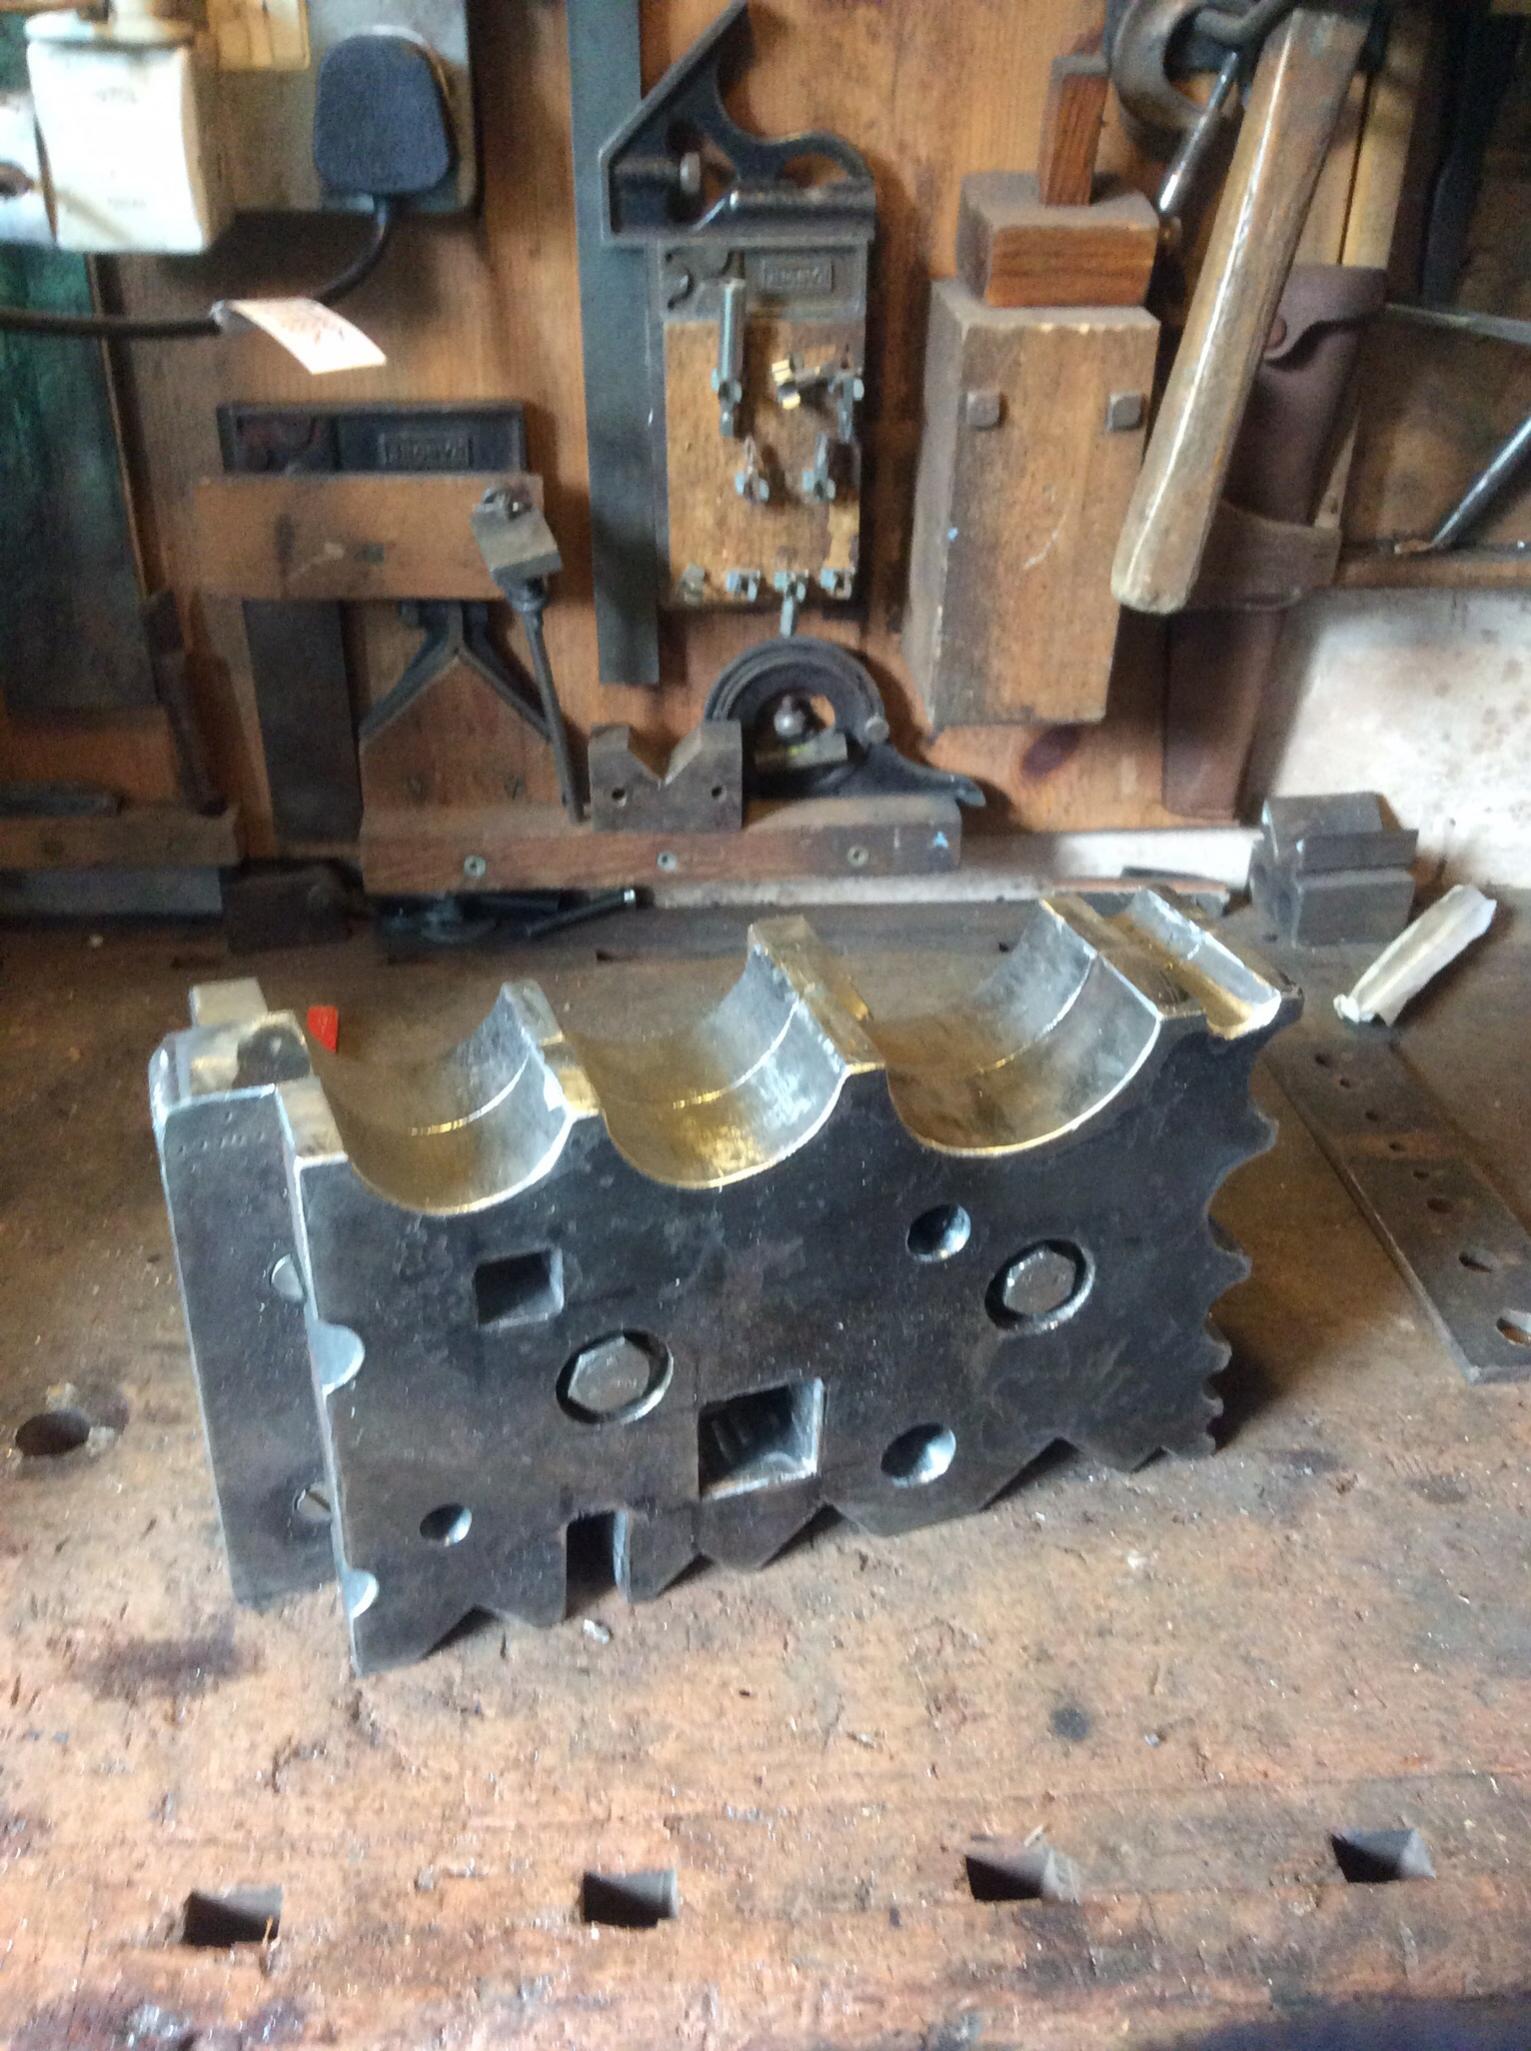
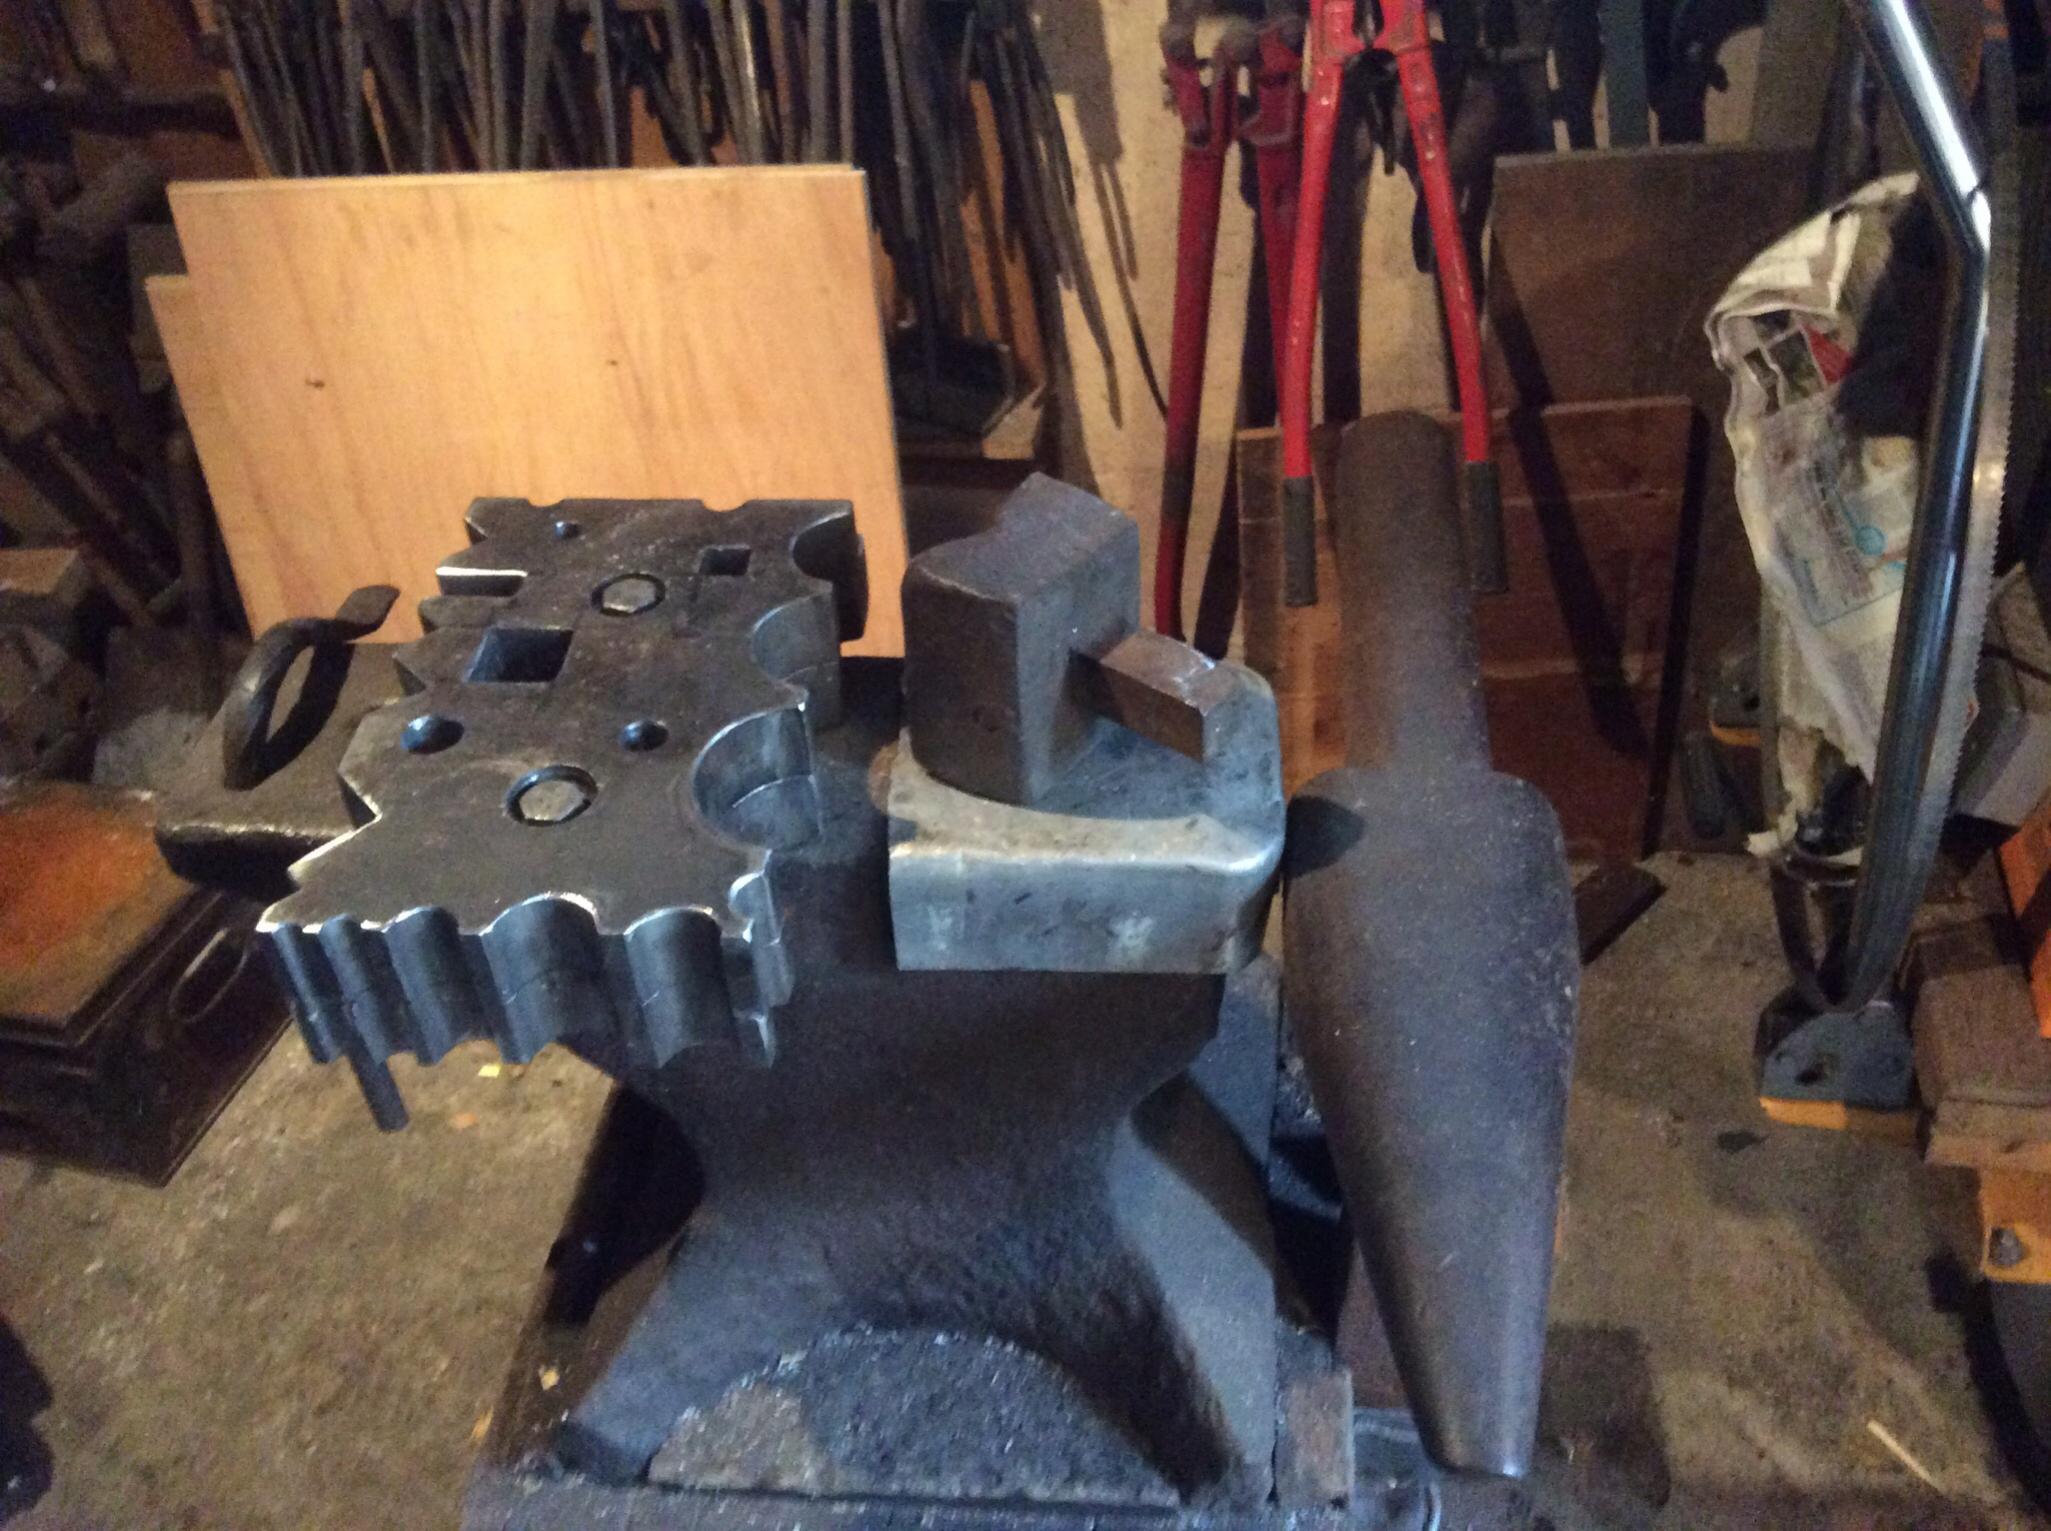
Adaptable SWAGE BLOCK
This is a bench top swage block, consisting of four components, bolted together. It is formed of two plates, cut from a salvaged plate, one and one quarter inches thick. It has been many hours' work, carving it with hand tools (apart from the initial drilling', as a result of which I discovered, too late,that my drill press table is way out of true. Also, I used a disc sander at work to true the edges) . The legs provide a saddle and prevent it sliding about on the anvil. My anvil lost its bick in the remote past; I don't want to break the hardy hole as well. Now I can make some top stages to suit.
I began it four months ago and finished it yesterday. This has been my main hobby time project during this period. While resting my arms, though, I have been also making other stuff, some of which will be posted in due course, if I am spared.Attachment 9515Attachment 9516Attachment 9517
-
<!-- BEGIN /var/www/html/homemadetools/protected/modules/zeus/views/tool/postUpdate.php -->
Thanks Philip Davies! We've added your Adaptable Swage Block to our Metalworking category,
as well as to your builder page: Philip Davies's Homemade Tools. Your receipt:
<div id="blocks">
<div class="block b1 pngfix">
<div class="bimg">
<div>
<a href="http://www.homemadetools.net/adaptable-swage-block">
<img src="/uploads/145963/adaptable-swage-block.jpeg"/>
</a>
</div>
</div>
<div class="head pngfix"></div>
<div class="left pngfix"></div>
<div class="right pngfix"></div>
<div class="blockover b1 pngfix">
<div class="title">
<a href="http://www.homemadetools.net/adaptable-swage-block">Adaptable Swage Block</a>
<span> by <a href="http://www.homemadetools.net/builder/Philip+Davies">Philip Davies</a></span>
</div>
<div class="tags">tags:
<a href='http://www.homemadetools.net/tag/swage-block'>swage block</a> </div>
</div>
</div>
</div>
<!-- END /var/www/html/homemadetools/protected/modules/zeus/views/tool/postUpdate.php -->
-
Well done!
I've been staring at a piece of A36, 12 inches square by 2 inches thick
for close to 10 years and wondering how to make a swage block of it...
Now I see at least part of the answer
-
I love it. A lot of good work went into that part.
I am going to buy mine, but I think you did a great job. Thanks.
-
Hi Seamus,
Welcome! :welcome:
What are you planning to do with the swage block once it's done?
Ken
-
Thank you very much. For professional use you are of course better off with a cast iron swage block. There are some excellent new ones available, and you can get stands which enable them to be easily turned. Made in Germany, I think.
The versatility of mine is that I could insert a plate between the 2 halves for eg collars and also it is lighter to move about.
-
Thank you, Seamus, and may I say that your profile picture is a favourite one of mine. Have you seen the movie?
-
Thanks again Seamus. I wanted to say why I chose to do it by hand but the reply has gone into the aether. I wanted to experience for myself the old way of doing things. It is salutary to think that I probably laid 50k hammer blows and in excess of 20k file strokes. I know no-one near with a plasma cutter, and I would not trust myself to cut accurately if I dared to ask for a loan of one. It is mild steel so only suitable for occasional use. But there are easier methods!
-
Yes indeed, although the version I saw was not
complete. Missing a fair amount of footage in the middle
and at the end. What's neat to me about it is that it shows
a blacksmith working on Model T's. While it's fiction, I have to
assume it was at least partially based on what was going on
at the time, the transition from oats to oil...
-
Seamus, I tried to add to the private message. Did you get it? Try again and I shall let you have my email
-
No sir I'm afraid it didn't make it.
I will send you p.m. with my email
-
Food for thought - Waterjet. I gotta tell you guys that there is another way to make one of these things, even in several pieces. Waterjet cutting is ideal. Makes a better edge than a plasma cutter and because the process involves no heat, the surface it creates has the same hardness and machineabiity as the original material. Water jet will leave a small taper on the bottom side of the cut so between that and the surface finish you can still expect some finish work. But you won't hurt tools like drills, reamers, milling cutters, files or chisels. Water jet cuts a pattern into a flat surface and cannot tolerate too much variation in height above the table because the clearance has to be close to focus the waterjet cutting stream. So the pattern is 2 dimensional. This makes it easy to create on a computer. Water jets do not start well over a surface. It's better to start outside the surface and work into it like a scroll saw. And like a scroll saw if you want to end up with a hole it's a lot better to start from inside a drilled hole. The shape of the hole you end up with is whatever you can draw on the computer screen.
Water jet machines are in the same expense category as large CNC machines and need a lot more floor space, not only for the cutter but also the pump filter and system and the supplies of cutting material. And they use lots of power.
The problem with water jets is that job shops that have them tend toward locating in large metropolitan areas. They are less suitable for mass production and more likely to be used for short run equipment and tool building leaving high volume products to other processes like casting, more traditional heavy metal fabrication and odd ball materials that can't be cut by cheaper methods. This makes most of the job shops with water jet cutters open to short run or one-off jobs. Here the key to making such a job economically practical is giving the waterjet shop a clear, clean 2D cad file so they don't have to charge you their shop rate with all it's necessary overhead to do the CAD work for you. Not that they can't. Many of their customers are job shops with their own high labor rates but not the specialized ability to create a 2d file that's good. So they save no money that way and often come out ahead because the waterjet shop already understands the special needs of the job shop. Like where to get the right material which in the case of a hobbyist is something he will likely supply himself. Fortunately mill finishes and flatness of most metal raw materials are better than the flatness and surface requirements of the waterjet cutter.
Ed Weldon, Los Gatos, CA
-
Thank you for your contribution, Ed. I do not have a water jet, of course, but I wanted to see how I would manage using hand tools (apart from a bent pillar drill)
-
Not being a smithy I had to look up what a swage block was.