
 LinkBack URL
 About LinkBacks


THIS JIG IS ANOTHER VERY SIMPLE TOOL TO MAKE.
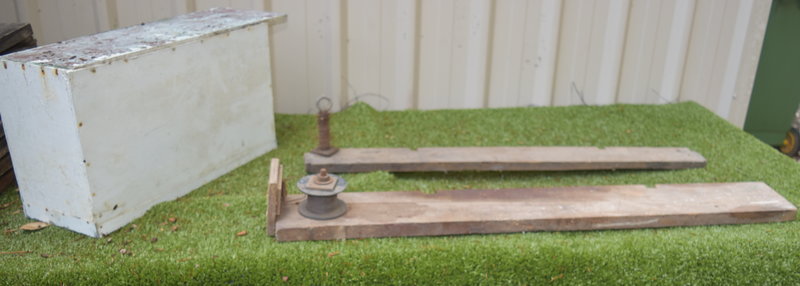
THE early 1970s version in the front replaced the 1960s one seen behind. Why didn't I throw it out? Well it is still ok so why throw it & there is always someone wanting to borrow tools and some are not returned and for that reason the earlier model is lent out.
All that is required is long reasonably stable board, edges eased, an appropriate diametered axle that can be tightened by hand (eye bolt or bolt with wing nut is better) and for the newer version an off cut of ply, a mouse trap and some aluminium angle.
Two notches are cut in the edge of the stable board (I used a hand saw and chisel) at an appropriate spacing around 449+1/2 mm from outside to outside ie: just under 18 inches and made to suit standard frames. The notch closest to the wire end is about 14mm while the other is about 16mm plus alum angle resulting in a total depth of approx 19mm. No need to get caught up with these measurements as it is just a matter of being about 1/2 the width of the frame styles or uprights which are about 35mm hence allowing the wire to pass through the holes without any problems.
If you make odd sizes due to availability of resources then adjust this figure to suit.The sole purpose of these notches is to hold the assembled frame slightly compressed. The aluminium angle was originally a simple adjustment mechanism for mass produced frames which can vary, but was found clumsy for the purpose but accidentally perfect for holding a small wedge like a tilers one or similar wooden hand crafted one.This wedge (or 2) permit(s) frames that aren't the exact same size and accomodates their compression
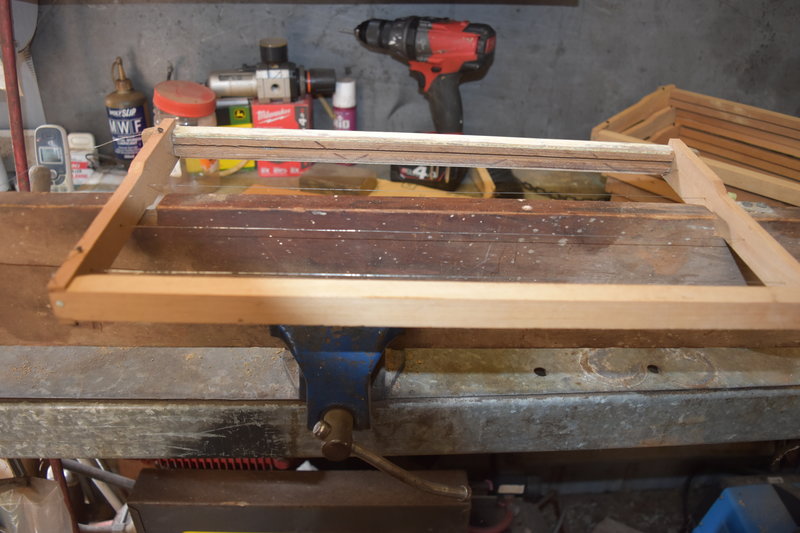
Note: The frames shown here in the pic don't have the holes fully bored for the wire that must pass through.
I've never bothered with eyelets with this setup as the wire is fastened at the bottom is then hand tightened from bottom to top before securing at the top. Once the frame is removed from the jig it further tightens the frame and gives a twang that Dwane Eddy could strum out "Peter Gunn" with.
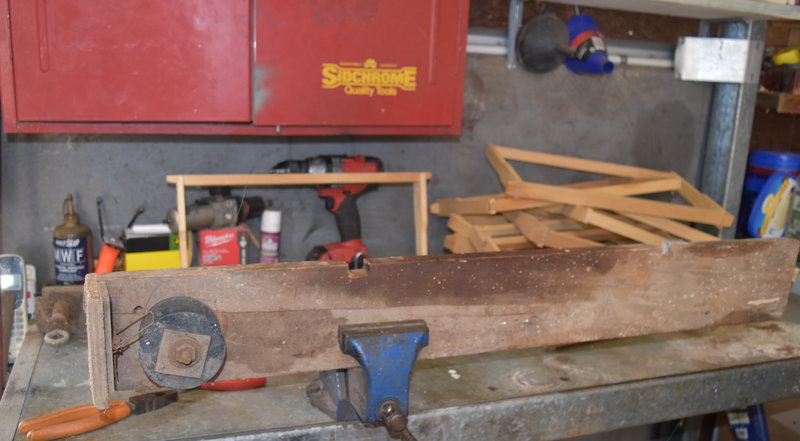
For longevity and ease of use, the timber (lumber) should be dressed and have about an extra 250 mm (10 inches)on mousetrap tensioner end and a similar amount or less but enough to prevent main body splitting/checking at the other end. My oldest one was the side of an old large drawer (dovetails still there). I'm also not into the heavier wire often used today which maynot kink as easily but this is just subjective.
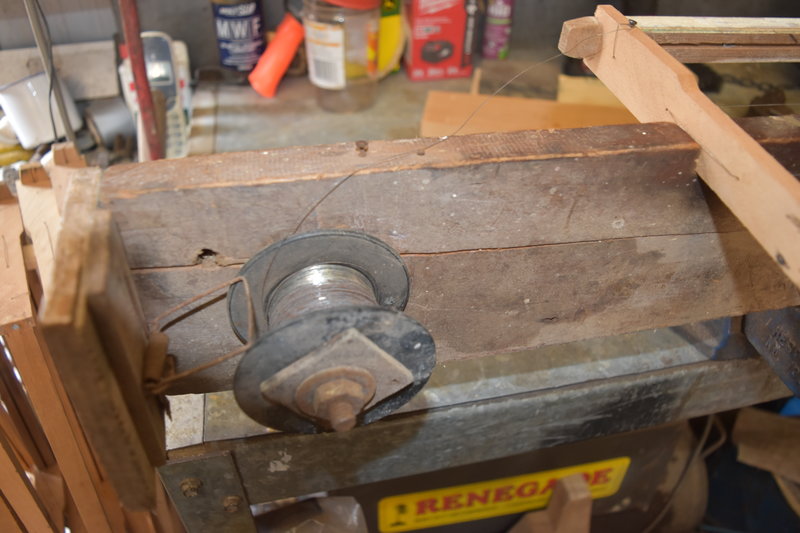
The plywood is roughly attached to the end (with about 250mm or 10" overhang) after eyeballing the approximate location for the mouse trap and its temp fixing until satisfied with a location that presses against the wire wheel which is temp clamped until the end is secured.Then drill out the hole and fix axle and wheel.
Why the mousetrap tensioner? With experience comes knowledge and it is a very annoying to be almost finished and get a kink in the wire which happens very easily and oh so often without tension: it WILL break so the process has to be redone with fresh wire. Answering the doorbell or phone is out unless using the tensioner. There is a waste of time & materials without it.
You may notice two tacks that help guide the wire between reel and frame. the one closest the end is higher as it only controls any backlash: these are not really necessary but the lower one is helpful.
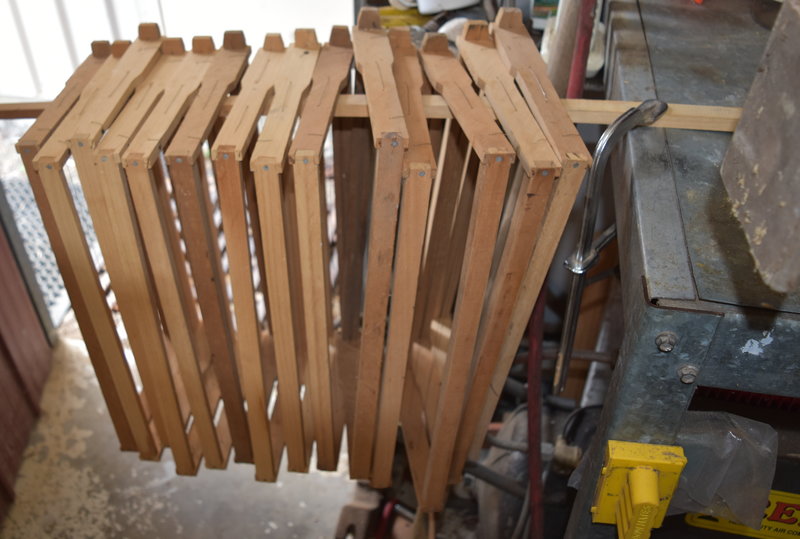
With heaps of space consumed I like to hang finished frames on a piece of scrap that is clamped to the bench. This is particularly useful way of dealing with certain proceedures: I use for other frames like serving tray frames and partly completed boxes.
I like the comfortable height of the metal bench for this purpose rather than a lower wood bench & vice.
P.s. that is the original mousetrap from early 70's.
Cheers, & enjoy the honey of your labours.https://www.homemadetools.net/forum/...cons/icon6.png


 Reply With Quote

Bookmarks