
 LinkBack URL
 About LinkBacks

 dismantled:
The only parts you can see in that image that I didn't make wer "Pin It")
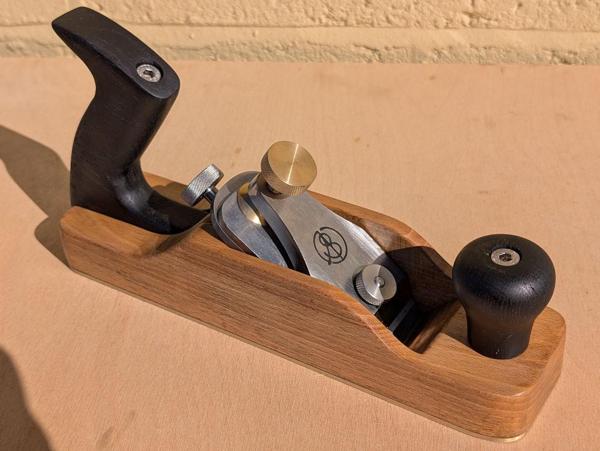
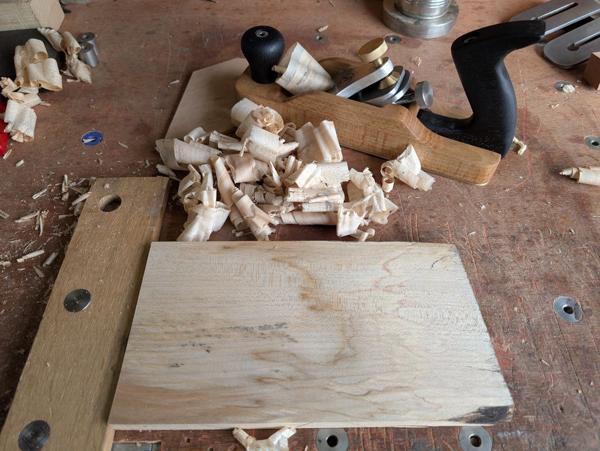
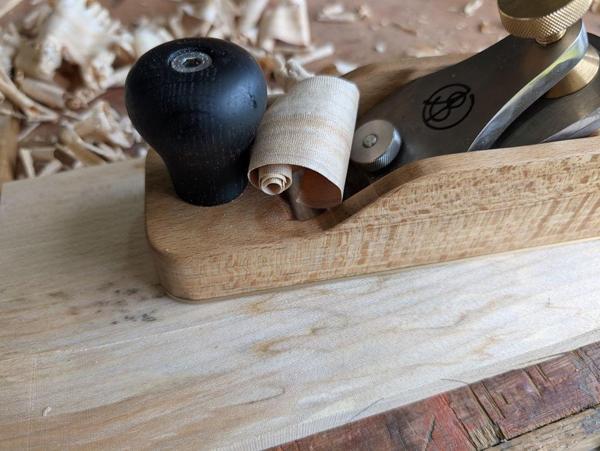
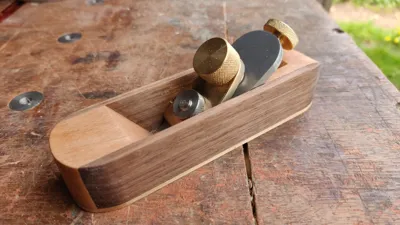
This is my home-made smoothing plane, made out of beech, bog oak, brass, steel and stainless steel. I made it mainly because I thought it would be an interesting project but also because I wanted to try out an idea I'd had for a plane that could be used in either a bevel-up or bevel-down configuration.
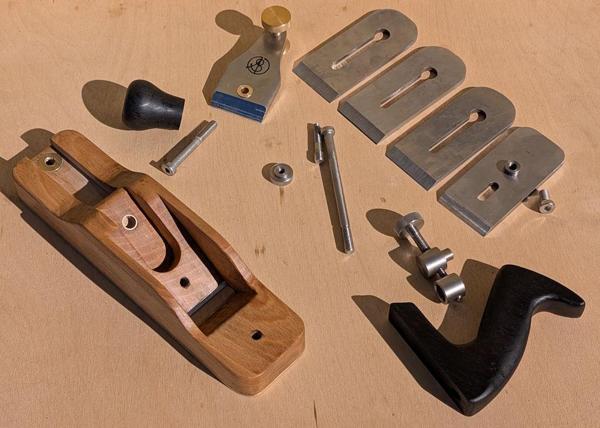
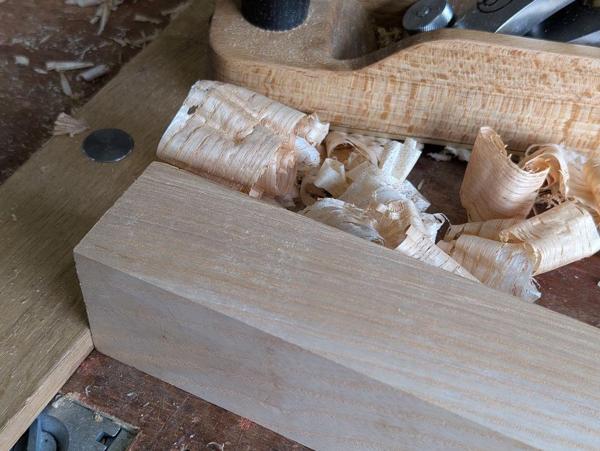
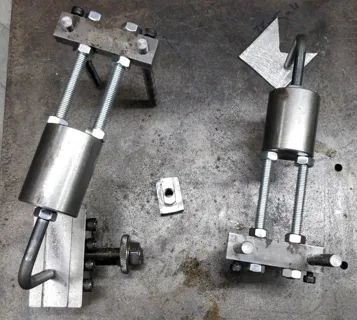
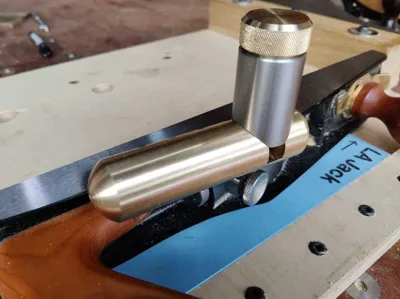
This is what all the pieces of the plane look like when (mostly) dismantled:
The only parts you can see in that image that I didn't make were the shorter two screws (the one near the front knob which holds the knob in place and the one on the far right which holds the blade to the cap iron).
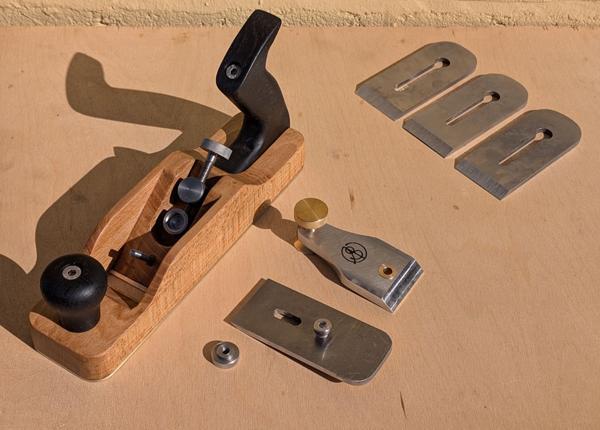
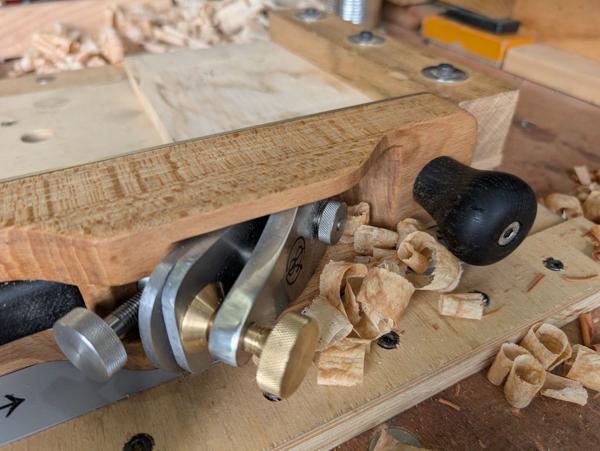
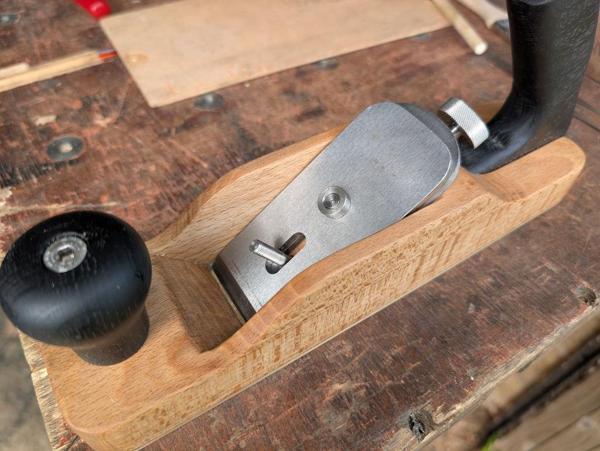
When partly assembled (and in the state it would be in when sharpening blades), it looks like this:
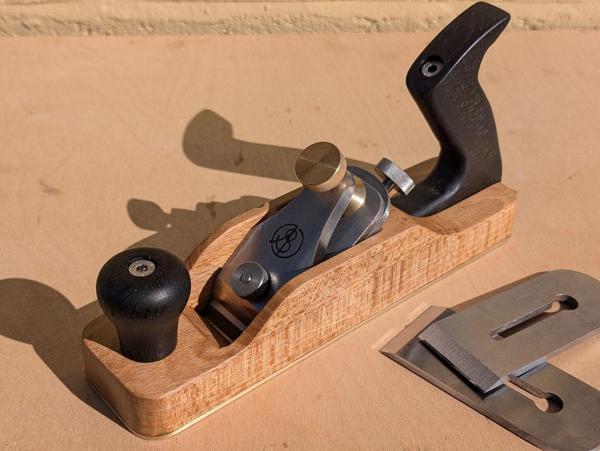
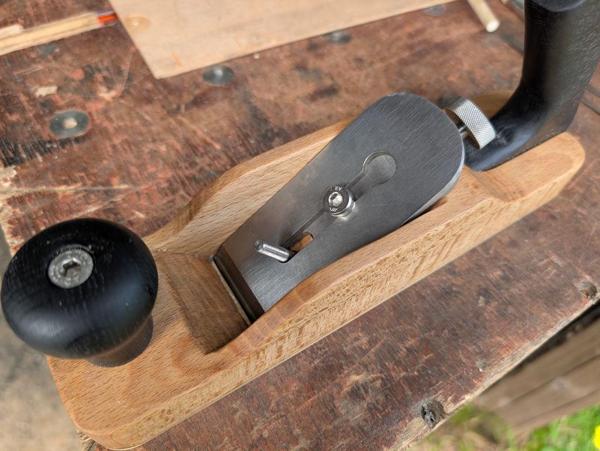
Another photo of it assembled:
The cap iron works in a very slightly different way to most. On a Stanley #5 (for example), there's a slight bend in the cap iron such that, when it's clamped to the blade, the tip of the cap iron is held firmly against the blade and shavings are deflected up and over the cap iron rather than getting stuck at the join.
My cap iron is flat and instead I use a burnisher (the sort of thing you'd use to add a burr to a card scraper) to roll over the edge slightly:
When the blade is clamped to the cap iron, that rolled edge gets pushed back flat and should ensure that there's a tight seal at the very tip. The reason I wanted the cap iron to work in that way is that I wanted it to be flat and of the same thickness as the blade,. The reason for that will become clear later.
Here's a photo of it having just planed a lovely piece of Sycamore (Acer Pseudoplantanus):
The plane has a low bed angle of 36°, which means it cuts through the wood very easily (with the downside being that it's less tolerant of changeable grain).
The low angle means it slices through end-grain with very little effort:
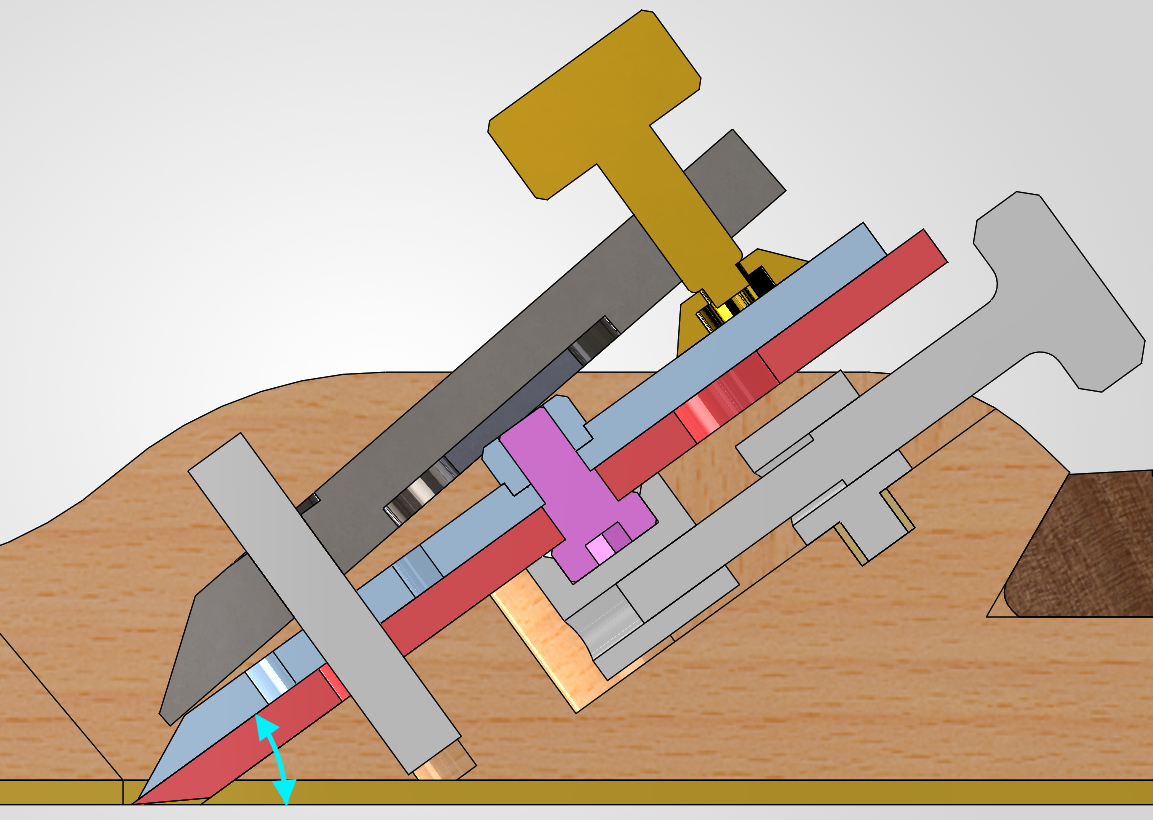
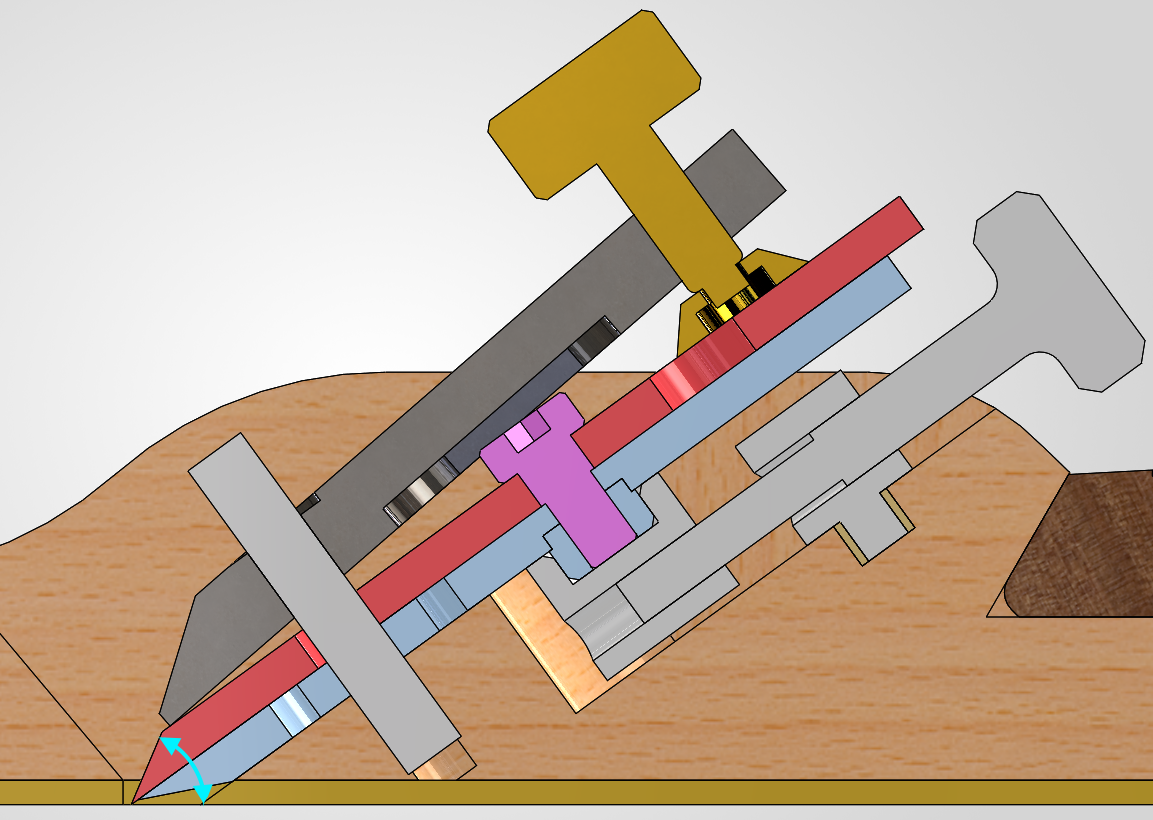
I feel I ought to discuss the cutting angle a little more on this plane as it explains some of the more unusual design decisions. This is a cross section of the plane:
Ignore the weird position of the lever cap: I didn't bother to update the CAD model as I moved some of the clamping parts around. On the real plane it clamps where you'd expect: on the flat bit of the cap iron (which is shown in blue).
The pale blue arrow shows the cutting angle: 36°. That's a lot lower than a Stanley #4 (45°) but is about the same as what you'd get with a low angle bevel-up plane with a 12° bed and 24° bevel. That low cutting angle is great for slicing easily through end grain or nicely grained wood, but not great if the grain's a bit more wavy as it'll cause tear-out very easily.
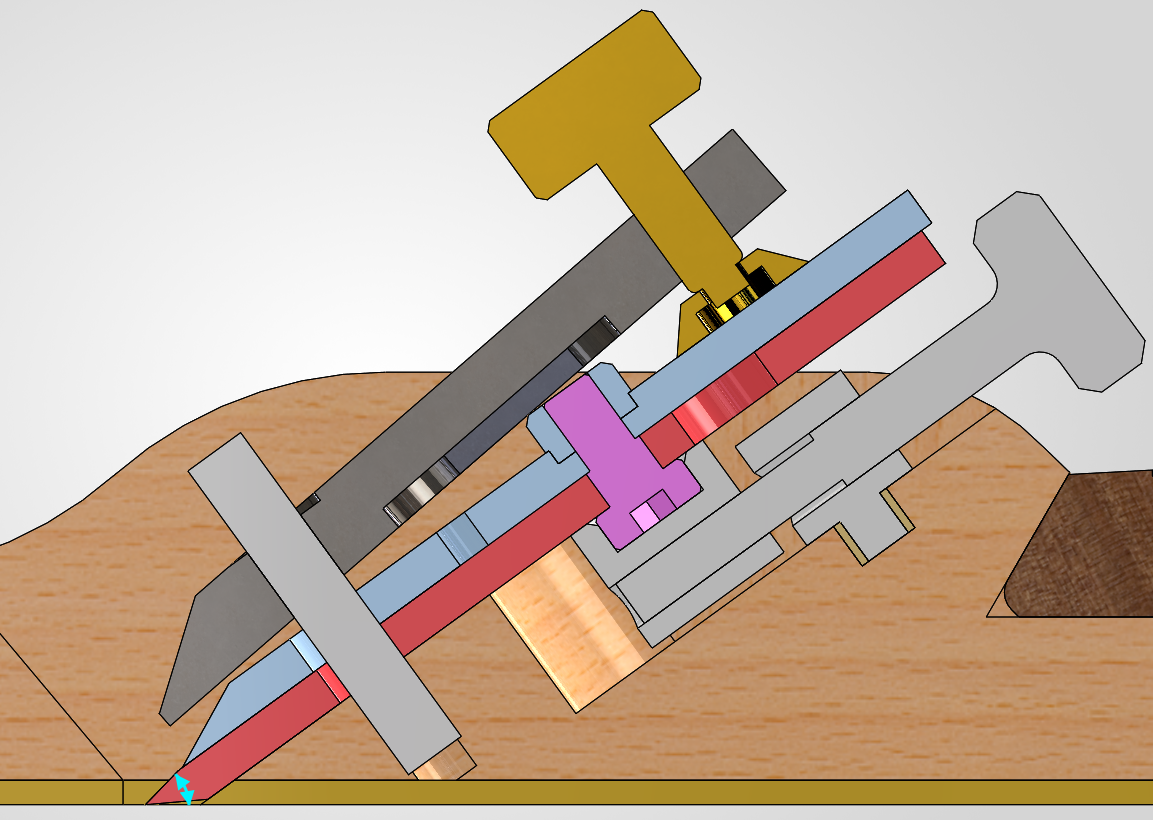
As I mentioned before, the mouth opening is quite tight. You can, of course, increase the cutting angle and the mouth opening together by adding a back-bevel onto the blade (shown in red):
Here the lever cap position looks even worse but that's just a CAD model issue as before. With this 10° back bevel the cutting angle is now 46° so fairly similar to a Stanley #5. The mouth opening is much bigger as a result of the back bevel so now the plane can be used to take quite heavy cuts if required:
That's fine when you're trying to rough some material down to thickness, but having a big mouth opening is perhaps not ideal for a smoothing plane. If we go back to the plain blade (with no back bevel and hence a 36° cutting angle) and try to plane something less well behaved (in this case Ash) you get a rough surface finish, which is hopefully visible in this photo:
So what if you want to have a tight mouth opening but a high cutting angle? That's where the unusual cap iron helps. This is what the plane looks like without the lever cap fitted:
That little protrusion on the cap iron (the nut for the screw that holds it to the blade) has the same diameter and thickness as the head of the screw. That, combined with the fact that the cap iron is flat and the same thickness as the blade, means you can turn them over:
It's now a bevel-up plane with a 66° cutting angle:
Having the cap iron the same thickness as the blade means that the tip of the blade is still in the same place and hence the mouth opening is the same.
Here's that same bit of ash after planing it with the plane in bevel-up mode.
Of course, in practice it's much more sensible to grab a different plane rather than removing the blade, turning it over and refitting it, so I don't know how often I'll take advantage of the the different ways of using it. Nevertheless it's been a fun experiment and I've really enjoyed the project. Even if the plane spends the rest of its life as a simple bevel-up smoothing plane it's great to try different things and see how they work.
There's a 24-page write-up of the process I went through to make this plane on the build log on my website.


 Reply With Quote


Bookmarks