-
12 Attachment(s)
Blasting cabinet mods.
Blast cabinet mods vapour blaster.
I have one of those small blasting cabinets, however it leaks like a sieve. The top door, through which you load stuff to be blasted is just a sheet of 3 mm acrylic, topped by a flimsy sheet metal surround, consequently it tends to bend and allows blasting media to exit. I tried sticking some rubber around the periphery of the lid but all that did was allow the lid to bend more.
To fix I made a frame to bolt underneath the acrylic made of 20x 10 flat bar, then drilled and tapped 16 x 4mm holes to line up with the existing fasteners that fix the sheet metal surround and perspex together. So now the Perspex is sandwiched between the 20x10mm frame and the sheet metal surround and held together by 16 M4 screws. To complete the job I place four M6 washers under each clamp handle and made raising blocks for under the hinges.
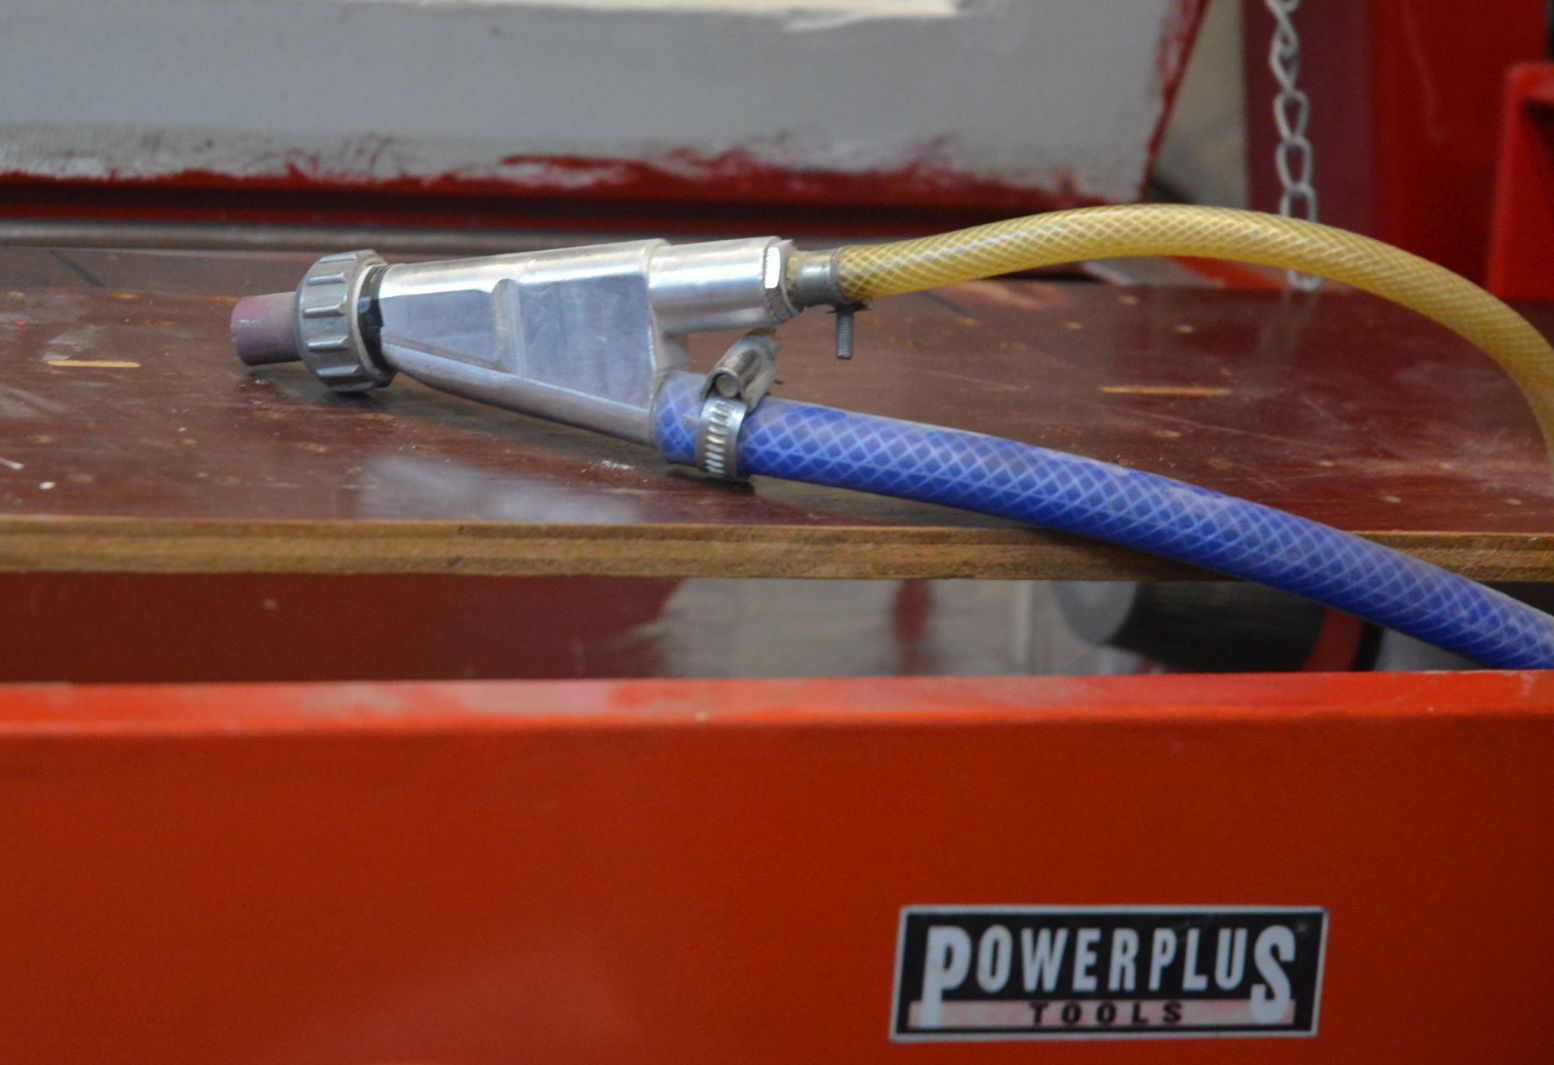
While I was at it I did some experimenting with the blasting gun. I found the original air nozzle inside the gun was too far short of the back of the blasting nozzle, so I turned up a slightly longer one, then turned up a steel nozzle with a 5mm aperture. The aperture was then countersunk at the back of the nozzle.
Ive found for best pickup of blasting media the air nozzle has to extend past the back of the media nozzle, the countersinking leaving enough room for the media to pass through. That allows the maximum amount of media to exit the nozzle. I did have a blasting gun that came with the cabinet but that was so flimsy it broke when screwing the hose connector into the handle. The gun I modified is a much sturdier type.
In future, Ill be attaching gloves to the cabinet and converting it to a vapour blaster, this gun should work with a water bead mixture.
I would have liked the next size up cabinet as it has a door that actually seals but I simply dont have room in my shop for a bigger cabinet.
Next job is to find a way of mixing the water and media, I dont really want to use a pump, but that may be the easiest way.
-
<!-- BEGIN /var/www/html/homemadetools/protected/modules/zeus/views/tool/postUpdate.php -->
Thanks th62! We've added your Blasting Cabinet Modification to our Media Blasting category,
as well as to your builder page: th62's Homemade Tools. Your receipt:
<div id="blocks">
<div class="block b1 pngfix">
<div class="bimg">
<div>
<a href="https://www.homemadetools.net/homemade-blasting-cabinet-modification">
<img src="/uploads/276012/homemade-blasting-cabinet-modification.jpeg"/>
</a>
</div>
</div>
<div class="head pngfix"></div>
<div class="left pngfix"></div>
<div class="right pngfix"></div>
<div class="blockover b1 pngfix">
<div class="title">
<a href="https://www.homemadetools.net/homemade-blasting-cabinet-modification">Blasting Cabinet Modification</a>
<span> by <a href="https://www.homemadetools.net/builder/th62">th62</a></span>
</div>
<div class="tags">tags:
<a href='https://www.homemadetools.net/tag/sandblaster'>sandblaster</a>, <a href='https://www.homemadetools.net/tag/modification'>modification</a> </div>
</div>
</div>
</div>
<!-- END /var/www/html/homemadetools/protected/modules/zeus/views/tool/postUpdate.php -->
-
I make nozzles for my blaster, mine uses nozzles that are 0.5 inch diameter. I use O2 drill rod, machine to final form, then do a quick heat treat with no tempering leaving the nozzle to be around Rockwell 60 or better. They still erode, with my white sand media.
-
1 Attachment(s)
I have the same model blaster although badged differently. I like your window frame, that must be a huge improvement.
I adopted a different approach, you may be interested in some of the mods that I made to mine which featured in an earlier post.
https://www.homemadetools.net/forum/...695#post209645
It is now 2 or 3 years since I did those mods and usage in that time has indicated that the only thing that still needs attention is the hopper as mentioned in the post. That is not high on my todo list though.
Not mentioned in that post was that I made a new gun from scratch. The media passage was aligned to be more inline with the air flow. It was a great improvement.
Attachment 49462 Click for full size.
I shall watch out for your mods to a vapour blaster with interest. I have often thought about doing that but my recent thinking is to make a pure liquid blaster (no abrasive grit) using a high pressure cleaner for the high pressure source and recirculating a detergent/water mix. I have a large fibreglass pool sand filter housing (that I rescued from the roadside) that I could easily cut a door in and also fit gloves.
PS. My cabinet came fitted with gloves, so you should be able to find some made specifically for our models.
-
I just used mild steel for my blasting nozzles, they probably won't last too long, but its not as if they are difficult to make. I do have some other mods in mind aside from vapor. A new section for the front of the gun to take the ceramic nozzles and make the media lead in at a better angle. Due to the trigger position though, it will probably have to go slightly to the side. I have noticed the media tends to pile in one corner, so I will be making an angular floor to fit inside the existing one.
I had thought of making a new gun, that would have entailed using a foot trigger, I prefer the trigger on the gun, so that idea went in the bin. Another benefit from converting to vapor is the media is contained in a seperate container, so a lot easier to switch from one type media to another.
Some time ago, I attached an old vacuum hose to the side of the cabinet to improve breathing, that hose is about 6-7'- high and leads up to the ceiling. The foam filters that came standard with the cabinet are just plain silly. As the lid leaked so much media I have no idea if this mod actually works, but now I've fixed the lid, I'll find out I guess.