3 Attachment(s)
But wait; more box truck saga
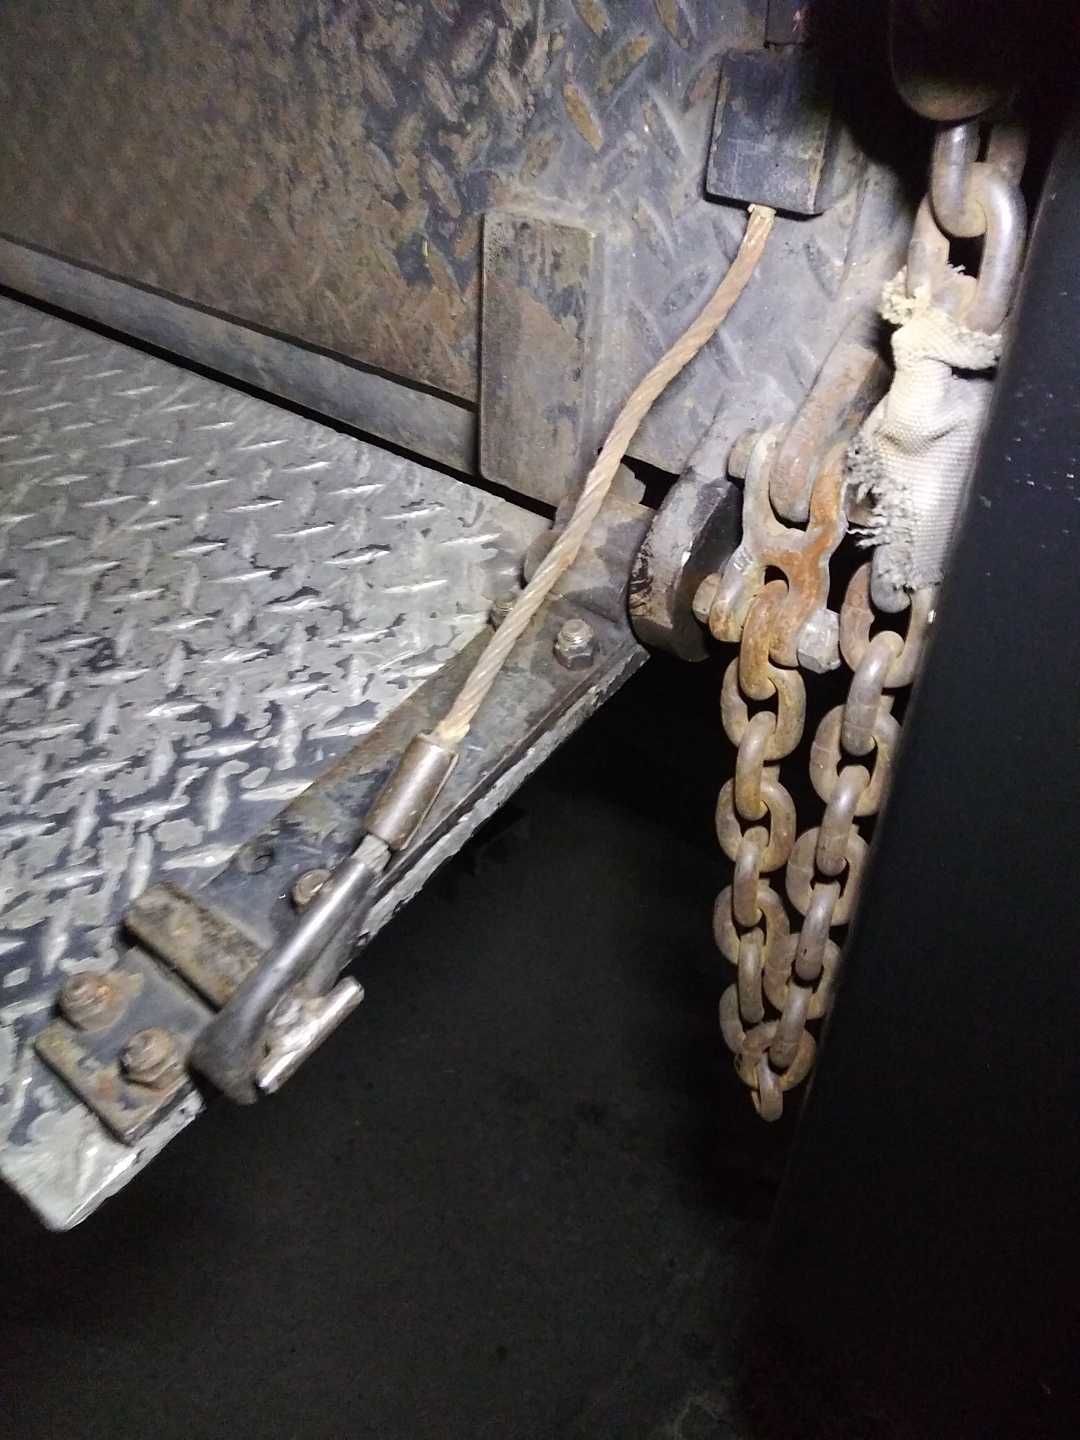
This will seem rather incidental, until you recall stabbings by frayed steel cable.
Attachment 44045
Same ramp, that I've found remedies for other negative conditions, my wounded thumb tipping scale of project votes by one. Actually it was a tie, but I capitulated, for his suffering.
You couldn't avoid it and set the loop over the anchor. Purpose is to not foul descent of platform by ramp hanging straight down. Age of course has misshaped and worsened it. Also, equally important, it keeps rolling carts on the platform when raised, being in near-vertical position.
So cable had to go. A 1/2" thick pad, drilled 5/16" on center holds it in place, with a swaged terminal. Other end is a loop, in a worn plastic jacket, wires poking through. Not a fan of cable, but decent substitutes are limited by the thin pad, not compliant with normal hardware.
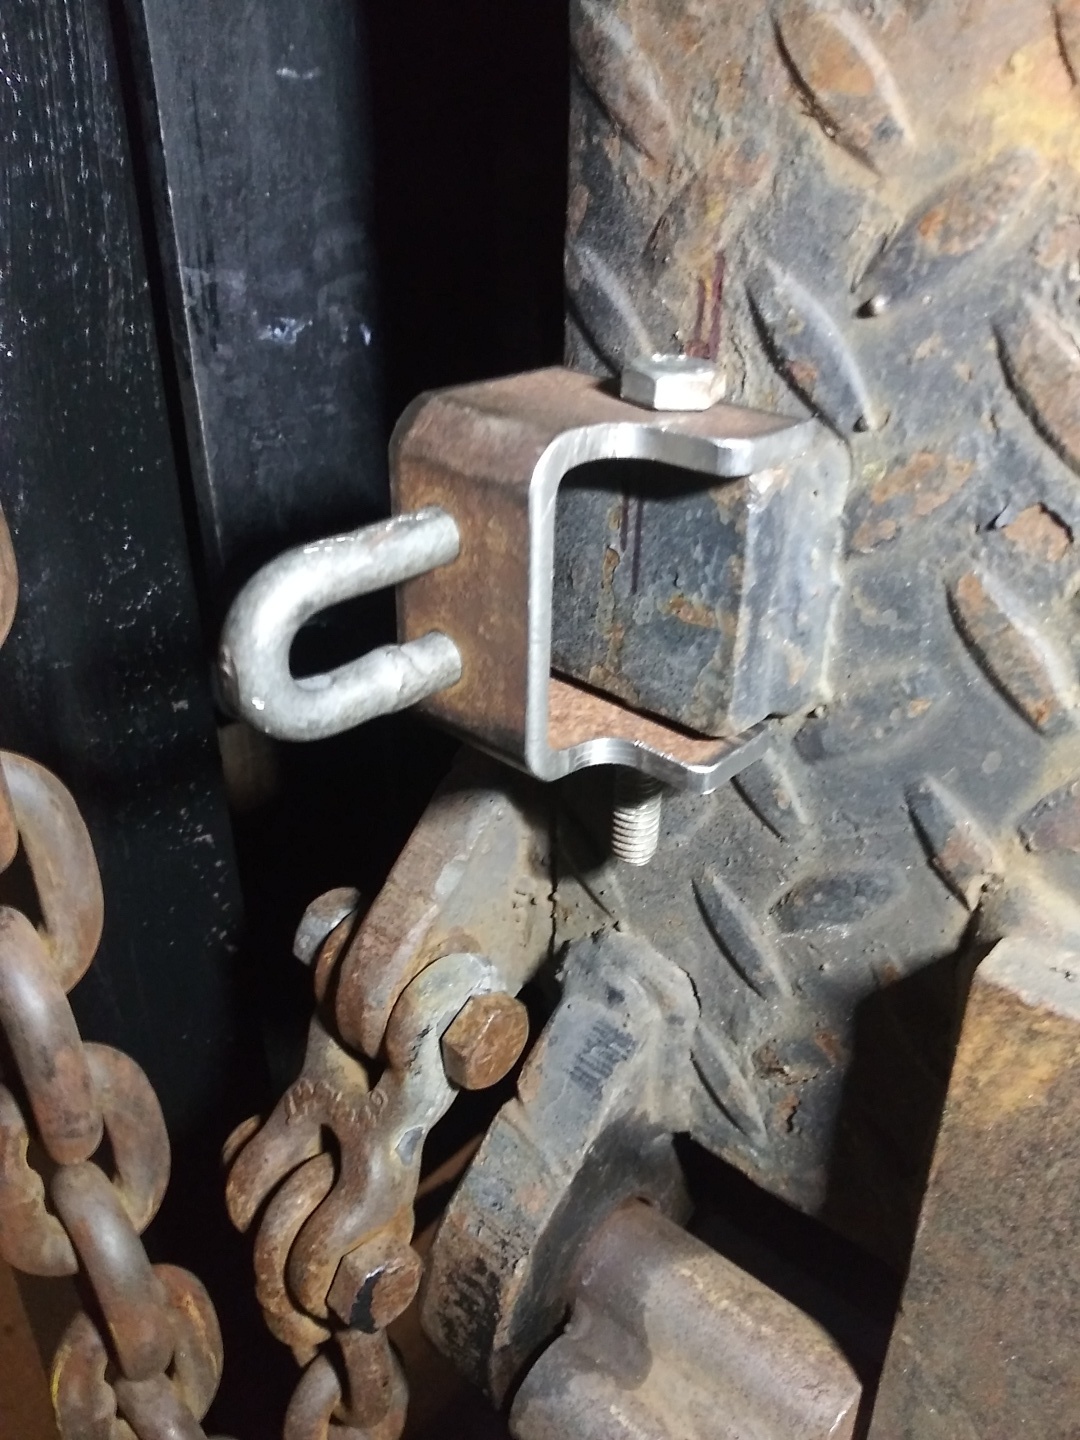
The workaround fabbed bridge for a cut link,
Attachment 44046
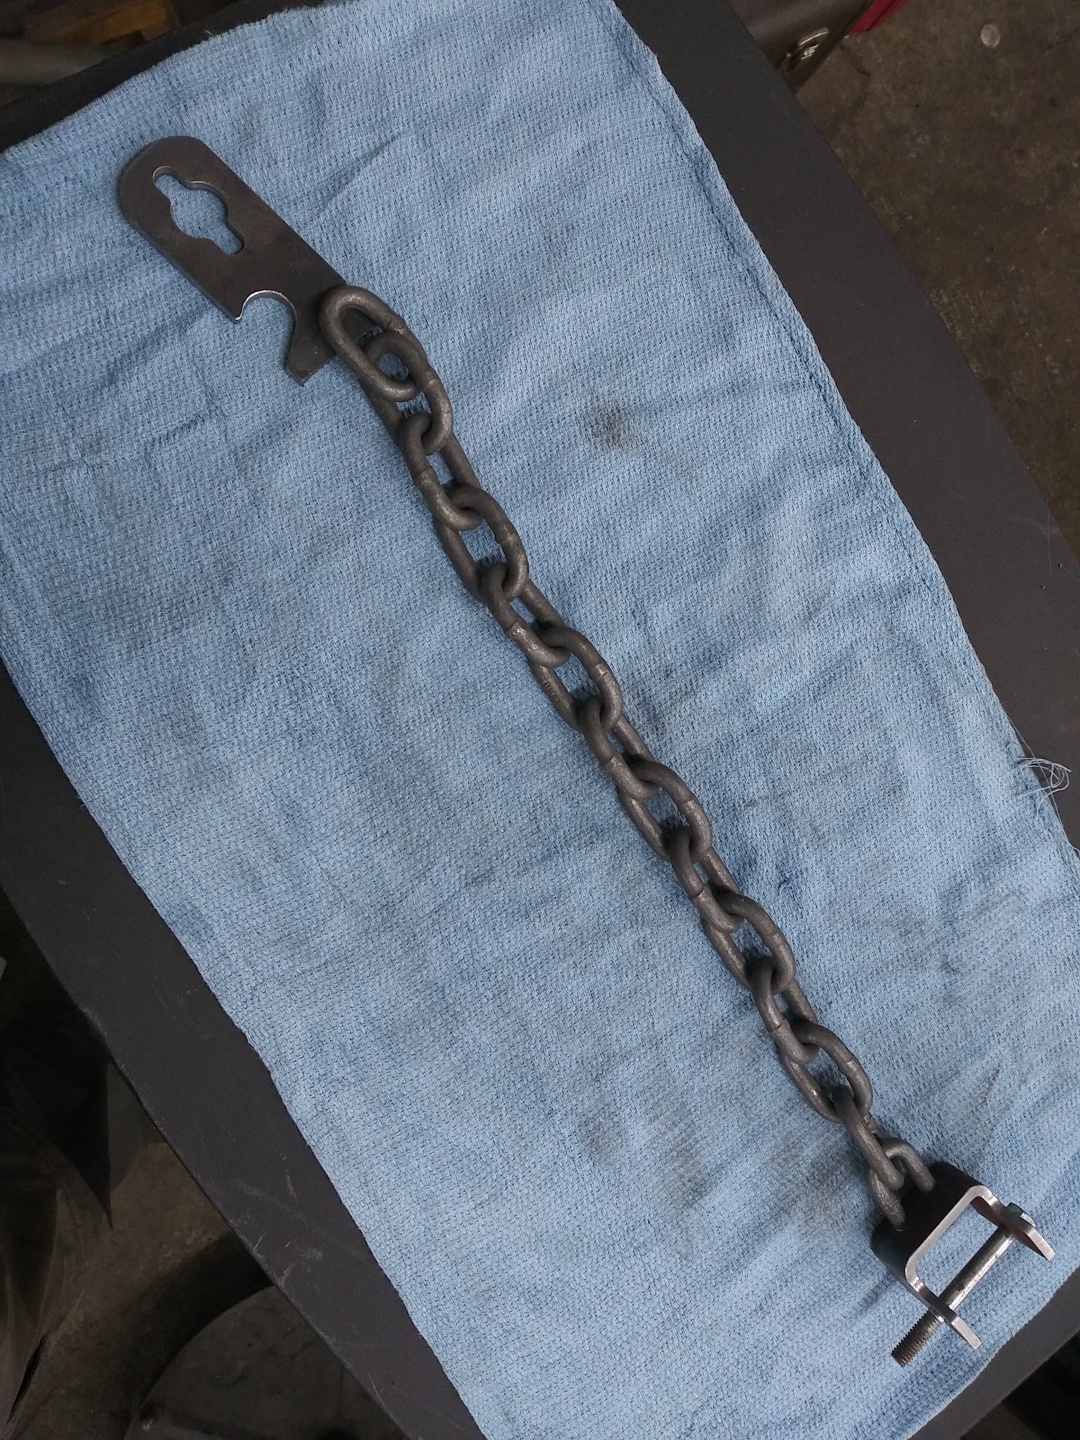
sectioned from rectangular tubing .18 x 2" x 3", a length of chain, and a small flat plate of hot-roll for the 'eye'. (In the morning, will check chain with other pitch sizes to get closer length needed and convenient attachment) Same 'eye' plate is unfinished on one end for adjustment of final length.
Halfway through, realized as I manipulated tools, "hey, this could double as a tray, a work table!" There's only 1-3/4" difference in radius from the 90° position to incline they designed, piece of cake!
Attachment 44047
The hook location is that length from its center to the 'eye', again 1-3/4".
As with certain DIY, it's good to hedge problems by not shaving everything off until it's clear the alterations work. For this truck to roll, that gate would be a roadblock, if unsecured.
1 Attachment(s)
But wait, More "more box truck saga"
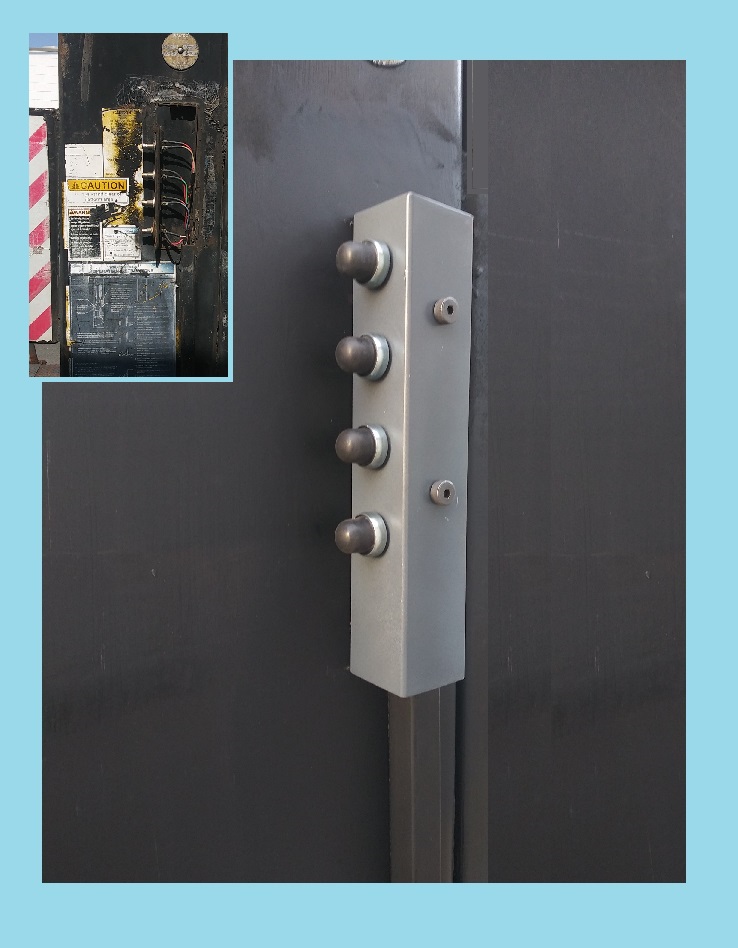
Truck was vandalized somewhat, they tore up the lift-gate switches, for that modicum of scrap value in the copper. Won't belabor the point, but replacement loom was pricey and ridiculous procedure to acquire correct replacement. Major companies should screen and monitor distributors carefully.
First switches I got unsuitable for exposure to weather, there are boots made for those combined plunger and thread size, but couldn't meet affordable minimum order. Of course, matching of items in stock has become a thing of the past.
Pic is result of planning around of switches were 100% suitable, in material anticipated to get desired completion. Inset is the prior condition, with new loom in place, mainly for testing remainder of system, after cutting away the surplus housing. Just prior to the attachment of new, all old metal was sliced off and angle ground smooth. The smaller vertical tube, 1" square 1/8" wall, is original surface conduit to protect wiring.
Attachment 44179
The new housing is 2" square tube of about .093 wall. 4 holes face rearward of 5/8" diameter for switch mount, the body is substantially larger. It's longer than 2", but that helped fishing each out of it's respective hole, as each plunger entered. A scriber point was only tool needed to 'steer' them. After tightening retaining nut, installed weatherproof boot. Each is a momentary push button, very sturdy and positive.
Top of the housing is angled a few degrees to shed water, TIG'ed in place. Lower forward corner covers opening in top of 1" square tube. Two shoulder screws fasten housing to frame of lift-gate, not welded as original (or work done by previous owner/s). That allows and simplifies work or modifications later. Sealing top of the tube instead of a plastic cap was for an "in case of" situation, not being able to fish four switches attached to the loom. I had a strip of 2" to make a 'door' in back, and attach with small self tapping screws, with the roof and a bridge at lower end to withstand clamping in mill vise.
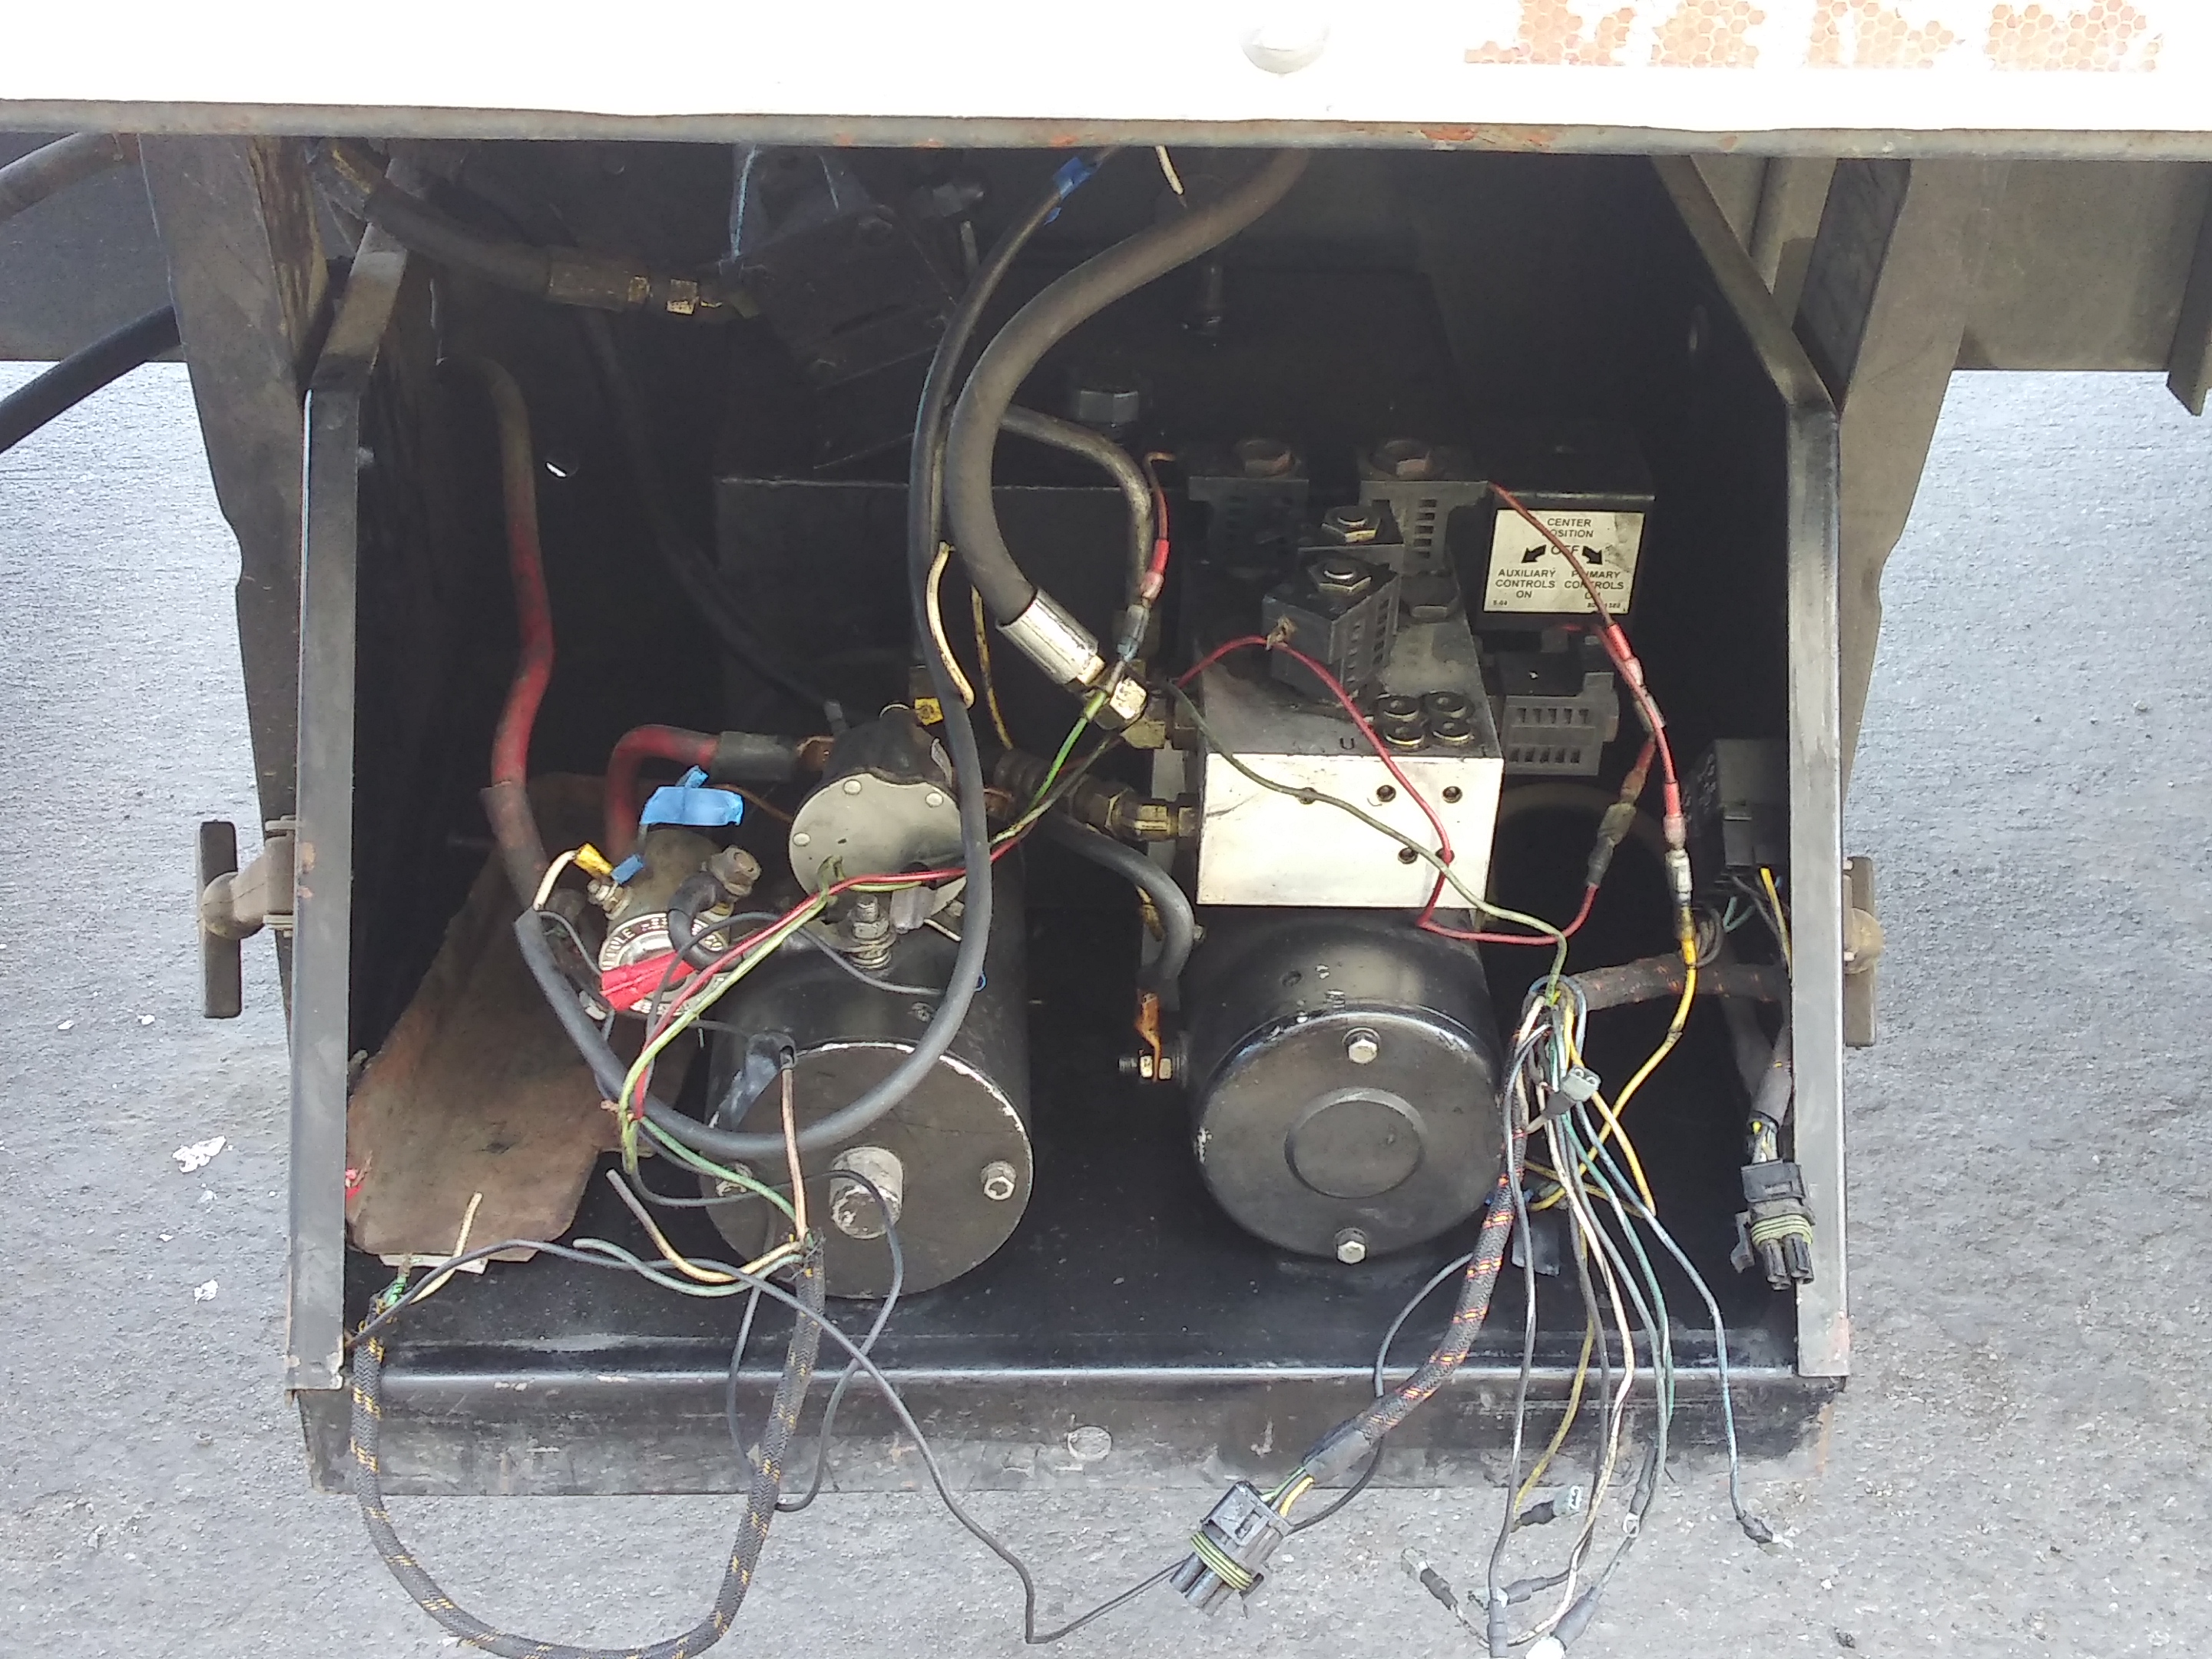
Functions are from the bottom, 1) energizes circuit, 2) lowers platform, 4) raises platform. Switch 3) folds platform when used with the *4, unfolds used with *2.
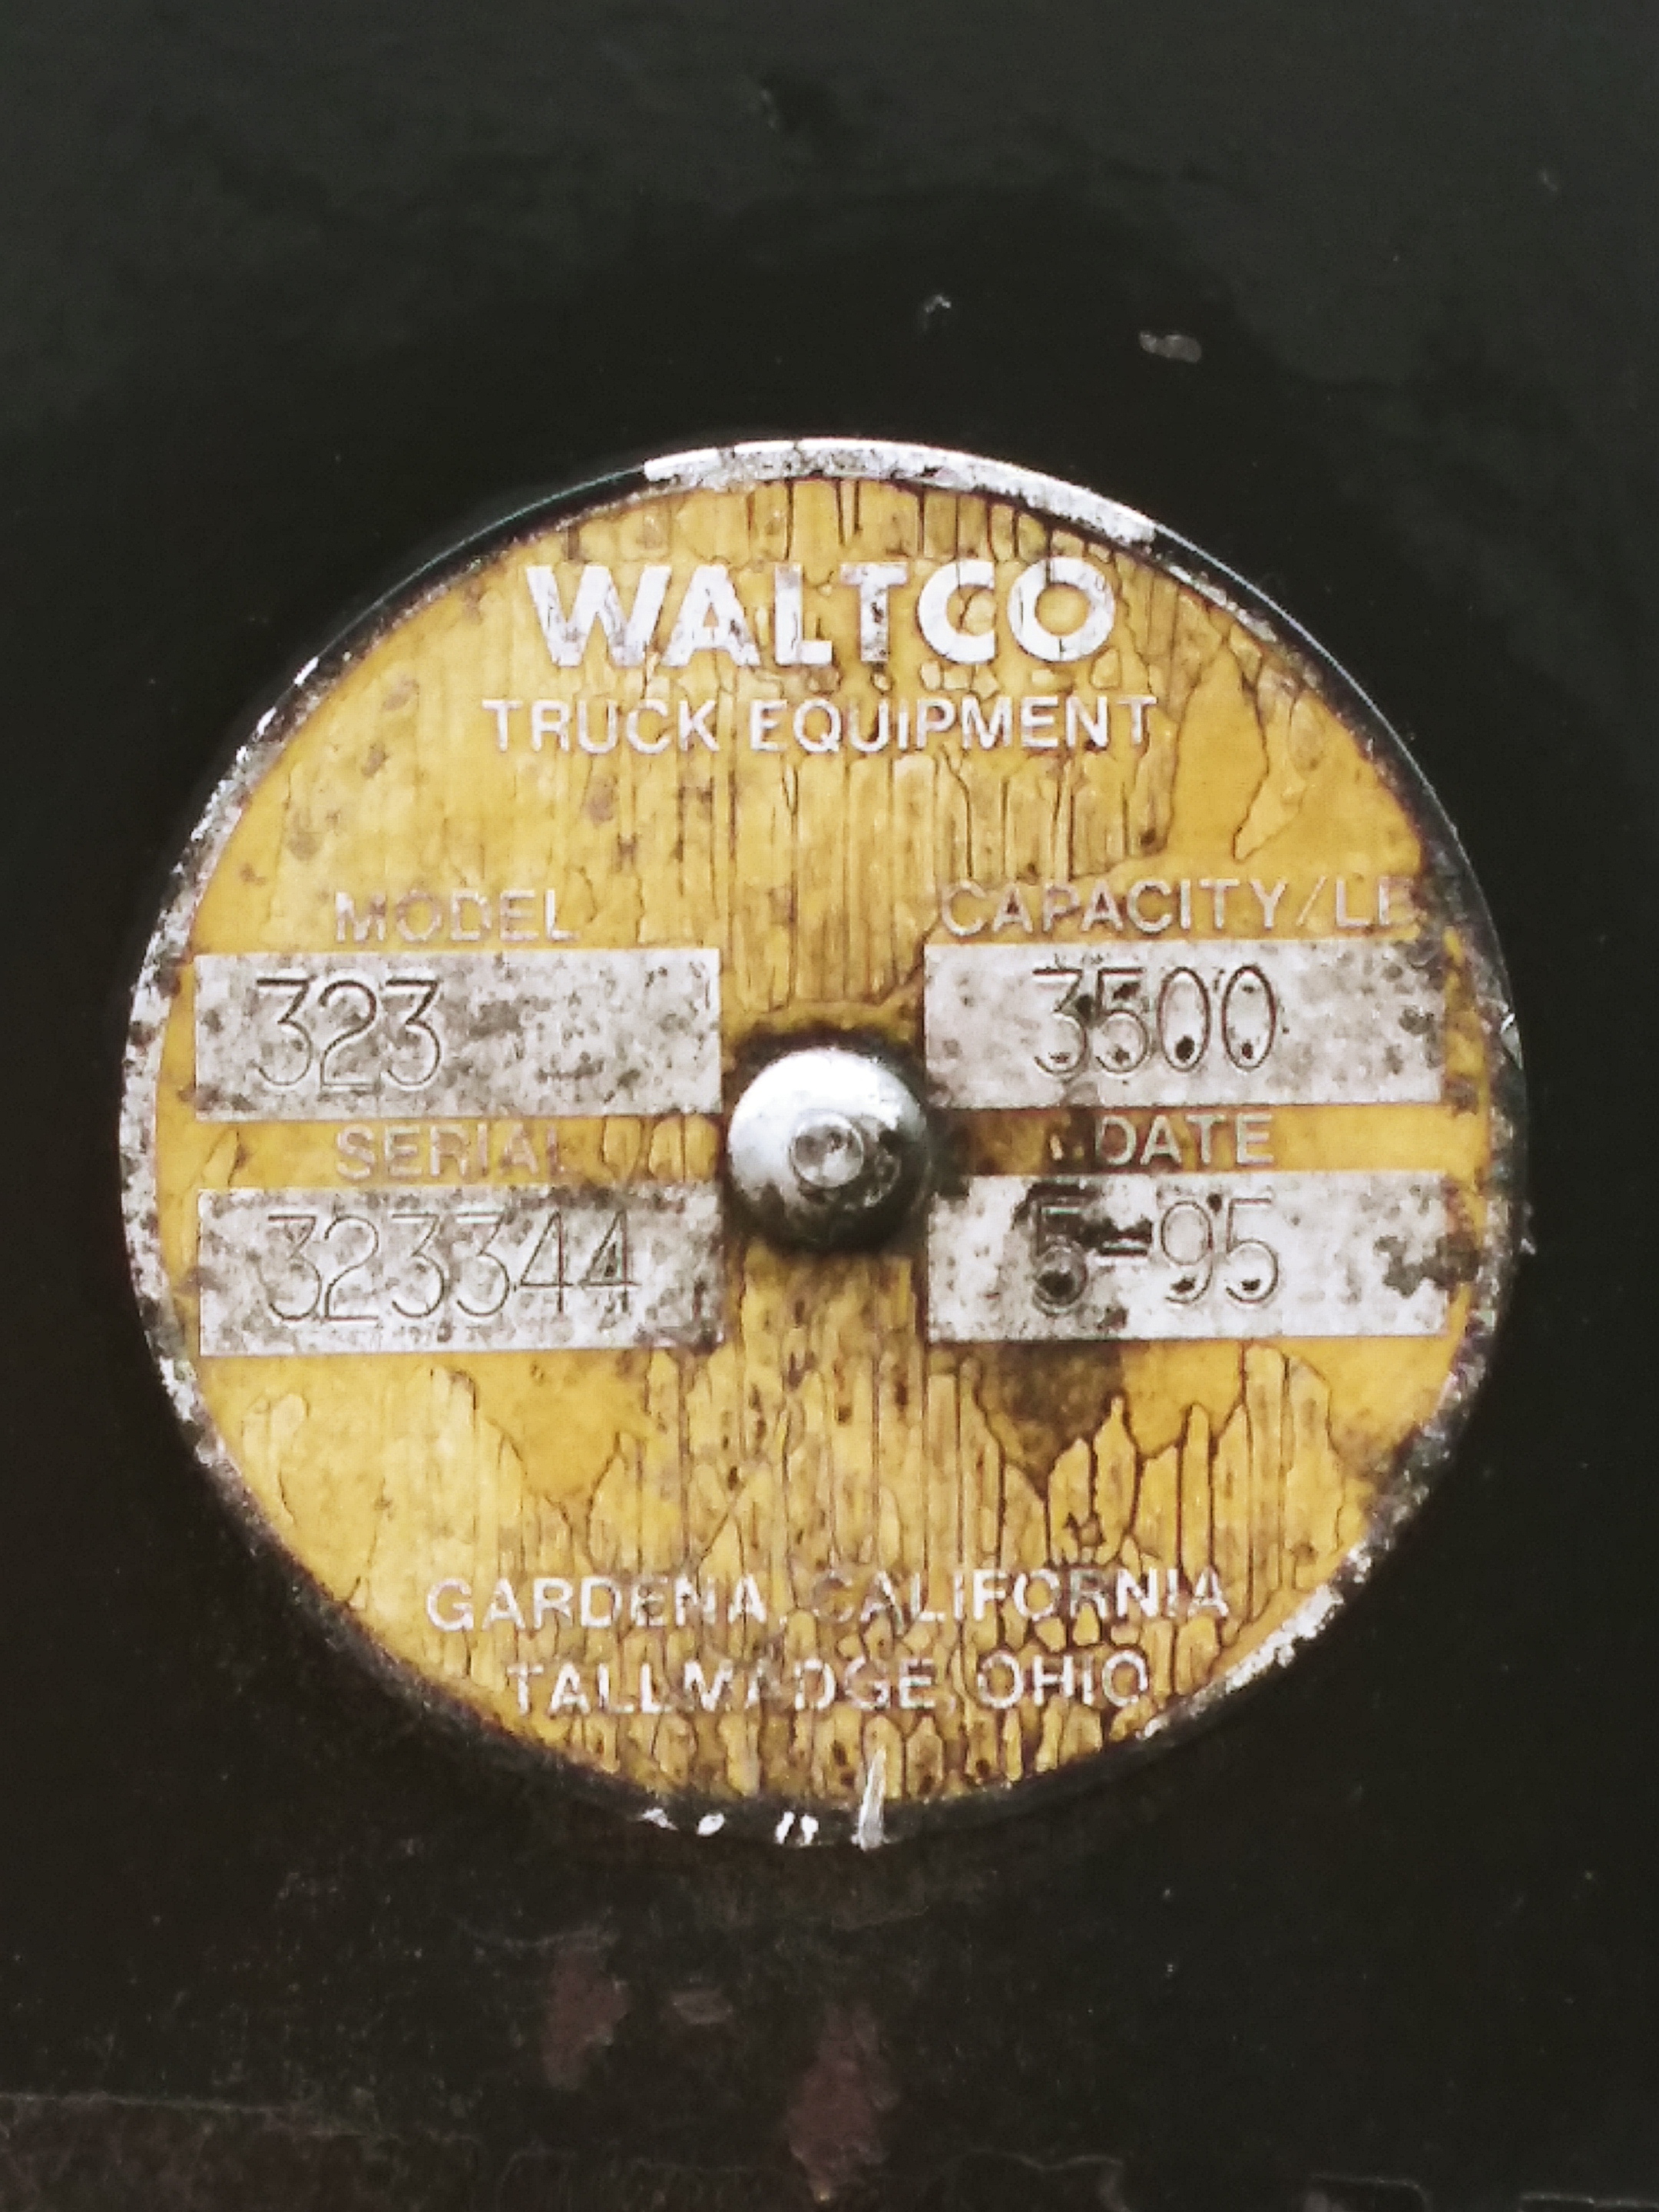
I'd appreciate assistance selecting components to build a latching relay for 1) to not make it a two handed affair. Electricity I can reasonably kluge. Electronics is not my forte'. Found all kinds of info on the DIY process but little [none] about 12 volts running equivalent of a Delco starter motor, there is some amperage, especially to tap the 3500 pound capacity. The truck wiring has a thermo breaker for overload/ short circuit conditions.
